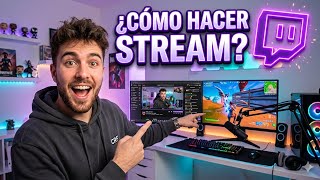

Start Streaming in 5 Minutes
45sQuick, actionable setup guide hooks viewers who want to start streaming fast.
▶ Play Clip"The title accurately promises a step-by-step Twitch streaming guide, and the video delivers exactly that."
This video provides a step-by-step guide on how to start a live stream on Twitch using OBS Studio in under 5 minutes. It covers connecting OBS to Twitch, adding sources like webcam, microphone, and screen, and verifying the stream is live.
The video begins by stating that you can start streaming on Twitch in less than 5 minutes using OBS Studio.
In OBS, click on 'Settings' then 'Stream'. Choose 'Custom' and paste your Twitch stream key.
Go to Twitch, click on your profile picture, go to 'Creator Dashboard', then 'Settings', and 'Stream'. Copy the stream key.
Paste the copied stream key into OBS and click 'Apply' and 'OK' to connect.
In OBS, under 'Sources', click the '+' button, select 'Display Capture', choose your monitor, and click 'OK'.
Add a 'Video Capture Device' source, select your webcam, set resolution to 1920x1080 and FPS to 30.
Add an 'Audio Input Capture' source, select your microphone device, and click 'OK'.
Arrange your sources on the canvas, then click 'Start Streaming' in OBS. The stream will go live.
Go to Twitch, click on your profile, go to 'Creator Dashboard', then 'Stream Manager'. It will show that you are live.
By following these steps, you can set up a Twitch stream with OBS Studio in just a few minutes, including screen capture, webcam, and microphone.
What software is used to stream on Twitch in this guide?
OBS Studio
00:01
Where do you paste the stream key in OBS?
In Settings > Stream > Custom, under 'Stream Key'.
00:16
How do you get your Twitch stream key?
Go to Creator Dashboard > Settings > Stream, then copy the stream key.
00:42
What resolution and FPS are recommended for the webcam?
1920x1080 resolution and 30 FPS.
02:46
What type of source is used to capture the monitor?
Display Capture.
01:38
What type of source is used for the webcam?
Video Capture Device.
02:18
What type of source is used for the microphone?
Audio Input Capture.
03:29
How do you verify that your stream is live on Twitch?
Go to Creator Dashboard > Stream Manager; it will show 'Live' status.
04:12
Stream in Under 5 Minutes
Sets the expectation that the process is quick and efficient.
00:01Using Custom Stream Key
Key step to connect OBS to Twitch without account linking.
00:16Adding Multiple Sources
Demonstrates how to combine screen, webcam, and audio for a professional stream.
01:24One-Click Go Live
Shows the simplicity of starting the broadcast after setup.
03:44[00:01] stream on Trips in less than 5 minutes, so pay attention. following. You're going to use OBS Studio, okay? If you don't have it installed, I'll Once you're inside OBS Studio, like I am, you're going to click
[00:16] . You hit a paperclip. After you touch a clip, it will load like this . You're going to click where it says broadcast. You hit a paperclip. Then you're going twips. It's possible you'll get it. We're going to click where it says "custom" and we're
[00:30] a clip. Then it will give you this option here where it says connect account recommended or use the issuance key. You do it however you want. I'm going to click where it says use issue key.
[00:42] Then here it will give us the option where it says automatic recommendation. Here where it says transmission key, we're going to paste ours. So, how do we do this? Okay, let's go to Twips right now, shall we? Here where we are. We're
[00:55] going to add our profile picture to this part here. We stumbled across a clip there. control panel. We found a clip of him. Once we find the control panel, we're going part here. And then we're going to click where it says stream. We found a paperclip and
[01:10] the top. We click the copy button. Ready. We close this browser window here and paste our key in these dots appear. We double-click there, then we're going to click and we click where it
[01:24] everything glued, we're going to click where it says accept. Okay, and that's it, we now have OBS connected to Twix. Now we're going to do the following. We're going to add our webcam, our microphone, and our desktop screen
[01:38] you see this part here that says " sources," just tap the little button for Max? of here" which says "screenshot", you'll click on a paperclip, you can leave it like that if that's what you want. We click accept. Then we click here where it says
[01:52] choose any of these. I'm going to choose the last one, and where it says screen, if you have two monitors like me, you choose the monitor you're going to play on. I'm going to choose this one that says 1920 by 1080. We click on it and
[02:05] if I select the other monitor, my second monitor appears, which is the one I'm going to use. Then I'm going to click here where it says accept and we'll have our monitor screen added. Now we're going to add our webcam.
[02:18] sources, we click the max button and we click where it says video capture; on this button here you'll see a clip. Then you can leave it like that or you . I'm going to leave it just as we click " accept". Next, we're going
[02:32] to do the following. Let's find our webcam where it says your webcam that will appear here. This is mine. I select it and automatically I come out here in this part here that says FPS resolution type. You tap
[02:46] personalized. This will allow us to choose the resolution of our webcam. Where it says resolution, click on a clip here and select 1920 by 1080. Then, where it says fps, we'll
[03:00] set it to 30. And then click OK. And here's our both shrink and move this thing here if we wish. Look at it here, I can move it around and if I want I can even shrink it and put it anywhere on
[03:16] the screen. Okay, I'll shrink it like this for now, for the time being. I'll microphone. To add our Max button. Again, we're going to click where it says "
[03:29] audio capture" in this part here. Look at it here. Pass a clip and then you're going to give it to him, you're going microphone on however you want. And where it says device, you tap a paperclip there and , it says Leviosa microphone. We click on it and then we click accept. And
[03:44] here we have both the microphone and our webcam and our screen. just have to adjust everything exactly as we want it. I'm going to get a little smaller. And we click where it says start transmission.
[03:57] will automatically connect, look, to the Twips server. And recording here, it says here that the broadcast is live. Now, to find out if you're live on Twips, just go back to your browser
[04:12] and your page, then click on your profile picture again, then where it says creator control panel or stream summaries, click on see a clip. Next, we're going to click here where it says stream manager. In
[04:25] this part here you'll find a clip and as you can see right now, it shows that I'm live. Look at it there. Look, it says here that I'm live and here it shows an alarm clock I have right now . As you can see here, it presents
[04:37] VIP internet speed and all that.
⚡ Saved you 0h 04m reading this? Transcribe any YouTube video for free — no signup needed.