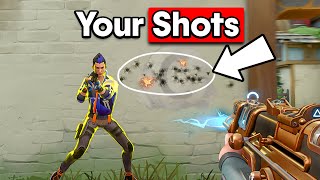

Why You Can't Hit Headshots
52sOpens with a relatable problem and promises a solution, hooking viewers who struggle with aim.
▶ Play Clip"Delivers on the promise with five clear, actionable reasons and drills, though it includes a brief program plug."
This video addresses the common frustration of low headshot percentages in Valorant, offering five key reasons and actionable fixes. The coach, with experience coaching thousands of students and reaching Radiant, explains the importance of crosshair placement, movement synchronization, reactionary control, mouse control, and translating practice into matches. The video includes specific drills and routines to improve aim and consistency.
Crosshair placement is crucial; it places your aim on the target's head before anything else. Even with better aim, poor crosshair placement can lose fights. Correct technique: visualize the angle, pre-aim at head height, then peek perpendicularly. Chain peaks by giving yourself time to register enemies and avoid overexposure.
A common issue is crosshair dipping when moving around the map. To fix, adjust your crosshair earlier than normal due to running speed, aim roughly in the middle of common angles as an anchor point, and aim slightly higher to make downward adjustments easier.
Synchronizing aim with movement is key. Dead zoning (stopping quickly without movement error) and strafe bursting (shooting two shots while moving) are essential. Practice in the range with strafe bursting and dead zoning, then apply in deathmatches with two-bullet bursts.
Hitting headshots relies on reacting effectively to information. Remember: when you stop, it's time to shoot; keep moving if not ready. Fire recovery is composure in long or sudden fights. If you miss the first burst, strafe to buy time and try again instead of panic spraying.
Maintaining control of your mouse in stressful situations is vital. Use aim trainers like Aim Lab with specific tasks: Voltaic Control Strafe Valorant Easy (smooth wrist, loose grip), Voltaic Sky Click Multi (micro-adjustments, 90-95% accuracy), and Voltaic Wide Reflex Valorant Easy (long flick then micro-adjust).
The toughest issue: applying practice habits in ranked. Warm up with a 10-minute range routine, then use deathmatches to refine mechanics. Write down 1-2 goals (e.g., pre-aim before peeking, keep aim centered, stay calm when surprised). Spend 30 minutes to an hour on deathmatches after ranked, maintaining 80% focus.
Improving headshot percentage in Valorant requires a combination of proper crosshair placement, movement synchronization, composure under pressure, mouse control, and consistent practice. By addressing these five areas and committing to deliberate practice, players can significantly enhance their aim and rank up.
What is the first reason you can't hit headshots in Valorant?
Not knowing where to aim, specifically poor crosshair placement.
00:14
What is the correct technique for peeking an angle?
Visualize the angle, pre-aim at head height, then peek perpendicularly to the line of sight.
00:53
What is 'dead zoning'?
The ability to stop quickly without any movement error before shooting.
04:49
What is 'strafe bursting'?
Shooting two shots and moving without spending time standing still.
04:49
What is 'fire recovery'?
Your composure in a long or sudden fight, especially after missing the first bullet.
06:56
What is the key reminder for reacting in gunfights?
When you stop, it's time to shoot; keep moving if you're not ready to shoot.
06:32
What accuracy should you aim for in the Voltaic Sky Click Multi task?
90-95% accuracy.
08:29
What is the fifth reason you can't hit headshots?
Failing to translate practice into actual games.
09:09
How long should you spend on deathmatches after ranked to improve mechanics?
30 minutes to an hour, maintaining at least 80% focus.
10:16
Crosshair placement is the foundation
Emphasizes that crosshair placement decides fights before aim adjustment, a core principle for FPS improvement.
00:14Aim-movement sync is critical
Introduces dead zoning and strafe bursting as measurable skills that directly impact headshot accuracy.
04:34Panic control through movement
Provides a concrete strategy (keep moving until ready to shoot) to manage reactionary panic in fights.
06:07Practice must translate to matches
Highlights the common gap between practice and ranked performance, offering a structured approach to bridge it.
09:09[00:01] and wondered why is my headshot percentage so low? Most of us have snooped onto a pro player's tracker to compare and seeing the crazy numbers these guys hit by comparison can make us feel inadequate. So, what's actually
[00:14] coached thousands of students and hit radiant multiple times, I've been asked about this a ton. So, today I want to share with you five reasons you can't hit headshots. And the first reason is not knowing where to aim. When watching
[00:27] better players peek an enemy, you'll often notice that there's minimal to headshot their target. Crosshair placement is what's going to place your aim on the target's head before anything else. So, even if you have better aim
[00:40] habits are better than yours, this could decide the fight before you even have a chance to adjust your aim. This is an example I see all the time of students peaking before their crosshair is ready. Notice how we move before we've set our
[00:53] corner. And it's really important for us to only be pressing A or D when peaking to have maximum speed on the opponent's screen. So, let's look at how to correct this. First, we want to visualize the angle, then pre-aim it at a head height,
[01:07] then peek perpendicularly to the line of sight of the angle. Now, you won't be enemy while being fully exposed to them. Many videos will discuss pre-aiming like this at length, but there are a few key details I don't see many people talking
[01:22] about. One is how we chain our peaks together. You're probably good at we have to clear a whole area, your technique is inconsistent. Pay attention to how I clear these common angles in split aiming. Notice that I give myself
[01:35] time to register an enemy on each of my peaks before moving on and following the basic formula of pre-aiming, then peaking each time. So, use your crosshair as a guide here. How deep you aim into the wall should determine how
[01:48] far you peek out. I also give myself time to walk up between angles so I don't have to take a long swing, therefore making less noise and having tighter peaks. The main goal is to not overexpose ourselves and apply our
[02:01] apply this when we're just running around the map? The obvious culprit here is crosshair dipping, where you struggle to peek into new areas with your crosshair at head height. This is a huge killer for headshot percentage and one
[02:14] of the most common issues I see low elo players face. And I'm sure you've heard actually address the problem, you need to learn the reasons why we pre-aim the way we do when we're going at a high
[02:26] pace. And before we dive into the intricacies, I just want to acknowledge our mistakes and watching guides can feel pointless and unclear, especially if you're struggling to pinpoint which exact tip directly pertains to your
[02:39] current struggles of ranking up. So, if you're feeling lost, trying to guess hit your dream rank like our thousands of students, the Immortal Roadmap program is built exactly for you. Inside our 10-week premium coaching program,
[02:52] you'll get over 100-plus hours of personalized hands-on help from radiant and VCT coaches. And we're so confident in getting you results that if you don't rank up at least 500 RR in 10 weeks, we'll give you a full refund. So, you
[03:05] can use the link down below to book a free call with me or one of our coaches to the video. When it comes to crosshair placement, the hidden villain for a lot of my students is how they set up to peek for headshots when running around.
[03:18] Watch how I take Sunset A link here. Before I even swing, my crosshair adjusts earlier than normal due to my running speed. I do this so I'm not running before I aim, which helps me maintain head height. And this is where
[03:31] play. Because we can't always spend the time to clear angles one by one. We've our peaks, but when we're running around, try aiming roughly in the middle of A link to make it easier for you to micro-adjust just using this point as an
[03:45] anchor point. And this is important because if we have to rely on a crazy flick, it's much less reliable for hitting heads. Generally, you want to aim for the furthest angle as well. Aiming a little higher will also make it
[03:57] easier to adjust your aim downwards onto an enemy's head rather than it being too low and having to do an upwards adjustment. So, go ahead and hop into a may think hitting heads just comes down to aim, but having a strong connection
[04:10] between your mouse and keyboard plays a big part as well. Ever have moments like [Music] We're going to really struggle with hitting headshots if we have this much movement error. So, if we haven't built
[04:22] good habits, we're likely going to rely on spraying in our fights, which is another major setback in improving our headshot percentage. And this is where the next point comes in. The second reason you can't hit headshots is that
[04:34] sync is how well you synchronize your aim with your movement. Learning this headshots since you'll be less likely to spam shots when your intentions aren't strafe bursting are key. Dead zoning is a measure of how quickly you can stop to
[04:49] shoot without having any movement error, while strafe bursting refers to shooting two shots and moving without time spent standing still. And to work on this, range. You want to focus on strafe bursting and giving yourself time to
[05:02] moving. Because these targets are at varying heights and distances, it'll and use our movement to buy us time. Even if we kill the target, we want to the practice range, but let's also put ourselves into these scenarios in a
[05:17] The first deathmatch will be with a between each shot. This will force you to stay accurate and stay on your feet. And in the next deathmatch, run around with your rifle trying to dead zone and
[05:30] focus on two bullet bursts to build good fundamental habits. And make sure you also keep your crosshair at head height and let the recoil reset itself instead alternate between the two pre-aiming techniques we discussed earlier as well
[05:43] based on whether you're running around or slowing down to clear a zone. And I know some of you feel like you do everything I just said, but still whiff your shots. And there's a chance it's because you're probably panicking. It's
[05:55] completely normal for this to happen when faced with stressful situations, but instead of giving into the urgency to shoot as quickly as possible, we also need to make the best choice with the small time window that we have. This is
[06:07] where we discuss the third reason why you can't hit headshots, and that's reactionary window. Hitting headshots rely on your ability to react in an effective way to the information that's
[06:19] being shown on your screen. Imagine if we always had a timer in our minds for gunfights. This would be amazing to determine how to act, and even though this isn't possible, these timers always exist. The trick is having a steady
[06:32] approach in how we react. To keep it simple, remember when you stop, it's time to shoot. And this also means we want to keep moving if we're not ready to shoot. Whenever you're surprised by an enemy in a deathmatch, make sure you
[06:44] focus extra hard on using your movement to buy you extra time instead of reacting immediately by stopping and trying to shoot. This will help you control your panic over time. And we call this fire recovery. Fire recovery
[06:56] refers to your composure in a long or sudden fight. Ever had a situation where you fought someone, missed your first bullet, and ended up panic spraying? This is a super common situation when learning to strafe burst or dead zone.
[07:08] techniques, people are quick to surrender to panic if things don't go their way immediately. The fix is identifying this in your deathmatches up and just because the first burst didn't hit. Go for a small strafe to buy
[07:22] time and try again. And keep this up until a winner has been decided because the only person who loses here is the one who panics. But panic doesn't only come from having issues in your peaking or your movement. It also comes from how
[07:36] you maintain control of your mouse, especially in stressful situations. So, this brings me onto the fourth reason why you can't hit headshots, having poor headshots, if you're not already aiming at the target, you need to find a way
[07:49] developing good mouse control habits acquire the target's head before it's too late. As we know, aim trainers are designed for this type of problem, so let's use a few tasks in Aim Lab to work
[08:02] help us improve our micro-adjustments as well as our ability to target switch. First, let's start off with Voltaic Control Strafe Valorant Easy, and we smoothen our wrist out. Make sure that you keep a loose grip and try to keep
[08:16] will help you improve your tension management habits and reading your enemy's current movement pattern. The next task is Voltaic Sky Click Multi on target confirmation as you need to
[08:29] great for working on micro-adjustments between each dot. We're looking for 90 to 95% accuracy in this type of task. So, take your time and speed up only if you can maintain the same level of precision. And finally, the last task
[08:43] that we have is Voltaic Wide Reflex Valorant Easy. This is all about to use when we're caught off guard or have to turn fast. Now, the trick here is to start with a long flick when you see a target to then correct with a
[08:56] micro-adjustment. Try using your arm for big motions while using your wrist and fingertips for the more precise motions. Now, with those drills, we're really can improve our headshot percentage. But we need to make sure this translates to
[09:09] our matches. So, I've saved the best for last here as this is the toughest issue you whiff your headshots is that you fail to translate your practice into an actual game. Most students I've coached struggle to apply better habits in the
[09:24] ranked games to push up that headshot percentage. But first, make sure we're overnight, but this will help us build more consistency with our headshots. having good form going into ranked. My 10-minute range-only aim routine is a
[09:38] good starting point to warm up fast, so make sure you check that out. Now, after you've warmed up and played ranked, the best way to accelerate your mechanics is having a block of time to work on them. And deathmatches are your best choice.
[09:50] This is how we refine our approach and get better at assessing our mechanics. Open up a notepad, sticky notes, your phone, and write down some goals from what we discussed today. Always aim to have one to two goals in mind when death
[10:02] example, it could be when running around, make sure I pre-aim before I peek a new angle. Or when running around, keep my aim centered. If I slow down, chain my peaks together. And if I'm surprised, stay calm and move until
[10:16] I've adjusted my aim. And lastly, if I miss, don't give up and spray. In my experience, the students who really put in the time into their mechanics are the anywhere from 30 minutes to even an hour of death matches after ranked,
[10:29] maintaining at least 80% of your focus throughout time. And finally, when queuing ranked, just remember what it is we're trying to get better at. Remind compromise on your fundamentals, no matter how stressful it gets. Because
[10:42] keeping this in the back of your mind will make better habits come faster than trust the process and have fun. That's it for this video. Thanks for watching. it for this video. Thanks for watching. [Music]
⚡ Saved you 0h 10m reading this? Transcribe any YouTube video for free — no signup needed.