
Why Your Mic Sucks: Condenser vs Dynamic
45sMyth-busting popular mic recommendations and explaining why expensive condenser mics fail for streamers triggers curiosity and debate.
▶ Play Clip"Title promises fixing audio, and the video delivers solid, actionable advice, though it includes a sponsor segment and some filler."
This video addresses common audio quality issues for streamers and content creators, debunking popular microphone recommendations and offering practical solutions. The creator emphasizes the importance of microphone type, placement, and leveling over expensive gear, and provides actionable tips for improving audio on a budget.
Most Twitch/YouTube viewers are lurkers who keep streams on as background noise; poor audio drives them away.
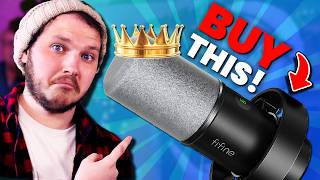
Influencers often recommend condenser mics (like Blue Yeti) because they're sponsored, not because they're best for streamers. These mics are too sensitive for untreated rooms.
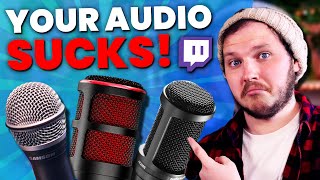
Dynamic microphones are less sensitive and handle untreated rooms better. Recommended budget options: Samsung Q2U, Audio Technica ATR2100X, AT2005USB.
Proper placement (5-10 cm from mouth, aimed just in front) dramatically improves audio quality. Leveling should be done after placement.
Adjust gain in Windows sound settings while presenting, aiming for OBS levels between -12 and -9 dB.
Reduce background noise by turning off fans, moving keyboard/mouse, or using music to mask hums (as the creator did with Epidemic Sound).
Most people sound fine; adding too many filters ruins audio. At most, use 3-4 filters: noise gate, noise suppression, compressor (or limiter).
People talk quieter when setting up, leading to over-boosted gain. Solution: do test recordings while presenting, then adjust levels based on actual speaking volume.
Good audio doesn't require expensive gear; it requires the right mic type, proper placement, and correct leveling. Avoid over-processing and test while presenting to achieve professional sound on a budget.
Influencer bias in mic recommendations
Reveals that many popular mic recommendations are sponsored, not based on merit, which is crucial for viewers to know.
00:16Dynamic mics are better for streamers
Challenges the common advice to buy condenser mics, offering a practical alternative for untreated rooms.
01:17Placement over gear
Demonstrates that simple placement changes can have a profound effect on audio quality, saving money.
03:06Avoid over-filtering
Warns against excessive EQ and filters, which often ruin audio, and suggests a minimal filter chain.
05:58Leveling while presenting
Identifies a common mistake and provides a practical testing method to ensure consistent audio levels.
07:44[00:00] Your audio sounds terrible, and since the majority of Twitch and YouTube viewers are lurkers who just need a human voice in the background to feel alive and can't be bothered to look away from their lead game, well, if your audio isn't perfect, they won't even want to lurk there. So let's fix your likely overproduced, badly placed, and far too expensive microphone today.
[00:16] The sad truth is, most of the reason you are struggling with your audio is simply just buying the wrong microphone to your face. You've been told over and over to buy the Elgato Wave series, the Quadcast, the Razer Siren, the Throat Guzzler 5000, blah blah blah.
[00:30] Most of the people recommending those microphones to you aren't telling you that they got sent those mics for free, and potentially even got paid to recommend them to you. Either way, they're biased, because if you buy the mic they recommend, they'll usually get sent more free gear to make more videos.
[00:42] In short, streaming gear videos suck ass, don't trust anyone. The mics you've been recommended over and over, like the Blue Yeti for example, are condenser microphones. These are aggressively sensitive microphones, and that's why they sound so good. The reviews you've seen of them make them sound so beautiful and clean because they're inexpensive, heavily treated stream rooms, or in videos where they can control the environment carefully.
[01:02] These microphones aren't good for streamers who can't control these things. You're in your bedroom, your office, you're slamming on your keyboard. You've got family yelling in the background, and the reality is you should have bought a dynamic microphone. Unlike condenser mics, they are better at dealing with untreated rooms because they are less sensitive.
[01:17] If you need them close to your mouth, sure, but you'd rather have that than bad audio. And you don't want just any dynamic microphone. No, you want something that sounds amazing. You need something that can grow with you, the USB or XLR for the future,
[01:29] and also isn't going to kill your wallet. That's why I often recommend the Samsung Q2U. It is all of these things and more. You'll hear this mic a lot through the rest of the video, don't worry, but if you'd like two other options as well, there's the Audio Technica ATR2100X and the AT2005USB.
[01:45] I'll link a video that breaks down each of these mics individually in the description down below, as well as a second channel called Podcastage, who is the most trusted audio reviewer I can think of, to also vouch for them. But what if you've already been tricked and bought the Wave 3 for $200?
[01:58] Well, don't worry, we can salvage it. After all, I made a $10 microphone from a grocery store work, so anything can. The thing that I want to focus on mostly is placement and distance. You need these set up before you start fiddling with the gain and levels of the microphone Let me show you what good placement can do Hello there my name is LJ and I often get emails asking to do paid sponsored gear reviews which I often turn down But then usually two weeks later I see people posting about
[02:22] the gear without labelling it as a paid review. I'm not implying anything, but I do think that's really interesting. Do you see how distance has such a profound effect on the audio quality? How even just the placement and angle can change how present your voice sounds? Now what happens if I set
[02:37] my mic up wrong and then try to level it properly. Now that I've boosted the gain you can likely hear my voice better, but you can probably also hear a lot of room tone and really gross sound. Again, I'm not trying to imply anything, but isn't it strange how every streamer
[02:50] gear influencer talks about the same gear around the same time? That's just so random. But it must be a coincidence because none of their tweets or videos are labelled as paid, and I know based on the emails that I get that these companies are offering a lot of money to do those videos. But how would I place it properly? Well, I'd want 5-10
[03:06] 10cm from my mouth, aimed just in front of it to avoid explosives popping every few seconds, and I'd be doing all of this with my Sonmax F6 low profile microphone arm. I'm not paid to use this microphone arm, I bought it myself, and unlike other low profile arms, it doesn't sag
[03:20] or break after a few months. But because I have my Shure XM7B on it, I'm actually also going to be using this, which is a Rode PSA1-12, I'm going to link all the gear from today's video in the description. Once it's placed properly, I can begin leveling by opening OBS, selecting my mic,
[03:32] and then opening the windows sound settings and changing the gain. I'm not just going to talk, but I'm actually going to present as if I were doing a video into my microphone. And then I'd watch my levels and go to the windows and keep adjusting it until my OBS is showing minus 12 to minus 9.
[03:45] I'm so glad that creators, especially new creators, can get such amazing sound on a budget. With a cost of living crisis around the globe and everyone struggling hoping to create content and live their dream, it would suck if they were told to purchase microphones or gear
[03:58] that cost hundreds of dollars just to lie in the influencer's pocket. Now, with proper placement and leveling, you might still struggle with a noisy room. Your first step, if you can't get the mic closer to you and leveled for that closeness, isn't to start editing the sound of the mic, but instead, edit the room.
[04:12] Can you lower the fan speed on your air conditioning or your fan? Can you move them further away, or can you just turn them off entirely? Can you move your keyboard and mouse further away, or get your mic further away from them and closer to your mic instead? Do you throw your little brother out of the window so he stops talking about his givety toilet These are all things you are capable and encouraged to do and if that doesn work we have two more options Yes filters but also just hide the sound For the first year on this channel I recorded out of a garage with an
[04:38] omnidirectional lav mic, which would have been fine, except the neighbor had an exhaust fan connected to my garage walls, so there was always a low hum in everything I recorded. Rather than try to filter it out and risk hurting the sound of my voice, I used music
[04:52] in my videos to carefully hide it and nobody ever noticed so that's why I can say to you that you can do it as well thanks to today's sponsor Epidemic Sound. Epidemic Sound has over 40,000 songs 90,000 sound effects all restriction free you can use all of them as much as you want on
[05:07] any social media account you connect to their service all under one license you can publish worry-free worldwide every single song or sound effect you've heard on this channel is from Epidemic Sound. I have used this service for over five years I've been using it much longer than
[05:20] they've been sponsoring the channel and I always know if I need something to spice up and edit or help convey a mood better, I can go straight to their library, search up something like Rising Action or Epic Music and I'll find something instantly.
[05:32] There it is, there it is, I know that one. You won't need to credit them or have this giant description of every single song you'd use and who it was by, all you have to do is connect your social media account and anything
[05:46] you publish during an active subscription will stay safe forever. So again, if you want to support me and protect yourself from copyright strikes and bans, check out the library with the link in the description. The next mistake is far too common and that's intense filters.
[05:58] I get it, you're anxious that your voice is too squeaky, or you keep remembering that one time your mum called you monotone and boring, so now you're aggressively adding EQ and filters to try and avoid that. But here's the thing, most of you sound fine, but your anxiety got the better of you, so
[06:11] you spend hours adding shit you don't need and barely understand how it works, when at most all you need is three, maybe four filters at max. First you want a noise gate. Imagine an actual gate. While it's shut, no sound can come through, but when
[06:24] you talk loud enough for the microphone to hear you, the gate opens up and once it opens, every sound can get through. If you set that microphone to pick up any sound at all, so being really
[06:36] sensitive it opens for keyboards mouse clicks and really anything But if you set it so that only the loudest noises can get through then it won open when you talk normally Noise gates don remove dodgy background sounds They just help clean up the audio when you not speaking So make sure you apply this very lightly
[06:52] Next, noise suppression or denoises. These don't do what you think. They don't remove all noise. They just work on white noise like fans, air conditioning units, or your computer fans.
[07:04] This is what often rips the presence out of your voice and makes it sound terrible and spacey. They do this because it's not just removing any white noise, it's removing an entire spectrum of sound which is how your voice is reacting at.
[07:16] No suppression. Next, compressors. These make the loud parts quiet and sort of make the quiet parts louder with make up gain. But not really at the same time. Truthfully, most of you don't actually need a compressor, especially if you set your mic up correctly.
[07:31] For the first two years, I used a limiter filter on my microphone instead. A limited filter essentially just says, hey, if my audio ever tries to go past minus 6 dB, tap it off there. Genuinely, nobody noticed, nobody cared.
[07:44] I didn't have someone bust into my stream and say, hey, set a compressor up, you loser. The next mistake is a hard one to overcome because you'll likely do this for the rest of your life. When you set up a microphone, even if you follow everything I've shown you today, you're going to level it wrong.
[07:57] Every single time. The reason is because when we're doing tech work, setups and techy things, we're not presenting. We aren't in the entertainment engagement mode. We're usually talking much quieter than we would on stream or in a video.
[08:09] So you end up boosting your game up to make up for it. And then when you go live and actually present, you blow your viewers' eardrums out. And the opposite is also true. Sometimes when you try to set it up, you think, okay, I gotta go into presenter mode. So you overcome the thing by screaming at your microphone,
[08:23] lower your game to get to minus 12, go live, and then nobody can f***ing hear you. The way around this is to do test recordings and genuinely present and pretend you're streaming for 5-15 minutes at a time. Then take that recording into editing software,
[08:36] lay it back so you can see your levels, and pay attention to where your mic is sitting. And only then make adjustments to get your vocals closer to constantly sitting around the minus 12 to minus 9. And in short, repeat this until you're happy with how the recording sounds.
[08:49] If you want to learn more about the Samsung QTU, click right here. And if you want to learn to present better, click right here. If you want to become a member to the channel, I'd really appreciate it. It costs $1. Click around here-ish. Alright? See you guys next week.
⚡ Saved you 0h 09m reading this? Transcribe any YouTube video for free — no signup needed.