
Jujutsu Kaisen Season 3 is Finally Back!
45sFans are hyped for the return of a popular anime, making this a highly anticipated moment.
▶ Play Clip"The title accurately reflects the video's content: a detailed breakdown of the animation's highs and lows."
Jujutsu Kaisen Season 3 returns with a visually ambitious but inconsistent start. The first two episodes showcase director Shota Goshozono's unorthodox compositions and creative animation, though minor polish issues and some clunky storyboarding choices are noted.
Jujutsu Kaisen season 3 is back after a couple of years, with episodes 1-2 being as good as ever, showcasing creative direction and animation.
Both episodes storyboarded by series director Shota Goshozono, with him directing episode 1 and Yusuke Takada directing episode 2.
Episode 1 had two chief animation directors (Hiomini and Yusuke Ajima) and a small key animator list with many second key animators. Episode 2 had four CADs, 7 ADs, and a longer KA list.
The episodes are solid animation-wise, with multiple approaches to movement, including weighty kinetic sequences and hyperdynamic fights.
The level of polish wasn't as high as expected, possibly due to advanced screenings or scheduling pressures.
The opening shot uses cinemascope aspect ratio, multiple background layers, and volumetric lighting to create a dynamic composition.
Some shots have inconsistent lines and off-sync sleeves, but overall fine.
Mitani animated the first section, including a shot with 3D background and dynamic composition.
The animation conveys heavy, impactful body mechanics with consistent weight and volume.
Some shots, like Yuji's head movement and jumping out of a window, appear stiff or janky.
The curse is well-drawn, but some background layers break the illusion of three-dimensionality.
Goshozono uses still frames and simple looped effects to create long shots without awkwardness.
Ambitious storyboards but less stellar animation, with stiffness and occasional melt.
Complex framing in the Zen clan scene symbolizes power struggles, with animated shadows adding depth.
Symbolic isolation represented by Yuji climbing stairs repeatedly, with reused shots and decent animation.
Tokumaru animates a technically impressive 2.5-minute sequence with kinetic motion, 3D backgrounds, and consistent weight.
The action uses smooth, continuous animation rather than stop-and-go payoffs.
A bird's-eye view of the city was modeled in 3D for a few seconds of footage.
Some cuts lack flow, like Yuji jumping down and landing without transition.
Animated by Teepeoka, with smooth motion and intentional choppiness to reflect Nya's ability.
Accompanied by Shinsaku Kosuma's effects with sharp geometric edges and solid acting.
Animated by Takafumi Mitani, with solid animation but some storyboarding choices that disrupt flow.
Yuji's ragdolling looks stiff and janky with massive jumps between key poses.
Smooth walk cycles, spacious compositions, and a spectacular fight with flow-over-form animation.
Action scenes presumed to be by Yakumo Crack, with distorted models and intense speed.
Similar flow-over-form philosophy, with better-executed quick cuts.
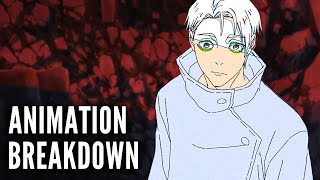
Outstanding animation but ruined by excessive red color, blurring, and dimming, making it hard to see.
A cool black and white negative film aesthetic that doesn't bury the drawings.
Goshozono's storyboarding keeps dialogue scenes engaging with outstanding compositions.
A great start to the season with inconsistencies, but any new Goshozono is good Goshozono.
Jujutsu Kaisen Season 3 episodes 1-2 deliver creative direction and impressive animation, though minor polish issues and some clunky storyboarding hold it back from perfection. Overall, a promising start.
Who storyboarded both episodes of Jujutsu Kaisen Season 3?
Shota Goshozono.
1:03
How many chief animation directors did episode 1 have?
Two: Hiomini and Yusuke Ajima.
1:42
What is the name of the animator who animated the first scene of Jujutsu Kaisen season 2 and also animated a 7-minute section in episode 1?
Takafumi Mitani.
5:08
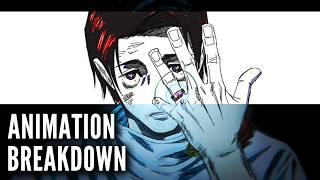
What technique did Goshozono use to represent Yuji's mental isolation in the opening scene?
He used a shot of Yuji washing his hands with blood refusing to come off, and blocked out his eyes.
4:47
Which animator is known for using 3D in his workflow and animated a 2.5-minute sequence in episode 1?
Masahiro Tokumaru.
9:23
What was the issue with Kichiro Watanabe's sequence in episode 2?
It was drowned in red, blurred, and dimmed, making the animation hard to see.
18:21
What is the name of the animator who animated the Nya fight in episode 1?
Teepeoka.
13:14
What was the purpose of the black and white negative film aesthetic in episode 2?
To showcase outstanding drawings without burying them.
19:37
Staff List Revealed
Identifies the key creative team behind the episodes.
1:03Symbolic Framing of Yuji's Isolation
Demonstrates Goshozono's genius in using visual storytelling to convey character emotion.
4:47Tokumaru's Technical Mastery
Highlights the impressive use of 3D and continuous motion in a 2.5-minute sequence.
9:23Watanabe's Sequence Ruined by Compositing
Shows how poor compositing can undermine outstanding animation.
18:21Overall Verdict: Inconsistent but Promising
Summarizes the video's balanced critique of the season's start.
20:22[00:00] We are back, Jiujutsu Kaisen. Bros, we
[00:02] are so, so back. It's been a solid
[00:05] couple of years, but JuiTutsu Kaisen,
[00:07] one of the most refreshingly creative-l
[00:09] lookinging anime led by one of the most
[00:10] refreshingly creative characters, is
[00:12] finally back. And I'm glad to report
[00:15] it's as good as ever. The first two
[00:17] episodes of the highly anticipated
[00:19] Jiu-Jitsu Kaisen season 3 were exactly
[00:21] what you'd expect them to be. They were
[00:23] textbook examples of creative people
[00:25] ditching the textbook and doing their
[00:26] own thing, of creative people being
[00:29] creative, and I wouldn't have it any
[00:30] other way. They were wonderfully
[00:32] directed. They were well animated. They
[00:34] were eye-catching in all the right ways.
[00:36] They were amazing. Minor issues and all.
[00:38] As such, as always, and as expected,
[00:41] let's break down the visuals. Make sure
[00:43] to subscribe. If you like this video,
[00:45] chances are you'll also like the 17,000
[00:47] more Juutsu Kaisen videos I'll upload in
[00:49] the coming weeks and months. So,
[00:50] subscribe. You can also become a member
[00:53] of this channel. Members get at least
[00:54] two exclusive videos per month, custom
[00:56] badges and emojis, shoutouts, and more.
[00:59] Just go down there and press the join
[01:00] button. As always, let's start with the
[01:03] staff list. Both episodes were
[01:05] storyboarded by series director Shota
[01:07] Shazono with him doubling down as the
[01:09] episode director for the first episode
[01:10] and assistant director Yusuke Takadada
[01:12] taking on that role for episode 2. Now,
[01:15] it's practically mandatory for me at
[01:17] this point to suffix the name Shotoshono
[01:19] with something along the lines of one of
[01:21] the most creative minds in the industry,
[01:22] which he is. And as you'd expect from a
[01:25] Shoison production, the episodes were
[01:27] filled with unorthodox composition
[01:29] choices, highly competent animation and
[01:31] an oxymoronic sense of familiarity in
[01:34] its sheer refusal to do anything
[01:35] familiar, or in other words, the
[01:37] direction and storyboards good for the
[01:39] most part. Over on the drawing front,
[01:42] episode 1 had two chief animation
[01:44] directors in the two character
[01:45] designers, Hiomini and Yusuke Ajima, two
[01:47] animation directors, a small but stacked
[01:50] key animator list, and an entire army of
[01:52] second key animators outnumbering the
[01:54] key animators 7 to1, which is just
[01:56] tradition at this point. Episode 2,
[01:58] meanwhile, had four CADs, the
[02:00] affforementioned two alongside JJK
[02:02] regular Sotaya Yamazaki and Mitsu Mori,
[02:04] 7 ADs, a longer KA list, and a slightly
[02:07] smaller second key animator army.
[02:09] Overall, not bad by Mapa's admittedly
[02:12] low standards. The episodes themselves
[02:15] were extremely solid animation-wise.
[02:17] They were wild in a methodical sense.
[02:19] Let's put it that way. Setting aside the
[02:21] respectable amount of movement, the
[02:23] episodes didn't shy away from having
[02:25] several different approaches to
[02:26] movement, which if that's not your cup
[02:28] of tea, I'm afraid this season is not
[02:30] for you. Depending on the situation, the
[02:33] animation took on many different forms.
[02:35] Be it the weighty kinetic sequence of
[02:37] Yugji fighting the curses, the
[02:38] spectacular unrestrained fright between
[02:40] Choo and Na or the unorthodox
[02:42] hyperdynamic Yuji versus Uta, the show
[02:45] isn't afraid to, for lack of a better
[02:47] phrase, filter out some of the normies
[02:48] with its visuals. A bold choice given
[02:50] the series's global popularity, but an
[02:52] unsurprising one given director Goshono
[02:55] and the rest of the team's track record
[02:56] both with this very show as well as
[02:58] other titles. It is however worth
[03:01] mentioning that these episodes weren't
[03:03] perfect. They had issues, minor issues,
[03:05] but issues nonetheless. Of course, I'll
[03:07] get into the specifics in a bit, but
[03:09] basically the level of polish wasn't as
[03:11] high as I had expected from the first
[03:13] two episodes of a production of this
[03:15] caliber. I wonder if it's because
[03:16] they're trying to give the latter
[03:18] episodes more time or because they had
[03:19] to rush the first two episodes a bit
[03:21] because of that advanced screening
[03:23] thing. Perhaps a combination of both.
[03:24] Who knows? Anyway, with all that being
[03:27] said, let's finally go through these
[03:29] episodes scene by scene. Starting with
[03:31] episode 1. The episode opened up with
[03:33] some trademark Goshono storyboards. This
[03:36] opening shot, for example, it was so
[03:38] eye-catching. Besides the cinemascope
[03:40] aspect ratio, you had the first
[03:41] background layer, the character cell,
[03:43] and another background layer on top
[03:45] making the composition feel dynamic and
[03:47] spacious. Also love the compositing
[03:50] head. The volutric lighting, aka those
[03:52] streaks of light meant to represent the
[03:53] reflective nature of the glass coupled
[03:55] with the bloom effect looks perfect and
[03:57] the light rays changing position gives
[03:59] the illusion that these things are
[04:00] moving despite the fact that they are
[04:02] part of the background layer, meaning
[04:03] they are entirely [music] static.
[04:05] Animation wise, the scene had very
[04:07] little going on, just a tiny Yugji
[04:09] moving in the corner, but it looked
[04:10] amazing regardless thanks to the clever
[04:12] composition and compositing. Moving on,
[04:15] the animation in this shot is a bit
[04:17] wonky. It's hard to tell given the
[04:18] blooding, but the lines don't appear to
[04:20] be particularly consistent, and even the
[04:22] sleeves are slightly off sync, but it's
[04:24] fine overall. Nitpicks aside, there are
[04:27] so many unique compositions here. Too
[04:29] many to go through. Once again, Goshono
[04:31] is a master of framing. He knows exactly
[04:33] how to draw the viewers's eyes towards
[04:35] whatever he wants their eyes drawn to.
[04:37] He knows exactly how much visual
[04:39] information to convey in each shot,
[04:41] ensuring the viewer is neither over
[04:42] stimulated nor bored. He is insanely
[04:45] good. Plus, the shots conveyed a ton of
[04:47] intent. The whole idea here was to
[04:50] convey Yuji's mental isolation and
[04:52] self-hate. And Goshono portrayed that
[04:54] perfectly. Him washing his hands, but
[04:56] the blood refusing to come off, his
[04:58] eyes, aka the most human part of a
[05:00] character being blocked out. Genius.
[05:02] More about the animation. This entire
[05:04] section and the scene that followed,
[05:06] basically everything before the OP was
[05:08] animated by Takafumi Mitani, which is
[05:10] particularly cool because he also
[05:12] animated the first scene of Jiu-Jitsu
[05:13] Kaisen season 2. And while not perfect,
[05:15] his work was really impressive. This
[05:18] shot was insanely fun and a perfect
[05:20] example of Koshaono's dynamic, spacious
[05:22] compositions. The background layers form
[05:25] a horizon and the curse is placed behind
[05:27] it except its arm which is actually in
[05:29] front of the horizon with a strong for
[05:30] shortening effect since it's closer to
[05:32] the camera with the effect getting
[05:34] stronger as it gets closer. Now, most
[05:36] sane directors would end the short hair,
[05:38] but not Goshono. Yuguji starts running
[05:41] and the camera pans backwards revealing
[05:43] that the background is actually 3D.
[05:45] Brilliant. Absolutely breathtaking piece
[05:48] of background art here with some solid
[05:49] creature animation and again every
[05:51] single shot is incredibly complex and
[05:54] layered. This one for example, you have
[05:56] the super super background sky, the
[05:58] super background building, 2D effects
[06:00] over it, another background layer in the
[06:02] windows and stuff, and a second cell
[06:03] layer of Utah. So that's five layers of
[06:05] visual information. Wow. By the way,
[06:08] don't let my obsession with the
[06:09] storyboards fool you. The actual
[06:11] animation was really impressive as well.
[06:13] The body mechanics felt heavy and
[06:15] impactful with every action being
[06:17] consistently drawn to convey the maximum
[06:19] amount of weight. The background work,
[06:21] be it 3D or otherwise, and the motion
[06:23] bluring helped with that. Things weren't
[06:25] perfect, though. This shot looked stiff.
[06:27] I don't like how Yuji's head went
[06:29] downwards and just froze. Also, him
[06:31] jumping out of the window was quite
[06:32] janky. And I didn't like how we saw him
[06:34] running towards the window in one shot
[06:36] and halfway in the air in the next one
[06:37] without any visual indicator of him
[06:39] jumping. Shortly afterwards, we had this
[06:42] shot where the curse is clearly damaging
[06:44] the buildings by brushing against them.
[06:46] But when the smoke clears, the buildings
[06:47] are intact, obviously, because they're a
[06:50] background layer. This makes the shot
[06:52] look flat, hindering the illusion of
[06:54] volume and three-dimensionality that
[06:55] Goshono loves to convey. None of this is
[06:58] significant, of course, but the first
[07:00] episode, which on paper should be the
[07:02] most polished. Having issues like these
[07:03] isn't exactly a good sign. Anyway, the
[07:06] curse itself was quite well drawn. Also,
[07:08] shout out to the random 2D bowls. I
[07:10] appreciate the effort. It was good.
[07:12] Just, you know, small things here and
[07:14] there, things most fans won't even
[07:15] notice. Another thing about Goshono is
[07:18] that he's excellent at making a lack of
[07:20] movement feel intentional. Near the end
[07:23] of Mitani's sequence, we had a 20 second
[07:25] shot of the camera panning up a still
[07:27] frame followed by another 20 second
[07:29] still frame with some simple looped
[07:30] effects near the end. So that's around
[07:33] 40 seconds that needed just two
[07:35] character drawings, a small amount of
[07:36] looped effects and some compositing
[07:38] tricks and it didn't look awkward
[07:40] whatsoever. That man is a genius. We
[07:43] then got to Okoda sequence and once
[07:45] again we had ambitious, dynamic and
[07:48] meaningful storyboards and less than
[07:50] stellar animation. The acting had a
[07:52] certain amount of stiffness to it with
[07:54] some occasional melt. It was ambitious.
[07:56] Absolutely. I'm sure Goshono's
[07:58] storyboards didn't make life any easier
[08:00] for Okuda, but I wouldn't exactly call
[08:02] it polished. This shot, for example,
[08:04] there are unintentional distracting
[08:06] jumps between the poses giving it that
[08:08] stiffness I talked about. Negativity
[08:10] aside, I love the complex framing hair
[08:12] and the drawings kept up. The room
[08:14] feeling claustrophobic because it's too
[08:16] small for all three of them. symbolism
[08:18] for the power struggles within the Zen
[08:20] clan was a brilliant idea. By the way,
[08:22] don't make the mistake of thinking these
[08:24] shots were stills. They weren't. The
[08:26] characters might be static, but the
[08:28] actual shadows were animated back and
[08:30] forth constantly. Also worth mentioning
[08:32] some meticulously animated shoe tying
[08:34] here. As you may know, small movements
[08:36] like these are held to animate. So,
[08:37] props to the team. A very fun scene
[08:39] overall. We then had this section. And
[08:42] while there wasn't much going on
[08:44] animation wise, the drawings, Yoskeima
[08:46] corrections, I believe color use and
[08:48] background art was insanely good. We
[08:50] also had more of Koshazono's Hall of
[08:52] Fame tier resourcefulness. Yuji climbing
[08:55] down the stairs only to end up at the
[08:56] top over and over again had symbolic
[08:58] meaning. It represented his isolation
[09:00] and it allowed the team to reuse the
[09:02] same shot by chopping it up. Two birds
[09:04] with one stone. By the way, the actual
[09:06] stair climbing was quite well animated,
[09:09] albeit slightly melty. I know I said the
[09:11] scene didn't have much going on
[09:12] animation wise, but this was nice. Also,
[09:14] a really well-drawn fist curl hair. And
[09:17] speaking of hands, a tremendously
[09:19] well-drawn pair of hands then brought us
[09:21] to the most technically impressive part
[09:23] of this episode in my opinion. Unpopular
[09:26] opinion perhaps, I don't know. This
[09:28] entire section was animated by Masahiro
[09:30] Tokumaru. And even if you aren't
[09:32] familiar with that name, chances are
[09:33] you've seen some of his work before.
[09:36] Remember those intricately choreographed
[09:37] fights from the anime Vivi? the ones
[09:39] that were plastered all over the
[09:41] internet back in the day. Well, most of
[09:42] them were bent by Tokumaru and more
[09:44] recently, he did a ton of work for the
[09:46] sports anime Oblivion Battery, animating
[09:49] many of its highlights and directing and
[09:50] storyboarding the most impressive
[09:52] looking episode of it. Needless
[09:54] biographies aside, the point is Tokumaru
[09:57] is excellent at kinetic motion at
[09:58] weighty body mechanics and he loves
[10:00] using 3D in his workflow and both of
[10:03] those skills were visible throughout
[10:04] this entire sequence. The scene started
[10:07] with this large scale shot that I've
[10:09] talked about before in a trailer
[10:10] breakdown. The sense of
[10:11] three-dimensionality was off the charts
[10:13] and the three-tone liquid animation
[10:15] complete with these vertical lines
[10:16] looked amazing. We then got this cut
[10:19] with those classic Tokumaru effects. The
[10:21] liquid had tons of organic individually
[10:23] animated shapes, lineless ones of
[10:25] course, because how cool is that? A
[10:28] thing I loved about this entire section
[10:29] was its use of long continuous motion.
[10:32] The action didn't hide behind stopand go
[10:34] payoffs. Not that there's anything wrong
[10:35] with that. Instead, it kept moving. The
[10:38] curses, for example, their movement was
[10:40] so smooth and had this weird sense of
[10:42] weight and flow because they never
[10:44] stopped moving. Also, the drawings
[10:46] themselves were incredibly consistent
[10:48] and volutric, which added to the
[10:50] three-dimensionality of this shot.
[10:52] Speaking of the third dimension, I'll be
[10:54] honest, the 3D bridge does look a bit
[10:56] clunky, especially in this wide shot.
[10:58] But the unorthodox camera placements and
[11:00] Eugi's top-notch body mechanics more
[11:02] than made up for it. There's so much
[11:04] weight behind Yugji's run, jump, and
[11:06] subsequent freef fall. Again, it's not
[11:08] stopand go motion. Rather, it's smooth,
[11:10] continuous animation made possible by
[11:12] Tokumaru's excellent draftsmanship. The
[11:15] placement of every single frame is
[11:17] methodical with the goal of making the
[11:18] curses and Yuji feel like actual
[11:20] physical bodies with consistent weight
[11:22] and volume. We then got this bird's eye,
[11:25] or rather this curs's eye view of the
[11:27] entire city. Meaning, yes, they modeled
[11:29] the entire thing in 3D just for these
[11:31] few seconds of footage. a luxury most
[11:33] other shows can't even think of
[11:34] affording and it was worth it in my
[11:36] opinion. Also, a lot of these curse
[11:39] insights were either 3D or 3D assisted.
[11:41] Again, Tokaroo loves his CGI, but they
[11:43] didn't look out of place given the
[11:45] consistent character animation.
[11:47] The framing throughout this entire
[11:49] section was absolutely topnotch. Here's
[11:52] an example. Why frame Yuji simply
[11:54] hanging from a balcony when you can add
[11:55] an extra building with broken walls that
[11:57] reveal parts of the interior? But wait,
[12:00] what if that's too much? What if the
[12:02] viewer doesn't know where to look? Well,
[12:03] fear not because one, the relevant
[12:05] building is lit while the rest are dark.
[12:07] And two, the composition itself
[12:09] naturally guides your eyes towards the
[12:11] focus. Again, genius. While we're on the
[12:14] topic, as impressive as the compositions
[12:16] were, I do have a few issues with the
[12:18] storyboarding. This section, for
[12:20] example, Yugji jumps down and in the
[12:22] next shot, he has already landed,
[12:23] letting the buildup of the previous shot
[12:25] go to waste. Then in the very next shot,
[12:28] we see him mid-run without ever seeing
[12:30] him get up and start running. We can
[12:32] figure that part out ourselves
[12:33] obviously, but it looks clunky in
[12:35] motion. I'm sure some of you will call
[12:37] this nitpicking, but I have to point
[12:38] this stuff out. Anyway, the curses were
[12:41] incredibly well animated. The weight
[12:43] behind their movement was outstanding,
[12:45] especially because many of them had
[12:46] unorthodox anatomies, the kind you can't
[12:48] use real life references for. Also, the
[12:51] untextured 3D backgrounds looked
[12:53] amazing, and these shots animated on
[12:54] once looked eerily smooth. Pretty sure
[12:57] they're not auto in between, which makes
[12:58] them even more impressive. Tokumaru's
[13:01] outstanding 2 and 1/2 minute sequence
[13:04] was finally brought to a close with some
[13:06] incredible drawings. Yajima productions
[13:07] again, I believe, and some fantastic
[13:09] liquid effects. We then got some fun
[13:12] shorthand drawings followed by the Nawa
[13:14] fight animated by Teepeoka, which was
[13:17] really fun. The motion was extremely
[13:19] smooth. And if you thought Nya's
[13:20] movement was choppy, that there were
[13:22] frames missing, well, mission
[13:24] accomplished, because that's the point.
[13:26] That's literally what his ability is. As
[13:28] per usual, the compositions were off the
[13:30] charts with an unparalleled sense of
[13:32] space and distance. Even the backgrounds
[13:34] were heavily warped at times to convey
[13:36] that effect. The Nya fight was followed
[13:39] by Uta's appearance, which was
[13:40] accompanied by Shinsaku Kosuma's easily
[13:42] recognizable effects with those sharp
[13:44] geometric edges and some solid acting.
[13:47] Love the paradax said. As far as I can
[13:49] tell, the background isn't 3D. It's just
[13:51] some clever fragmentation of the BG
[13:53] illustration and panning. Although I'm
[13:54] not entirely sure. The episodes also
[13:57] used a ton of these short reverse shots.
[14:00] At least that's what I think they're
[14:01] called. Shots where the composition
[14:03] remains the same, but the camera flips
[14:05] 180°. Koshas only used a lot of those
[14:07] hair. This shot was cool in concept. I
[14:10] get what they were going for and I
[14:12] understand how difficult it is to draw a
[14:13] shot from that perspective, but in
[14:15] motion it just looks a bit comical. Not
[14:18] a fan. Anyway, that brief chase sequence
[14:21] then brought us to Yuji versus Uta. And
[14:23] I have opinions. Firstly, it seems like
[14:26] the entire fight was animated by
[14:27] Takafumi Mitani, meaning he animated
[14:30] seven solid minutes around a third of
[14:32] the episode, which insane. And the
[14:34] animation throughout the fight was
[14:36] pretty solid. It's just I don't know how
[14:38] I feel about some of the storyboarding
[14:39] choices. Let's go through it in order.
[14:42] This first exchange looks a bit off to
[14:44] me. Not a fan of the weird zoom in and
[14:46] the whole thing seems to lack the sense
[14:48] of flow it was going for with those
[14:49] quick cuts. Here's an example. The
[14:52] energy/buildup hair was stopped dead in
[14:54] its tracks by this slow motion shot. And
[14:56] the shot that followed didn't build up
[14:58] enough energy for the shot that came
[14:59] after it to feel natural. Does that make
[15:01] sense? Watch it again. Maybe you'll
[15:03] understand what I mean. I did love these
[15:06] long exchanges. The actions made sense.
[15:08] It wasn't just I'll swing wildly and you
[15:11] dodge. Every single slash was carefully
[15:13] thought out. Also, the animation was
[15:15] really solid. The movement wasn't
[15:17] particularly tight or snappy, but that
[15:19] was the intention to convey motion
[15:20] that's more natural and loose. This shot
[15:24] looked really mediocre. Unfortunately,
[15:26] Yugji Ragdolling looked incredibly stiff
[15:28] and janky with massive jumps between key
[15:31] poses and a complete lack of energy near
[15:33] the end. It looked like Yuji rolled over
[15:36] for absolutely no reason whatsoever,
[15:38] like it was a video game and the player
[15:39] had high ping. Even the debris animation
[15:42] melted a fair bit. Plus, some of the
[15:44] drawings and movement around it weren't
[15:46] exactly stellar. We did have more of
[15:47] Midani's loose natural body mechanics,
[15:49] so at least there's that. But the issues
[15:52] were evident. Regardless, really strong
[15:54] drawings here, followed by a ridiculous
[15:56] bit of background animation. And the
[15:58] entire background, including the car and
[16:00] its interior, was hand animated, which
[16:02] of course is insane. But once again, the
[16:04] storyboards were a bit iffy. Goshona
[16:07] tried to do that thing where you use a
[16:09] lot of quick cuts and each cut flows
[16:11] into the next one seamlessly, kind of
[16:12] like what itsami occasionally does, but
[16:15] I don't think he got the timing right.
[16:17] The editing just felt clunky. The flow
[16:19] was almost there, but not quite. In my
[16:21] opinion, the transfer of energy between
[16:23] shots was imperfect. I don't know. Am I
[16:26] the only one? And I'm a massive
[16:27] storyboarding nerd, so I see both what
[16:29] Koshuna was going for and how he didn't
[16:31] quite get there. But do let me know what
[16:33] you guys think. Anyway, some lovely
[16:35] drawings and curse animation then
[16:37] brought us to the end of episode 1. Long
[16:39] story short, a fairly impressive work,
[16:41] but not one without its issues. Episode
[16:44] 2 started with a couple of really smooth
[16:46] walk cycles, some spacious compositions,
[16:49] some insane background art, and this
[16:50] absolutely spectacular fight. Many of
[16:53] those action scenes are presumed to be
[16:55] the work of Yakumo Crack, an animator
[16:57] who caught my eye with his work on
[16:58] Shield Hero season 3. Initially, a lot
[17:01] of people thought those scenes were
[17:02] animated either by Goshono himself or by
[17:04] Rui since both have animated similar
[17:06] shots before. I wasn't the Koshono camp,
[17:08] by the way, but that doesn't appear to
[17:10] be the case. It still looks a bit
[17:12] Goshono to me, but hey, whatever.
[17:14] Anyway, I've talked about these shots
[17:16] before. They are a textbook example of
[17:18] that flow over form mentality that makes
[17:20] 2D animation so special. The idea was to
[17:23] convey speed, force, and intensity. And
[17:25] good god, did they succeed. They weren't
[17:28] afraid to distort and twist the
[17:29] character models to their utmost limits,
[17:31] literally breaking them at times. It's
[17:33] the kind of sequence fans scream
[17:35] incomplete animation or I can't tell
[17:37] what's happening at both very wrong
[17:39] opinions. By the way, as impressive as
[17:41] the animation was, we need to talk about
[17:43] the art direction and the compositing.
[17:46] These Shinyhira inspired pencil lines
[17:48] added by the latter looked amazing and
[17:50] the distorted intensity of the animation
[17:52] was perfectly complemented by the warped
[17:54] backgrounds. Fantastic work. We then got
[17:57] Fay Hung sequence which had a similar
[17:59] flow over form philosophy. Although it
[18:01] wasn't as over the top. Also worth
[18:03] mentioning the sequence used that quick
[18:05] cuts method of action storyboarding that
[18:07] Yuji versus Uta used but it was executed
[18:09] better. The flow was flowing if that
[18:12] makes sense. Some solid character
[18:14] acting, brilliant compositions, and 3D
[18:17] background black magic then brought us
[18:18] to Kichiro Watanabe's sequence. And once
[18:21] again, I have opinions. Animation wise,
[18:24] it was outstanding. One of Watanabe's
[18:26] career best. And think of how much
[18:27] territory that takes in [music] the
[18:29] wild, unrestrained motion, the iconic
[18:31] flowy timing, those trademark effects,
[18:34] it tremendous amount of background
[18:35] animation. It was outstanding. I just
[18:38] wish I could see any of it. What the
[18:40] [ __ ] just happened here? Why did they
[18:42] butcher Watanavi's work like this? Why?
[18:45] The scene was drowned out in red, making
[18:47] it feel a bit one note and making it
[18:49] difficult to appreciate the drawings,
[18:50] which would have been bad enough on its
[18:52] own. But on top of that, they decided to
[18:54] blur everything, as well as add this
[18:56] light flicker and dim effect, which made
[18:57] the animation practically
[18:59] incomprehensible.
[19:01] Don't get me wrong, I don't have a
[19:02] problem with the movement itself being
[19:03] difficult to follow. That's the point.
[19:05] And I don't have a problem with
[19:06] directors prioritizing the overall
[19:08] screen instead of the raw 2D animation.
[19:11] As long as the overall screen looks
[19:13] better than said raw 2D animation, which
[19:15] was not the case here. From what I've
[19:17] seen, the advanced screening didn't have
[19:19] that obnoxious bluring and dimming. I
[19:21] haven't seen it, but based on what I've
[19:23] heard, it didn't, which makes it
[19:24] particularly bizarre. In the back of my
[19:27] mind, I can kind of see what they were
[19:29] going for, enhancing the uncanny nature
[19:31] of Fatanabi's animation with the
[19:32] bluring, but I don't think it worked at
[19:34] all. Anyway, this was cool, though.
[19:37] Loved the black and white negative film
[19:39] aesthetic, especially because they
[19:40] didn't bury the outstanding drawings.
[19:42] Good stuff. Moving on, we had a lot of
[19:45] dialogue, but thanks to Goshono
[19:47] storyboarding, it didn't feel boring.
[19:49] The compositions were consistently
[19:51] outstanding, so much so that they could
[19:53] linger on nearly, if not outright,
[19:55] static shots for long periods of time
[19:57] without it feeling awkward. Of course,
[19:59] we did have a decent bit of character
[20:01] acting. Some shots executed better than
[20:03] others, but by and large, it wasn't
[20:05] exactly a Sakuga fest. Plus, some of the
[20:07] drawings weren't perfect. The drawing
[20:09] supervision was a bit inconsistent.
[20:11] Despite all that though, the shots
[20:13] looked captivating, which hey, that's
[20:15] Shota's owner for you. He'll find a way
[20:17] to make things look interesting no
[20:18] matter what. And those with the episodes
[20:22] a great way to start the season in
[20:24] consistencies and all. As a general rule
[20:26] of thumb, any new Goshono is good
[20:28] Goshono and that's doubly true if he
[20:31] isn't actively being [ __ ] over by the
[20:32] schedule. So, this was great. I don't
[20:35] know how well this season will fared in
[20:37] the long run based on everything I've
[20:38] heard. The answer should be a lot lot
[20:40] better than season 2, but you never
[20:42] know. So, I'll end this video on an
[20:43] optimistic hoping for the best. That's
[20:46] about it. A special thanks to N03,
[20:48] Ahmed, and the Galas 90 for becoming
[20:50] tier three members.
⚡ Saved you 0h 20m reading this? Transcribe any YouTube video for free — no signup needed.