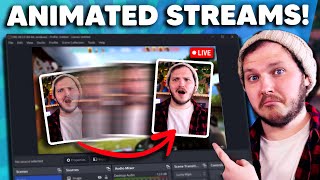

Stop Boring Streams: Dramatic Zoom in OBS
45sImmediately hooks viewers with a bold statement and demonstrates a visually striking effect that creators want to replicate.
▶ Play Clip"Delivers exactly what the title promises: a comprehensive guide to creating dynamic OBS animations. Some sponsor content but overall high value."
This video is a comprehensive tutorial on using the Move plugin for OBS to create dynamic and engaging stream animations, including dramatic zooms, camera movements, scene transitions, and even a vanish effect triggered by audio. The creator demonstrates how to set up the plugin, configure filters, and use hotkeys and triggers to control animations seamlessly.
The creator emphasizes the importance of motion in keeping streams engaging, using dramatic zooms and animated sources to enhance viewer experience.
OWN.TV offers a free scene editor in OWN Pro, allowing streamers to set up overlays, alerts, and labels in three clicks, plus access to a chatbot and auto-moderator. Paid version includes full overlay packs and Epidemic Sound subscription.
The Move plugin allows animating sources, scenes, and filter values in OBS. It can move sources, animate scene transitions, and control filter properties like opacity.
Download the installer from OBS Project forums, close OBS, and run the installer. Manual installation involves copying files to the OBS folder in Program Files.
Add a Move Source filter to the scene (not the source) to avoid breaking things. Set a default state with Get Transform, then create a second filter for the zoomed position. Use custom duration and easing for smoothness.
Change custom duration to 100ms for a fast dramatic zoom. Assign hotkeys in OBS settings for quick activation during streams, or use a Stream Deck.
Create multiple Move filters with different zoom levels (wide, medium, close-up) and assign hotkeys to switch between them for engaging chatting segments.
Use Move filters to move the webcam to different corners or sizes. Chain multiple movements using triggers to create complex animations like moving off-screen, flipping, and returning.
Link filters via triggers so that when one movement ends, the next begins automatically, enabling seamless multi-step animations.
Combine multiple Move filters with simultaneous triggers to create a cinematic zoom effect with black bars and camera zoom, all activated by a single hotkey.
Set up a Move transition to animate matched, appearing, and disappearing items. Ensure all sources exist in both scenes for smooth transitions, or use crop movements for matched items.
Use Move Value filters to control opacity of a color correction filter, triggered by audio magnitude from the microphone, to make the camera vanish on loud noises.
Place a screenshot of the background behind the camera so when the camera vanishes, only the person disappears, not the background.
The Move plugin is a powerful tool for OBS that can significantly enhance stream production value through dynamic animations. By mastering filters, triggers, and hotkeys, streamers can create professional-looking effects that keep audiences engaged.
Move Plugin Overview
Explains the core functionality of the Move plugin, which is the foundation for all effects in the video.
01:17Setting Up Dramatic Zoom
Provides a step-by-step method for creating a basic zoom effect, which is reusable for many other animations.
02:14Chaining Movements
Demonstrates how to link multiple filters for complex animations, a key technique for advanced OBS use.
08:10Scene Transitions
Shows how to use the Move plugin for smooth scene transitions, improving stream professionalism.
10:06Vanish Effect
Innovative use of audio triggers and filter values to create an interactive effect, showcasing the plugin's versatility.
12:46[00:00] Your stream is... BORING. That is called a dramatic zoom, and I did that live using OBS. One of the ways I keep my stream engaging, especially for just chatting segments, is through motion. I animate camera zooms both fast and slow.
[00:13] I animate sources like text, graphics, and even my webcam to swap sides, or sizes at the press of a button. That way I'm never blocking any important information in my game, or maybe I just died and I want to express my sadness like a cheesy 80s film,
[00:25] or become a cinematic hero with just one click. And finally, what if when I scream out of absolute terror, I vanish completely? All of this makes my content more fun to watch. It took me weeks to set up, and I'm going to show you how today in one video.
[00:37] Let's get into it. Oh, but first, let me say thank you to our sponsor, OWN.TV. OWN, your one-stop shop as a streamer, has created an entire scene editor and integrated it into their free version of OWN Pro. This means not only can you now get full overlays from webcam borders, alerts, labels and more set up in just three clicks,
[00:53] but you can also use their chatbot, auto-moderator, and try any of their free full overlay packs without paying anything. And if you want to use literally any of the packs on their website, well then you can upgrade from the free version to the paid and get access to their entire library.
[01:05] And for a little extra month, you also get access to the entire Epidemic Sound subscription, which means 40,000 songs and 90,000 sound effects. If you want to support me, check out the link in the description to try out OwnPro's new free scene editor and so much more.
[01:17] So today we're setting up a plugin called Move, and the way it works in short is to allow you to move pretty much anything, or animate pretty much anything and everything inside OBS. From individual sources, entire scenes, it can animate scene transitions,
[01:31] and it can also be used to move values on filters such as opacity, which is what we'll be doing later. First, let's install the plugin. To install it, you'll head to the OBS Project forums, link in the description, and download the installer. Once it's downloaded, make sure OBS is closed and double click it,
[01:46] and that will just simply install the plugin to OBS. If you want to do this manually, download the manual files and copy them into the OBS folder in Program Files. The path will look something like this, which you can see on screen now, but I have to ask, why are you doing this manually when it has an installer? Do you hate joy?
[02:01] Once you've done that, open OBS, right-click any scene, click Filters, click the plus button, and if you can see Move Source and these other Move Filters, you've installed it correctly. Which means we can jump straight into setting up a dramatic zoom.
[02:14] It's simple and lays the foundation for all your other effects. We're going to right click our big chatting scene here. If you don't have one, I highly recommend a scene where it's just your webcam and nothing else. Once in, we're going to click filters and add a move source filter, name this default camera.
[02:29] Now remember, we are adding this to the scene and not to the individual source, because otherwise you'll break everything. Trust me, add the filter to the scene and not to the source. Make sure you name it or you'll be screwed later as well.
[02:41] First, we need to give the move plugin a default state. Essentially, this will be a filter that tells OBS, hey, this is where the camera started, and this is where it needs to always go back to. Click your move source filter you added to the scene, and over on the right, go to the source, and make sure you've selected your camera.
[02:57] After all, that's what we're zooming in on. You don't need a start delay, but you will select custom duration. This is how long the movement takes. Set this to 300 for now. Below that is end delay. Ignore this for now. Next is easing. This controls how smooth the movement actually is, and if you don't ease it, it will be the same speed the entire movement.
[03:13] But if you do ease it, well, it will slowly start and slowly end, making it feel less sharp and unnatural. Under this is Transform. This is your bread and butter. Since we haven't moved our camera yet, it's in a default position.
[03:25] We will click Get Transform, which will tell the filter to mark the source's location and size, which, in this case, our camera source's location and size. That's it for now. We've set a default position for our camera. Now we're going to set up the position to end up at after the dramatic zoom.
[03:39] We're going to do the exact same process as earlier. We're going to right click our chatting scene, add filter, add move source, but name this dramatic zoom. Now, move this window to the side and grab your camera source by the corner.
[03:51] Drag it so it really big nice and tight on your face or until you happy with it at least Remember this is the final spot it ends up in so make sure you sat in the position you be in for streaming and once you happy you make sure the dramatic zoom filter has the camera source selected and then scroll down and click
[04:07] Get Transform. Now, if you move our mouse up to the filter list and click our default filter eye, it should zoom back to the default state, and then we'll click the dramatic filter's eye, and it should zoom in. This is a bit too slow for my liking, though. It's
[04:19] meant to be dramatic, which means fast. So, click the dramatic zoom, go to Custom Duration, and change this to 100ms, aka 0.1 seconds. Now if we test this again by going to default first and then clicking dramatic zoom, it's much faster. And you're probably thinking, yeah cool,
[04:34] but I can't be clicking eyeballs midstream in some little window. How do I activate it? Great question Billy Bob. We're going to use hotkeys. So go to your settings and click hotkeys and search for the filter. First, default. You'll set a hotkey for activating that and then search for a dramatic
[04:48] zoom and set a different hotkey. I'm going to use ctrl shift 1 and ctrl shift 2. Try to set the hotkeys to things you can reach easily, but not something you use all the time. And if you do have a stream deck, you can use that.
[05:00] Just open the app, search filters, and it will have a button inside the OBS filter control to set one up, and that's it. This process is pretty much how we're going to do all of our scene animations. For example, if I wanted to, I could create three move filters on my chatting scene, select
[05:14] the camera source, same as before, and then zoom each one in slightly more, getting transform on each one, and now I can activate camera movements from a wide, to a medium, to a close-up, which, of course, helps me keep my chatting really engaging.
[05:27] Personally, I like to add two really slow zooms, so I make a close-up, and then edit the length to be 5000ms, aka 5 seconds long. This is really subtle, and helps draw the viewer in to what I'm actually saying.
[05:39] But find what works for you, because again, it's quite a simple process. You add a new filter, move the camera, get transform, add a hotkey, and voila, you're done. This exact process is how I created my sad movie scene. I have this scene called Press F with rain, and a camera that is black and white.
[05:54] I set this up in a video from a few weeks ago that I'll link in the description if you want a scene like this, but essentially, I simply added a series of moves to this source that were all 8000ms, aka 8 seconds long, so when I turn on my rain scene, it's the same hotkey that starts that movement.
[06:08] And if I wanted, I could layer this with several versions of the source at different opacities. But I'm lazy, so I stopped after just tying together several move filters. Wait, what was that? You can tie together several move filters? Yeah, you can. Let me show you.
[06:21] Let's use our webcam as an example. We want to animate our webcam so it can go to any of the four corners on our screen, or even change sizes at the press of a button. This way, if your camera is blocking important game elements, then you can easily press a button and have it move out of the way.
[06:35] Let's head over to our gaming scene. Here I have my webcam source. I'm going to add a move source filter like I did earlier, but this time I'm going to add it to my game scene and select my webcam source. From there, I'm going to create my other filters to lock in my floor movements.
[06:47] Exactly the same as animating my camera to zoom in earlier, but instead, we're just moving the webcam's position and size. The snag though is when I look at my monitor, I naturally am facing right to left, which draws my eyes to the center of my screen.
[07:00] It's nice to look at when it's this way. So when I animate over to the other side of the screen, it becomes really awkward because I'm looking at a wall like some sort of sick freak. So let's fix this. Of course, yours might be the opposite, so just follow this, but in reverse.
[07:13] We're going to tie together several movements and even a spicy flip to fix this. Take your webcam back to the default state, make sure you save that as a placement, and then move it off-screen to the right and make a new filter in this position.
[07:25] Call it Exit Right. Now right-click it, transform, and flip horizontally. Make a new filter and call this Flip. Now make four move filters for four more movements, one moving the webcam upwards above the canvas,
[07:37] the next moving it far to the left above the canvas, and next down to the left of the canvas, and finally put it on the left of the scene where everyone can see it and add the final filter position. In short, we are making the webcam exit, jump over the canvas, kickflip
[07:52] it and then re on the other side And if we work our way through these filters to test it it does just that It starts on the right moves off screen flips goes above it moves across to the side back down and then in on the left Now we don want to hotkey all of these individual moves that would be an absolute pain and sounds like hell We want to tie them
[08:10] together so that when we activate the first movement, it activates the next, and the next, and the next, and the next. Our first move should be off right, so scroll down to triggers, and then set the next move to be the flip, and then go to the flip, and set the next move to go
[08:23] above. Go to the above, and the next move should be above left. Continue that to the above left, and then the next move should be off left. And finally, off left should be left webcam. We are literally chaining together several movements, so when one stops, it starts the next and the next.
[08:39] Then, when we hotkey and activate off right, it does just that if we set the chain up correctly. Congratulations, you're now a pro at moving sources around, and you can easily combine all of these fields to create my cinematic zoom. Sort of. Essentially we want all the movements to
[08:53] happen at the exact same time rather than one by one. So let's do that. For this effect all I did was add two black boxes to my scene. I cropped them with Alt Z and drag and then I created two move filter positions for each box. One where they are off the screen and one where they're on the
[09:08] screen. And then I did two filters for my camera. A zoomed in position and a new default position. Again this is a new default position not the same as the original. So name everything accordingly For example, I named all of mine Not Cinematic and Cinematic.
[09:22] Once we have all of the starting and final positions, we go to the Cinematic Zoom Filter, scroll to the Action Trigger, and where it says Simultaneous Movement, we set that to be our bottom box coming on, and then we go to the bottom box and say Simultaneously Move the top box on.
[09:37] We set a hotkey for the Cinematic Zoom Filter, and we press it, and ta-da, all three of these moves happen at the same time. Then, if we want to zoom back out, we do the same thing. we find our not cinematic default state, use simultaneous move to link it to the two filters
[09:51] for moving the boxes out, and then set a hotkey for it. Now we can press that, and it zoomed out all at the same time. Now I know this is a big video, and it's a very dense video. I know I'm not making any jokes as normal, but I hope it's still being helpful. Let's quickly cover how to
[10:06] transition scenes through animation, and then I will show you how to make yourself vanish when you scream or get scared. So, much like adding any global scene transition, we're going to set up a new one called Move. Go to the bottom right, click the drop down, select Move, and
[10:19] now click the three dots to edit properties. We're going to focus on a few things. First, matched items, then appearing items, and finally, disappearing items. These are named in a way that makes it pretty self-explanatory, but essentially, these are how your theme sources
[10:32] will act depending on what they do. For example, if I have the exact same source, let's say my camera, in both the chatting and the gaming scene, then it is a matched item, so it will just move to the new scene's position when I swap scenes. But if I don't have my game
[10:46] capture in my chatting scene, obviously I wouldn't, then this is an appearing item, and it needs to know how to appear. And of course, in reverse, maybe in my chatting scene I have a small graphic, but in my gaming scene I don't have that graphic, then it's a disappearing
[10:59] item, so it needs to know how to disappear. Personally, I hate how appearing and disappearing look no matter what, so I try to just make sure I have every source in both scene's positions nicely, which I'll show you how to do in a second, but for now, just set appearing and disappearing
[11:12] to fade. That way, if there are any loose sources, they'll at least be subtle. Okay, so if I were to transition from my chatting scene to my gaming scene, we have a few issues. First, I have a different webcam source, and I have a game capture in gaming, but not in chatting, so it looks kind
[11:26] of dreadful. To solve this, I am going to go into my game scene and copy my game capture and my rounded webcam. These are the new appearing items. I will paste these into my chatting scene and place my game capture underneath my big camera at the bottom of the source list so it's hidden,
[11:41] and then place my rounded webcam source that I took from my gaming scene off to the side of the canvas so it's not seen. Stick with me now because I'm going to copy my big chatting camera and I'm going to paste that into my gaming scene, but I'm going to move it under the frame so it's out of
[11:53] sight below everything Now when I transition to my game scene the big camera has a matching source so it will move down off screen to reveal the game capture behind it and the webcam has a matching source as well so it moves off to on
[12:08] This also works in reverse now between scenes as well, because again, I made it so all the sources in one were in the other. But here's the thing, if I didn't have a different camera source, I could also just do a crop movement. For example, let's hide my gameplay webcam and instead grab that
[12:22] chatting camera source that we added. We're going to hold alt and we're going to drag to crop. The The source now might be cropped here and not in the other scene, but OBS still reads it as a matched item, so now when we transition from chatting to gaming, the crop is part
[12:34] of the animation. How cool is that? Okay, you should be a pro at using this plugin now, you understand filters, next moves, simultaneous triggers, matched source transitions and everything you need, but there is one last step, and
[12:46] that is using the move plugin to control other filter values. I'm going to show this off using a method I learned from shindags on Twitter, to make yourself vanish after a loud noise like a scream. I will have Shindag's Twitter and Twitch in the description, please go give them a like and engage with them so more people see them, they're honestly an amazing creator.
[13:02] Now, we're going to do this by first creating three filters on our camera source in our just chatting scene. That's right, I said source, not scene. I'm doing the opposite of my first step and my first warning by applying filters directly to a source.
[13:15] Right click your camera and add a color correction source and name it vanish. Do not adjust any of the settings on this. Next, add two more filters. Both of these are going to be Move Value filters. Name one
[13:27] Move Value 0 and name the other Move Value 1. These filters are what move the value of the Color Correction filter. So first go to Move Value 0 and I want you to select the Vanish filter, which is a Color Correction filter, and then select Single Settings and
[13:41] select Opacity. Set this opacity to 0. These settings are telling the filter to control the opacity and move it to 0, so essentially vanish the source. Scroll down and change the custom duration to 150, because we want the opacity to change very fast. The end delay
[13:57] will be 5000, this is how long after you vanish before the next filter will activate. Turn off easing and now we move on to move value 1. The same as before, select the vanish filter, single setting, opacity, and set its value to 1. This means this filter will turn the
[14:12] opacity back to 1, aka 100% visible. Scroll down, change custom duration to 300ms so you fade back in nice and fast, but leave easing on this time. We're not done yet though. Now go back up to move value 0, scroll to your triggers, and change next move to be move value 1. Remember,
[14:29] this tells the filter, once it's finished, to start the next filter, which is fading you back in. Now we want to activate this when we scream or if there's a loud noise, not when there's a hotkey. To do this, you want to go down to your audio mixer and select your microphone track. You want
[14:42] this only on your microphone. If there is any other audio on that single track and it gets loud, obviously you will be vanishing as well. Click the three dots on your microphone and click filters. Add an audio move filter and then leave the setting as magnitude.
[14:56] I want no easing and the action should be filter enable because we want this filter to enable our other filter. Select the camera source and then select your move value zero filter. Below that threshold action should be enable over
[15:09] and then we will set our threshold. This is a bit tricky and everyone will be slightly different. If I have this really low when I talk I vanish so I keep moving this along until I no longer vanish just from speaking. But not so far along that when I yell, I no longer vanish.
[15:23] It's a balancing act finding where your yell actually is. So if I yell, scream, or smack my mic, I vanish. But wait, that's my whole camera vanishing. How did I make it so that only I vanish and not the background?
[15:35] Well, simple. I screenshot of my background without me or my chair in it. Then I put it behind my camera, so when my camera vanishes, my background is still there, making it appear that only my chair, mic and self vanish.
[15:48] This video was very dense and probably a little tricky, so I'd like to recommend this video on OBS tips. I teach you how to set up nested scenes, those rain effects I showed you earlier, and how to use hotkeys for simple live editing. I'll also show you how to set up plugins. If this video helps you, please consider becoming a member,
[16:01] and I'll see you guys next week.
⚡ Saved you 0h 16m reading this? Transcribe any YouTube video for free — no signup needed.