Your AI videos look blurry? Fix them now
44sDirectly addresses a common frustration for AI video creators, making them eager to learn the solution.
▶ Play ClipThis video demonstrates how to upscale low-resolution AI-generated videos to professional 4K quality using OpenArt, an all-in-one AI platform powered by Topaz Labs. The tutorial walks through the step-by-step process, including resolution selection, frame interpolation, and pricing, showing a dramatic quality improvement from 1080p to 4K.
AI videos often look great initially but lose quality in real projects—low resolution, blurry details, and poor scaling.
A tool exists that can upscale low-res AI videos all the way to 4K with insane clarity, better than anything else tested.
OpenArt is an all-in-one AI platform for creating, editing, and upscaling images and videos, with upscaling powered by Topaz Labs.
Log into OpenArt, click the video icon on the left menu, then select the video upscale option.
You can upload a new file or choose from previously generated videos saved in history (e.g., from Kling, VO3).
Upscale up to 4K using the drop-down menu. 2K is already sharp, but 4K provides extra detail for professional use.
2K costs 250 credits; 4K without interpolation costs 150; 4K with interpolation costs 250. Framerate changes cost extra (30fps: 100 credits, 60/90/120fps: 150 credits).
Frame interpolation creates artificial frames between existing ones to smooth footage, bumping up from typical 16/24fps to 30, 60, or 120fps for more natural motion.
For a 5-second clip from 1080p to 4K, processing takes about 8-9 minutes. The AI analyzes each frame, enhances details, and rebuilds at higher resolution.
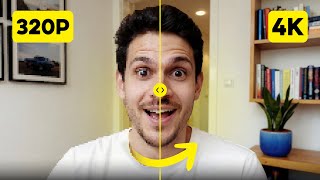
Original 1080p shows blur and pixelation when zoomed; the 4K upscaled version is sharper, with better colors, no glitches, and natural movement thanks to interpolation.
Not necessary for quick social media or testing; essential for YouTube videos, client projects, or combining with real high-resolution footage.
OpenArt also offers image generation (Flux, C-Dream, Nano-Banana), video generation (Kling, VO3, Sora2), editing tools (in-paint, face swap), and consistent character creation.
"Delivers exactly what it promises: a step-by-step guide to upscaling AI videos to 4K using OpenArt."
What is the maximum resolution OpenArt can upscale to?
4K.
02:09
How many credits does 4K upscaling with interpolation cost?
250 credits.
02:24
What is frame interpolation?
It creates artificial frames between existing ones to smooth footage and increase framerate.
03:02
What is the processing time for a 5-second clip from 1080p to 4K?
About 8-9 minutes.
03:55
Which company powers OpenArt's upscaling feature?
Topaz Labs.
00:44
What framerate options are available and their credit costs?
30fps for 100 credits; 60, 90, or 120fps for 150 credits.
02:50
When is upscaling not necessary?
For quick social media content or testing ideas.
05:01
What other features does OpenArt offer besides upscaling?
Image generation, video generation, in-paint, face swap, and consistent character creation.
05:44
Tool can upscale low-res AI videos to 4K
Introduces the core solution that addresses a common pain point for AI video creators.
00:15OpenArt uses Topaz Labs for upscaling
Reveals the underlying technology that makes the upscaling effective and credible.
00:44Frame interpolation smooths footage
Explains a key technique that improves motion quality beyond just resolution.
03:02Comparison shows significant quality improvement
Provides visual proof that the upscaling process delivers professional-grade results.
04:19OpenArt is an all-in-one creative toolkit
Highlights the platform's broader value beyond just upscaling, making it a comprehensive solution.
05:44[00:00] Your AI videos might look great at first, but once you try to use them in a real project, the quality just falls apart. The resolution is low, the details are blurry, and if you try to scale it up, it gets even worse. Most creators think they're stuck with whatever quality the AI gives them, but that's not
[00:15] true anymore. There's actually a tool that can take your low resolution AI videos and upscale them all the way to 4k with insane clarity, and it does it better than anything else I've tested. I've been using this for months now, and it's completely changed how I approach AI video
[00:29] creation. In this video, I'm going to show you exactly how to upscale your AI videos to professional quality step-by-step, so you can finally use them in real projects without worrying about low quality footage. The platform we're using today is called OpenArt, and it's honestly become my go-to for
[00:44] pretty much everything AI related. What makes it special is that it's not just an image generator or just a video tool, it's an all-in-one platform that lets you create, edit, and upscale everything in one place. And the upscaling feature specifically is powered by Topaz Labs, which is basically the
[00:59] best tool for video enhancement. By the way, if you want to follow along, I'll put a link for OpenArt in the description so you can try this while you watch. Alright, let's jump right into it. When you first log into OpenArt, you'll land on the homepage, and on the left hand side,
[01:11] you'll see a menu with different options. What you want to do is click on the video icon. This opens up a completely separate workflow that's dedicated to working with video content. You'll see options for text-to-video, image-to-video, and a bunch of other features.
[01:24] But what we're focusing on today is the upscaling tool. Click for the video upscale option and click on it. Now you can either upload a brand new video file from your computer, or you can use a video you've already generated inside OpenArt. If you've been creating videos with models like Kling, VO3, or any of the other generators
[01:40] on the platform, those videos are already saved in your history. So just click on history, and you'll see everything you've made before. For this example, I'm going to pick a clip I made earlier with Kling. It's a 5-second clip, and the original resolution is 1920 by 1080, which is standard HD.
[01:56] It's decent, but it's not good enough if you want to use this footage professionally, or if you're planning to display it on a larger screen. Once you select your video, it'll load into the upscaler window. Now, in the top corner, you'll see the original resolution and duration of your clip.
[02:09] Right below that, there's a drop-down menu, where you can choose your target resolution. You can upscale all the way up to 4K. OpenArt goes up to 4K, so you get plenty of flexibility for whatever you're making. Usually, 2K already looks super sharp, but having full 4K available is great when you want
[02:24] extra detail. Pricing is very simple. You'll see 2K at 250 credits. 2K without interpolation at 150, 4K without interpolation, also at 150, and 4K with interpolation
[02:36] at 250. So you can pick any resolution you want without worrying about the price. The only thing that changes the cost is whether interpolation is on or off. Framerate changes are handled on their own. If you want your clip at 30 frames per second, that's 100 credits.
[02:50] And if you want 60, 90, or 120 frames per second, that one costs 150 credits. And before we hit the generate button, there's one more setting that affects the look and feel, something a lot of people miss. Framer Interpolation
[03:02] This is a feature that smooths out your footage by creating artificial frames in between the existing ones. Most AI video generators output at 16 or 24 frames per second, which can look a little laggy, especially if there's a lot of movement.
[03:15] Framer Interpolation bumps that up to 30, 60, or even 120 frames per second, making everything look way more natural. Think of it like this. If your video is shot at 16 frames per second, you're missing a lot of visual information between
[03:27] each frame. When you slow it down or watch it on a high refresh rate, those flaws become really obvious. But when you use frame interpolation, the AI fills in those gaps, creating a way better viewing experience. Now you don't always need 120 frames per second, that's really only useful if you're planning
[03:42] to slow down the footage. For most videos, 30 or 60 frames per second is perfect. Alright, so now that we've selected our resolution and understood how frame interpolation works, let's actually generate the upscaled version. I'm going with 4k for this example.
[03:55] Once you've made your selection, just click generate. The processing time depends on the length of your video and how much you're upscaling. But for a 5 second clip, going from 1080p to 4k, it usually takes about 8 to 9 minutes.
[04:07] I know that sounds like a while, but trust me, it's worth the wait. While it's processing, the AI is doing a ton of work behind the scenes. It's analyzing every frame, enhancing details, smoothing out motion, and rebuilding the video at a much higher resolution.
[04:19] Alright, so now that the upscaled version is done, let's take a look at the difference. I'm going to play the original 1080p version first, so you can see what we started with. As you can see, it's not bad, but when you zoom in, the details start to fall apart pretty
[04:31] quickly. There's some blur, the edges aren't super sharp, and if you try to use this on a big screen, it wouldn't look nearly as good. Now, let's look at the 4k upscaled version. The difference is immediately noticeable. The details are way sharper, the colors stand out more, and the overall clarity is just
[04:46] on another level. Even when you zoom in, everything holds up. There's no pixelation, no weird AI glitches, just clean, professional looking footage, and the movement is way more natural too, thanks to the frame interpolation. This is the kind of quality you can actually use in real projects without worrying about it
[05:01] looking cheap or low quality. Now, you might be wondering, do I need to upscale every single video I make? And the answer is no, not necessarily if you're just making quick social media content, or testing out ideas. The original resolution from most AI video generators is fine, but if you're working
[05:15] on something more serious, like a YouTube video, a client project, or any kind of professional content, upscaling makes a huge difference. It's also super useful if you're combining AI-generated footage with real footage. Real cameras shoot in high resolution, so if your AI clips are stuck at 720p, they're going
[05:31] to stick out. Upscaling them to match the quality of your other footage makes everything blend together. One more thing I want to mention. Open art isn't just about upscaling. The reason I love this platform so much is because it's a complete creative toolkit.
[05:44] You can generate images with models, like flux, c-dream, or nano-banana. You can create videos with Kling, VO3, or Sora2. You can edit your images with tools like in-paint and face swap. And you can even create consistent characters that you can use across multiple projects, so
[05:57] instead of having and paying for multiple subscriptions, you've got everything in one place. And the upscaling feature is just one piece of that puzzle, but it's a really important piece because it ensures that everything you create looks professional.
[06:09] By now, you've learned how to take your AI-generated clips and boost them up to 4K using open art. And with open art, you're not just getting an upscaler. You're getting an entire platform that handles every part of your AI content creation workflow.
[06:21] If you want to start creating professional quality AI videos that actually look good enough to use in real projects, then click the link in the description and sign up for open art today. Thanks for watching, and I'll see you in the next one.
⚡ Saved you 0h 06m reading this? Transcribe any YouTube video for free — no signup needed.