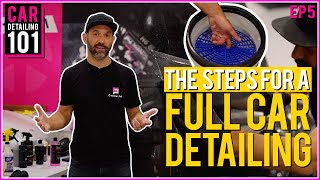
Professional Car Wash Secrets
45sReveals professional pre-rinse and two-bucket wash techniques that amateurs often miss.
▶ Play ClipThis video introduces a car detailing series, covering the complete process from exterior wash to interior cleaning. The host demonstrates professional techniques using spot-free water, two-bucket washing, decontamination, and specialized tools to achieve showroom-quality results.
Adam from Ceramic Pro launches Detailing 101, promising to cover the full process from top to bottom, encouraging subscription for future in-depth steps.
Start with a pre-rinse using spot-free water to remove loose dirt. Use a two-bucket system with grit guards to keep wash media clean. Soap from top to bottom, then pressure wash off.
Spray degreaser into wheel wells and on wheels/tires, pressure wash, then use detailing brushes to clean all nooks and crannies.
Use mild pH-neutral degreaser on plastic panels and painted door jambs, scrub gently, and rinse. Dry with microfiber towels.
Lubricate paint with pink wipeout, then use a clay towel or bar from top to bottom until paint feels smooth. Dry completely, using compressed air for crevices.
Vacuum, then use compressed air to loosen hidden dirt, vacuum again. Clean surfaces with appropriate products, brushes, and steam cleaner. Finish with carpet extraction using hot water.
Apply ceramic coatings for exterior and interior protection, including antimicrobial Ceramic Pro Tag. Encourages viewers to find a certified installer or subscribe for more.
This video provides a solid foundation for anyone wanting to detail their car like a professional, covering exterior wash, decontamination, interior cleaning, and protection. Following these steps will yield showroom-quality results.
"Title accurately promises professional detailing techniques; video delivers a thorough walkthrough of exterior and interior steps."
Two-bucket system with grit guards
tool
Pressure washer
tool
Microfiber drying towels
tool
Clay towel or clay bar
tool
Compressed air
tool
Industrial steam cleaner
tool
Carpet extractor
tool
Pink Wipeout (lubricant)
product
Ceramic Pro exterior protection
product
Ceramic Pro interior protection
product
Ceramic Pro Tag (antimicrobial coating)
product
What type of water is recommended for pre-rinse to avoid water spots?
Spot-free (deionized) water.
0:32
What is the purpose of a grit guard in a two-bucket wash system?
To allow dirt to fall to the bottom while keeping wash media at the top.
1:08
Why should you work from top to bottom when washing a car?
Because the top collects the most dirt and sun-baked contaminants.
0:42
What tool is used to decontaminate the paint after washing?
A clay towel or clay bar.
5:03
What lubricant is used before clay barring in this video?
Pink Wipeout.
4:50
Why is compressed air used after drying the exterior?
To blow water out of cracks and crevices to prevent water spots.
5:32
What is the first step in interior detailing according to the video?
Vacuuming.
6:14
What machine is used to deep clean carpets?
A carpet extractor that sprays 210°F hot water and sucks up dirt.
8:03
What is Ceramic Pro Tag used for?
It is an antimicrobial coating that kills germs for months after application.
8:43
Why is it important to use a mild pH-neutral degreaser on plastic panels?
To avoid damaging the paint while cleaning plastic surfaces.
2:36
Detailing 101 Series Launch
Establishes the educational goal of teaching professional car detailing at home.
0:08Spot-Free Water Advantage
Explains why professionals use deionized water to prevent water spots.
0:32Two-Bucket System with Grit Guard
Key technique to avoid scratching paint during washing.
1:08Decontamination Process
Clay barring is essential to remove bonded contaminants before polishing or coating.
4:59Antimicrobial Coating
Introduces Ceramic Pro Tag as a modern solution for interior hygiene.
8:43[00:00] hey guys this is adam with ceramic pro
[00:02] and this is the first video of a series
[00:04] on how to detail your car welcome to
[00:06] detailing 101
[00:08] so i'm going to run you through the
[00:09] whole process starting from the top of
[00:11] the vehicle
[00:12] all the way to the bottom i'm going to
[00:13] introduce you to all the tools but i
[00:15] encourage you to subscribe now
[00:17] because we're going to go in depth in
[00:19] the future on every step
[00:21] to get you professional results at home
[00:23] or to show you
[00:24] why you should choose a professional
[00:26] installer first things first
[00:28] we're going to wash the vehicle you
[00:30] start with a pre-rinse
[00:32] here with a professional facility we use
[00:34] spot-free water it's deionized
[00:36] so we can actually wash the vehicle
[00:37] start from the top do the wheels and
[00:39] leave the car wet for a long period of
[00:41] time
[00:42] the top is where all of the dinginess
[00:44] lands where the sun beats down your car
[00:46] and bakes in all of that stuff up there
[00:49] that you don't want there
[00:50] so first thing pre-rinse the vehicle get
[00:52] off all the loose dirt
[00:53] as you move your way down you'll want to
[00:55] pre-rinse the wheel wells and then
[00:57] pre-rinse the wheels
[00:59] once you've knocked off all of the
[01:01] general loose dirt the next thing you're
[01:02] going to do
[01:03] is move to the two bucket system washing
[01:06] so as you can see we have two buckets
[01:08] we always have a grit guard in there so
[01:10] that
[01:11] your dirt falls to the bottom but your
[01:13] wash media stays at the top
[01:14] we also love using an eco wash system
[01:17] here and i'll go into that
[01:18] again on the next video so now that your
[01:21] car's been pre-rinsed
[01:23] you're gonna start soaping the car from
[01:25] the top
[01:26] work your way down if you're working in
[01:28] a nice shaded area like we have
[01:30] and you have spot-free water you can
[01:33] basically soak the entire vehicle
[01:35] working from your top to the bottom and
[01:37] do all the smooth painted surfaces
[01:40] next you'll go ahead and pressure wash
[01:42] all of that soap
[01:43] off then once the body is generally
[01:46] clean
[01:47] you're going to spray some degreasers
[01:49] into the wheel wells
[01:50] and break up any hard dirt that's in
[01:52] there and then pressure wash
[01:54] all that out once that's clean your
[01:55] wheels are going to look dirty dirty
[01:57] dirty
[01:58] so get down low and you're going to
[02:00] degrease the wheels
[02:01] degrease the tires pressure wash it and
[02:04] then use
[02:05] a variety of detailing brushes to make
[02:07] sure that you get into
[02:08] all the nooks and crannies once it's
[02:11] clean
[02:11] you go ahead and pressure wash that out
[02:13] again and the wheel should be
[02:14] totally clean from the back to the front
[02:17] including all around the lugs
[02:20] next your truck should be very clean
[02:23] but you probably have some hidden dirt
[02:26] on your running boards
[02:28] or on your accessory plastic panels like
[02:30] this
[02:31] so you'll wanna almost in a way start
[02:34] from the beginning again
[02:36] spray some mild ph neutral
[02:39] degreaser and cleaner onto these
[02:41] plastics
[02:42] then you'll go ahead and gently scrub it
[02:45] with a scrub brush
[02:46] being very very careful to not touch the
[02:48] paint
[02:50] now once that's all cleaned up you'll
[02:52] pressure wash that again
[02:54] and make sure you got all of that debris
[02:56] off the body
[02:57] if needed you might need to soak that
[02:59] area once again
[03:01] and pressure wash it again after that
[03:04] the exterior of your car or truck should
[03:06] look
[03:06] very clean and again because we're using
[03:09] spot-free water
[03:10] and we're indoors we have time so what i
[03:13] mean by
[03:14] having time is you won't be getting
[03:16] water spots on the vehicle
[03:17] which are a really really negative thing
[03:19] that you don't want
[03:21] so i'm opening the doors you're probably
[03:23] thinking i'm moving on to cleaning the
[03:24] interior but i'm actually not i'm still
[03:26] working the paint
[03:27] as you can see in the door jambs they're
[03:30] all painted
[03:31] just like the exterior of the vehicle so
[03:33] i'm still cleaning paint
[03:35] here you'll want to use that mild ph
[03:39] neutral degreaser
[03:40] and spray it all in the cracks and
[03:42] crevices
[03:43] all throughout and you'll start to see
[03:45] dirt just falling out like you never
[03:47] knew was there
[03:48] next use um just water
[03:52] or a uh or a even more mild cleaner
[03:55] and spray it in and you'll use a
[03:56] microfiber towel to clean all those
[03:58] areas
[04:00] being careful of course to not let it
[04:03] over spray into the interior
[04:05] once you've cleaned it then you want to
[04:07] dry it close the doors
[04:09] and begin the process of drying the
[04:11] vehicle
[04:13] so during this process you'll use very
[04:15] soft microfiber towels drying towels
[04:18] and you can dry the vehicle to about
[04:21] eighty percent dry
[04:22] it doesn't have to be perfectly bone dry
[04:25] because you're about to decontaminate
[04:27] the paint
[04:28] after that so now the vehicle
[04:31] is almost completely dry you'll begin
[04:33] again
[04:34] by adding a lubricant onto the paint
[04:37] you always want to work with semi-wet
[04:40] paint or lubricated paint
[04:42] you very rarely want to rub dry because
[04:45] you can actually add scratches
[04:46] so once it's lubricated using
[04:50] our preferred product which is pink
[04:52] wipeout
[04:55] then you will move into the
[04:57] decontamination process
[04:59] decontamination is a fancy word for clay
[05:02] barring
[05:03] this is a clay towel you can use a clay
[05:05] bar or a clay towel
[05:07] and you will again begin from the top
[05:10] and work your way down gently wiping it
[05:13] until the paint feels smooth
[05:15] again we're going to go into depth in
[05:17] that in the next video
[05:18] that's the decontamination process once
[05:21] the paint feels entirely smooth
[05:23] then you dry the vehicle completely back
[05:26] with the microfiber drying towels that
[05:28] are very soft
[05:29] and if needed you can use compressed air
[05:32] which we have here hanging from the
[05:34] ceilings to get all the water
[05:36] out of all the cracks and crevices
[05:38] because the last thing you want when you
[05:39] go for a drive
[05:40] is water to run down the paint after
[05:42] you've decontaminated it and dried it
[05:44] totally
[05:45] you can move on to either detailing the
[05:47] interior
[05:48] or continuing to polish and brighten the
[05:51] paint
[05:52] using a machine polisher so we just got
[05:55] finished drying the vehicle
[05:56] and now you have to look at how you're
[05:57] going to protect the exterior of course
[05:59] you can look into old methods like wax
[06:00] or sealants
[06:01] or you can check out ceramic pro's full
[06:03] line of exterior protection products
[06:06] alright so we just got finished with the
[06:08] exterior of the vehicle now we're moving
[06:09] on to the interior
[06:10] and of course the first step when
[06:12] detailing your interior is vacuuming
[06:14] so choosing the right vacuum is
[06:16] important this one has
[06:17] very high suction and even possibly more
[06:20] important than that
[06:21] is having the right attachments to make
[06:23] sure you can get into all the nooks and
[06:24] crannies
[06:25] so come on over i'll show you the basic
[06:28] process to detail the interior vehicle
[06:30] so as i said of course first thing we do
[06:32] here at a ceramic pro shop
[06:34] is we vacuum the interior and actually
[06:36] the next thing we do
[06:37] is we use compressed air and then we
[06:41] blow out
[06:42] as much of the dirt and debris that's
[06:43] hidden as possible to loosen it back up
[06:45] and then believe it or not we vacuum the
[06:48] vehicle again
[06:50] so once it's totally vacuumed then you
[06:52] have to diagnose the vehicle and say i'm
[06:54] going to work from top to bottom
[06:55] so when you look in this car it actually
[06:57] has a lot of different types of surfaces
[07:00] so you have leather you have plastic you
[07:03] have rubber
[07:04] you have carbon fiber and then even the
[07:06] stereo screen
[07:07] you need to be careful of those so
[07:09] knowing which products to use
[07:11] at which time is very important so you
[07:13] can see we've got a variety of products
[07:15] we also have a variety of cleaning
[07:16] brushes and then
[07:19] we have high quality microfiber towels
[07:22] that are designated for the interior
[07:24] only when you're cleaning the surfaces
[07:26] oftentimes
[07:27] you'll have to use a combination of
[07:29] cleaning detergents
[07:30] brushes towels and then we also use
[07:33] a high-powered industrial steam cleaner
[07:36] as well
[07:37] so the steam cleaner will help get out
[07:40] all the loose debris
[07:42] clean with using less chemicals and also
[07:44] disinfect
[07:46] and because we work from top to bottom
[07:48] now we've pushed
[07:49] everything down to the bottom and we've
[07:51] cleaned all of the surfaces as we work
[07:53] down
[07:54] and lastly you have your carpets carpets
[07:56] often are a place that hide a lot of
[07:58] dirt
[07:59] and vacuuming just simply isn't enough
[08:01] so you'll want to use
[08:03] a industrial carpet cleaning machine
[08:06] so this is called carpet extractor it
[08:09] sprays out 210 degree hot water
[08:11] and simultaneously sucks up the dirt
[08:13] which you'll see in the next video it's
[08:15] sucking a lot of dirt through this clear
[08:17] kind of observation window here now your
[08:19] carpets are clean
[08:20] your leather is clean your plastics are
[08:22] clean everything on the interior is
[08:24] clean and
[08:26] just like the exterior of your vehicle
[08:27] you're going to want to look into how to
[08:29] preserve it
[08:30] so you can use old school products like
[08:33] dressings or silicones or you can use
[08:36] the full lineup of ceramic pro interior
[08:38] protection
[08:39] as well as a really cool product that we
[08:41] have called ceramic protag
[08:43] ceramic protag is an antimicrobial
[08:45] coating which is so important now
[08:47] because it actually continues to work
[08:49] by killing germs for months after
[08:52] application thank you guys so much for
[08:54] watching
[08:55] how to detail the interior of your
[08:57] vehicle and before that of course how to
[08:58] detail the exterior
[09:00] if you're looking to get this done today
[09:02] please look for a ceramic pro certified
[09:03] installer
[09:04] if you're looking to do this at home or
[09:06] learn more about
[09:08] how we do it subscribe to see our full
[09:11] mini series on how to detail your
[09:13] vehicle thanks for watching the first
[09:15] video of detailing 101. we'll see you on
[09:17] the next video
[09:22] you
⚡ Saved you 0h 09m reading this? Transcribe any YouTube video for free — no signup needed.