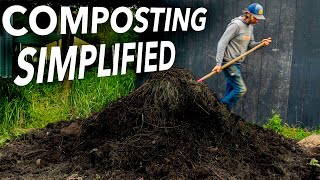

Composting Basics: No Jargon, Just Results
60sThe host's promise to simplify composting and his humorous dad jokes hook viewers seeking an easy entry into the topic.
▶ Play Clip"The title promises a beginner's guide and delivers exactly that—clear, actionable advice without unnecessary fluff, though a few dad jokes and sponsor mentions pad the runtime."
Farmer Jesse from No-Till Growers presents a beginner-friendly guide to composting, emphasizing simplicity and accessibility for any scale. The video covers the essential tools, location considerations, material ratios, and the step-by-step process of building and maintaining a compost pile, along with alternative methods for those with physical limitations.
The video aims to demystify composting jargon and provide a simple, universally applicable method for creating compost, regardless of scale or goals.
The basic goal of any compost is to add nutrients, beneficial microbes, and lively organic matter to a garden.
The presenter recommends a tried-and-true, entry-level method that requires minimal materials and experience, though it does involve physical labor.
Only a shovel and a pitchfork are essential; a tarp, water source, and thermometer are also useful. A household thermometer can be used by digging a hole into the pile's center.
Compost piles should be placed in a well-draining area to avoid waterlogging, which can harbor disease-causing organisms. A covered area helps control moisture and temperature.
Adequate space is needed to turn the entire pile, ideally moving it from the middle out. Avoid weedy areas or use landscape fabric to prevent weed seeds.
Compost requires carbonaceous (brown) materials like wood chips, leaves, and straw, and nitrogenous (green) materials like grass clippings, vegetable scraps, and manure. Diversity of ingredients is beneficial.
Instead of a strict 30:1 carbon-to-nitrogen ratio, simply cover nitrogen-rich materials with enough brown materials to block the smell and sight. Adjust as needed based on moisture.
Start the active composting process when the pile is 3-4 feet tall. Composting can be done year-round, but starting in summer/fall allows for maturation over winter.
Turn the pile when it exceeds 131°F (55°C) to mix ingredients, add air, break up anaerobic pockets, and check moisture. The pile should be moist like a wrung-out sponge.
Cover the pile with a semi-breathable tarp to manage moisture. Monitor temperature; if too hot (above 165°F), flatten the pile; if not heating, add nitrogen and moisture.
Soaking fresh grass clippings overnight in non-chlorinated water and adding a bit of compost can kickstart a pile's heating. Pack this mixture into the center.
Wait a few months for the compost to mature; it should smell rich and earthy. Once it reaches ambient temperature, it's mostly safe to use, though larger wood chips may remain.
For less labor-intensive options, consider static aerated piles, Johnson-Su bioreactors, worm bins, bokashi, or a combination. These can reduce physical effort and handle food scraps.
Composting is a simple, adaptable process that anyone can master with basic principles and a bit of patience. By focusing on the essentials—location, materials, moisture, and turning—you can create rich compost to enhance your garden's health.
What is the basic goal of compost?
To add nutrients, beneficial microbes, and lively organic matter to a garden.
01:44
What are the essential tools for composting?
A shovel and a pitchfork; a tarp, water source, and thermometer are also useful.
03:04
Why should a compost pile be located in a well-draining area?
To avoid waterlogging, which can incubate disease-causing organisms at the bottom of the pile.
04:12
What are carbonaceous (brown) materials?
Materials mostly containing carbon, such as wood chips, leaves, and straw.
06:15
What are nitrogenous (green) materials?
Nitrogen-rich materials like fresh grass clippings, rotting vegetables, manure, and fish scraps.
07:10
What is the simplified method for achieving the correct carbon-to-nitrogen ratio?
Cover nitrogen-rich materials with enough brown materials to block the smell and sight.
09:05
What is the ideal height for a compost pile to start the active process?
3-4 feet (90-122 cm) tall.
10:36
At what temperature should you turn the compost pile?
Above 131°F (55°C).
11:58
What does the 'wrung-out sponge' test indicate?
The pile has the correct moisture level—moist but not dripping.
12:54
What should you do if the pile is not heating up?
Add nitrogen and check moisture; you can also pack soaked grass clippings into the center.
14:08
What is the NOP temperature requirement for certified organic compost?
Maintain between 131°F and 170°F (55-77°C) for 15 days, turning five times.
15:18
How long should you wait before using compost?
A few months, until it reaches ambient temperature and smells earthy.
16:14
What is a static aerated pile?
A composting method that requires no turning but uses an aeration system.
17:27
What is bokashi?
An anaerobic composting method that uses lactic acid bacteria to decompose food waste.
18:24
Core Purpose of Compost
Establishes the fundamental goal, guiding all subsequent advice.
01:44Simplified Ratio Approach
Demystifies the intimidating 30:1 ratio, making composting accessible to beginners.
08:40Moisture Test
Provides a simple, tactile method to assess moisture, a critical factor for successful composting.
12:54NOP Regulations
Highlights the specific requirements for certified organic compost, adding credibility.
15:18Alternative Methods
Offers solutions for those with physical limitations, ensuring inclusivity.
17:14[00:01] foreign [Music]
[00:17] hey you all farmer Jesse here today we are going to talk about the basics of composting I know that when I started researching compost for the first time I jargon and all the different styles so this video will attempt to be the
[00:33] opposite of that something simple that basically anyone can do the approach I'll demonstrate in fact for you today will be applicable regardless of your scale or goals because composting largely follows the same rules whether
[00:48] it's turned with a giant tractor or by hand or by shovel because I don't know who would just turn a compost pile with their hands seems like it would be a hot job so I'll go through the different things to think about some different
[01:01] styles some different types of compost making the Bare Essentials and more dad jokes so let's do it [Music]
[01:14] hit the Subscribe button and if you are subscribed you're awesome if you always support our work by picking up a copy of the living soil handbook or a hat or other merch at no-till growers.com or become a patron at
[01:30] patreon.com no-till Growers hit the super thanks button if the video is helpful YouTube videos are very rarely ever covering the cost of their production so we super duper appreciate it and I do not use the word duper
[01:44] lightly or ever in any other context not even sure it's a word all right so basic goal of any compost is to add nutrients beneficial microbes and some Lively organic matter to a garden and there are
[01:58] so many types of compost systems out there that you can explore and I'll talk about some of those at the end but for me in my opinion the ideal way to start your composting journey is with what I'm going to show you today I want to give
[02:12] you a tried and true entry level practically anyone can do it sort of method that has worked for us for many years and requires basically no materials and not a lot of experience now the method does require some
[02:25] physical labor so if you have mobility issues I offer some less intensive methods towards the end of this video though many of the same principles will still apply so kick back and hang out for a few minutes generally speaking the
[02:37] for a few minutes generally speaking the method all detail here is a great entry into compost making that will help you develop your nose your eyes your tongue don't look at me like that your senses for making good compost so that if you
[02:49] want to venture out and try some other more nuanced methods like Korean natural you'll kind of have a base understanding okay so let's start with tools uh tool wise you don't need much all you will really need is a shovel and maybe a
[03:04] pitchfork I kind of like having both because the shovel is not always easy to poke into a pile when it's first getting started because there's just like too much raw stuff blocking the shovel I find that a pitchfork is really good for
[03:17] turning it in the beginning and then a shovel for kind of the cleanup around the pile and then as the pile decomposes you may also want a tarp for covering or a covered area but you may still want a tarp as well even if you're doing it in
[03:31] a covered area and of course like a hose for watering a decent water source we'll thermometer is a nice addition but you can also use a small household thermometer and just dig a hole deep enough into the pile to get the probe in
[03:45] into roughly the center and that's basically it on the tool side there's not a lot needed like I said we're keeping this thing super simple next we'll need to just do some basic trigonometry kidding fun fact about
[03:57] being a dad actually is that when you have your firstborn you actually get with like a bunch of really bad bad jokes and a dad bod and a U2 album they're all strangely hard to delete now before we talk materials we should talk
[04:12] about location like as in where you're going to put your compost pile compost piles need to be in a location that drains what I mean is that you don't really want to build a compost pile in an area where water is going to just sit
[04:24] underneath it making the sort of bottom of the pile on the sides of the pile incubating some disease-causing organisms if you don't have a choice but to locate the pile in a wet area build up a thick layer of wood chips on the
[04:39] bottom and just try to avoid that layer when you're shoveling the compost out later you can also build like drain tiles or something too but let's just keep it simple for now also if you do have a covered area
[04:52] um like a unused shed or something that's nice for keeping excessive heat like sunshine and also excessive rain off of the pile you want to be able to control the moisture especially in other words which I will discuss presently it
[05:05] may likewise also be a nice neighborly gesture to locate your pile somewhere where a little smell won't bother anyone because although yes a good compost pile should not smell when you turn your pile for the first time or probably the first
[05:18] three times it will likely smell like something more on smell mitigation more name more on smell mitigation in a minute I also like to have enough space minute I also like to have enough space where I can pile my materials on one
[05:33] side and move them either back and forth as I turn the pile or move that whole as I turn the pile or move that whole pile in a sort of square fashion having space to actually turn the whole pile over is ideal like you want to be able
[05:46] to turn that whole pile from the middle out all of it all the way over so you need the space to do that also try to avoid weedy areas for your composting pile or at least put down some like landscape fabric or something to block
[05:58] the weeds from contaminating that is to say seeding your lovely compost pile now let's talk inputs or ingredients or feedstocks or materials whatever you want to call them so you will need some carbonaceous meaning ingredients that
[06:15] are mostly just like carbon which I'll explain presently and you need some nitrogenous or just nitrogen containing materials to make a good compost but don't get too hung up on that jargon like don't let that cloud what I'm
[06:30] when I'm referring to carbonaceous materials even though yes technically every living thing contains carbon these are your brown materials like wood chips
[06:42] leaves plus things like straw preferably a little of each of these A diversity of ingredients will generally make a better compost but anyway the Browner stuff you can use hay too but it can be a little bit more complicated because of the weed
[06:57] seeds so I'm not going to recommend starting with those others but that is all brown carbonaceous material that's what we're generally referring to when we say your carbon or your brown stock now for nitrogen or the nitrogenous
[07:10] materials this is what is sometimes called the green part of the compost as opposed to the Brown These nitrogen-rich materials are generally somewhat fresh wet uh sometimes dark in color sometimes colorful so fresh cut grass is a good
[07:28] one rotting vegetables is it often one that we use basically anything from an vegetarian friends will forgive me here but that would be things like manure viscera feathers feather meal fish scraps Etc a little animal fat is okay
[07:44] though a lot can take a while to decompose so I just maybe just balance that a little bit just remember that anything that is high protein is also high in nitrogen you do not need animal products though to make a good compost
[07:56] indeed for us I would say most of the compost I make do not use a lot of animal products at all relying instead on things like green waste from garden and kitchen and scrap of course sometimes we will mix in a little bit of
[08:11] fish hydrolyzate as well which is just a fermented fish liquid that is a super unappetizing phrase to add a little bit of nitrogen uh if need be but honestly it's not that uncommon for us to have zero animal products at all in our
[08:24] composts uh again I like a diversity of materials for the best compost possible but sometimes we just use what we have just like in cooking good technique will ingredients ratios can be a little complicated but let's try to make that
[08:40] part easy usually people will tell you something like a ratio of 30 parts carbon materials to one part nitrogen materials is ideal and it is but that does not mean 30 buckets full of your brown sores for every one bucket of your
[08:53] nitrogen Source because again all organic matter contains some amount of carbon so the simpler approach here is to not overthink it instead of thinking
[09:05] about 30 to 1 think more or in terms of just covering your material covering the rotting nitrogen materials up with brown dry materials so in your composting area you start by staging what we call staging your materials in layers like
[09:21] for every five gallon bucket of kitchen scraps or whatever add one or two or enough to cover it depending on what you're using and you will know it's adequately covered when you can't smell it if it's straw you're using which can
[09:34] be a little bit harder just add about two or three inches or enough to cover the material fully and again block the smell and that should be enough a little bit of so for every bucket or so of nitrogen you put down just cover it
[09:46] or can't see it one clarifying note here if it's a wet you'll need more carbonaceous material than if it's a drier one like grass
[09:58] clippings or material from the garden which is not as wet and won't need as much carbonaceous cover that's as easy of an indication as any is not being able to smell or see it uh does that mean you're going to get a
[10:10] perfect ratio every time no maybe not but it should be pretty close and you can always just adjust as you go um if it starts to smell for instance add a bit more carbon and when you get into the heating and turning process you
[10:23] can always add a little more nitrogen if the pile is not heating up for instance think of it like a soup and you're just adding a little bit of this and a little adding a little bit of this and a little dash of that balancing it as you go with
[10:36] appetizing analogy once you've got a pile that is three to four feet tall or 90 to 122 centimeters that's when you can start the active process of
[10:49] composting it can be taller than that it could be a little bit smaller it can be long but the bigger you make it the more labor it's going to take so depending on who's turning it and how they're turning it those are things to keep just keep in
[11:03] don't build a giant pile and then have to hand turn that multiple times and the pile can be shorter but much shorter than say like three or even three and a half feet can be hard to maintain the temperatures depending on how warm or
[11:17] cold it is outside and just one quick note about that about time of year I compost all year long here in Kentucky Zone 6B famous for the world's largest bus stop is that true but it can be a slower process in the winter and it can
[11:29] also be hard to get a pile going that is heated up so ideally I like to start my piles in the summer and fall and then let them mature over the winter for the spring usage but that you know sometimes you just got to make compost when you
[11:44] have the materials but compost microbes are incredibly resilient so you can technically make compost pretty much wherever and whenever with some limitations all right back to the pile itself if your pile gets hot just as is
[11:58] like after you've staged it um that's that is to say like above 131 degrees Fahrenheit or 55 degrees Celsius you can go ahead and give it a turn now I'm not going to go into the organic regulations around composting in this
[12:11] regulations around composting in this video because I did that here so if you are certified you do have to take good notes and follow NOP guidelines if you are not certified the regulations will not help you make a better compost they
[12:24] regulations they are not about microbes or soil health or anything unfortunately but the reason we turn compost piles is to mix the ingredients to add air which AIDS in the decomposition process we do it to break up any anaerobic Pockets to
[12:41] it to break up any anaerobic Pockets to ensure even decomposition we also turn to evaluate moisture and as a bonus in general you kind of just get to observe the progress of the pile through physically turning it over so I like to
[12:54] turn the pile once check to make sure there is enough moisture to squeeze a drop of liquid out of it and add water if necessary moisture is microbial processes but especially compost too much like if it's mushy in
[13:11] your hands or too little like it feels dry and crumbly um and you won't get the desired progress or desired organisms and you may even struggle to get the pile to actually heat up and if you're adding
[13:24] water try to avoid unfiltered City water for the chlorine and chloramine which are antimicrobial and well not great for composting microbes after I turn the pile fully all the way through the middle I cover it with a semi-breathable
[13:39] tarp like not just straight sheets of plastic you can use just about anything for this that won't blow away or add weed seeds it just needs to allow the pile to breathe a little bit while also managing some of the moisture because
[13:53] the moisture will try its darndest to escape in the heat from the heat from start watching the temperature really close I have this long thermometer but you really just need to take a few readings in the middle of the pile to
[14:08] make sure the pile is getting above that 131 degrees or 55 degrees Celsius Mark if it is not heating up you will want to add some nitrogen and just check to make moisture now if it's getting too hot like above 165 or so you will want to
[14:23] flatten the pile just a bit you may be also could consider a little bit of moisture to cool it down some piles you make will never need any real attention Beyond turning them a few times others you will have to Baby along it's just
[14:37] the way it works now if the pile is warm but not hot then you may want to pile it I could use a better verb there you may want to pile it a little bit taller as opposed to flattening it out and add a little more nitrogen of some form
[14:50] something that often works well to Kickstart a pile is to soak fresh grass clippings overnight in non-chlorinated water rain water being ideal and then maybe even a little sprinkle some compost in there and then pack that into
[15:04] the center of the pile and give it a day or two any wet green vegetation packed that's ever mowed a lawn and taken fresh grass clippings out of their bag has felt how hot they can get really quickly that can be a great way to just get a
[15:18] pile going now again because I'm certified I have certain regulations on my piles I have to turn my piles five times in the first 15 days while maintaining a temperature between 131 and 170 degrees Fahrenheit or between 55
[15:33] and 77 Celsius to ensure it meets NOP regulations but generally speaking with compost the idea with the temperatures is to kill weed seeds and diseases but is to kill weed seeds and diseases but if you are not certified and your farm
[15:47] does not fall under fisma food safety modernization act regulations just turn the pile a couple times or a few times over the course of the next week it will see the temperatures stay pretty high for a while and then they will call calm
[16:02] down it will likely still run hotter the pile than ambient temperature for a while um and that's good that's fine that's the maturation process and will often build up a nice beneficial fungal
[16:14] build up a nice beneficial fungal populations during that time now how soon can you use it ideally you wait a few months to let it mature but once it reaches ambient temperatures after hot stages it should be mostly fine to use
[16:29] it should smell rich and nice and not raw like manure or anything like that and yes you will absolutely be able to tell the difference you can sift it if you want like you can build like a hardware cloth screen if you want but
[16:43] generally if you allow enough time for the compost to mature the larger wood chips and such will decompose adequately enough that you don't have to now clearly this type of compost pile is very labor intensive so ask someone for
[16:57] help if need be and please don't hurt yourself to do composting like this uh front end loader follow this same process but with long windrows instead of piles you can always scale up to a compost Turner if you're a bigger Farm
[17:14] um if it's beyond your capabilities don't worry there are other composting sort of options for you to explore so let's just cover those briefly one technique that is allowed in Organic certification is static aerated piles
[17:27] which do not require turning but require an aeration system I did a whole video on this on ours last year that you can watch here basically it's a set it and
[17:40] forget it type of system which is nice though I suspect the compost is not always as good I usually use the static aerated compost as our mulching compost handbook there are also things like the Johnson
[17:55] suit bioreactor which I don't personally have experience with but there is plenty of info out there on that on a small scale a worm bin can be beneficial but you do have to regulate what you add and the amount of moisture and they honestly
[18:10] are not going to be able to handle all of your food scraps most of the time depending on how much food scrap you produce I prefer personally using the worm bins to enhance finished compost you could supplement worms which I love
[18:24] dearly to be clear I love my worms with something like maybe the bokashi system which is uses an anaerobic approach to decompose food waste with like lactic acid bacteria it's like food scrap pickles another appetizing image there
[18:38] I'm sure someone will ask me about that electronic table top thing that's overnight I have no idea about that device I've never tried it it's kind of a cool idea because managing composts in a house is a really obnoxious process
[18:53] makes actually like a really high quality compost I imagine that it just it down a little bit which is fine I suppose but some combo of bokashi and worm bins and maybe a static aerated system could greatly reduce the physical
[19:09] labor involved in compost making for you and also provide you with some good mentioned in a recent video that I will use chickens to help scratch a pile down or add their manure so you can check that out here
[19:24] anyway let me know your thoughts and questions let me know how you make your own compost otherwise like this video If you like this video subscribe to the channel if you've not already join us at patreon.com no-till Growers and become a
[19:37] handbook where I dedicate a whole chapter to using compost in the four things you can always super thanks the fire out of this video that helps too watching bye [Music]
[19:53] foreign yeah I do better like making compost make that a thing [Music]
⚡ Saved you 0h 20m reading this? Transcribe any YouTube video for free — no signup needed.