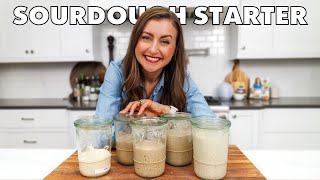

Sourdough Starter: Easier Than You Think!
45sOpens with a confident claim that sourdough starter is easy, hooking beginners who are intimidated.
▶ Play Clip"The title accurately reflects the content: the tutorial exclusively uses flour and water, and is beginner-friendly."
This tutorial demystifies sourdough starter creation, showing it requires only flour and water. The presenter, Natasha from Natasha's Kitchen, provides a step-by-step, day-by-day guide in her laboratory setting, emphasizing patience and consistency.
Sourdough starter requires just flour and water. A digital kitchen scale is recommended for accuracy and ease, particularly with a 'wet jar' pre-weighed to simplify calculations.
Start by zeroing the jar, adding 100 grams of whole wheat or rye flour (whole grain provides more food for starter growth), then 100 grams of filtered room temperature water. Use a fork to mix the thick paste.
Place a rubber band around the jar at the starter level to track rise. Cover with a loose-fitting lid to allow air escape. Label the jar with the start date.
After 24 hours, nothing happens; the mixture looks the same. Let it rest another 24 hours. Do not place in a warm place, as it may exhaust the yeast.
Bubbles appear. Discard half the starter (retain ~100 grams). Feed with 100 grams all-purpose flour and 100 grams room temperature water. Mix well, scrape sides, adjust rubber band, and let rest 24 hours. Maintain consistent feeding schedule.
Day 4: noticeable rise and bubbling. Keep 100g, discard rest, feed as before. Mixture loosens over time. Day 5: continued growth; a potential pause is normal. Keep feeding.
Significant growth, lots of bubbles. Keep 100g, discard rest, feed as before. Discard (not yet used for baking) is fine to discard while starter matures.
Starter more than doubles in volume within 4-6 hours after feeding. It is super airy, bubbly, and has a pleasant sour smell. The float test confirms readiness: a dollop of starter floats in water.
Making a sourdough starter is simple with patience and consistency. Once active, it can be stored in the fridge for weekly baking and easily revived.
What are the only two ingredients needed for a sourdough starter?
Flour and water.
00:15
What type of flour is recommended for the initial starter feeding and why?
Whole wheat or rye flour; it provides more food for starter growth.
00:46
Why should you avoid using warm water or a warm place when making a starter?
It will cause the starter to rise too quickly, exhausting the yeast and potentially slowing down results.
02:00
What is the purpose of placing a rubber band around the jar?
To track the starter's rise.
01:28
At what temperature should the water be when feeding the starter?
Room temperature, or lukewarm but no warmer than 85°F.
00:59
What does it indicate when a dollop of starter floats in water?
The starter has enough rising power and is ready to use in recipes.
06:08
How much starter should you retain at each feeding?
100 grams.
02:16
What should you do if the growth seems to slow down around day 4 or 5?
Continue feeding as usual; a pause is normal.
03:49
Only Two Ingredients
Simplifies a perceived complex process, making sourdough accessible.
00:15Digital Scale Investment
Practical tip that saves time and ensures accuracy.
00:29Avoiding Warmth Trap
Counterintuitive advice that prevents yeast exhaustion.
02:00The Float Test
Definitive, simple test for starter readiness.
04:57[00:00] Welcome to my laboratory. I've been so excited to share this tutorial with you. We are making a sourdough starter. I think this is the thing that intimidates people and keeps them from making amazing sourdough, and I'm going to show you exactly how to make it.
[00:15] It is so easy, literally two ingredients, flour and water, and you're going to be a pro at making sourdough starter in no time. All right, let's do this. One of the best investments you can make in your sourdough
[00:29] journey is a digital kitchen scale. This will save you tons of time and dishes, and it'll be way more accurate. You can use a regular mason jar, but I love using my wet jar because it weighs exactly 400 grams, so it's really easy to calculate measurements. Start by zeroing out the jar, then
[00:46] add 100 grams of flour. You can either use whole wheat flour or rye flour. Using a whole grain flour to start the soft will give your starter a lot more food to grow. Next, add 100 grams of filtered
[00:59] room temperature water. If you have spring water, that's even better. If you keep your house cooler, you can use lukewarm water, but no warmer than 85 degrees Fahrenheit. Also, avoid adding cold water, which will really slow down the growth. Initially, the mixture will be super thick, which is why I like
[01:14] to mix it together with a fork. This is especially true if you're using rye flour, but this is totally normal. Mix it together, scrape down the sides. You see how thick that is. Then put a rubber band around
[01:28] your jar to the level of the starter. This will help you keep track of the starter as it rises. Cover that with the lid, and I love how the wet jar comes with a loose fitting lid. If you're using a standard mason jar, just set the lid over the top and do not tighten it. You definitely want air
[01:43] to escape from the jar. To keep track of your starter, slap a label on there with the start date. 24 hours later, we see nothing is happening. It actually looks exactly the same. Continue to let it rest for another 24 hours. Then, on day 3, you'll see some bubbling. Also, make sure to let this
[02:00] rise at room temperature and don't be tempted to put it in a warm place. Otherwise, it'll rise too quickly and exhaust the yeast. Since we're seeing bubbling action in the jar, we're going to do our first feeding. Discard half of the starter and you should have about 100 grams left. You can see what
[02:16] I mean about easy math using a wet jar. The jar weighs 400 grams. We have about 100 grams of starter in there. Now, we're going to feed it with 100 grams of all-purpose flour and 100 grams of room
[02:28] temperature water. Thoroughly stir that together. You want to make sure there aren't any bits of dry flour left in there. It should be really well combined. Once you've got it all mixed together, scrape down the walls of the jar to keep it clean. Also, adjust your rubber band to the level of your
[02:44] starter, this way you can keep an eye on growth. Cover that with your lid and let it rest for another 24 hours. For best results, try to stay on a consistent schedule and feed the starter at the same time each day. We are now on day 4 and we're definitely seeing some growth. We see a lot of rise above
[03:00] that rubber band line and plenty of bubbling inside. You want to keep 100 grams of starter in the jar, go ahead and discard the rest. Again, a kitchen scale will help you track exactly how much starter you need left in your jar. Now feed it the same way. You'll need 100 grams of all-purpose flour and 100 grams
[03:18] of room temperature water. Thoroughly stir that together until it's really well combined. You'll also notice as time goes on that the mixture will loosen up quite a bit and be a lot easier to stir together. Once it's well combined, scrape down the sides of your jar and I also like to
[03:33] clean the rim if it gets messy. This will ensure that the lid doesn't get glued onto the jar. Your starter needs to be able to breathe. We are now on day 5 and we're seeing more growth. If you get to day 5 and the growth seems to have slowed down, don't worry, just continue to feed it.
[03:49] In all of my testing, I've had several starters take a little pause around day 4 or 5 and it's totally normal. Just keep going. Keep 100 grams of the starter in the jar and discard the rest. Then
[04:01] feed it again the same way. 100 grams of all-purpose flour and 100 grams of room temperature water. Thoroughly stir that together until all of the flour is incorporated. Then clean the lid again if needed.
[04:13] Cover with a loose-fitting lid and let that rest for another 24 hours. By day 6 we're seeing quite a bit of growth, lots of bubbling on top and throughout the mixture. Keep 100 grams of your starter in
[04:25] the jar and get rid of the rest. Once you have a mature starter, you can definitely use that discard for so many great, delicious projects but while you're growing your starter, you just want to get rid of it. Feed your starter exactly the same way 100 grams of flour and 100 grams of room temperature water.
[04:42] Thoroughly stir that together, then scrape down the sides of your jar, wipe off the rim, cover with the lid and let it rest. When it's ready to use, your starter should reach its peak bubbleiness between four to six hours after you feed it. You'll see it's more than doubled in volume
[04:57] and it's super airy and bubbly. Okay, it is day 7. This is exactly what the starter should look like. Sometimes it'll start doing this by day 6 and I've even had one do this by day 5 where it more than
[05:10] doubles in volume. Boom, you want to use it when it's more than double in volume like this before it starts to go back down. This is like peak performance. This is ready to make the best sourdough bread. Let me show you this texture. Take a look at that bubbleage. It really doesn't get any
[05:27] better than that. This is amazing. I feel like I'm going to ruin it. That's okay, I have to show you and it smells good. So that's one way to know that the sourdough starter is done is do the sniff test
[05:40] and it smells so good. It's like sour and just it makes you want sourdough bread. I'm telling you just say here and smell it and then it is so bubbly. Look at this. The texture here. Look at these
[05:55] bubbles go. I mean, wowie, wowie. The way that you know that it has enough rising power and that it's ready to use in recipes is if you take a dollop of it and you just
[06:08] plunk it into some water. It's a big dollop. It doesn't want to let go. It'll float. Look, it's floating like a little turd. We've got a floater. Okay, and there you have it. How to make
[06:22] homemade sourdough starter with just two ingredients. Easy peasy. It just takes some patience and make sure to follow all of our tips for how to make sourdough starter. Remember to use room temperature water. Don't be tempted to use too warm of water because you don't want to speed through this process.
[06:38] You want to give the yeast and bacteria time to grow and develop at room temperature. If you speed through it, you can slow down your results. I've had that happen. So follow the process. Trust in
[06:50] the process and before long you guys are going to be making the best sourdough bread and sourdough recipes. I cannot wait to share more with you. We definitely have a great sourdough recipe coming your way. I've made hundreds of loaves and I have perfected it. I cannot wait to share it.
[07:06] Let me know where you spotted Sharky in the video. Also, if you have any recipe requests, maybe sourdough recipe requests. I would love to hear from you. Once you've got your sourdough all active and bubbly, you can also store it in the fridge, which is what I do. Then I just take
[07:21] it out of the fridge and bring it to room temperature overnight. It's ready to feed and use the next day. It's so convenient because I cook sourdough bread once a week. I make a couple loaves. It lasts us all week and I love it. Also, if you're going on vacation, put it in the fridge. It's a really
[07:36] so easy to maintain. You don't have to do it every day once your sourdough starter is made. So that's the good news. I will share all of my tips and tricks also in the blog post on Natasha's kitchen.com. And let's see what else. The cookbook. Every time if you haven't already, our cookbook is
[07:53] available for sale. I will link to this in the notes. I don't know what happened there. Bye!
⚡ Saved you 0h 08m reading this? Transcribe any YouTube video for free — no signup needed.