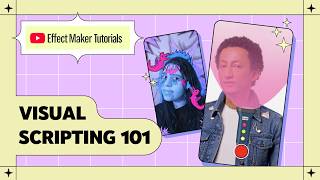

What Is Visual Scripting in Effect Maker?
40sA perfect beginner explainer that demystifies coding with a no-code hook, making it highly shareable for creators intimidated by programming.
▶ Play Clip"A straightforward, beginner-friendly tutorial that delivers every promised concept — no exaggerated claims, just solid Visual Scripting fundamentals."
This tutorial introduces Visual Scripting inside Effect Maker, a node-based way to create interactive AR effects without writing code. It walks through building a working flashlight effect with tap-to-toggle controls and color-changing buttons, plus tips for testing and submitting effects.
Visual Scripting connects code-bearing nodes rather than using text-based programming, making it easy to add interactivity and functionality.
Use Visual Scripting for interactive and responsive effects, fun animations, and even mini-game effects. Combined with creativity, possibilities are endless.
Click the hand-shaped Visual Script icon on the left side to open the node panel with categories.
Green triangle ports control execution flow/order; gray circle ports transmit data like numbers, text, and objects.
Right-click in the Visual Scripting panel, then add an Object Tap node from the Triggers category to respond to taps.
An If node with a Get Property condition allows the flashlight to switch on and off based on the current visible property.
Use Ctrl+D to duplicate nodes, then connect the If node's false output to a second Set Visible node set to true.
Combine Object Tap nodes with Set Color Tint nodes to give users multiple color options, including a default white button.
Use 'Preview on Device' to generate a QR code; scan it with your phone camera to open the effect in the YouTube camera for real testing.
Add an icon, name, description, and user instructions before submitting the effect for review.
By connecting a few core nodes — Object Tap, Set/Get Property, and If — you can build interactive effects in Effect Maker without writing code. The key is to start small, test often on your device, and keep iterating.
What is Visual Scripting?
A type of programming that uses connected nodes or blocks containing code, instead of text-based programming.
00:02
What do green triangle ports control?
Execution flow — they manage the order in which nodes execute.
02:04
What do gray circle ports transfer?
Data such as numbers, text, and objects between nodes.
02:18
When do port connections fail?
If the port types or data types don't match, e.g., connecting a control flow port to a data port, or a number output to an object input.
02:59
What does the Object Tap node do?
It executes code whenever an object assigned to it, such as an image, is tapped.
04:22
How do you make the flashlight toggle on and off?
Use an If node whose condition reads the current visible property via a Get Property node; the true output sets visible to false and the false output sets visible to true.
07:53
What keyboard shortcut duplicates a node in Effect Maker?
Ctrl+D.
09:50
What is the recommended approach for building complex effects?
Break the idea down into small, simple pieces (pseudo code) and combine them step by step.
14:10
Interactivity without code
Shows that node-based scripting unlocks responsive effects for non-programmers.
00:26Port types explained
Clear distinction between control flow and data flow is the core mental model for visual scripting.
02:04Boolean toggle with If node
Demonstrates conditional branching in a practical, beginner-friendly way.
07:53Pseudo-code mindset
Encourages incremental building, a transferable skill for any creative coding.
14:10[00:02] to learn how to create interactive effects in YouTube's Effect Maker with Visual Script. So, you may be wondering, what is Visual Script? Well, Visual Scripting is a type of programming that doesn't require
[00:14] traditional text-based programming. In Visual Scripting, we connect blocks that contain bits of code and are called nodes together in order to add functionality and interactivity to our effects.
[00:26] opportunities to create more kinds of effects. We can use it to make our effects interactive and responsive. For example, in this tutorial, I'll show you something happen based on various interactions such as tapping on the
[00:41] You can also use it to add fun animations for improved visual effects in your effects. And if you want to go more advanced, you can even use Visual Scripting to create mini game effects. One of my favorite things to say is that
[00:54] if you combine Visual Scripting with creativity, then the possibilities are absolutely endless. To start creating a Visual Script, you can click on the Visual Script icon that looks like a hand on the left side of
[01:08] When clicked on, it opens a panel with node categories. Each node in the categories contains a specific functionality and can be used to change the behavior. I'm going to select the objects and properties
[01:21] category. Select a node that's called set property and click add node. If you take a look at the node that has just appeared, you can see small circle and triangle ports.
[01:36] These ports are what we use to control our execution flow and transfer data between nodes. Ports that are located on the left side of the node receive input from other nodes. And ports located on
[01:49] the right side of the node can be used to send output to other nodes. In the case of the set property node, on the input side, which is the left side, there are two ports. One is a green port that is a triangle shape, and the other
[02:04] is a gray port that is a circle shape. The green triangle ports and their corresponding green lines are what we use to manage the order in which nodes will execute. They control when to run a node. The gray circle ports and their
[02:18] corresponding gray lines are what we use to transmit information, like numbers, text, and objects between nodes. They receive and transfer the what that a node uses and produces. We can click and drag on ports to pull
[02:32] out a connection line, and then drop that connection line into other nodes' ports. This is how we can connect multiple nodes together to trigger other nodes and to transfer data. If you're ever unsure about how specific node
[02:45] works, you can click on a little circle with an eye symbol located at the top right of the node to see further info about what the node does and what types of data it can take. Remember that the port types and data types that you're
[02:59] trying to connect together must match. For example, if we try to connect a control flow to one of the data ports, it will not connect. In addition, when connecting two data ports, the type of data that they carry
[03:13] must match. For example, if we try to connect an output data port that has a type of number to your input data port that has a type of object, we will get an error because the information types are incompatible. It's trying to connect
[03:26] the wrong end of a power cord to your laptop. To move around your visual scripting panel, you can click and hold on your mouse around. If you want to zoom in, you can use the
[03:39] scroll on your mouse to zoom in and out. If you don't have a mouse, you can also hold space while pressing and dragging on the touchpad to move around. For zooming in and out, you use two fingers on your touch pad
[03:55] or adjust it using the zoom controls located here on your visual scripting graphs top bar. Currently, we have a set property node, other nodes, it won't do anything.
[04:09] Let's change this and add functionality so that when we tap on the screen, a flashlight will turn on and off. A quick tip is that you can also add nodes by right-clicking anywhere in your visual scripting panel to open the list of node
[04:22] categories. Let's select the triggers category and add an object tap node. An object tap node can be used to execute code whenever an object that is assigned to it, such as an image, is tapped. Now we have both an object tap
[04:38] graph. As you can see, the object tap node has one output port that is a green control flow port, and it fires whenever a tap on a specific object is detected. I will pull out the connection line from the
[04:54] object tap node's control flow output port and connect it to our set property node's input port. Because they are both control flow ports, they connect. However, if I were to try and pull the connection line from the object tap
[05:07] node's execution output port and connect it to our set property node's objects input data port, they won't connect. This is because, as mentioned earlier, to connect ports, they must have the same type. Even
[05:21] though the object tap and set property nodes are connected, nothing is happening. This is because we haven't selected which objects and which properties of the object that we actually want to set.
[05:34] panel and right-click to add a few image I'm going to add an image for our flashlight's body, flashlight's body, an image for the flashlight's light ray,
[05:49] and an image for our flashlight's power button to turn it on and off. Make sure to name your objects accordingly. We can do this by right-clicking on each of our images in our objects panel and clicking rename. I'm going to rename the light
[06:03] image to flashlight ray. I'm also going to quickly adjust the positions and sizes of each of these newly added images. scripting graph. Click on the object drop-down on our
[06:19] object tap node and select the new image that we just added called power button, so we can detect if the user taps on our flashlight's power button. We also need to click on the select drop-down menu on the set property node.
[06:34] We can select the flashlight light ray that we just added to our scene as the object we want to set the property on. Next, we need to choose which property we want to set. We can click on the select property
[06:48] node. It will open a panel that lists several properties we can select, including position, size, color tint, and many position, size, color tint, and many more. Let's choose the visible property.
[07:01] Our set property node has now been transformed into a set visible node that we can use to turn the flashlight light's visibility on or off when the user taps on our power button image on the screen. In fact, it's already making
[07:15] our image visible, but we can't see it yet because the image was already visible before we added this code. Let's try changing the visible value inside try changing the visible value inside the set visible node to false.
[07:27] Now, if we go to our preview panel and tap on the power button image on the we can see that it successfully turns off the flashlight light ray image's visibility. Since we want the button to switch the flashlight's light on and
[07:41] off, rather than just off. We'll need to add logic to determine whether the light is currently visible. To do this, I'm going to go to the To do this, I'm going to go to the control flow category and add an if node
[07:53] to our graph. The if node has two execution outputs, true and false. We can use this node to determine whether a value we feed into it is true or false, and then execute a series of nodes accordingly based on the
[08:08] resulting value. To add the if node into our current logic, I'm going to disconnect the object tap node's execution output port from the set visible node, and instead connect it to the start
[08:23] execution input of the if node. We can then connect the if node's true execution output into the set visible node's start execution input. Now, when we tap on the screen, because
[08:39] our if node's condition input is currently set to true, which looks like a check mark in a box, the true execution output will trigger, turning off the visibility. However, because we're never modifying
[08:53] the if node's condition value, the light will never turn back on. To fix this, let's go to the objects and properties category property. Select the object that we want to use as
[09:07] the flashlight's light ray image. Next, click on the select property drop down that appears on the node and choose the visible property. The get property node now changes into a get visible node. We can use this node to retrieve the
[09:22] value of our light image's visible property, which indicates whether the image is visible. We also need to connect the get visible node's output data port into our if node's condition input data our
[09:36] Finally, we just need to add one more set visible node to turn our flashlight light visibility back on. Instead of having to re-add another almost identical set visible node, we can easily duplicate it by clicking on our
[09:50] current set visible node and pressing control plus D keys on the keyboard to duplicate the node. Now, set the duplicate visible property to true and connect our if node's false
[10:05] execution output into our duplicate set visible node's start execution input. When we tap the screen, our flashlight correctly switches. It turns on if it was off and off if it was on. Great work. For the last part of
[10:21] this tutorial, let's make our flashlight a bit more fun and give it some color. I'm going to walk you through how to add a few more buttons onto our flashlight that users can use to make the light in a bit change colors.
[10:34] First, let's add an image to use for one of our color buttons. To do this, I'm going to right click on our objects panel and add an image for a I will modify the button size and position to fit onto our flashlight.
[10:49] Now, let's go back to our visual script graph. We'll need to add an object tap node to our graph for detecting when our color button is tapped and add a set property node for setting and changing the color of our light.
[11:03] For the object tap node, we need to select the object that we want to set as the image that we just added. It is named pink button. For our set property node, we should select the flashlight's light right image as the object whose
[11:18] property we want to change. We should also select the property that we want to set as the color tint. Our set property node will now transform into a set color tint node that can be used to change the color tint of images.
[11:33] setting our images color tint property to from the default white, we can either click on the square block that appears on the color node and change the color using Effect Maker's built-in color picker, or we can just type in the color
[11:49] code that we want the light turn. I'm going to set the value to a hot pink color. Finally, we can connect the object tap node's execution output to the set property node's execution input.
[12:04] If you try tapping on the image in our preview panel, our flashlight will successfully change to a pink color. It would be great if our users had more than one color option to choose from, as it would allow our users to add more
[12:18] personalization to their videos using that effect. We can add more color buttons and options for our users by repeating the same process that we used when adding our first color button and its
[12:30] functionality. I'll start by adding two more images for I'll start by adding two more images for our new color buttons to the scene. position in the inspector to fit onto our flashlight.
[12:45] Once we're happy with our new button placements, we can now navigate back to our visual scripting panel. Let's select the object tap and set color tint nodes for our first color button, then duplicate them twice so we
[12:59] can provide the user with two more color options. we'll need to change the objects we're detecting taps on. Let's select and set the object value for one of the duplicated object tap
[13:12] nodes to the green button, and then set our third object tap node's object to be button. Last but not least, we need to change
[13:24] the colors of our duplicated set color tint nodes. I'm going to change our second set property nodes color value to a green color and the third one to the color value of our flashlights light ray
[13:38] images original color tint, which is white, so this button can act as the default color button. Finally, it's time to test our effect in the preview panel. When we tap on the color buttons on our flashlight,
[13:57] You've successfully learned how to create an interactive flashlight. One final tip for everyone to take throughout your effect journeys is to break down your idea into small steps. Programmers often call it pseudo code.
[14:10] Instead of focusing on a whole effect with tons of complicated interactivity, break your project down into simple and small pieces of functionality, such as a small animation or a button. Then build on that and put those small pieces
[14:24] together to make up the big pieces of your project. It can help a lot if you think of your effects as a house, where you first build the base before you can build the roof and polish the insides. Finally, before submitting, we should
[14:39] test our effect on our mobile device. To preview on our device, ensure that account on your phone as you're signed into with Effect Maker. Then, you can click the preview on device button that's located at the very
[14:53] top of the screen. It will open a pop-up that shows a QR code. Open your camera app on your mobile device and use it to scan this QR code. It should open the YouTube camera on your phone with your effect applied.
[15:07] This will allow you to test how your effect really looks and feels and helps expectations. Remember, it's always best to preview your effect multiple times while you're creating to ensure that there are no
[15:20] bugs and to make it as pretty and polished as possible. Once we're happy with our effect, we can click the submit button. A submission panel will appear where we can add an icon for our effect. When
[15:34] continue. We can name our effect and also add a description for it. If your effect has any functionality that allows users to interact with it, you'll be given the option to choose an
[15:49] instruction for it. Instructions will appear on the effect when users use it to provide them with guidance on what is needed. Best practice is to always add instructions so users can clearly
[16:03] understand how to use your effect. Finally, we can click submit to finalize and send our effect out for review. Always remember that the best way to learn and become master of visual scripting is to practice, keep trying,
[16:18] and don't give up. You can check out some of Effect House makers already made effect templates to learn and discover how you can extend and change them to create even more unique types of effects. For more info on how to use
[16:30] Effect House maker, check out the links in the description below. Thank you for watching, and don't forget to subscribe for even more news and updates.
⚡ Saved you 0h 16m reading this? Transcribe any YouTube video for free — no signup needed.