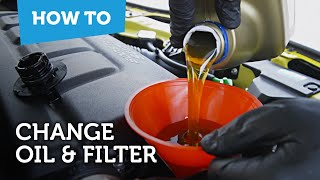

Oil Change Mistakes You're Making
45sStarts with critical pre-checks and avoids common oil change errors, appealing to DIYers seeking to avoid costly mistakes.
▶ Play Clip"The title is straightforward and the video delivers exactly what it promises—a basic, no-frills guide to changing oil and filter."
This video provides a straightforward, step-by-step guide to changing your car's oil and filter. The creator emphasizes preparation—checking manufacturer specs, locating components, and having the right tools—before walking through the process. Key tips include replacing the crush washer, avoiding over-tightening, and accounting for the empty oil filter when checking levels.
Check the manufacturer's recommended oil quantity and viscosity. If unsure, consult a reputable forum or the manufacturer.
Locate the dipstick, sump plug, and oil filter on your engine. Familiarize yourself with the layout before starting.
Remove the oil filler cap to prevent an airlock and allow oil to drain smoothly without mess.
When fitting the new oil filter, ensure it isn't squashed or crushed. Tighten by hand—no need to over-tighten.
Always replace the crush washer on the sump plug. Never reuse an old one, as it can leak.
Don't over-tighten the sump plug to avoid stripping threads. The recommended amount was 3.3 liters, but topped up to about 2.8–2.9 liters.
Check the dipstick; it should be between min and max. Remember the oil filter will be empty, so the engine needs enough oil to circulate.
Many modern vehicles won't start until oil pressure is recognized. On older models, turn the engine over to build pressure before starting.
Refit the under tray and re-check the oil level after running the engine.
What should you do first to determine the correct oil specification?
Check with the manufacturer or a reputable forum.
Why remove the oil filler cap before draining?
To prevent an airlock and allow smooth draining.
00:47
Why replace the crush washer on the sump plug?
To prevent leaks; never reuse an old one.
01:49
Why shouldn't you over-tighten the sump plug?
To avoid stripping the threads.
02:08
What was the recommended oil amount and how much was actually added?
3.3 liters (recommended), but topped up to about 2.8–2.9 liters initially.
02:08
Why should you consider that the oil filter is empty when checking the dipstick?
Because the new oil filter will be empty and needs oil to circulate.
02:22
Remove oil filler cap to prevent airlock
This small step prevents a common mess and ensures smooth draining.
00:47Always replace the crush washer
Reusing a crush washer is a frequent cause of leaks; this is a critical safety tip.
01:49Don't over-tighten the sump plug
Over-tightening can strip threads, leading to expensive repairs.
02:08Account for empty oil filter when checking level
Understanding that the filter will fill after startup prevents overfilling.
02:22[00:00] First, I would recommend making sure when checking the oil specification with the manufacturer. The manufacturer will offer two different quantities of oil,
[00:16] Second, the correct oil filter. and where everything is that you will need to interact with. On this engine I've also got a dipstick on this particular model,
[00:33] to familiarize myself with where the sump plug is and where the oil filter is. but if you're unsure, check a reputable forum or query it with the manufacturer
[00:47] I'm now coming back up to the top of the engine to remove the oil filler cap. not an airlock in the engine. rather than glugging out and potentially causing a mess all over your driveway.
[01:18] doesn't get squashed or crushed when fitting the new oil filter. to make sure that it goes on smoothly.
[01:30] There's no need to over tighten this.
[01:49] make sure you replace the crushed washer on the sump plug. flipping over the original crush washer and putting it back in place. This instance, though, we've got a new one, so we'll be using that
[02:08] It doesn't need to be overly tightened. So you don't want to be stripping the threads on the sump When I checked online, the recommended amount was 3.3 liters, I've topped it up to about 2.8/2.9 liters.
[02:22] I'm now checking the dipstick and it's in between the minimum and maximum mark, I am taking into consideration, though, that the oil filter will be empty, that when we turn the engine over, it's got plenty to go around the full system
[02:36] won't allow an engine to start until oil pressure is being recognized. If you're working on an older vehicle, it may be worth turning the vehicle over Until oil pressures build up within the oil system.
[02:52] Now we just need to refit the under tray, perhaps check the oil level again If you found this video useful, like the video, subscribe
[03:05] and check out more how to’s on the silverline channel.
⚡ Saved you 0h 03m reading this? Transcribe any YouTube video for free — no signup needed.