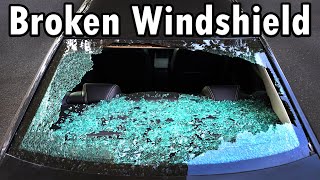

Rear windshield explodes for no reason!
45sThe unexpected explosion and dad's close call hook viewers immediately, sparking curiosity about why it happened.
▶ Play Clip"Delivers exactly what it promises: a detailed, no-special-tools DIY guide, though some parts are padded."
This video provides a comprehensive, step-by-step guide to replacing a broken rear windshield using common hand tools, emphasizing safety and proper technique. The host explains the causes of rear glass breakage, demonstrates how to source replacement glass, and walks through the entire process from removal to installation, including testing the defroster and ensuring a leak-proof seal.
The video will show how to safely replace a broken rear windshield, noting that the process is similar for most makes and models.
The rear windshield shattered when the door was closed, likely due to clogged vents or a rock impact. Tempered glass breaks into small cubes.
Laminated glass has a plastic layer and is used for windshields; tempered glass is used for rear and side windows and shatters into small pieces.
Clogged rear vents can cause pressure buildup when closing doors, leading to glass breakage. Vents are located behind side panels in the trunk.
Options include dealership (OEM), local glass installer, eBay, or junkyard. The host chose a junkyard piece for $75, which is guaranteed to work.
Use a multimeter to check continuity across the defroster grid. Also visually inspect for breaks; repair kits are available.
High-end urethane, primer (matching brand), suction cups, soapy water, safety glasses, scrapers, panel clip pliers, plastic chisels, and a caulking gun.
Use a shop vac to clean up broken glass, then tape over remaining glass to contain it. Use plastic chisels and a hammer to remove the old urethane.
Clean the pinch weld, shave down old urethane to 1-2mm thick, and apply primer to bare metal spots to prevent rust.
Remove old urethane from the glass, clean it, apply primer, and dry test fit. Install rubber molding if applicable.
Apply primer to bare metal spots on the pinch weld, avoiding the fresh cut urethane. Let dry for 10 minutes.
Cut the nozzle to a quarter-inch diameter and shape it into a triangle for a better bond.
Lay a continuous triangular bead of urethane around the pinch weld, pushing it into the weld. Practice first.
Lower the glass into place, check panel gaps, press down firmly, and tape the top to prevent sagging. Allow 24 hours to cure.
Remove tape, clean glass, connect defroster wires, and test the defroster and water seal.
Replacing a rear windshield is a manageable DIY task with the right tools and patience. The key is proper preparation, using quality materials, and allowing adequate curing time for a safe, leak-free result.
What are the two main reasons a rear windshield breaks?
Clogged vents causing pressure buildup, or impact from a sharp object like a rock.
00:38
What is the difference between laminated and tempered glass?
Laminated glass has a plastic layer and holds together on impact; tempered glass shatters into small cubes.
01:06
Where are the rear vents typically located?
Behind the side panels in the trunk.
02:04
What are four ways to source replacement glass?
Dealership (OEM), local glass installer, eBay, or junkyard.
03:40
How do you test the defroster grid with a multimeter?
Set multimeter to ohms, connect leads to the grid terminals, and check for continuity.
04:57
Why is it important to use a high-end urethane?
For safety (prevents glass flying out), to avoid wind noise and leaks.
06:19
What is the recommended thickness of the shaved-down urethane on the pinch weld?
1 to 2 millimeters thick.
12:08
Why should you avoid getting primer on the fresh cut urethane?
The fresh cut urethane is the best bonding surface for the new urethane; primer would contaminate it.
23:08
What shape should the urethane bead be and why?
Triangular, because when squished it creates a rectangular shape that contacts more surface area for a stronger bond.
24:39
How long does the urethane take to cure?
About 24 hours.
31:02
Glass types explained
Clear distinction between laminated and tempered glass, crucial for understanding breakage and replacement.
01:06Testing defroster grid
Practical method to verify a used glass's defroster works before installation.
04:31Shaving urethane to 1-2mm
Key prep step for a strong bond, showing attention to detail.
12:08Triangular bead for better bond
Explains why a triangular bead is superior to a round one for adhesion.
24:39Panel gap check
Emphasizes the importance of alignment before the urethane sets.
29:20[00:02] going to show you how to safely and properly replace a broken rear windshield and the best part is whether you're replacing the front windshield or the rear windshield the main steps to do it are very similar for most makes and
[00:14] models so i'm gonna break down those steps very clearly and easily in this video so after you're done watching the video you'll be able to tackle a job asking yourself how does something like this happen well let me show you my dad
[00:26] was just getting in the car like any normal person he's going to go use it so he gets in like this he goes to close the door like this and the rear windshield explodes it blows out and shatters all over the
[00:38] place very unexpectedly good thing nobody was back there now unlike the windshield the rear windshield is made of tempered glass so these only break for two reasons the first reason is the vents in the car are clogged so when you
[00:51] close the door it creates a lot of pressure and that pressure buildup how to check that real quick and the second reason is this car is parked in people drive by if a rock or something hard and sharp kicks up and lands on the
[01:06] glass if it's pointy it'll break the glass what real quick let me show you the difference between laminated glass and tempered glass so laminated glass is the glass is layered meaning there's a sheet of plastic in the middle
[01:19] that's how it's held together so you could really hit on this it could take together which is why they use it for the front windshield the other type of this is what our rear windshield as well as the side windows are made of so let
[01:34] as the side windows are made of so let me show you the difference glass multiple times it's very strong and could take multiple impacts but if we replace this hammer with something that has a fine point to it almost like
[01:50] if a rock kicked up and hit your glass watch this the glass breaks up into these very small cube pieces and that's what happened to our windshield now we want to make sure something like this doesn't happen again and while a rock
[02:04] kicking up is not in our control what is in our control is checking the rear vents to make sure they aren't clogged up so typically the vents are located on the sides of the trunk so behind that panel there and behind that panel there
[02:18] so to get to that what we need to do is remove this plastic piece right here so going to want to carefully remove this panel clip right here so pop that out just like that same thing on the other side just pop that right out
[02:33] beautiful next just pop the plastic trim out like that and then we can remove it from the trunk and with that plastic piece removed now we could go and peel back this side panel here and check to see if our vent is clogged up you can
[02:45] see the vent right there and if we take a quick look at these vents you can see open up no problem at all sometimes what happens is mice or squirrels or whatever prevents the vents from opening up so when you go to close your door the air
[03:00] has nowhere to go normally the air gets pushed right through this vent and it pressure will build up and you can blow out your rear glass but in this case we are good to go so our vent isn't clogged on that side if we come to this side
[03:13] don't think this will be clogged either but it's nice and easy to check that one is not clogged as well so we are good to go here unfortunately it wasn't something that we could actually fix it was just some bad luck a rock probably
[03:26] kicked up or something a stick fell whatever damaged the glass enough since pressure a little bit of vibration caused it to burst like that but that's the opportunity to show you guys how to replace your rear windshield using some
[03:40] common hand tools so let's get started with where you could actually buy some to source glass the first way is to call your local dealership and they sell brand new oem glass the second way is to call your local glass installer and see
[03:53] if they'll sell you just the glass the third way is to check on ebay ebay has a ton of used glass and the fourth way is to check your local junkyard because they have a lot of used glass as well and that's actually where this came from
[04:05] wanted a brand new oem piece of glass but they said it would take over two weeks to get and it would cost 500 and i didn't want to leave the car like that for two weeks because it does stay outside so i decided to go with the
[04:19] junkyard piece which is perfectly fine costs 75 dollars they guarantee it'll work and it's in great shape i just need to clean it up a little bit and remove some of this old adhesive now i real quickly want to show you guys if your
[04:31] this i want to show you how to test it so that you know it works before you element works in a rear windshield like this you can see all these lines in here those lines conduct electricity and they flow across so what happens is the
[04:45] electricity comes in right here and then it flows across these are high resistance lines so that electrical resistance creates heat and then it grounds out to the other side right here so all you need to do to check this is
[04:57] to grab a multimeter set it to ohms and then grab your two leads one lead we will connect right here on this piece like that and we're going to connect our glass this piece of metal right here and if this number changes that means
[05:11] there's electricity flowing through these lines so let's see and look at that we're good to go so we know these heater lines are working so know there's an electrical connection from there across the grid to there but
[05:24] it doesn't tell us if all these grid lines are working so what you're going going to go in i put some cardboard here so you can see it easier the electrical line connects right here you're going to go across and just watch make sure there
[05:37] are no breaks at all all the way across so as you work your continuous line just a visual inspection all the way to there so we are good to the lines if there are any breaks don't worry you could repair they sell repair
[05:51] kits it just paints right on but in this case this is perfectly fine it all works it all looks good we have no chips no scratches and our glass is perfect which is great for 75 you can't beat that so that's how you get your glass that's how
[06:03] tools and products you're gonna need to get this job done and as always i like find products that way you guys could do this job at home yourself no problem at all the most important thing in this entire job is using a high-end urethane
[06:19] this is the sealant this is the glue this is what sticks your window to your for safety reasons we don't want that flying out so it's also important to use a high end urethane so that you don't get wind noise and you don't get leaks
[06:32] so i'll be sure to include a link to all these tools and products in the using another good thing about this urethane is it's diy friendly it works with a regular caulking gun this is a 26 to one caulking gun so you don't need to
[06:45] have one of those professional expensive electric caulking guns with this urethane now with the urethane you also need primer and these are the same exact brands i don't care what brand you use but always match your primer and
[06:57] urethane brand wise so that they bond together properly and then the rest of that are cut resistant since we're working with glass i have a suction cup here that is an action camera suction cup so that we could carry the glass
[07:10] easier we have our soapy water we have our safety glasses very important since glass in our eye next we have some scrapers we have this specialized window it but it's inexpensive so i have it just in case helps you remove glass we
[07:25] have panel clip pliers to remove panels in the interior and then we have chisels here these are plastic chisels they work great i'll show you how those work and we could remove the old urethane and that's really all you're gonna need so
[07:38] let's go get started and the first thing we're gonna do is remove the old glass and the best way to do that is to use a shop vac which effortlessly sucks up the it by hand and i don't know about you guys but for some reason cleaning this
[07:52] guys but for some reason cleaning this glass up is super satisfying
[08:13] glass breaks it could travel 25 feet so make sure you check the front and rear glass everywhere we have glass on the armrest so let's vacuum that up then there's glass inside this armrest pocket get that out of there and even the
[08:27] much anywhere with a little pocket to hold the glass you'll find glass and going to vacuum the entire interior of the car you guys don't have to watch me do that you get the idea so with most of the glass cleaned up it's not perfect
[08:41] but it's pretty close now let's get the glass that is stuck to the pinch welds you can see we have a ton of glass right up here that if we touch this it's all really broken up but we need to get all this glass off so how do we prevent all
[08:54] this from falling back down well a simple trick is to use packing tape just lay down the tape over the broken glass and be sure to cover wait to show you how well this works to keep the glass contained so with that
[09:07] excess glass around the perimeter all taped up that's just a real quick tip going to make a huge mess when we go in here and we try to remove the glass that's bonded to that urethane now what we're going to do is pick a corner this
[09:20] missing piece so we could get under here grab your plastic scraper or a plastic chisel like this and we're going to chisel away at that urethane to remove along with the plastic chisel we are using a weighted plastic hammer so get
[09:36] the chisel under the glass and start hammering away the urethane and don't just get it so it peels up and away from the pinch weld and try not to scratch is working to contain the glass which would otherwise get everywhere now this
[09:51] we're going to use a professional tool like an electric reciprocating windshield removal tool but those are over 800 and for somebody doing this once or twice you can see this method works just fine these plastic chisels
[10:03] of them in a set and i'll be sure to link these in the description so you now right here is our window heater wire so let's disconnect the broken glass the new glass i'll show you how to reconnect it it's pretty simple
[10:17] like using these plastic chisels you just hammer away and it peels up all even thinner later but right now we just want to remove the glass and the plastic is way better than metal metal definitely works faster but the metal
[10:32] could scratch the paintwork and then if you get a scratch over here that'll rust now we could cover that scratch with primer but it's better if we avoid scratches in general which is why i like using a sharp plastic chisel like this
[10:47] urethane around the entire windshield to remove it from the top pinch weld remove it from the driver's side pinch weld and although this is sped up it's really as easy as it looks and remember on this side we also have that window heater
[11:00] wire that needs to be disconnected good and finally we need to pop the trunk and that gives us access to remove the glass from the bottom pinch weld and finally we're almost done just a couple more hits until it's removed
[11:12] good and with that we have removed the glass from the pinch weld all right and we just completed the most difficult part of this entire job and that is removing all of the old glass from our car i also ended up vacuuming
[11:26] flying off so all the old glass is removed and it is all in this box this is the proper way to get rid of old glass you put it in a box not a bag because it could cut through a bag and then seal up this box and this is how
[11:41] so no one gets cut so now there's only three main steps left the first step is to prepare the pinch weld on the car for the glass the second step is to prepare the glass for putting onto the car and the third step is to actually put the
[11:54] glass on the car and all these steps are really straightforward easy to do i'll exactly what you guys need to do so let's get started now what i mean by prepping the car surface is we need to get this surface ready for the brand new
[12:08] of urethane right on here but surprisingly we don't want to remove all of this old urethane we just want to shave it down so there's a fresh new layer that's like one to two millimeters thick max but before we do that we want
[12:22] to make sure that we clean out all of this old gunk in here because that fresh really good surface for the new urethane to bond to but not if there's all this junk here and it gets on that fresh urethane so the first thing we need to
[12:36] car and you don't need anything special lint-free towel just spray this down here and clean out that pinch weld removing all the dirt and debris that's collected
[12:48] and check this out all the dirt we removed this is what we don't want to contaminate our freshly cut urethane so it's a good thing we clean this off and are so clean them up with some soapy water and a lint-free towel just like
[13:03] that and work your way around the entire window frame spraying it down and wiping it with your towel like so all right and check out how clean this pinch weld is all the way around the entire car that looks awesome now before
[13:17] we go and shave down our urethane so it's one to two millimeters thick what i have to install these wires into our heated rear windshield but this plastic rather not put the glass on and then try to figure out how to get this out so
[13:31] let's remove the plastic trim now so we don't have to worry about this getting in our way and it's pretty simple to remove this first use a plastic trim plastic trim and pry this cap open and inside of here is an eight millimeter
[13:44] bolt we need to remove good and then we can just pop this panel out like so and carefully remove it same thing on the other side pop that cap open unscrew that bolt holding it in and pop that trim out and you can hear that glass in
[13:57] contain the glass so it doesn't get everywhere good so with both of the plastic trim pieces out of the way we have one last thing we need to do to is to shave down this thick piece of urethane bead that runs around our
[14:11] entire pinch weld and to do that we're using a brand new razor blade because we need this to be extra sharp but anytime you use a new razor blade they coat packaging so it's very important that you get a towel with some isopropyl
[14:24] alcohol on it and carefully clean off all the oils that are on that razor blade both the front and the back that way we don't contaminate our fresh urethane also the corners of these razors are really sharp so as we go in
[14:37] and try to scrape up that urethane you could easily scratch the paint on the rust could start forming and if that rust bubbles up it could lift the glass that glass could start lifting up and
[14:50] come off so rust is the enemy we need to avoid it so a way to protect the corners easily is to use tape and just fold over the tape on each of the corners and then you can even rip it off so that the tape is a smaller profile it's not in your
[15:03] way and it should look something like that so now our corners are protected so weld paint so now let me show you how to remove the urethane and now you're going along that pinch weld underneath that urethane almost like you're filleting a
[15:17] fish and leave behind this beautiful flat one to two millimeter thick urethane surface that's nice and fresh that's exactly what we want that's the perfect surface for our new urethane to bond to so now we want to shave down all
[15:31] millimeters thick just like that and you can see right too far this is inevitable you're gonna get scratches you're going to shave it a you're not going to be perfect don't worry this will get covered by primer
[15:44] that way it won't rust and also so the new urethane will bond properly now if cold the urethane is a lot harder to cut so a trick is to carefully heat it up using a heat gun just keep that heat gun moving and don't hold it in one spot
[15:57] now even in the colder weather look how easy this urethane is to cut that razor cuts through it like a hot knife through butter so work your way around the entire window frame for laying the urethane nice and thin off the pinch
[16:10] the bottom of the window frame and this is just going so smoothly and it's so satisfying who says replacing your windshield doesn't have to be fun now show you guys while i'm shaving the urethane down here check this out this
[16:25] is from the factory this is a factory mistake they put sound ending over here and they put the urethane over the sound deadening that is not right sound bond to you have to bond straight to the metal surface so scrape up the sound
[16:39] ending as well as the adhesive under it so we can lay down our urethane straight residue just use a towel with some alcohol on it and the residue will come right off so with that sound ending and the adhesive completely removed now we
[16:52] could properly apply our urethane in that area never apply your urethane to anything except the pinch weld it should never go over sound deadening it should never go over carpeting nothing except that pinch weld and i'm very surprised
[17:05] the oem manufacturer did that because that's incorrect but we fixed the problem and we removed all of the urethane around the pinch weld we shaved it down to make it nice and thin so we are done prepping our car now
[17:18] we need to prep our glass and this process is very similar now if you have you don't have to do half of the stuff we're about to do but because we bought to prep it so let's start by removing both of these wires from the heater
[17:32] element since we already have these built into the car next what we need to do is remove all of this old urethane around the entire border of our glass don't want to even have a sliver on here this isn't like the car we need to
[17:46] completely remove all of the urethane so we have a fresh glass surface because then we're going to put primer down so to do that i have this tool that works very well it's a razor on a stick and this is great it gives you the leverage
[17:58] you need to help peel this up now all you need to do is just get the razor under the urethane and scrape it along the glass like so and make sure you angle against the glass don't be afraid to scrape the razor along the glass
[18:11] trying to remove as much urethane as possible the razor won't damage the it like we did with the car paint so work your way all the way around the glass removing the old urethane and we're coming to the end here with our
[18:23] last bit of urethane to remove beautiful alright so with all that urethane removed from the glass now we need to get down to the bare glass surface and the glass like this scraping back and forth until there's no more urethane
[18:36] downwards into the glass to make sure that blade is scraping as close to that there's small amounts of urethane still left on here but it's coming right off urethane free all right and check out our glass it is
[18:52] looking absolutely amazing nice and smooth all of the old urethane is gone the dark spot is just the old primer and don't worry we're gonna add new primer sand it down we don't want to ruin the glass so we're gonna just keep it like
[19:05] that that is perfectly fine at this point it's almost like we just got new glass so now what we need to do is follow the instructions on our primer this is a single step primer that we're going to use around the edge of the
[19:17] pinch weld so we want to make sure we follow the instructions exactly and the first thing we need to do is spray the glass down with glass cleaner and clean it off and when you're cleaning glass with heater lines like this right here
[19:30] this heater line right there you want to make sure that you go in the same direction with the grain you don't want to go against the grain of the heater be sure to wipe the towel with the grain along those heater lines and wipe the
[19:43] entire windshield down so there's no oils or residue all right so with our glass completely clean before we go and add our primer what we want to do is dry test fit this so grab your suction cups this is a professional suction cup i'm
[19:57] them they're not that expensive what most people have already is an action we're going to use so wipe down the glass and stick that suction cup on tight and that's not going anywhere same for the other side and i'm using a
[20:11] has three suction cups so we're not going to have any problems at all now it's oriented in the correct direction and when you flip this over you can see windshield now and i'm going to show you how those fit into the car so right here
[20:26] are the two holes our alignment pegs on the glass are going to fit into not all glass has this but many do so if yours does it will make your life that much properly so right now we're just practicing to see what it's like to
[20:39] actually fits right in there pretty easily and although we have those make it easier to line up the glass correctly is to use two pieces of tape to lay them across the roof and onto the glass one on each side and cut the tape
[20:54] line these pieces of tape up when we add the glass later and that just makes definitely want to make sure that you test fit your glass that was a perfect have the urethane on and then you have one shot it's good to have some practice
[21:09] and get those alignment marks as well now we're almost ready to add our primer but before we do that we have a piece of window trim i didn't get a new one i'm just using the factory one it's in good shape and it goes on the back now to
[21:21] install our rubber trim molding onto the glass all you need to do is slide it onto the edge of the glass making sure it's even on each side and then once you on the rubber molding to stick that double-sided tape onto the glass don't
[21:34] worry when we add our urethane to the glass later it's gonna squish against and that's how you install rubber molding onto the glass if your car has it so with our molding in place now we're ready to add our primer and this
[21:48] is very important this gives you the proper bond from the glass to the and it's very important on the car as well to prevent rust for any spots that is to make sure your primer is not expired this isn't that's very important
[22:02] and then shake it up for a minute you should hear a metal ball banging around finally the last thing you're going to need to spread out the primer is a again i'll link it all in the description so you can easily find it
[22:15] let me show you how to apply this so let's dunk the dauber into the primer and then lay down that primer onto the glass following the old primer stain it's that simple so work your way around the entire perimeter of the glass
[22:27] covering the old primer and making one continuous bead of primer all the way around and you want to make sure your primer is going on evenly it's not looking great and one thing i definitely want to mention is this stuff has a
[22:40] really strong odor and it's not good to breathe in so make sure you're working you're indoors make sure you have ventilation or a respirator on so you rounding this last corner here coming back to where we started and we are done
[22:55] and now our glass is completely done this is prepped and ready to go all we need to do is let that primer dry for at least 10 minutes before we add this to our car so with the primer on the glass drying now let me show you how to add
[23:08] primer to our car and this is completely different so we have a fresh cut urethane right here and we do not want to get primer on that fresh cut urethane this fresh cut urethane is the best bonding surface for our brand new
[23:21] urethane what the primer is for on the car is for spots like this you see where no more urethane same thing right there there's another spot those spots will rust after we add our new urethane also the new urethane won't bond the best to
[23:35] this it bonds best to primed surfaces so the primer stops the rust and makes sure that it bonds properly now one thing i do want to mention we're using black don't have to be super careful with where we put this if you have a white
[23:47] car though anywhere you get primer it's gonna stain so make sure you keep it underneath the glass now for these bare metal parts on the pinch weld just cover them up completely with primer so they don't rust just like that and same thing
[23:59] for any smaller pieces of exposed metal like this right here as well as this bare metal right here where our hole is for the glass alignment peg so now you just want to go along the pinch weld and very carefully look for any nicks or
[24:11] scratches like that right there you can see that little nick it's very important prevent rust and after that spot's covered continue around the pinch weld touching up anything that you could find like this scratch right here it's small
[24:25] it's narrow but it needs to be touched up or it could rust so i went around the entire pinch weld touching up all the little nicks and scratches i made with need to let this dry for 10 minutes and as this dries let me show you how to cut
[24:39] the urethane tip so when we add our bead of urethane we want to make sure the tip just cut it here and have a round bead we want to have a triangular bead the urethane bead as it gets squished down
[24:52] surface area contacting the glass or the pinch weld now with the triangular bead as the glass squishes down it creates a rectangular shape and that contacts much more of the glass and pinch-weld surface creating a stronger bond so although it
[25:06] seems like a small detail that makes a big difference on how well this glass adheres so you might as well do the best job you can let's cut this into a triangle and the first thing we're going to do is we need to make sure our tip is
[25:18] nozzle where the urethane is going to be coming out has to be a quarter of an inch wide and i have our digital caliper set to a quarter of an inch and i'm just also use a ruler and you can see right there is as far as it's going so that is
[25:33] going to do is i'm going to take a razor right where that quarter of an inch mark is and i'm just going to cut straight down just like that so now the tip of our nozzle is a quarter of an inch in
[25:46] diameter which is the correct diameter for applying our urethane now let me show you how to measure how high our triangle has to be so to get the correct over to the pinch weld and push the tip all the way down into the pinch weld and
[25:59] glass sits flush is what we want to use to mark the height of the bead and i'm now we could use a marker to outline the two cuts you're going to make to make the triangle and then carefully get your razor and cut along those lines and
[26:13] you just need to get that triangular shape and you'll be fine and then make sticking out so it doesn't break off and contaminate your urethane good and that'll work so with the tip cut properly we are on our final step and
[26:27] that is adding our urethane so first we need to poke a hole in the urethane we need to make sure it's big because this is pretty thick and we need to make sure it flows so you can see that hole is completely opened up so now let's add
[26:40] our tip and this screws on like so then we could remove the rear cap which keeps this air tight so the urethane doesn't get hard and then add the tube to the what i like to do is fill this up with
[26:52] urethane and shoot a practice bead also another thing i do want to mention is as your urethane like this you don't want to drag it across like that because want to force that urethane into the pinch weld so you want to point it
[27:07] pushing it into the pinch weld to give it the best bond possible and you always want to do a practice run before you lay down the urethane on your pinch weld and this first practice speed isn't that great because it's leaning over so let's
[27:20] try that again and we want the beat to stand straight up and not lean over and this is looking way better so now i have a good feel for it and i'm ready for the real thing all right and finally the last part is laying down our bead of
[27:33] urethane i like to start in the bottom corner here so we're going to lay our bead down here and we want to try to have one continuous bead if possible if could paddle the ends together but you want to try to be as smooth and even as
[27:47] possible all the way around and the bead should be in the center of this urethane here so let's start at the bottom here and make sure your triangular bead stands straight up like that and this looks perfect and around this corner
[28:00] is not really that good it's falling over a little and i need to go a little worry we could straighten that up when little tricky the straight parts like this are really easy to lay down even
[28:13] with a manual hand pump caulk gun now coming around this other corner i'm going a little slower and check it out that's way better than the last one and you're going around the corner so i think you get the idea take your time
[28:25] and lay down a continuous bead right over that fresh cut urethane and make we're almost completely around the windshield frame and when we get back to bead a little bit past the starting point so there's overlap
[28:40] bead like where you start and finish your bead you can see i overlapped the two beads and what we're gonna do now is called paddling where you push the two wanna use something flat and non-porous and i'm using these plastic razors and
[28:54] which is good but it makes it difficult to paddle but you get the idea you just want to make sure it's combined into one piece and you also want to make sure look pretty we are good to go so now these are combined into one and we don't
[29:08] and squishing the urethane together because if it doesn't you're gonna get a leak but since we did it ourselves we know we won't have a leak now real quick take a look at how good this came out it's not difficult to do at all and if i
[29:20] filming you guys could get even better results without a camera in your way so minutes before it skins over so let's not waste any time and go get our glass on the car okay so take your time here and lower it down carefully and don't
[29:35] let that glass touch the urethane until you know you're aligned because once it does the urethane will stick to it and we can't lift up after that all right so i'm good on my side ready to lower it down
[29:47] good all right and we are in there you go all right so with your glass set in place do not press down on the glass just yet the first thing you're going to want to do is check the panel gap between the panel and the glass and make
[30:00] sure it's even all the way down and that side already that's nice and even so both sides are even and we're good here isn't even let's just say the glass is too close to the panel so all you would
[30:14] do to fix an uneven gap here if the glass is pushed up against this piece of metal we need to move the glass that way but very very slightly just a millimeter or two is all it takes once the glass is down you can't make big adjustments so
[30:26] with an open hand carefully and lightly push that way keeping an eye on that gap and once that gap opens up so it's even you're good to go after your glass is in your panel gap is good now you're going to take an open
[30:38] hand and press down around the perimeter of the glass pretty hard you want to make sure that you seat this very well all the way around the entire perimeter of the glass and then after you do that it's seated it's squished down against
[30:50] that urethane now you're gonna grab some tape and you're gonna tape the top of the windshield like that and like that and what that's gonna do is that's gonna help prevent the window from sagging downwards because of
[31:02] it cures in place and this takes about 24 hours to cure for this specific inspect where the glass meets the pinch weld and you can see right here we have some primer that's clearly visible so before it dries we could easily fix this
[31:16] just get a towel with a little bit of alcohol on it and wipe it away like so you want to clean these up now because tomorrow it'll be fully cured and it won't come off easily and finally a few more quick tips leave your suction cups
[31:28] them off the glass and then lift the to let the urethane cure and then we can take this off tomorrow when you're closing your trunk do not slam the trunk you're going to want to lightly close
[31:41] the trunk like that and then just press down and then finally one more thing you could do is you could open the window on your car crack will help equalize any pressure inside the car and if you open the door
[31:54] it won't push air through that new urethane and it won't separate that is going to escape through that open window instead so those are some quick results so now all we need to do is wait 24 hours for our urethane to cure and
[32:10] we're good to go all right now 24 hours later our glass is completely cured and just to make sure you could go over to your test piece here and make sure that it is completely cured there's no gooeyness no
[32:22] stickiness it is completely solid so we know our urethane is cured now we can remove all the tape from the windshield because it's not needed anymore same worked great next use your favorite glass cleaner and spray down the glass
[32:36] and we want to clean up any suction cup marks as well as any dirt so our glass going to show you how to easily remove that marker from the junkyard that's on clean off this marker just take a razor and lightly scrape the glass the razor
[32:49] isn't going to scratch the glass but it'll clean the paint off no problem it'll clean the paint off no problem beautiful oh baby and look at that glass that thing looks brand spanking new so good and for 75 dollars but we're not
[33:01] done yet we still have to connect our window defroster so connect the wire to the defroster grid and make sure you hear a click to know it's fully seated then we can get the plastic trim piece in place and press on it so it snaps in
[33:14] that holds it in and finally push the cap in just like that now we have to connect the wire on the other side and watch this boom done all right so with both plastic pieces in there the last thing to do is to start up the car
[33:29] and test it out and with our engine running we'll come down here to our climate control and we'll hit our rear defroster now we just have to let that sit for like 5-10 minutes and 10 minutes later let's check
[33:43] this out let's see if we can feel it alright it is warm warm warm it is warm across the entire windshield and i have a really cool way that i could prove this to you guys so
[33:55] capturing the window heating up with a five minute time lapse blue and purple are colder yellow and orange are warmer and it's so cool you could actually see the grid lines heating up the glass so now the glass is toasty warm and you can
[34:08] see each individual grid line is working perfect just like we tested for beautiful and finally for one last test we need to make it rain i want to prove to you guys that we have no leaks so i'm simulating a heavy rainfall and check it
[34:21] out not a drop of water is getting into the car so we know this is sealed perfectly so there you go that's everything you need to know on how to replace a broken rear windshield properly and if you guys were wondering
[34:33] it's almost the exact same process the biggest difference is removing the old glass with the front windshield it comes out as one big piece that's the only same so you'd follow the same exact
[34:46] video was helpful if it was remember to give the video a thumbs up if you're not subscribe button and as always all the tools and products i used in this video tools and products i used in this video are linked in the description
⚡ Saved you 0h 34m reading this? Transcribe any YouTube video for free — no signup needed.