
Urgent: Gear Oil Leak Before Car Show
45sThe dramatic setup of a last-minute repair before a car show creates immediate tension and relatability for car enthusiasts.
▶ Play Clip"Delivers exactly what the title promises: a thorough, step-by-step guide to replacing axle seals, with no fluff."
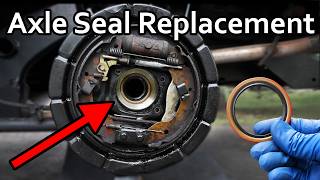
This video is a step-by-step tutorial on how to replace leaking rear axle seals in a car, truck, or SUV. The host demonstrates the process on a small SUV owned by Henry from Donut Media, which is leaking gear oil from its rear axle. The tutorial covers all necessary tools, safety precautions, and detailed procedures for removing the axle, replacing the seals, and reassembling the brake components.
The video begins with the host introducing the task of fixing a leaking rear axle by replacing axle seals. The vehicle is a small SUV driven by Henry from Donut Media, which has been leaking gear oil and requires topping up every 100 miles.
Henry started at J Leno's Garage in California and drove to Rhode Island for a car show. He restored his beat-up car to win the show, but with one day left, he discovered a major problem: leaking gear oil from the rear axle seals.
Underneath the car, the host points out gear oil shooting out from the end of the axle shaft and dripping from the drum brake backing plate. The wheel is coated in gear oil, confirming a significant leak from the axle seals.
The host lists all necessary tools: an 80-piece socket set with 180-tooth ratchets, wrench set, torque wrench, hammer, plier set, seal puller, seal driver (a large socket), slide hammer, axle seals, differential fluid, and thread locker. He also mentions that Craftsman sent tools overnighted, and the slide hammer is from a local part store.
Chock the front wheels, loosen the lug nuts on the rear wheels with a breaker bar, then jack up the rear differential and place jack stands. The host emphasizes using a piece of cardboard on the jack to protect the freshly painted axle.
Remove the fill plug first to ensure it can be refilled, then remove the drain plug. The host checks the magnetic drain plug for metal flakes; a silvery paste is normal wear. Torque the drain plug to 18 ft-lb and hand-tighten the fill bolt.
Remove the wheels and slide them under the car as a safety measure. Remove the drum by using bolts to push it off. Then remove the 12mm nuts behind the backing plate that hold the axle in. Use a slide hammer to pull the axle out, being careful not to damage the splines.
The old seal is cracked and shot. Use a seal puller to pop it out. Note the orientation: the yellow dots were on the inside. The new seal has a spring that must face inward (towards the differential) so fluid pressure expands it for a better seal.
Clean the area with a towel to remove dirt. Install the new seal with the opening facing inward. Use a large socket to drive it in evenly. If it goes in crooked, tap the high side with a pin punch to level it. The seal is fully seated when the hammer sound changes pitch.
The brake shoes are saturated with gear oil, so the host replaces them. He recommends taking pictures and laying out parts in order. Clean the backing plate and apply copper grease to touch points to prevent squeaking.
Reinstall the axle carefully, ensuring the splines align and don't damage the new seal. Use thread locker on the nuts and tighten them evenly in a crisscross pattern. Reinstall the drum and wheel, torquing lug nuts to spec in a star pattern.
The host performs the same procedure on the other side: pop off drum, remove four nuts, pull axle, replace seal, replace brakes, reinstall axle, and torque nuts.
Remove the fill bolt and pump in about 2 quarts of 80W-90 gear oil until it weeps out of the fill hole. Torque the fill bolt to 18 ft-lb. Lower the car and remove jack stands and chocks.
The host concludes the tutorial. Later, Henry sends an update from the car show, confirming the seals are still leak-free and the car won the show.
Replacing leaking axle seals is a straightforward DIY job that requires careful attention to seal orientation and proper torque specs. The video provides a comprehensive guide, and the successful outcome at the car show demonstrates the effectiveness of the repair.
Craftsman 80-piece socket set
tool
Torque wrench
tool
Slide hammer
tool
Seal puller
tool
Seal driver (large socket)
tool
Breaker bar
tool
Jack and jack stands
tool
Thread locker
tool
Differential fluid (80W-90)
tool
Axle seals
tool
Drum brake tool kit (optional)
tool
Henry from Donut Media
person
Chris (host)
person
Donut Media video
link
What is the first step before draining the differential fluid?
Remove the fill plug first to ensure it can be refilled.
03:46
What torque spec is used for the drain plug?
18 ft-lb.
04:26
Why should you slide the wheel under the car after removing it?
To protect yourself if a jack stand fails; the car will fall on the wheel instead of on you.
04:52
What is the orientation of the new axle seal?
The spring opening must face inward (towards the differential) so fluid pressure expands the seal.
08:39
How do you know the seal is fully seated?
When it stops moving and the hammer sound changes to a higher pitch.
10:32
What type of fluid is used for the differential?
80W-90 gear oil.
14:56
How much gear oil is needed?
A little over 2 quarts.
15:08
What is the torque spec for the fill bolt?
18 ft-lb.
15:35
Safety Tip: Wheel as Protection
Emphasizes a simple but critical safety practice that could save a life.
04:52Seal Orientation
Explains the correct orientation of the seal spring for proper sealing.
08:39Seal Seating Indicator
Provides a practical auditory cue to know when the seal is fully seated.
10:32Successful Outcome
Confirms the repair was effective, as the car won the car show.
15:49[00:01] going to show you how to fix a leaking rear axle by replacing these axle seals in your car truck or SUV and I'm not going to be doing this on just any car we're going to be working on this small SUV driven by Henry from donut media
[00:14] country so Henry started at J Leno's Garage in California and headed towards Rhode Island for a car show and along the way he took his car which was pretty beat up and restored it to hopefully win this car show but with only one day left
[00:27] before the show there was a big problem Chris I need your help I'm leaking gear oil I've had to fill it up every 100 miles or so because the seals have gone bad on my rear axle can you check it out for me yeah let's go take a look so if
[00:39] we take a look underneath this car wow this is in really good shape they did a great job restoring this thing you can easily see at the end of the axle shaft here look at all that gear oil shooting out on the end of the tire this is
[00:51] coated in gear oil and if we look closer you can actually see gear oil dripping from the drum brake backing plate and it's all over the inside of the wheel so it is obvious that we are leaking a lot of gear oil out those seals on the end
[01:04] of the axle on this side and if we take a look over here same thing look at all that gear oil so we need to replace these seals and in order to replace the road and leak free here are all the tools and products you're going to need
[01:18] now this isn't my normal setup as you might have noticed well that's because finally found my own place so in that white container I'm moving all my tools spare car parts and the Delo Turbo kit over 1,000 M away that also includes
[01:32] moving my cars which is not as easy as it looks apparently I have a lot of project cars some of which you guys have seen before and some that you'll see pretty soon once I get settled into the new driveway so I really meant it when
[01:44] this was not planned I had no tools at all so I reached out to Craftsman and they sent out all these tools and overnighted them like parts from Japan tools you actually need to work on your car and do a complex job like this
[01:57] here's everything you're going to need we have an 80 piece socket set and these ratchets in here have 180 teeth which is really good then we have our wrench set we have a torque wrench Hammer we have a plier set seal po this is going to be
[02:12] our new seal driver it's just a big socket and then we have our Slide Hammer local part store for free just have to return it when you're done but in this case they sent it out to us so we have it on hand and then we have our axle
[02:24] seals our differential fluid and some thread Locker so that's everything done I'll be sure to link all the tools and products in the description so you can easily find them and with that said we don't have a lot of time so let's get
[02:36] is Chuck off the front wheels so the car doesn't move by accident so with the to the back wheels and let's loosen up the lug nuts so grab your breaker bar and loosen all five of the lug nuts and we're doing this with the car on the
[02:50] prevents the wheels from spinning but if you have an impact wrench you could do that loose I also loosened the other wheel as well now we can get our Jack rear differential so let's slide this under and I have a piece of cardboard on
[03:04] the jack to prevent the freshly painted rear axle from getting damaged now let's lift this up so the tires come off the ground good and then we can slide the jack stands under the car then we can lower the Jack down so
[03:19] the axles rest on the jack stands and then finally let's Slide the Jack out give the car a good shake to make sure it doesn't budge and that feels solid underneath let's go drain the differential fluid okay so first let's
[03:33] you don't have one of these they are great I highly recommend them because they really help prevent the driveway from getting stained with oil the drain that we want to remove the fill plug first and to remove this you use the
[03:46] pushes right in like that and then we can break this loose and loosen it all way now with that removed we can remove the drain plug and the reason why we because if we remove the drain plug plug
[04:00] and drain the entire system but the fill plug is seized and we can't refill it remove the fill plug first that way you know you could fill the diff back up now as that drains let's check the drain plug which most of the time is magnetic
[04:13] here which is normal we just don't want to see any large flakes or chunks of metal but this silvery paste is typical wear for a differential so just clean it off all right now with this drained we could hand tighten that drain plug back
[04:26] rest of the way with a torque wrench to 18 ftlb good and finally to make sure dirt doesn't get in I'm just going to hand tighten the fill bolt for now so with the differential completely empty now we
[04:39] can go and remove the wheels and pull the axles out so let's remove all five them they should come right off and now let's take the wheel off and slide it under the car and trust me it's totally worth doing takes a couple of seconds
[04:52] and it could save your life if a jack stand fails or Falls over the car will fall on the wheel instead of falling on you so don't skip this step all right so now we're good to go here what we're going to want to do to remove this axle
[05:04] bolts up here that need to be removed and two bolts under here that need to be right out so we'll start with removing the drum and you want to make sure that your e brake is not engaged you can see we could spin this freely so the E
[05:18] braake is not engaged but this is not coming off easily luckily there are two what you're going to do is you're going to get bolts that are the correct thread pitch and get the in there work them in all the way until you can't anymore and
[05:32] then you're just going to tighten these bolts down little bit on each side and just like that and it's a good thing we're doing this because look at all the gear oil that's saturated these brake shoes yep that's why the brakes didn't
[05:46] feel very good so with our drum removed the only thing holding this axle in are behind this backing plate you could see two Fasteners right here so let's remove them and these are 12 mm nuts so break them loose and remove them the rest of
[05:59] the way by hand same for the bottom nut break it loose and then loosen the nut these two removed let's swing around to the other side and remove the other nuts and you can see the other two nuts are right there so remove the top
[06:13] one good and then remove the bottom one and you can see where that 180 to ratchet helps loosen the nut even in such a tight place you don't have to it up so with those Fasteners removed
[06:25] here because it's starting to drip and I don't want to get it on the driveway way and at this point our axle should be free we'll see I'm going to try to remove it by hand it's going to be pretty tight in there I'm going to
[06:37] to get this off but it's worth giving it a shot by hand let's try it out I have a feeling this is going to be useless but it's worth a shot and yeah this is really tight in here so just as I figured this is not going to come off by
[06:50] hand you're going to need a little bit more oomph to pull this out so we have you how this works it's really easy so we have the actual Slide Hammer part which is this right here so we're going to remove that and then we have two
[07:03] which is a little small so I don't think we're going to be using that but we have this adapter right here which looks like it should fit on beautiful just like that so it slides over the studs like that and then all you have to do is
[07:16] place make sure it's nice and tight that next we want to thread on the slide hammer and then tighten down the jam nut doesn't loosen by accident now just sling the weight to the back of the rod
[07:30] this axle out beautiful all right and now we can use your hand to guide it out that way it's not dragging in that axle tube and
[07:42] we want to be very careful the splines right here we want to make sure we don't hit them against any of this metal because that could cause major issues differential so just be careful with that and with the axle remove check this
[07:56] out you can see that seal is shot right in here here is all cracked and no we're going to replace this all right so now let's remove this bad seal with a with this is you get it right behind the
[08:10] use this as leverage so you're going to just lift up and it should pop the seal just lift up and it should pop the seal out just like that right there beautiful now one thing I do want to mention is notice the orientation of this you can
[08:24] there are on the inside if we flip this over you can see the yellow dots are on the outside so yellow dots on inside is how this was oriented just in case if we take a look at our new one it's actually a little bit different we have a spring
[08:39] opening always goes inside that's where the pressure pushes in and expands the seal so it's going to go in that way but just in case always reference this take know which way you need to put the new one back in so our old seal is out and
[08:55] then we have this plate in here which is also cracked a little bit bit but this have any extras so we're just going to clean it up and we're going to put that crack facing up and reinstall it now you want to quickly clean the area with a
[09:09] towel and get any dirt or grit out of here which could compromise our seal what we could do is reinstall this again with that crack facing up that just slides in like that so there is our new seal and to drive that seal in you could
[09:24] a big socket like this and you can see that fits right on the outside perfectly here now we have our new seal and remember what I said this opening on the new seal always goes towards the back you can see how there is a gap in there
[09:40] and a spring you want the fluid pressure to push that open so the seal opens up more and seals even better so opening always goes towards the inside and you just want to push this in by hand to get
[09:52] it as flat and level as possible good and now we can grab our socket and try and now we can grab our socket and try to evenly Drive the seal in there can see how the bottom here is pushed in more than the top so it's not going in
[10:07] straight once you notice it not going in straight stop right away stop hitting it in and what we're going to do is tap in the top part of the seal to make it level so use something like a pin punch which has a flat head so it won't damage
[10:19] the seal and gently tap the seal so that it pushes the top in to make it even seal the rest of the way in and you know it's all the way in when it stops moving and the Hammer sound changes you could hear the hammer has a higher pitch sound
[10:32] and it's not being driven in anymore so we're good to go so with the axle seal in all this stuff is completely saturated in gear oil I don't trust these brakes we could try to clean them off but I rather replace the drum brakes
[10:44] going to go in so let's knock this out real quick and before you remove this always recommend taking pictures of everything looks like so you have something to reference just in case okay
[10:56] your safety glasses on when removing these Springs they have a lot of spring don't have a drum brake tool kit with me so I'm just using pliers and stuff I have around to make it work now let's clean the gear oil off
[11:09] the brake drum backing plate so we don't contaminate the new brakes then we could the six touch points on the backing plate and that prevents squeaking so the want to make sure it's a thin coat all right so all the old brake parts have
[11:23] so there's no more gear oil at all and we also lubricated the wear points with some copper for an's another thing I wanted to show you real quick is this only to take pictures but lay out your brake parts in order as you remove them
[11:37] and easy so I already did a video on how to replace drum brakes so I'm not going watch that video it's down in the description if you're interested in this that way we can get the axle in and get this side done so first let's get the
[11:52] shoe good and then we can get the rear shoe on next we can install the bottom spring like that and then then we want to get the self adjuster in place and spring and now our drum brakes are good
[12:05] to go so now we can install our axle and right here is the wheel bearing so if what you have to do is you have to cut it and then take a chisel and break it free on both sides and then press a new bearing on unfortunately we can't easily
[12:17] get wheel bearings so we have no time for that we're just going to reuse this and this one feels solid you can see it's not freely spinning it doesn't feel gritty there's no play in it at all so we're good to go here so now when we
[12:30] careful with these splines and we also want to be very careful not to damage the new axle seal so try to get the splines right in the middle don't rest the axle on the seal slowly move that in all the
[12:43] way then we want to get these two bolts right through those holes as we're working this axle in there to fit into that
[12:55] that beautiful you can see both of those bolts are pushed it's the same thing on we can tighten it from the back actually so we could get some threads to stick out behind it good now let's get some
[13:07] threads because this is a high vibration area and this holds the axle on so we the wheel could come off while you're driving now let's snug these up with a ratchet and tighten each side down a little bit at a time so it evenly seats
[13:22] same thing for the other side get some thread Locker on there and then evenly tighten them down these nuts to Speck in a crisscross pattern now we could add our drum and
[13:36] sure it spins somewhat freely you want to feel a little bit of drag from the will do the rest of the work to adjust the brake shoes as you use the car now all we need to do is get the wheel back on the axle and I find using my feet
[13:49] mounting a heavy wheel and then we want to torque the lug nuts down to spec in a star pattern and that's all there is to replacing a leaking axle seal now for a quick overview let's do the other side real fast first pop the drum off next
[14:03] remove all four nuts behind the backing plate that hold the axle in then we can out and remove the axle the rest of the hand now let's use our seal removal tool to pop out the leaking seal and out with
[14:16] the old and in with the new so put the new seal in place and then drive that seal in all the way until a bottoms out now with the new seal all the way in out now with the new seal all the way in let's replace these oil saturated brakes
[14:30] good then we could carefully reinstall the axle making sure it meshes with the differential beautiful and then we could torque down the nuts on the backing plate that hold the axle in finally let's get the drum on there then install
[14:42] the wheel and torque it to spec in a star pattern good and now both axle seals have been replaced so now we need to this we're completely done so just remove the fill bolt and you want to
[14:56] for the correct viscosity in this case it says we could use 8 w90 and now comes pump a little over 2 quarts of gear oil into the differential this 80 w90 is
[15:08] test your arm strength pumping all this fluid in here now you want to keep pumping until it's full and you'll know it's full once gear oil starts dripping out of the fill hole just like that you can see it weeping out and that means
[15:20] we're good to go so get that fill bolt in there and let's clean this leaking fluid and then you want to torque this down to 18 ftlb here and lift the car up so we can remove the jack
[15:35] stands and then we could slowly let the car back on the ground and finish up by removing the wheel chalks so there you go that's everything you need to know on how to replace leaky axle seals all right dude
[15:49] good seeing you thanks good luck tomorrow get out of here oh yeah I'm going to send you an update video we're going to win the show so Chris we made it to the car show and
[16:02] I've got great news the rear axle seals you fixed are still all sealed up an absolutely incredible job on the rear axle seals because they're not leaking
[16:15] news because the judges were looking very meticulous at this thing so thank those things sealed up and getting me over the final finish line thanks Chris
[16:27] leaking axle seals hopefully the video was helpful if it was remember to give it a thumbs up and consider subscribing and all the tools and products I used in description so you could easily find them also if you want to see donut
[16:40] media's video of their Suzuki X90 traveling across the country and see if you wins the car show just click their video up on the screen to check it out
⚡ Saved you 0h 16m reading this? Transcribe any YouTube video for free — no signup needed.