
AI Summary
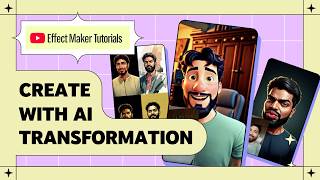
This video is a comprehensive tutorial on creating an AI transformation effect using Effect House Maker. The walkthrough uses the AR transformation template to build a vaporwave-themed effect that transforms a user's selfie into a stylized portrait via generative AI, covering everything from setup and customization to testing and publishing.
Chapters
The AR transformation template in Effect House Maker transforms a user's selfie into a stylized portrait using generative AI. It teaches key components like character description, pose control, and art styles.
Open Effect House Maker in the browser, select the AR transformation template from the template library. The interface includes objects panel, assets panel, visual script area, and preview panel.
Clicking record starts a countdown, then a flash is triggered, a photo is captured, a loading indicator appears, and the transformed image is shown.
The background object is hidden by default and becomes visible during the loading phase. Its visibility is controlled dynamically by the visual script.
To customize the background, upload an asset in the assets panel, then assign it to the Background object via the properties panel dropdown.
The loading spinner is a PNG image with continuous rotation animation. Replace it by uploading a new asset in the properties panel (e.g., one made with Nano Banana Pro on Google Gemini).
The template includes countdown text, a title text (e.g., 'clay look'), and a flash image whose opacity animates from 0 to 1 and back in 1 second to mimic a camera flash.
Edit text content, font, size, rotation, and colors in the properties panel. The presenter changes the title to 'vaporwave' and applies the same style to the look text and countdown text.
The AI image prompt asset contains parameters: character description, art style, pose similarity, description similarity, and retain likeness.
Write the desired subject directly (e.g., 'vaporwave 80s retro 3D graphic style low poly'). Avoid phrases like 'turn me into a character' to get better results.
Input pose similarity (80%) keeps the generated image's pose close to the selfie; description similarity controls transformation strength — 20% results in minimal changes.
Retain likeness can preserve gender, skin tone, hairstyle, clothing, and background. Uncheck unwanted attributes, like clothing, to let the style dominate.
The visual script has six sections: start trigger, countdown animation, loading screen control, AI generation trigger with flash, image display animation, and loading spinner/body segmentation.
Test generations across different models in the preview panel. Use the 'preview on phone' button and scan the QR with the YouTube app; ensure the same account is logged in.
Click submit, upload a thumbnail — best practice is a clear before/after split image — name the effect, write a description, set instruction trigger to 'record to start', and submit for YouTube review.
In the left toolbar, click the image option, select AI image, and click 'add with visual script'. Write a character description and Effect Maker auto-populates the scene with the object, prompt, camera snapshot, and visual script.
By following this walkthrough, you can fully customize the AR transformation template to create and publish your own AI-powered effects, and you can quickly add AI image generation to any new or existing project using the built-in tool.
Mentioned in this Video
Tutorial Checklist
Study Flashcards (12)
What does the AR transformation template in Effect House Maker do?
easy
Click to reveal answer
What does the AR transformation template in Effect House Maker do?
It transforms a user's selfie into a stylized portrait using generative AI.
00:02
How do you open the AR transformation template?
easy
Click to reveal answer
How do you open the AR transformation template?
Open Effect House Maker in your browser and select the AR transformation template from the template library.
00:42
What happens when the effect recording starts?
medium
Click to reveal answer
What happens when the effect recording starts?
A countdown timer runs, then a flash is triggered, a photo is captured, and a loading indicator appears before the transformed image shows.
01:27
How is the background image visibility controlled?
medium
Click to reveal answer
How is the background image visibility controlled?
It's controlled dynamically using the visual script, hidden by default and visible during the loading phase.
01:55
What are the five parameters of the AI image prompt?
medium
Click to reveal answer
What are the five parameters of the AI image prompt?
Character description, art style, input pose similarity, description similarity, and retain likeness.
05:24
What is the recommended way to write the character description for best results?
medium
Click to reveal answer
What is the recommended way to write the character description for best results?
Use the subject as your prompt (e.g., 'vaporwave, '80s retro, 3D graphic style, low poly') and avoid phrases like 'turn me into a specific character.'
05:38
What does input pose similarity control?
easy
Click to reveal answer
What does input pose similarity control?
It sets how closely the generated image matches the captured selfie's pose.
06:21
What does description similarity do?
easy
Click to reveal answer
What does description similarity do?
It controls how strongly the description changes the input photo; higher values create more dramatic transformations.
06:49
Which attributes can retain likeness preserve?
easy
Click to reveal answer
Which attributes can retain likeness preserve?
Gender, skin tone, hairstyle, clothing, and background.
07:02
How many main sections does the visual script have?
easy
Click to reveal answer
How many main sections does the visual script have?
Six.
07:30
What is the best practice for an AI transformation effect thumbnail?
medium
Click to reveal answer
What is the best practice for an AI transformation effect thumbnail?
Use a clear before-and-after split image showing the original subject on one side and the AI transformation on the other.
09:38
How do you add an AI image object to an existing project?
medium
Click to reveal answer
How do you add an AI image object to an existing project?
Click the image option in the left toolbar, select AI image, click 'add with visual script', and write a character description.
10:21
💡 Key Takeaways
Prompt Construction Tip
Avoiding 'turn me into' phrasing and using the subject directly is a key technique that dramatically improves AI transformation results.
05:38Pose Similarity Trade-off
Demonstrates how adjusting pose similarity from 80% to 20% changes control, giving creators a concrete knob for effect behavior.
06:21Visual Script Structure
Breaking the effect into six logical sections makes it easy to understand and modify the underlying logic even without deep scripting knowledge.
07:30Thumbnail Design Principle
Using a before/after split image is a clear, user-friendly way to communicate an AI transformation effect's value.
09:38Quick Add AI Image Feature
The auto-population of scene objects and visual script drastically reduces setup time for adding AI generation to any project.
10:21Full Transcript
[00:02] the AR transformation template in Effect House Maker to build a vaporwave look effect. This effect transforms the user's selfie into a stylized portrait using generative AI. Learning how to use it will teach you the key components of
[00:16] using AI image generation in Effect House Maker including character description, post control, art styles, and more. You can use it to create stylized effects, mood portraits, character
[00:30] transformations, and whatever else you can think of. Your imagination is the only limit. I'll show you how to set it up, customize it, and make it your own. To get started, open Effect House Maker on your browser and select the AR
[00:42] transformation template in the template library. this screen with the card pop-up that tells you about the effect and also ways On the left, you have an objects panel where a couple of objects are hidden and
[00:57] some of them are visible. These are the objects that you see in the scene view. Right beside that, we have an assets panel where you can see all the assets effect. I'm going to update and customize both
[01:11] assets and the objects to make my own vaporwave look effect. Coming back to panel where you can see the visual script for this effect. You can easily show or hide this area by clicking on the change layout button.
[01:27] where we can preview the effect. I'll increase the size of this preview panel and click on the record button to start. On start, we see a countdown timer. Once it ends, a flash is triggered and the photo is captured followed by a loading
[01:41] loading indicator. This shows the user as it's generated, the loading spinner fades away and the transformed image I'll show you all the objects in this
[01:55] First, I'll stop recording and reset the effect. I'll scale down the preview panel. The first object we have is the background and I can click on this eye button to toggle its visibility. This is
[02:09] the image that we see during the loading phase. It's currently set to a black image. By default, it's hidden and only gets visible during the loading phase. It's visibility is controlled dynamically using the visual script.
[02:21] I'll change the background image to match my vaporwave theme. To do so, first navigate to the assets panel. Here, click on the upload asset button and select the new background and upload it.
[02:36] objects panel and here select the background image and in the properties panel, click on the drop down menu under asset and select the new background image. As I make changes, I can easily verify them in the preview panel.
[02:49] Next is the AI image. This is an image canvas object where the generated image is applied. It currently has a camera snapshot image assigned to it, which captures the image and sends it to the create AI image node to generate the
[03:02] transformed image. Up next, we have the loading spinner. This is the loading indicator that we see during the loading phase. It is just a PNG image whose rotation is continuously being animated using visual script. This time to change
[03:15] the image for this loading indicator, I'll use the properties panel. First, spinner object and here under asset, click on add asset and upload the new loading indicator. By the way, I have generated this loading indicator using
[03:28] the Nano Banana Pro model on the Google Gemini app. Once it's uploaded, it will object. This is my preferred way of updating image This allows us to capture the user's reaction
[03:44] to the generated image and it's only visible after the countdown finishes and the image is being created. One more thing about body segmentation is that we can just tap and drag it around in the scene to place it anywhere else. Up
[03:57] next, we have the countdown text. This is the 3 2 1 text that you see on start. Below that, we have the title text that currently says clay look and a flash image object, which is just a white image whose opacity goes from 0 to 1 and
[04:13] back to 0 in a span of 1 second. This mimics a camera flash as the effect captures the user's selfie. To continue customizing my effect, I'll change the title text to match the vaporwave theme. We can easily change the text by editing
[04:28] the text content of the object. Here, I'll type vaporwave and change the font to press start 2 P, decrease the size, change the rotation to 0, and update the colors to match the theme. Then, I'll apply the same style on the look text as
[04:44] Rewrite it in all caps, decrease the size, make the rotation 0, and update size, make the rotation 0, and update the colors. text, I'll adjust their position using the move tool in the scene view. I'll
[04:59] also change the countdown text font to be the same as the title text to match our theme better. Now, we have a countdown text, title text, loading spinner, and a background image that matches our theme. It's time to
[05:11] customize the AI image generation. To do so, we have to edit the image prompt. I'll switch to the assets panel. Here, you'll see an AI image prompt. Click on it and once you select it, you'll be able to customize its parameters in the
[05:24] properties panel. It has character description, art style, post similarity, description similarity, and retain likeness. First is the character description. Here, type what you want the user to
[05:38] turn into. For this, I'll write vaporwave, '80s, retro, 3D graphic style, low poly. For best results, skip phrases like turn me into a specific character or turn me into a specific style. Instead, use the subject as your
[05:54] prompt, just like how I have it over here. Once the prompt is ready, next we move to art style selection. Here, click on the drop-down menu to view all the available styles. If you don't find an art style that you are looking for, then
[06:08] you can select from description option and define a custom style in the character description. But, for this effect, I'll select pixel art. on preview AI image to preview your generation.
[06:21] I like these generations. Next is input post similarity. This sets how closely the generated image matches the captured selfie's pose. Currently, it's set to 80%, so the generated image pose will be very close to the input image pose. If I
[06:36] change it to 20%, you'll see that AI has decided the pose on its own, but I prefer how it was looking at 80%, so I'll change it back to that. Next is description similarity. This controls how strongly the description
[06:49] changes the input photo. Higher values create more dramatic transformations, and lower values do not change the image much. If I set it to a lower value like 20% or even 0%, the input image won't change
[07:02] much. Finally, retain likeness. This option would like to preserve, and it currently supports gender, skin tone, hairstyle, clothing, and background. I want to retain gender, skin tone, and hairstyle,
[07:16] so I'll uncheck clothing and preview the final generation. This looks perfect. Awesome. Now that we have fully customized this effect, let's take a look at the visual script that controls the logic flow for this effect.
[07:30] It mainly has six sections. This section over here triggers the start for this effect. On record start, the scale of the countdown object is set, and the transition node setting the countdown timer variable is triggered.
[07:44] Next, the on recording output animates the scale of the countdown text by updating the countdown timer variable on every frame. Next, we have this set of nodes controlling the loading screen, which
[07:56] are hiding the title and countdown text once the countdown is finished and showing the body segmentation and the background image. Below that, we have this section which triggers the AI image generation as soon
[08:08] as the countdown ends, a camera snapshot is taken and it starts the AI image generation process using the create AI image node. And also, a flash animation is triggered at the same time. Once it's done, a loading spinner and an image
[08:22] canvas object are made visible. Next, we have this section over here that sets the newly generated image and animates the scale and rotation for the image the scale and rotation for the image canvas object to fill the screen.
[08:35] And finally, we have these two sections over here. This section animates the loading spinner and the script below it allows us to drag the body segmentation Now, coming to testing, it's best practice to test generations across
[08:48] different models in the preview panel. You can change the model by clicking model that you want to test the effect on. important for you to test it on your phone.
[09:02] You can easily do so by clicking on this preview on phone button and scan this QR using your phone's camera or any QR code scanner app. Once scanned, it will load the effect on your YouTube app and if you get any error, just make sure that
[09:14] you have the same account logged in on both your YouTube app and the effect maker website on your desktop. Once you're happy with the results and it works as expected, click on this submit button and upload an effect
[09:26] thumbnail. Click on upload image, select your thumbnail and open. This is what the user will see before opening the effect. For AI image transformation effects, use a clear before and after image to show the
[09:38] demonstrate this with a clear split image just like how I have it over here. Showing the original subject on one side and the AI transformation on the other. Click on continue and here we have to give it a name. I'll call it vaporwave
[09:53] look. For the description, write what the effect does. I'll write, "This effect turns the user's selfie into a vaporwave style portrait with a single tap. It uses AI to transform the selfie."
[10:08] Here for instruction, I'll select the trigger as record to start. Click on submit and that's it. You have successfully created an AI image published to YouTube once it's reviewed and approved by the YouTube team.
[10:21] Alternatively, if you'd like to add an AI image object to an existing project scratch, you can easily do so by simply clicking on the image option in the left toolbar. Here, select the AI image and click on add with visual script. It will
[10:36] ask you to write a character description. I'll write, "Vaporwave 80s description. I'll write, "Vaporwave 80s retro 3D graphic style low poly" and Now, Effect Maker will automatically populate the scene with an AI image
[10:48] object, image prompt, camera snapshot canvas, and its visual script. This is how easy it is to add AI image object to any new or existing project. Maker, check out the links in the description below and thank you so much
[11:03] for watching. Don't forget to subscribe for more updates and tutorials.