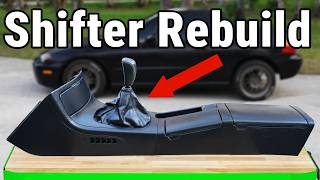

Fix Your Sloppy Shifter in 5 Steps
45sHigh relatability for manual transmission owners; visual demonstration of the problem creates immediate engagement.
▶ Play Clip"Delivers exactly what the title promises: a thorough, step-by-step fix for a sloppy shifter and leaking transmission."
In this video, ChrisFix demonstrates how to fix a loose, sloppy shifter and repair a leaking transmission seal on a high-mileage car. He covers the entire process from diagnosis to final test drive, including replacing worn bushings, installing a new shifter, and addressing rust.
ChrisFix introduces the video, showing a loose shifter with excessive play and a leaking transmission that has stained his driveway.
He measures the shifter play at about 3 inches (8 cm) in fourth gear, demonstrating the severity of the sloppiness.
Under the car, he identifies worn and dry-rotted bushings, a rusted bracket, and corrosion as the causes of the excessive play.
He lists the necessary tools and products, including a new transmission seal, polyurethane bushings, a short throw shifter, and Honda manual transmission fluid.
He removes the center console trim and shift knob to access the shifter assembly from inside the car.
Under the car, he removes the two bolts holding the shifter, carefully dealing with rust, and then removes the shifter assembly.
He removes the shift linkage and the retaining clip, then uses a 7mm punch to drive out the spring pin, a trick to avoid damaging the pin.
With the linkage removed, he reveals the leaking shift seal and notes corrosion on the shaft that likely damaged the seal.
He drains the transmission fluid, emphasizing the importance of removing the fill bolt first, and notes the dark color indicating old fluid.
He removes the old seal using pliers and a hammer, cleans the shaft with 1500-grit sandpaper, and installs the new seal with a socket.
He fills the transmission with Honda MTF, explaining that it has additives for synchros that regular motor oil lacks, and fills until fluid drips out.
He removes rust from the undercarriage using a wire wheel, then applies rust encapsulating spray paint to prevent future corrosion.
He disassembles the shifter, finds excessive rust, and decides to use a junkyard shifter instead, which he cleans and rebuilds with new parts.
He compares aftermarket shifters, showing that only a $100 shifter matches the OEM ball diameter of 35mm, while cheaper ones have 33mm, causing play.
He installs the plastic cage, rubber boot, and poly bushings, using silicone grease to prevent squeaks and ensure smooth operation.
He reinstalls the shifter assembly, torquing bolts to spec, and connects the linkage to the transmission, ensuring proper alignment.
He reinstalls the rubber boots, cleans the interior, and replaces the torn leather shift boot with a new one, adapting it to fit the old bracket.
After lowering the car, he demonstrates the improved shifter feel, measuring less than an inch (2 cm) of play, a huge improvement from the original 3 inches.
The video successfully demonstrates how to fix a sloppy shifter and leaking transmission, resulting in crisp, direct shifts and a clean driveway. The key is replacing worn bushings, using quality parts, and addressing rust to prevent future issues.
7mm punch
tool
Wire wheel on angle grinder
tool
1500 grit sandpaper
tool
18mm deep socket
tool
Torque wrench
tool
Silicone grease
tool
Rust encapsulator spray paint
tool
P100 respirator
tool
Honda manual transmission fluid
product
Polyurethane bushings
product
Short throw shifter
product
Transmission seal
product
What is the recommended tool to remove a spring pin from a shifter linkage?
A 7mm diameter punch, placed on the outer edge of the pin.
07:05
Why should you use silicone grease instead of petroleum-based grease on plastic and rubber parts?
Petroleum-based grease breaks down plastic and rubber over time.
22:33
What is the correct order for removing transmission drain and fill bolts?
Remove the fill bolt first, then the drain bolt.
09:06
What is the torque spec for the transmission drain bolt in this car?
29 ft-lbs.
09:50
Why is Honda manual transmission fluid preferred over 10W30 motor oil?
It has additives for the synchros that motor oil lacks.
12:17
What is the purpose of using a rust encapsulator spray paint?
It contains epoxy that blocks oxygen from reaching the metal, preventing rust.
14:10
What is the difference in ball diameter between the OEM shifter and cheap aftermarket shifters?
OEM is 35mm, while cheap ones are 33mm, causing play.
21:20
Measuring Shifter Play
Provides a quantitative baseline (3 inches) to compare after the fix.
00:30Spring Pin Removal Trick
A practical technique to avoid damaging the pin, saving time and frustration.
07:05Importance of Proper Transmission Fluid
Explains why using the correct fluid with synchro additives is crucial for performance.
12:17Quality of Aftermarket Shifters
Demonstrates that cheaper parts can be worse than OEM, emphasizing 'you get what you pay for'.
21:20Before and After Comparison
Visual proof of the dramatic improvement in shifter feel, from 3 inches to under 1 inch of play.
31:43[00:00] Hey guys ChrisFix here and today I'm going to show you how to fix your loose sloppy wet noodle of a shifter that right there is not neutral that way after you're done watching this video you'll be able to get some nice direct crisp shifts and I'm going to show you how to repair a leaking
[00:15] transmission which has leaked all over my once clean driveway put a catch pan under here after I figured it out and you could see it is leaking a lot so I'm going to show you how to replace a transmission seal to fix that that way our driveway stays clean so let's get started now in
[00:30] this car and many high mileage cars your shifter might feel a little loose and indirect this right here is neutral if we go into first look at how much play there is even if I lightly move side to side there is a ton of play and that's in every gear there's fourth there's fifth oh there's fifth
[00:48] you can see what I'm talking about is very sloppy and because it's so sloppy it's hard to get into every gear and know that you're in the correct gear so I'm going to show you how to fix all this sloppiness and so we could get an accurate before and after let's get into fourth gear and
[01:01] now we could use a tape measure to measure from one side of the play to the other side of the play and we have about 3 in or just under 8 cm of play which is a lot of play and no wonder this car feels so bad to drive so let's go under the car and I can show you why there's so much play
[01:16] in the shifter so let's get the car up on ramps and then chalk off the wheels and now we're going to lift the rear of the car with the jack and I like to use a rubber jack pad so I don't damage anything so lift the car up until she's level like that and then get your jack stands under
[01:31] the car already set up the other jack stand on the other side and now we can slowly drop the car onto the jack stands like that beautiful and I also like to raise the jack up so it's lightly touching the frame just as backup so with the car lifted up now I like to give it a good shake to
[01:46] make sure it doesn't budge and that is solid so now let's go underneath all right so that way is the front of the car so the oil pan is right here this is the exhaust and then we have our transmission and if you take a look you can see this is leaking pretty good over here so we're
[02:00] going to replace the seal to fix this now these right here are the transmission shift linkages this connects the transmission to the shifter so if we follow these long shift linkage rods all the way to the middle of the car right over here it brings us to our shifter so this is neutral first
[02:15] gear second gear and as I rode through the gears look at how much play there is this is because the bushings are old and dry rotted and because of all this rust and you can see here this bracket is completely rusted away this is what the bracket should look like and without it you can see how
[02:30] much play there is and I'm not even pulling hard so we're going to replace that bracket and we're going to replace the rubber shifter bushing with this poly bushing and that should help tremendously also all this rust is definitely not good so I'm going to show you how to go from this
[02:43] to this that way you could fix any rust on your car as well and here's all the tools and products you need to get this job done as always we're using common hand tools and you can't forget about your safety glasses product-wise we have some thread locker we have a new transmission
[02:56] seal a new shifter boot because ours is all torn up and we're going to be using Honda manual transmission fluid which is very important i'll explain more later we're also going to be installing brand new polyurethane bushings and a new shifter seat and this is also very important
[03:10] and to show you why here is an OEM rubber bushing and here is an aftermarket polyurethane bushing the rubber bushing has a lot of give a lot of play could easily bend this and that is going to make your shifts not feel as direct now a polyurethane bushing is a lot harder it does not
[03:26] bend as easy so you're going to get more direct crisp shifts and the last important part to get good crisp shifts is our shifter we're going to be installing this short throw shifter now I do have a really nice spherical bearing fully adjustable short throw shifter but this shifter costs more
[03:42] than I paid for this car and the whole point of this build is for it to be budget friendly it's so that you guys could replicate this in your driveway and not spend a ton of money so as much as I'd love to install this I'm going to show you we could get amazing results with a more
[03:55] that rust and encapsulate it with a special spray paint which means you either need a wire wheel on a grinder or you could use a metal wire brush like this so that's all the tools and products
[04:08] you're going to need to get this job done properly i'll be sure to link everything in the description so you could easily find it and with that said let's get started and the first thing we want to do is start inside the car because we want to remove the plastic trim around the shifter
[04:22] now normally there is a screw right there as well as the other side if we move the seat back you can see there is another screw hole there with the screw missing the screws are missing in this because if you guys remember last year I had to deal with my first hurricane and this car
[04:35] was flooded a little bit the carpets were really wet so I removed all the plastic pieces and seats and stuff that way I could get it nice and dry so the only screw holding in the plastic right now is right there so remove the screw using a Phillips head screwdriver then we can remove the back part
[04:50] of the center console by carefully lifting it out good then we could unscrew the shift knob all the way and remove it that way we could get the front part of the center console out actually we do have some wires here that need to be disconnected this goes to our kill switch so let's disconnect those
[05:04] wires and if you guys want to see how to install a kill switch in your car I'll link that video in could come out and then this rubber boot could be removed and this just keeps the road noise out of the cabin and there's one last rubber boot right here that is again designed to keep the noise and
[05:20] hot and cold air from coming into the cabin and if we just tuck this in like that I'm going to tuck it under here that way it doesn't get all caught up when we remove this so now we are ready to go let's go under the car and loosen this up now under the car you can see our shifter is right
[05:34] here and it's actually only held in by two bolts there's one right there and one right there now these bolts are really rusty i'm hoping they don't snap so I'm going to be careful here if I start to feel like it's going to snap I'll use some heat okay beautiful and I thought we're going to have
[05:49] a problem with these now I was a little nervous about this bolt because of how rusty it was but you could see there is still some of that zinc coating on the threads it's just this part that was all rusty so it came out pretty easily now let's hope that the other bolt comes out as easily
[06:07] all right two for two i should probably go play lotto now with this bolt coming out the shifter is loose and will drop down and that's all there is to it now with the shifter removed the back of the transmission right here and then at the transmission this shift linkage
[06:23] mounts to the transmission it's just bolted to it it doesn't move it provides support now this shift linkage is what moves when you change gears so we want to pull this all the way out like that and then slide the rubber boot back and then that reveals the retaining clip that we need to remove
[06:38] and the easiest way to remove it is to spin it around so you can see the ends of the clip then we could use a small pry bar to get under the clip and get ready cuz this is probably going to go flying okay so it went flying but we got it off and this retaining clip is designed to prevent
[06:52] the pin from coming out because if it comes out your shifter is going to stop working now this pin is officially called a spring pin but it has a much less friendly name on the streets because of how difficult it is to remove but don't worry I'm going to show you a trick to remove it easily
[07:05] and the trick is using a 7 millimeter diameter punch like this this punch fits perfectly on the outer edge of the spring pin don't use a screwdriver or anything like that that fits on the inside because that's going to force the pin to open up more and make it even harder to remove
[07:18] so be sure to use a 7 mm punch get it centered right on the spring pin just like that and then use a big hammer something like a 5lb hammer and just hammer it away now don't let this scare you this is super easy to do and it should take less than a minute and you can see the pin is moving
[07:32] already perfect and that's what the spring pin looks like now with the pin removed the shifter should slide right off the transmission just like that and then we can remove the dust boot and that
[07:48] uncovers our leaking shift seal so this is the shifter shaft which selects which gear you're in and there is some corrosion at the base of the shaft which is probably what wore down the seal and damaged it because this rod moves back and forth every time you change gear so we're
[08:00] gonna have to sand down the corrosion to make it smooth and then replace the seal but before we do that let's remove the other shift linkage so get a wrench on the bolt and break it free and then we could remove this bolt completely so the linkage could be removed and finally
[08:14] the whole shifter assembly is disconnected from the car so let's remove it from under the car being careful not to hit anything and let's get this thing out of our way with that out of the way next let's remove the mount right here at the transmission you technically don't
[08:26] have to remove this but it's very rusty i want to sand it down and paint it plus it does give me just a little bit more room to work down here since it's pretty tight so just get this last bolt out and this could be removed so with the bracket removed let's replace this leaking
[08:40] transmission shift seal here's what the seal looks like it goes in about that deep and this right here is the part number i'll leave this linked in the description so you can easily find it that way you can install OEM parts so all we have to do is hammer the old seal
[08:53] out and push the new seal in but before we do that when we remove this old seal if you don't drain the fluid it's going to come pouring out so first let's drain the transmission fluid now to drain a manual transmission there's usually a drain bolt and a fill bolt on the side so let's
[09:06] head over to the side of the transmission and right there is the transmission drain bolt and right here is the transmission fill bolt and you always want to remove the fill bolt first so let's break this free and then we could remove it the rest of the way by hand good
[09:19] and make sure you don't lose that washer now let's slide the drain pan under the drain bolt that way we don't make a mess and this drain bolt uses the square end of a 3/8 ratchet so let's get that in there and let's break this free good and with that loose now you can remove it the rest of the way by
[09:34] hand perfect and judging by how dark this fluid is I bet it's been in here for a long time so this is your reminder to replace your manual transmission fluid all right so let it drain all the way and once it's completely empty let's screw the drain bolt back in clean up any drips and torque it to
[09:50] spec and for this car that's 29 foot-lbs good so with the transmission drained now let's replace the seal now this seal is pressed in and to remove it you could use a little pry bar like this and just pry around the edges and push it out you could also use your punch from before and punch
[10:05] the edges that way it slowly works its way out or you could grab your pliers like these these are locking pliers we could get them right around the edge here and now grab our hammer and hammer this out beautiful and now this should slide right off the shaft like so now we want to clean off
[10:25] the rust and roughness on this shaft and to do that we're going to be using 1500 grit sandpaper it's rough enough to clean the rust but not too rough to remove too much material but we don't want this giant piece of sandpaper so I cut this small thin piece like that and we'll wrap it
[10:41] around and we'll sand that smooth you can see all the pitting and corrosion on here we want to get that nice and smooth so it doesn't damage the new seal so the technique is to get the sandpaper and wrap it around the shaft and work it back and forth like this the key here is to sand it just
[10:55] enough to remove the corrosion but don't sand it too much where you remove too much material and the seal won't have a tight fit anymore okay and this is looking pretty good so let's shoot some compressed air back there into the cavity to remove any dirt that might have gotten back there
[11:07] from sanding and then let's wipe down the area to clean it up now if you rub your fingernail across the surface it feels pretty smooth that way our new seal won't get damaged all right and now we are ready to drive in our new seal and I'm going to be using this 18 mm deep socket it fits right
[11:23] on the inside right on that hardened lip that's a hardened steel lip that's what you want to hit against you don't want to hit on the outside of this lip so let's get the new seal on the shaft and then we can use the socket to push it in by hand and get it started make sure it's not
[11:36] cocked to the side and then with it pushed in as straight as possible hammer in the rest of the way you don't need to use a lot of force and you can see it start to drive in already and then once you hear that pitch change that means it's bottomed out so stop hammering cuz you don't want
[11:49] to damage the seal and if you remember from before we use these pliers to grab onto the old seal and it fit between the seal and the transmission just like that so this just helps me verify that we hammered it in to the correct depth and the seal is completely seated so now let's fill
[12:02] the transmission with fluid now if we take a look in the back of the owner's manual it says to use 10W30 or 10W40 motor oil in the transmission and while technically this 10W30 would work just fine in the transmission it doesn't have any additives for the synchros but that's why I'm using Honda
[12:17] manual transmission fluid this stuff came out in the late '9s early 2000s after this car was built so it's an upgraded fluid and it'll work much better because it has additives for the synchros so this is what we're going to add and although we unscrewed the bolt from the bottom it's actually
[12:30] a lot easier to fill up the transmission from the top if we take a look down here you can see right there is the transmission fill hole so to fill it with fluid grab a long flexible funnel like this one and then we're just going to get this right down here next to the engine and I really
[12:43] like this funnel it's flexible yet sturdy that way we can put it into the fill hole without kinking it so feed it in there and now we could add our transmission fluid the manual does say it takes two quarts so that's one and let's add the second one and as we come to the end of our second bottle
[12:58] let's go take a look down by the fill hole because once fluid starts dripping out and just like that you know it's full okay so now we could remove the funnel then we can screw the drain bolt back in and you want to make sure that washer is still on there so tighten it by hand and then torque it
[13:12] to spec which is 33 ft-lb good and finally let's clean up this spilled fluid so we can identify any potential future leaks so with our transmission full of fluid I don't see any leaks at all which is awesome so one last thing we need to do under this car is remove all this
[13:27] rust and prevent it from coming back because look at how crusty this is that's pretty bad and to clean up the rust here's everything you're going to need very important you need a full face respirator and P100 filters because we're going to create a lot of dust and we're going to spray
[13:42] paint in a relatively enclosed area underneath the vehicle you do not want to breathe that in so wear your mask tool-wise we have a flaad screwdriver scraper 180 grit sandpaper and an angle grinder with a wire wheel attachment that'll remove most of the rust then we're going to go in and clean
[13:57] with acetone or you could use alcohol and then finally after everything's clean we're going to spray paint and it's very important that you use a spray paint designed for painting over rust this is called a rust encapsulator spray paint you're never going to be able to remove all the
[14:10] rust so using a spray paint that goes over rust is important because this has epoxy in it which will block the oxygen from getting to the metal of the car which is what creates rust in the first place find it now let's go under the car and remove the rust now before we begin cleaning up any rust the
[14:28] sheet metal to make sure the screwdriver won't go through if it goes through that means you need to do a rust repair because the rust is so bad that the metal is weak and don't worry if that happens
[14:40] i have a video on how to do that and I'll link that video so you can easily find it but in this case we're good to go so next what you want to do is grab a scraper and remove all the loose surface more aggressive and basically all you need to do is scrape every inch of the surface if there's
[14:57] any loose bubbling rust it needs to be removed and right here is the perfect example you can see how just by scraping this all this loose crumbly rust comes right off and that's what we want okay so once we finished scraping up all those loose chunks of rust now let's tape up any holes
[15:12] into the interior like this giant hole at the shifter so we're just going to grab some tape and cover the hole to seal it off because we don't want any rust or any paint getting into the cabin of the car good next we can get our wire wheel and we want to sand as much of the rust away as
[15:25] possible now this is where you're never going to get all the rust you'll get a lot of it you'll make it look a lot better but there will always be some rust there and that's okay because we're using a special rust encapsulating paint but you definitely want to try to get down to shiny bare
[15:37] metal as much as possible and I think you could see why I said you have to wear a respirator because look at how much dust there is good after you're done with the wire wheel next grab 180 grit sandpaper and we're going to scuff up all the metal that way the paint has a rough surface to
[15:50] mechanically adhere to now with a rough surface we could wipe it down with some acetone and we're basically trying to remove all the dust and any grease from being underneath the car because dust and grease will prevent the paint from sticking good and now it's finally time to paint and again
[16:04] to start at the bottom here and spray from side to side and work our way up and as you're doing this you want to overlap each spray about 50% to make sure there's full coverage and for this first coat
[16:17] coat we're going to put it on a little bit heavier to make sure we cover everything but for now just try to get into all the nooks and crannies try to spray at different angles and different directions that way you get the best coverage possible all right now this is looking pretty good and
[16:33] the instructions say to let this dry for an hour and an hour later we are back and ready to spray our second coat for this coat we want complete coverage so what I like to do is spray a light coat and once you finish that immediately go back over that same area again one more time and this
[16:48] different angles make sure you get into all the nooks and crannies and this is looking pretty good down here so let me finish this up and then the instructions on the can say "Let this dry for 24 hours." Now as we let that dry let's go and rebuild our shifter and the first thing we
[17:05] need to do is take a look over here cuz there is a lot of rust now you can see the shifter ball and socket is really rusty in here i mean this whole thing is just crumbling apart rust means material is lost and there's going to be extra play and that is what we're trying to avoid also this
[17:18] rod over here that the bushing goes through looks like it's bad so let's remove the bushing off the rod o that's not good okay hey and if you take a look this is really rusty and we're going to sand the rust off of this to make it smooth it's going to remove a significant amount of material
[17:36] and then when we install our new bushing there's going to be a lot more play in here and any play in here is going to transfer to play in the stick shift so that's not good you know what that means it's out with the old let's vacuum up all the loose rust and in with the new well almost new
[17:51] so I got this out of a junkyard Dell soul and it looks to be almost completely rust-free which is a huge difference so we're going to rebuild this instead look at the condition a lot better just need some new bushings i'll teach you how to make this a little bit tighter we'll install all those
[18:07] parts into our shifter and make it basically a brand new shifter so let's get started first let's remove the old rubber bushing from the end then unscrew this bolt that holds in the shifter to the linkage and now the linkage slides right off let's get these washers out of the way we don't
[18:21] need them anymore and next let's remove these two bolts here so break it loose and unscrew it the rest of the way by hand same for the other side and now we can remove this cover plate that we're going to reuse and finally the shifter is free to come right out like that and I guess this was
[18:36] from a female owned dell soole oh yeah and let's get this rubber boot off the top as well okay so this is the OEM Dell Soul shifter and right here is a plastic cage with a rubber boot now this plastic cage will wear out over time and it makes the shifter feel loose so we're definitely
[18:50] going to be installing a new one all right so our junkyard shifter assembly has been disassembled and this is much better than the one off my Dell Soul there is a little bit of rust right here but it's nothing we can't sand down and paint but just check out this difference this was the rust bucket
[19:03] that came out of my Del Soul and unfortunately it's just too far gone to make it work that's why there's junkyards one man's junk is another man's treasure let's go get this cleaned up get a little bit of paint on it install our new shift components and bushings and get it back in the car
[19:17] so we could go for a ride but first the other end of the shifter is actually in pretty decent shape and moves smoothly same with this joint right here these move smoothly which is great but there is room for improvement because I did notice there's a little play in this and if you
[19:29] take a look right there you'll notice all the play that's in here it's not a lot but it is amplified because of how long the shift linkages are so we're going to try to get rid of that play by hammering down on this we don't want to bind it up we still want to be smooth we just don't want
[19:43] it to have as much play now unfortunately these joints are riveted in see there's a rivet there and a rivet here you can drill them out and add a bolt and tighten them down but those bolts could loosen over time it's also a lot of work so let me show you a little trick with these so
[19:58] to place this rivet on that hard flat surface and we're going to hammer on the top rivet and that's going to squish this together it's going to close this gap just a little bit and you can see there's
[20:10] that little space around the edge of the rivet we want to tighten that up by hammering it down all right now that is much better and while it's not much the head of the rivet is mushroomed
[20:25] it's still smooth it's not binding up at all but we did remove most of that joint so it's still smooth and moves back and forth no problem but there is no side to side play
[20:51] beautiful so now with this nice and tight let's go rebuild our shifter and before installing the new parts let's make this look brand new so now the shift linkage looks brand new let's make it feel brand new so it's out with the old rusty parts and in with the brand new ones now when you're
[21:06] rebuilding a shifter no matter what car you have you want to use high quality parts because you're going to feel it especially when you're picking your actual stick shift this is very important while these all look the same online through the pictures there are big differences let me show you
[21:20] now these four aftermarket shifters all look the same and they're all made for my Honda but only one is actually good the rest are junk here's the OEM shifter we removed from the Dell Soul and the diameter of this ball is 35 mm now if we check the blue $15 shifter from one company it's 33 mm
[21:36] the black $15 shifter from another company also 33 mm the blue $25 shifter from yet another company 33 millimeters and finally the silver $100 shifter is 35 millimeters same as OEM and this is the only
[21:49] usable shifter from this entire group and the reason why this is a big problem is because the shifter sits in this plastic cage which acts like a socket in the shift linkage so any play in this you're going to feel now this is the OEM stick shift and you can see it's pretty tight now let's
[22:03] take a look at how loose it is on an aftermarket shifter and holy smokes look at that there is so much play it's only 2 mm but there is so much play and that's going to make it feel even worse than the stock shifter we removed then if we put this on the well-engineered stick shift you could see
[22:18] nice and tight you get what you pay for in this situation so now let me show you how to rebuild and install this shifter in your car and the first thing we need to do is install the plastic cage and rubber boot on the shifter so let's get this plastic cage in the boot and this is definitely a
[22:33] tight squeeze but it will fit so work it all the way in there good and it should look something like this when you're done now we want to add lubrication and make sure you use silicone grease if you use petroleum based grease it'll break down the plastic and rubber quicker over time and with
[22:46] that lubricated let's install it on the shifter and the trick here is to go from the bottom not from the top and now comes the tricky part cuz this is a really tight squeeze and what I find works well is using a mini pry bar and just work that in there and that'll help you hold one side
[22:59] of the boot as you use your fingers to stretch the other side good and now the boot and cage can slide over the ball of the shifter perfect now we're ready to install the shifter into the shift linkage then we can get that cover plate back on which holds the boot and cage in place
[23:15] and I'm using some nice new zinc coated hardware to hold this in then we can get a washer on the front add some medium strength thread locker and then handtighten the nut on there let's do the same exact thing to the other side as well then we can tighten down both of these passengers so
[23:28] they're snug and that's one and then that's the other good now we can install this poly bushing but first let's get some silicone grease on the metal that way this not only slides on smoothly but it doesn't squeak after you install it now the last thing to install is this rubber piece which
[23:42] slides over the shifter and sits on here but as you can see this rubber is really dry so a little trick I have to bring rubber parts back to life is using this protectant spray just spray it onto the rubber to make sure to coat the entire thing front and back then use a brush to work the chemicals
[23:55] into the rubber and after you let it soak for a few minutes you can wipe away any excess liquid and this will keep that rubber looking good and protected for a long time now we could install it onto the shifter so it snaps in place good next we could get the lower shift linkage onto
[24:09] the shifter and the new shifter comes with these two inserts that need to get installed and these prevent the bearing in the shifter from binding up so one goes on this side and the other goes on the other side and now the linkage could be installed onto the shifter then we could slide the bolt in
[24:23] get the washer on and tighten the nylon nut on by hand normally I would add thread locker but since this is a nylon locking nut you don't need to so tighten it down and snug it up all right and that is a completely rebuilt shifter and just so you can remember where we started from this
[24:39] is the original Dell Soul Loosey Goosey rusted to bits shifter and this is basically our brand new rebuilt shifter and we have one thing left we need to do before we could install this and that's replace this bushing now the stock rubber bushing is a one piece design our aftermarket poly
[24:54] bushing is a two-piece design so to remove the bushing first push out the center metal race and and the metal and carefully pry the bushing out and this should come out the rest of the way by
[25:07] hand good then we want to lubricate the inside with some silicone paste and now we can install the poly bushing one side at a time now these are really tight fitting so it's important that you get them squared up before pushing them in or it won't fit same thing for the bottom get it squared
[25:21] up and then push it in and finally you want to add a little silicone to the metal race and let's get that pushed in as well this is a really tight fit so it's going to take some force good so with our bushing installed we are completely done rebuilding the entire shifter linkage and shifter
[25:37] i cannot wait to go for a test drive in this car so let's go back under the car and reinstall it actually first let's go in the car and remove this tape and now we could go under the car and just check out how amazing this paint came out just so you could remember here's a before
[25:49] and after what a difference so let's get our shifter assembly back under the car and you want to be careful because everything is all freshly painted and it would be a shame if we nicked the paint so carefully work your shifter up into the trans tunnel perfect now we can get the bushing
[26:04] bracket installed and that just slides over the bushing next we have these old rusty bolts which I'm not reinstalling instead I'm going to replace it with some nice new hardware so get some medium strength thread locker on these that way all the vibrations down here won't loosen it up and now
[26:17] we need to line it up like so and then we could handtighten one side then get the other side lined up and handtighten that side and finally you want to torque these to spec which in this case is 16 ft-lbs perfect now the shifter is mounted securely to the car so let's head to the front of the car
[26:32] and mount the other side of the shift linkage to the transmission so let's get our freshly painted mount in place and I'm using new hardware with thread locker on these threads so tighten the bottom one down by hand and then get the top one tightened down as well then you want to just
[26:44] tighten them down with a ratchet that way they're both snug and torque them to spec which for this is 33 ft-lb next we want to add some silicone grease to the ears of the mount then we want to slide the poly bushing into the mount which is a lot easier said than done this is a really tight
[26:59] fit so I'm going to tap it with a hammer to get it in place and it's good that this is tight because it's going to make the shifter feel so much tighter now we can get thread locker on our bolt slide it into place and torque to spec which for this is also 33 ft-lb good next I'm going to add
[27:14] some silicone grease to the shift selector shaft that way it prevents any future rust then we can get the dust boot on here and this just hooks to the lip of the seal that we installed like that and now we can slide the shift linkage on here and you just want to make sure the holes are lined up
[27:27] like so and now technically you're supposed to replace this spring pin but this one's in good shape so I'm just going to reinstall it so drive it in with the same tools you use to remove it
[27:43] good and you want to make sure that it's flush with the surface like that now let's install the retaining clip and you can see there's a little notch in this clip that notch has to go into the spring pin hole so snap the retaining clip on the shaft and then spin it so the notch fits into the
[27:56] hole like that good and that's nice and secure and finally let's get the dust boot stretched over this so it's covered and we are done all right so we're finished under the car so let's head up into the cabin of the car and reinstall the interior first let's get the rubber boot
[28:11] installed on here that way the road noise and any fumes and hot air stay out of the car and that just snaps into place around the lip and then we have another boot which is even thicker for more insulation and that slides over the top like that so with that all done let's go and
[28:24] install our center console but before we do that you can see it is a mess in here so let's clean this up real quick and the trick to vacuuming is to use a brush to loosen up any dust and dirt and that gives you a better clean now we can grab some soapy water and spray the area down then we could
[28:38] use a brush to agitate that stubborn dirt and then finally wipe it all down with a microfiber towel so with that all cleaned up looking really good the last thing we need to do is replace this old crusty torn leather shift boot with a nice brand new OEM leather shift boot so to remove this shift
[28:54] boot just flip it over and there's two screws right here so grab a Phillips head screwdriver and unscrew and remove both of these screws so it's out with the old and in with the new ah
[29:07] you got to be kidding me here so unfortunately if you take a look these two are definitely not the same they're close but they're not the same so it doesn't fit even though online it said this would fit but what's new right anytime you're working on cars stuff like this happens you just got to be a
[29:20] little creative so I have an idea so that idea is to remove the new leather from the bracket and transplant it onto the old bracket and you can see the leather's hooked in by these little tabs so let's just unhook the leather from the tabs being careful not to tear it and with all
[29:34] the tabs unhooked the leather comes right off the bracket now let's do the same thing with the old bracket just unhook the old worn leather from the tabs and now it's out with the old torn crusty leather and in with the new and let's see if we could get this to fit and that actually looks
[29:49] pretty close we might be able to pull this one off so hook the leather around the tab and I'm going to crimp the tab down just to hold it in a little bit better good but now we have a problem the slits in the leather don't line up with the tabs so what I'm going to try to do here is slide
[30:01] the leather underneath the tab push it in like that then crimp down the tab that way it's going to hold the leather in place perfect and that's not going anywhere so let's work our way around the entire shift boot securing the leather to the bracket all right even though the brackets weren't
[30:15] the same we still made this work so now let's get our brand new shift boot installed into our center console and all we need to do now is just tighten down the two screws to hold it in place so with those two screwed in our boot is secured and check this out this looks so good i'm looking around the
[30:32] edge here i don't see any silver from the bracket so we did a perfect job making this fit now let's go get this installed and go for a ride i cannot wait so let's get the center console off to the side here that way I could connect the kill switch and the order of these wires doesn't matter just
[30:47] make sure each one is connected nice and tight so get these pushed completely together and then and now let's get this center console in place and you kind of want to just work it in there
[30:59] until it fits so get the shifter boot over the shifter good then we can install the back part of the center console as well and that kind of just fits into place now let's screw on our shift knob all the way and then finally I'm going to tighten that single screw on the
[31:14] side to hold it in i still need to replace the carpets in this car so this one screw will do for now so with everything installed now let's get this car back on the ground so we can go for a test drive so lift the car up and remove each of the jack stands now
[31:28] we can lower the car to the ground remove the wheel chock and let's get her off the ramps holy smokes what a difference a rebuilt shifter makes real quick just so you remember
[31:43] the difference this is before we rebuilt the shifter you can see how loose every gear is the shifter is sloppy and indirect and it's very easy to miss a gear and this right here is after we rebuilt the shifter so that's neutral that's first look at that look at how tight that is look
[32:00] at how crisp these shifts are it feels so good it's direct and it feels absolutely amazing i wish I did this sooner so now let's see the measured difference before and after so this
[32:12] was before with the original worn out shifter and we had 3 in or 8 cm of play and the shifter was very loose and this is the after with our rebuilt shifter we're in fourth gear and if we move this back and forth you can see we have less than an inch or 2 cm of play which is a
[32:28] huge difference and check out this awesome visual comparison in fourth gear i think this speaks for itself so there you go we're one step closer to turbocharging this car now our shifter is good to go that way we don't miss any shifts under boost which could be catastrophic and I hope this
[32:42] video was helpful if it was remember to give it a thumbs up if you're not a subscriber definitely hit that subscribe button to see more of the Project Dell Soul and as always all the tools and products I used in this video are linked down in the description so you can easily find
⚡ Saved you 0h 32m reading this? Transcribe any YouTube video for free — no signup needed.