
Why You NEED a Battery Kill Switch
60sOpens with a life-saving safety tip that applies to any driver, making it highly shareable.
▶ Play Clip"Delivers exactly what the title promises: a thorough, step-by-step installation guide with no fluff."
This video provides a comprehensive, step-by-step guide to installing a battery kill switch in a vehicle, covering everything from safety principles and wiring diagrams to crimping techniques and bracket fabrication. The presenter demonstrates the installation on a race car, emphasizing the importance of proper mounting for track inspection and the ability to kill the engine and electrical system instantly in an emergency.
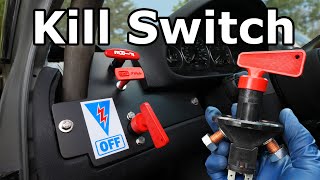
A battery kill switch isolates the alternator and battery, stopping all electrical flow and killing the engine instantly. It is crucial in accidents to prevent fuel pump operation and reduce fire risk.
Besides racing, a kill switch can solve parasitic battery drain if the cause cannot be found, and it acts as a theft deterrent by cutting all power.
For track inspection, the switch must be reachable from outside the car by a track worker. The presenter chooses a location near the driver's position, accessible even when strapped in.
Necessary tools include a drill, impact gun, angle grinder, and various crimpers (hydraulic, hand, hammer). Materials include 2-gauge wire, terminal connectors, heat shrink, and a switch with resistor.
First step is to disconnect the negative battery cable to isolate the battery. The kill switch must be on the positive side to also kill the alternator.
Drawing a wiring diagram before cutting wires is highly recommended to stay organized and avoid mistakes. The diagram shows interrupting the battery, alternator, and fuse box wires with the switch.
The switch has main poles for battery and alternator/fuse box wires, and additional poles for the ECU and a resistor to ground. When flipped, it cuts power to the ECU and dissipates alternator current through the resistor.
Wires are cut cleanly and new wires are run from the cut points to the switch location, typically behind the dash. Proper wire routing and protection are emphasized.
Three types of crimpers are demonstrated: hammer, hand, and hydraulic. Each has pros and cons, but all can produce good crimps if used correctly. Testing crimps by cutting them in half is recommended.
Always add heat shrink before crimping. Silicone paste is applied to prevent corrosion, and heat shrink is used to create a watertight seal.
The four main wires are run to the switch, with color coding (yellow tape) to identify battery vs. alternator/fuse box connections. The alternator cable is connected to the firewall, and a butt connector is used for the fuse box wire.
Zip tie mounts and wire sheathing are used to secure and protect wires, ensuring safety and a professional appearance.
The ECU (DME) wire is identified by testing which wire kills the engine when disconnected. This wire is then connected to the switch so flipping it interrupts the ECU power.
A ground wire is connected to the switch with an in-line resistor to safely dissipate alternator current when the switch is off.
A custom bracket is made from aluminum sheet using a jigsaw, template, and filing. The bracket is painted and installed to mount the switch and fire suppression switches.
After connecting the battery, the switch is tested by revving the engine above 3,000 RPM and flipping the switch, which kills the engine instantly. A sticker is added to indicate the switch.
Installing a battery kill switch is a detailed but manageable DIY project that enhances safety and security. Proper wiring, crimping, and mounting are essential for reliable operation, and the video provides thorough guidance to achieve a professional result.
What is the primary purpose of a battery kill switch?
To isolate the alternator and battery, stopping all electrical flow and killing the engine instantly.
00:02
Why must the kill switch be mounted on the positive side?
To also kill the alternator, as the rules for tech inspection require stopping power from the alternator.
04:29
What is the purpose of the resistor in the ground wire?
To safely dissipate alternator current when the switch is off, preventing damage to the alternator.
07:47
What are the three types of crimpers demonstrated?
Hammer crimper, hand crimper, and hydraulic crimper.
11:18
Why is it important to test a crimp by cutting it in half?
To ensure the copper strands are compressed into a solid piece with no air gaps, which ensures good conductivity.
14:27
What is the recommended way to strip thick battery cable without damaging copper strands?
Use a razor to cut through the insulation only, making a circular cut and then a perpendicular cut, then pull off the insulation.
12:10
Why must the kill switch be reachable from outside the car?
For tech inspection, a track worker must be able to reach the switch from outside in case of emergency.
01:45
What is the function of the jumper wire from the main post to the number one post?
It routes alternator current to the resistor and ground when the switch is off, preventing alternator damage.
07:47
What does the ECU wire do when connected to the switch?
It interrupts power to the ECU when the switch is flipped, killing the engine instantly.
26:11
What is the recommended drill bit size for the main switch hole?
7/8 inch, using a step drill bit.
35:22
Safety Purpose
Explains the critical safety function of a kill switch in preventing fires during accidents.
00:02Mounting Requirement
Highlights the specific rule for track inspection that dictates switch placement.
01:45Wiring Diagram
Emphasizes the importance of planning before cutting wires to avoid mistakes.
05:22Resistor Grounding
Explains a key technical detail to protect the alternator from damage.
07:47Crimp Testing
Shows a practical method to verify crimp quality by cutting it open.
14:27ECU Identification
Demonstrates a safe method to identify the correct wire by testing.
26:11[00:02] going to show you how to install a battery kill switch in your vehicle and this is very important so how this works is when you flip this switch it completely isolates the alternator and the battery so there's no electrical
[00:14] flow in the vehicle it also kills that engine instantly so if you get into an accident you have a fuel leak you have an electrical short you flip this switch already have a fire when you flip the switch it'll prevent that fuel pump from
[00:27] running that way it's not dumping fuel onto the are making it worse so as you I'm going to show you how to properly install it now I know not everybody has applications for a kill switch for example maybe when you go to start your
[00:40] car in the morning your battery is dead because something is drawing on the battery now I do have a video on how to find this parasitic draw and I'll link you should really be able to find that draw and fix it but for whatever reason
[00:52] if you can't find what's causing that draw on your battery a solution could be a kill switch all you have to do is shut the switch off and then now your battery you go back into the car to start it in the morning you put it back on and your
[01:05] should start right up and finally if your car doesn't have a theft deterrent device one way you could add one is with a kill switch so when you leave the car and now the car can't be started cuz there's no power now I do want you to
[01:19] remember anytime you shut the kill switch off you are taking battery power radio so you're going to reset all those things so just keep that in mind all kill switch let me show you how to install one and here are all the tools
[01:33] and products you're going to need as always I try to use common hand tools that way you could get the job done at home yourself no problem at all we're because we need to make a bracket we're
[01:45] our kill switch to mount to and this is actually very important let me show you where this has to be mounted so Tech inspection requires a track worker to be able to reach your kill switch from outside the car so it can't be anywhere
[01:58] over here somewhere so they could easily reach it in case of emergency so the actually perfect you can see we have a nice cutout right here that'll easily bracket this bracket right here is just a rough bracket I made real quick just
[02:14] good bracket the one we're going to fabricate in this video is going to fit in this area real nice that way it looks Factory race car and one last important thing about this location is our driver is able to reach this switch without
[02:28] completely strapped in and still kill the engine and electrical system so this we need to fabricate our own bracket to a couple of power tools and I do want to thank RI very much for sending me out
[02:41] some tools and supporting the video they actually saw a previous video of mine where I used their da polisher and they reached out and asked what tools I could use so here's what we need we need a drill we need an impact gun we need a
[02:54] has this adapter at the end for heat to show you that and then we need an angle grinder with a cut off wheel and that'll be able to cut the metal now I'm not here to try to sell you anything I
[03:07] like to use that's completely fine I just thought this was very fitting to use on my channel my channel is all about fixing your car at home yourself DIY this is very DIY friendly also this is very budget friendly and one thing
[03:19] that I really like all these tools use one single battery type this is an 18vt lithium battery and they all work on this so you don't have to go and buy a saves you a ton of money so those are the power tools that we need we're also
[03:32] have three different types we have a hydraulic crimpers we have a hand crimpers and we have a hammer crimpers you only need one of these but I have way whichever one you have you'll be able to get the job done and then
[03:46] have heat shrink we have terminal end connectors Buck connectors and then we have our thick two gauge heavy duty wiring and we have our switch and our which is very important that way we don't damage the alternator when we flip
[04:01] going to need I'll be sure to link it all in the description so you can easily find it let's get our safety glasses on and let's get started so first let's Pop the trunk and we need to disconnect the battery which in this car is located
[04:15] the negative side of the battery and this takes a 10 mm to loosen and then from the negative battery post so with our negative cable disconnected our battery is completely isolated and the funny thing is our kill switch isn't
[04:29] to be on the positive side because that's the rules to pass Tech inspection for our race and also because we need to kill the alternator we need to make sure we stop power from the alternator when we flip the switch off and that's on the
[04:41] we need to follow our positive wires we have two here we have one that comes up here and goes out to the front and then we have the other one which comes over here and again out to the front so let's go around and if you come to the rear
[04:55] passenger side you could see we have both of our wires right here coming along passenger side door sill right up there and then we keep moving forward and we have our red wire here and our other red wire here and that continues
[05:09] forward to the front passenger foot well right up here so this red wire right Powers the alternator and starter and then this red wire right here goes with all these wires to our fuse box under here we're going to have to end up
[05:22] need to make sure that we cut power to our fuse box and power from our alternator to completely kill the car okay so before we cut those wires anytime you do any wiring on your car I highly recommend drawing out a wiring
[05:36] keep you organized and it'll keep you from making any mistakes so real quick here's our wiring diagram the batter's in the trunk and the two wires run up now we need to interrupt these wires with a switch so we'll cut them right
[05:50] wires to the switch and then wires from the switch to the alternator Infuse box we're also going to have to shut off the computer of the car so we'll cut a wire and finally our switch has to be grounded through a resistor so we don't
[06:04] that in a second so now you understand how the car is going to be wired that's very important it's also very important to understand how the switch works and how you need to wire the switch so real quick here's a wiring diagram for our
[06:16] and screenshot it but since I have a real switch I want to show you how it works on this so I have a multimeter set up that when you touch these two leads together it beeps and that's letting you know that the circuit is closed and 's
[06:29] electricity flowing when you take it apart there's no more electrical flow so the two main poles on our switch we have our alternator and fuse box wires go to the other pole so let's get the battery
[06:42] fuse box wires on the other pole since our switch is off there is no electrical flow but once we turn the switch on you could hear clearly that we have electrical flow so if we need to stop our flow of electricity we just shut the
[06:55] switch off now unfortunately this doesn't stop the engine from running the alternator and that's enough to keep the electrical system on the engine running so our switch has extra poles you can see we have four extra poles at
[07:08] let's start with number two here so circuit number two could go either to so when you flip the switch it kills the engine so let's connect our car's computer wires to the number two poles on the switch so when we turn our switch
[07:22] on there is a connection to the computer there's electrical flow so with the everything you flip the switch and now there there's no electrical flow so the engine will die within a second or two now since it takes a second or two for
[07:34] and the alternator is still pumping out a little bit of electricity but since we need that electricity to go somewhere otherwise the alternator will get our number one posts we're going to have a jumper wire going from the alternator
[07:47] post down to the number one post so when we flip the switch off the current will go into our number one post on the other side and through our resistor to ground let's connect our jumper wire from the main post to number one post and then
[08:02] main post and then let's get our resistor to ground on our other number one post so now our switch is on so the electricity is going from the alternator switch it's going to go down here to our jumper wire to our resistor and to
[08:16] watch this so it takes a couple seconds for is dissipated so it's very important that how the switch works now you know how we're wiring the car let's go cut some
[08:31] wires so if we take a look at our wires over here we have to decide where we're here we could cut it here we could cut it more towards the front now my fire over here so I'm not going to cut over here I think it' be a lot easier to cut
[08:44] the wires over near the front and then we can run our wires up behind the dash to our switch and from our switch down back over here now when cutting your wires it's very important we have a nice clean straight cut we don't want to use
[08:57] have to hack at at the wire and it won't cut straight so get a nice large Cutters and again it's very important that we cut these nice and straight so there's one straight cut and there's our other straight cut so with our wires
[09:13] disconnected now what we need to do is we need to run new wire from our two wires here to our switch so let's get the wire and run it up into the center all the way through and then we could run it up behind the dash where the
[09:26] climate control and radio would be just like that and you can see already it let's get the steering wheel out of the way to make some room now we can pull unscrewed from when the roll cage was installed and take a look at all the
[09:38] room back here to run our wires this is perfect so let's run this wire behind the gauge cluster like that and then let's put the gauges back and there you go our wire is run to where the switch is going to be mounted all right that
[09:50] wire sticking out here where our switch is going to be that's fine i' rather have a little bit extra than not enough and then if we push our gauges all the way back that fits in perfect without touching the wire which is good we are
[10:02] sheath that way we don't have to worry about anything cutting into it and shorting out behind the dash and then our wire runs down the center console and out to the side right over here now here's how much wire we have left
[10:15] is fine we want a little bit of wiggle room we could always trim this later over here and there's plenty of wire to get back here even to the firewall and at the firewall let me show you how this wire connects by removing this plastic
[10:28] connected to this post and I'm thinking we could just remove this and run our wire directly to this spot on the firewall all right so let's remove the wire that we just ran because this is the perfect length and we could use this
[10:40] wire to cut our other three wires to the correct length as well okay so let's spread this wire all the way out and then we have our bundle of new wire so let's grab the end of The Wire that we just ran and the end of the bundled wire
[10:52] and spread out this bundled wire so it's the same exact length now this doesn't later but we want to get somewhat close so we aren't wasting too much wire okay so let's cut this wire to length beautiful and now we have two of the
[11:05] same length wires and with some editing magic now all four of our wires are cut to length so now we need to connect these wires to our switch two are going that means we have four terminal and connectors that need to be crimped on so
[11:18] three different crimpers here that I'm going to show you how to use a hammer crimper a hand crimper and a hydraulic crimper they all work but they have some pros and cons of each but whatever you have I'll make sure you guys know
[11:31] how to properly crimp it and get a great crimp now no matter which crimper you use you need to make sure that you splice the end of your wire properly and show you real quick now when picking out the proper crimp you can see on the
[11:44] crimp there are two numbers 2x 3/8 so the two is which gauge wire fits in your gauge wire so we pick a two gauge terminal end connector and the 38 is the
[11:56] that this fits on so if we look look here that fits perfectly on this 3/8 stud so we have the correct terminal and connector once you find the correct of our wire now remember I said it's very important for this to be straight
[12:10] do not cut your wire at an angle you'll see why in a second now how I like to splice thick battery cable like this is with a razor now when splicing your wire it's very important you just cut through the outside insulation do not cut into
[12:22] copper strands that's not good so what I like to do is I like to get my terminal end connector and I like to match it up like that and we have a really sharp razor and we just stick it straight into the insulation do not saw so now we know
[12:35] saw back and forth cuz that'll cut into the copper and you'll lose some strands down then you can work your way all the way around pushing downwards making a complete circle around that wire and then finally make a cut perpendicular to
[12:49] that again just pushing straight down and now the instulation comes right off copper strands at all now the reason why I emphasis not losing any of these breaking them off is because think of each one of these strands as a water
[13:03] water if you cut a bunch of hoses off you're going to have less flow of water copper there is the less of these strands the less flow of electricity lose any strands all right now before we add our terminal and connector I always
[13:17] forget to do this so I want you guys to remember always add your heat shrink now this is very important because once the terminal end connector on there our heat won't fit so add your heat shrink and and push it all the way down the wire
[13:31] connector and when adding the connector it's important we get all the strands get any outside the connector like that that's not good so what I like to do is twist and pinch the wires at the end and that keeps them nice and tight and then
[13:45] just twist and push it on and you want the connector to push all the way to the wire insulation like that and now the wire is ready to be crimped okay so let just get the middle of the connector into the crimper like so and then you
[13:59] want to grab a hammer I'm using a 4lb hammer and Hammer the top of the crimper and hear the difference so that's three hits and it's bottomed out completely which means it's fully crimped so let's check it out and
[14:13] properly use a hammer crimp but now how do you test this crimp to make sure it's should feel solid and this is not budging anywhere but how do we know inside this crimp is solid there's good conductivity well there's a reason why I
[14:27] crimps and that's because you want to cut this in half and look inside now to give you an idea of what a good crimp looks like here's a factory OEM crimped battery cable from a BMW and if you cut it in half you can see this is
[14:40] completely solid inside there are no individual strands of copper visible they're all compressed into one solid piece of copper and there's no air gaps conduct electricity well and then for an
[14:52] could see the difference right away you could actually see the individual strands of copper and there's air gaps so this is a bad crimp and this won't conduct electricity well so now let's see how the hammer crimp turned out and
[15:04] right down the middle and look at both sides of the cut all right so with our terminal end that was Hammer crimped together you can see we have absolutely no individual strands that is one piece and that looks absolutely perfect so
[15:18] get a perfect crimp and this is probably the least expensive crimper you could get for thick cable now the downside is you need to have a solid foundation to hammer on cuz you really need to hit this real hard also you need to swing a
[15:30] hammer so if you need to do this inside the car or on a soft surface you won't is our hand crimpers this is a little crimper but cheaper than our hydraulic crimper and it gets the job done let me
[15:43] what does the crimping and you can see there's dyes here so you're actually able to switch the dyes which I thought was really nice just a press of a button like that you flip them over and they lock in place and you can go from eight
[15:55] gauge all the way down to zero gauge now a downside to the hand crimpers is the crimp in a small area so we could actually probably crimp right there and then crimp again right there so let's start near the base now when crimping
[16:08] crimpers and squeeze but that's a little pop out like that by accident now what I like to do is I like to brace the tool wherever you're working with one hand you could grab this with the other hand
[16:22] you could grab onto the wire and hold it in place as you crimp so squeeze the crimper closed good and you can see we just crimped up here so let's slide it down a little and repeat so squeeze one more time and look at that we got both
[16:34] big area that's been crimped and compressed and that looks perfect now how we did so here's our crimp and here's what it looks like inside and you all the way through so this is a good crimp and finally we have our hydraulic
[16:51] amazing but they are the most expensive of the three so if you don't need to use use it for like one or two projects it might not be worth it but you get perfect crimps every single time so let me show you how it works now this
[17:04] crimper will crimp from 12 gauge wire all the way up to two gauge wire and for our two gauge wire here's the crimps that we're going to need so each of and you want to line up your connector
[17:16] how wide this crimp die is and this is going to give us a bigger crimp which is just like you would a Jack and the hydraulic power will crimp the connector the crimp and that's looking pretty good but let's make sure so you know the
[17:31] drill by now let's cut the crimp in half and let's check it out okay so this is horrible but you can see there's still strands of copper which means we need to use a smaller die so let's try this again this time using a Dy that's one
[17:43] connector and then let's saw this in is much better you can see it's one solid piece of copper compare that to you can see why it's always good to do at least one crimp test when crimping
[17:57] know how to use all three different isn't going to work in our car because we can't Hammer against the floorboard feel like most of you are going to end up using this which is what I'm going to
[18:10] use to do this entire job so now we know how to properly crimp let's crimp four of these terminal ends one on each end of the wire all right so remember line insulation to mark it then cut all the way around the wire like so and then cut
[18:24] along the wire to easily remove the insulation without damaging the copper the strands and then add the connector to the end of The Wire pushing it all the way on and finally make your first crimp good followed by a second crimp
[18:38] good all right so all four wires are crimped perfectly and now you guys know different tools now you always want to look over your crimps because you can from the crimping process which isn't good so to remove these burs just get a
[18:52] file and file them smooth the birds need to be removed so the heat shrink doesn't copper and that's much much better okay great now all these are nice and smooth little trick I like to use is to grab some silicone paste and add it to where
[19:06] this prevents moisture from getting in and causing corrosion now is it Overkill to do this maybe but you guys know I like to do everything to Perfection and heat shrink so it covers the connector like that and we want to do this for all
[19:20] wait to show you how this works this is one of my favorite tools so let's connect the battery to the heat gun and we have an adapter here that goes right over the end for our heat shrink now watch this just put the heat shrink in
[19:32] here pull the trigger and this works so well to heat the entire heat shrink we run it through and watch that heat shrink shrink down and push out any excess silicone to make a watertight seal and again do this for all four
[19:45] wires so with that done now all we need to do is add some sheathing to our wires to do this you slip the split tubing over the end of the wire and push it down the entire wire this is a very tedious and hand cramping job but do I
[19:59] you want to grab a wrench like this and you want to slide that closed end of the wrench into the sheathing and run the wrench all the way down the length of better when the wire is thinner or the sheathing is thicker but even in this
[20:14] done so you can see how much quicker this is and how much easier it is on your hands so hopefully this little trick helps all right so our wires are heat shrinked and they're protected so let's go install them in the car
[20:29] okay so before we go and install our cables we have a very important step we these are just red at the end these are going to our battery I put a little bit of yellow tape on the ends of these cables that way I know where these are
[20:42] going otherwise I'll have no clue because it's going to be hidden behind have to use a Multimeter it just wouldn't be fun so mark it now and save some time for later okay so time to run all four of these wires up to the switch
[20:56] up through the console and it's tight up a time to the top of the console and then we can get those other two wires up here as well and then we can pop the gauge cluster out and run the wires
[21:08] lot of room back here because there's four of these two gauge wires which ends up using a lot of space and let's push the gauges in see if they still fit and the wires to where the switch is going to be and so you guys remember we have
[21:23] switch and the alternator and fuse box on that side of the switch along with a jumper wire that we have to install so let's get the alternator INF fuse box them with yellow tape just makes it that much easier to identify them then we can
[21:35] get our jumper wire on here and finally we need to get the split washer on and start threading on the nut but only hand tighten it for now we'll tighten it all the way later on the other post get both of our battery wires on here then we
[21:47] then hand tighten the nut to hold it all in place good and let's get it into position like so and we will make a bracket so this switch fits nicely in this up because that's the priority the bracket's the last thing we're going to
[22:01] do and this is the perfect example of why marking the cables was important you can see here's our alternator and fuse box cable and here are our battery start up here by removing the old alternator cable so let's remove this
[22:15] nut and the cable comes right off so now let's get the terminal end crimped onto our cable here and I'm changing it up using a hydraulic crimper to speed up crimp which makes this easier then add some silicone heat shrink the con
[22:28] connector on and push the sheathing back onto the wire all the way at the end and the sheathing in place at the end of that wire now let's connect our new wire to the firewall hand tighten that nut on there and then tighten it the rest of
[22:41] connection and finally put the plastic cover back on all right so with the fuse box wire done now for this we're using a butt connector to connect the two wires together end to end so just push the connector onto the end of The
[22:56] connector and then crimp down on that wire good and now that half the butt about your heat shrink cuz if you don't add it now there's no way to put it on connector over the wire and crimp down nice and tight to make a solid
[23:11] silicone paste and use a heat gun to shrink the heat shrink just like that and that's how you connect two wires with a butt connector okay now the fuse let's finish up with these two battery wires so crimp down on the butt
[23:24] connector on one end then slide it over the other wire we want to connect to and crimp that down as well add your Silicone paste and then heat the heat then the last thing to do is get a little bit of plastic sheathing onto the
[23:36] protection and with that done let's move on to our last wire and I think you get it by now crimp the one end on connect the other wire and crimp that end on as connection then you add the silicone paste heat up that heat shrink to
[23:50] insulate the connector and finally add that plastic sheathing for Extra Protection and just like that we are done with our main wires they are all crimp they look good to go and well they don't look that great they look like
[24:02] organized for both safety so we pass Tech and we don't have these things flying around as we're racing and also for Aesthetics we want to look good too make these zip timee mounts that stick on with double SED tape and this will
[24:15] everything we've done so far to crimp and wire this car has been done to an above and beyond standard in order to finish this job properly it's important to have a good wire management that not only looks good but keeps the wires in
[24:28] wires don't get damaged so let's route this wire along the floor then clean the painted surface with some alcohol so the double-sided tape sticks then we can remove the backing on the tape and press that zip tie Mount firmly in place now
[24:41] run the zip tie through the mount put the wire over the zip tie and zip tie that wire in place like so and don't forget to clip the end of the zip tie like that then let's repeat this process one more time right here and get that
[24:53] cable zip tied in place beautiful so our alternator wire is neat and secured now let's get get these wires neat and secured and to do that I have this really large 1- inin wire sheath so let's tuck that first Cable in here good
[25:05] here and it's going to be a tight fit but we can make it work with a little finessing good now to hold this in place I have a zip tie that pushes into the Christmas tree panel clips that hold the plastic panels in your car and just to
[25:19] ties are awesome they push right into the hole that's already in the metal and it secures it right to that piece of metal in the car and don't forget to trim the end of the zip tie and the other zip tie as well all right and
[25:32] check it out that's not going anywhere that looks so good and all our wires are now secured now we just need to clean up the wires up here cuz this is a mess and also our wires back here so with a little bit of editing magic check it out
[25:44] and one more time beautiful all right and what a huge difference a little bit of wire management makes Not only does it look absolutely amazing nice and organized but it's all protected that way in case of an accident none of the
[25:58] wires will be exposed they can't short and we are good to go that is a professional job right there look at that I love it okay so now you know how to crimp we got the main wires done next up we got to get our ECU wires wired to
[26:11] the switch all right so we just finished wiring in our four main wires to our switch now we have to do the ECU and the ground and now the ECU is the car's computer it's also known as the DME in a BMW and it's located right over here
[26:25] underneath this plastic cover so let's remove the cover and one of these wires has to get cut but which one so to figure that out I printed out a diagram of our relay box you can see number one is our main
[26:38] computer number four is our computer main relay that relay provides power to the computer so if we cut out that relay it can't provide Power and our car will shut off instantly and when you compare to the diagram you can see our computer
[26:51] is right back here and our main relay is this blue one right here and unfortunately this won't come out unless if we we take the wires off the computer computer and don't worry these wires only fit in one position so you can't
[27:04] mix these up now with the ECU wires out of the way we can pull this bracket out and get access to the wires below the blue relay so if we take a look at our thick wires these are the power wires there's a lot of current going through
[27:17] wire right here this is a trigger wire there's not a lot of current going goes through and that triggers the relay to turn on and power the ECU with these wires so this is the wire we want to cut and just to make sure before we go and
[27:30] disconnect this and see if the engine shuts off now in order to get the car to start we need to reconnect our battery but before we even do that we need to reconnect our ECU so here's the ECU and let's plug all these connectors back in
[27:44] back here okay so everything is reconnected now we can connect the battery real quick because we don't have switch is exposed we just want to make sure it's dangling there and not rubbing
[27:56] up against any metal so that is just dangling there it's not touching any metal so now let's go to the back of the car and reconnect our battery and I'm tighten it down because it's coming right off after this test okay in the
[28:09] car let's go start her [Music] up so with the engine running let's pull this wire out and make sure it's the correct one beautiful and that kills the engine
[28:21] battery again so we're not working on a hot car and then let's reconnect the wire to the relay and until you hear a nice solid click good and now we can cut our wire and strip each end of it and with the wire cut now what we want to do
[28:35] is run each end of the wire to the switch so when the switch is on there's will run and when we shut the switch it interrupts that connection basically like cutting it and the engine dies instantly so let's add a butt connector
[28:48] to the wire we just cut and crimp that on there nice and tight and always do good next we could add a length of wire that'll reach our switch so let's crimp this on as well and then heat shrink it down for a corrosion free connection and
[29:01] the other side of the cut wire crimp it down get another length of wire that goes to the switch and crimp that down as well and with these crimp heat shrink the butt connector and let's tape this to the surrounding wires so there's no
[29:14] pressure on our newly crimp wires and it stays in place now let's disconnect the ECU so we can get it out of our way and then grab our two wires and run them down here through this hole back here and this goes right into the car let me
[29:26] show you okay so if we come right down here by the pedals you can see the wires way through so that they can reach the switch and now we need a crimp on female blade connectors to the end of both of our wires like so and then heat shrink
[29:40] wire gets connected to which spot just make sure they're both securely pushed connect the jumper wire to the number one pole and that leaves one last Pole it's very important that we protect the wires so they don't chafe and rub up
[29:56] car and kill the engine so you know the drill by now slide on a piece of plastic wire loom like this so the wires are completely protected all right so with this last spot right here so all we need to do is connect a wire like this to a
[30:10] to make sure that we add the included resistor in line so let me show you how Okay so let's cut the ground wire so we can add the resistor in line then strip both ends of the wire slot a butt
[30:22] connector over the resistor and crimp down now crimp the wire onto the resistor good and crimp the other wire onto the other side of the resistor good now heat shrink down both connectors and let's add heat shrink over the resistor
[30:36] so slide one piece of heat shrink over the resistor and shrink it down then slide the other heat shrink over the other end and Shrink that down that way finally get some plastic sheathing over
[30:48] the wires and tape up the resistor so it doesn't come out of the sheathing good now let's get this installed so one end we need to connect to our switch and now we have to find a ground to connect to and I like this bolt right here it goes
[31:00] into the chassis it's on this big piece of metal and it's bare metal so let's remove the bolt then get the ring terminal on the bolt and tighten that bolt back down by hand and then snug it up the rest of the
[31:12] way so it makes a good electrical contact so with our ground bolted in all bracket for our switch we'll do that in a second but first real quick we need to come over here and reinstall all of this so let's secure the relays back down in
[31:26] install the computer and now we have to attach all the wires and each set of wires has a specific plug shape so it only plugs into one spot on the ECU so push the wires all the way down so they snap in place and then we can get the
[31:40] lid back on and snug up the screw holding it in good and with our ECU all sealed up we've officially wired in our kill switch now before we go and test panel for this to mount to so it's not just dangling here so let me show you
[31:55] all the tools you're going to need now originally I was going to use a cut off wheel on an angle grinder to cut our aluminum sheet but I think it's going to went out and got a jigsaw with a metal cutting bit that way we could cut into
[32:09] our 8 in aluminum sheet no problem now I like to use either carboard or in this case card stock to make a template before we cut into our sheet metal so because it's thick enough but it's thinner than cardboard so it's flexible
[32:23] and makes it easy to trace shapes on so now let's cut this out and just like template over the metal we're using for the bracket and Trace out the entire template with a thick marker that way we could easily see where we need to cut
[32:37] can see it's on the slowest setting and for aluminum it's better to increase the speed a little bit so it keeps the teeth from clogging up with metal and now we're ready to cut and I think you're going to quickly
[32:50] realize why I went with a jigsaw here instead of a cutof wheel this tool is so easy to use and cuts right through the metal like a hot knife through butter also the cuts are much quicker and more accurate and much cleaner so cut along
[33:02] the black line we just traced out and let's start shaving this piece down to
[33:17] bracket cut out so let's see how it fits in the car okay moment of truth let's test fit our panel and wow that's actually pretty good we do have to trim cor we have to round this corner right here and this corner and that corner
[33:31] to go round these Corners so to get rid of these sharp corners and make it fit so there's no exact signs to this just file down the corner and keep that file moving so you don't remove too much material in one spot perfect so repeat
[33:46] get them nice and rounded so they fit in the dash better all right let's test fit Corners okay so now that these Corners fit very nicely let me show you how to smooth and round these edges that way this fits and looks even better so grab
[34:02] 180 grit sandpaper and curl it around the edge you want around and just move it back and forth like this and after a little bit of sanding check it out a nice rounded Edge so repeat this process in all the edges of the bracket that way
[34:15] you get a way more finished and professional look so with all our edges rounded and smooth let's go give this another test fit and see how we did here especially for a race car now let's drill our holes for for our switch we'll
[34:28] suppression system and then we'll need some holes to mount the bracket to the dash here you can see we have two good mounting points these bolt holes right so get your template in place and to figure out where the holes are all you
[34:40] need to do is press your template hard against the holes and if you use the make a pretty distinct outline of the hole like that so do the other side as well and let's drill out these holes okay so take the template and place it
[34:54] punch to Mark where we need a drill and then we could drill out both the holes and that's one hole and then we could drill out the other hole good so with both holes drilled let's go test fit this in the car and
[35:09] let's thread in a bolt on this side good and let's try threading in the other side as well good so both sides threaded in straight and now our bracket is secured in place all right so now let's unscrew this and get it out of the way
[35:22] cut the switch holes out so the main hole is a 7/8 inch hole but we need to that mount the switch to the bracket so let's get this on here and then use the back of a screwdriver to make indents in our card stock and that's where the
[35:36] back in and then tape up both sides of be good now let's go and cut the holes so first center punch the main hole for the switch and since we need to drill a large 7/8 in hole let's use a step drill
[35:50] bit and a helpful trick to know when to stop drilling is to Mark the bit with a bright color like this green right on the 7/8 in step so once this color disappears you know you're done drilling so get the bit centered on that center
[36:02] bit you want to apply firm pressure downwards until you get a hole after you lighter pressure and let the drill do scraping off as we drill and it's messing up the template so before we
[36:16] destroy it let's mark our two smaller holes with our center punch and now we let's finish drilling our main hole and watch how easy it is to tell when to stop drilling boom no more green so we are done and finally drill out the two
[36:30] smaller holes for the bolts to hold the switch in good all right now let's make in place and beautiful so our switch bolts a big space up here for whatever you need more switches in this case I'm
[36:46] suppression system pull switches and if you're wondering what they look like set off the fire suppression system in case of a fire so let's drill out those holes now these holes have to be a/ an inch
[36:59] wide and that's one and then let's put the second one slightly below that that way it's out of the way of our kill switch good and there you go that is what it looks like with the switches in place that looks so good so now let's
[37:11] sand this down and paint it so use some 320 grit sandpaper and you want to sand down all the scratches and gouges out of the surface anything you see now will sand this nice and smooth then get some 90% alcohol and wipe off all the dust
[37:25] to paint after letting this dry for 10 minutes let's paint now the paint I'm using Bond straight to metal with no primer needed then after a few minutes spray
[37:38] one more coat the same exact way for a total of two overnight and a day later check it out this came out awesome so let's get this installed first let's get the mounting bolts in and I'm screwing this in slowly
[37:53] can get the other mounting bolt in as well good now we can get the kill switch in place and then push both bolts into the switch to hold it in and the nuts I'm using have a lock washer built in which makes this quick and easy so just
[38:07] then tighten it down the rest of the way until it's snug same for the top one since this is plastic make sure you don't overtighten it cuz you could crack suppression switches in so carefully feed the switch all the way in and then
[38:23] pull switch and do the same thing with the other fire suppression switch feed it all the way in just like that and then hand tighten the nut on the back wrench so it won't budge and do the same for the bottom one as well now the last
[38:38] nuts on the back of the switch all the way so they make good electrical contact and won't come loose I waited to the end to do this so the cables could move are thick and stiff it makes it a lot easier to move the switch around when
[38:52] you're trying to install it and now one last thing I added these silicone post they go over the two positive posts like that and this will prevent anything which would short it out and could cause Sparks okay and the last thing to do is
[39:06] to get the negative terminal back on the battery and tighten it down so it's snug and now our battery is hot all right so with our battery connected moment of truth let's go and test out our new kill switch all right
[39:20] test out our new kill switch all right let's try it out let's turn the switch let's try it out let's turn the switch on and we have power okay close in let's try starting her up okay she's alive that's a good thing
[39:34] few minutes and she's running perfectly also when you rev it up she has plenty also when you rev it up she has plenty of Tech inspection and get on the track we need to be able to rev our engine over
[39:47] the tech inspector is going to flick the switch off and make sure the engine dies quickly so let's give it a try let's get our RPMs above 3,000 RPMs hold it
[39:59] talking about we had the engine above 3,000 RPMs we flipped the switch and it killed everything instantly and we have no power at all so now we know we properly installed our kill switch and one last thing to do is to
[40:13] put our kill switch sticker on here so the track workers know this is a switch officially finished installing our battery cut off switch so our mounting bracket came out awesome our fire suppression switches came out great and
[40:26] most importantly our battery cut off switch works perfectly so that's install a kill switch hopefully this video was helpful if it was remember to subscriber consider hitting that subscribe button we got some more videos
[40:39] and products I used in this video will be linked down in the description so you be linked down in the description so you can easily find them
⚡ Saved you 0h 40m reading this? Transcribe any YouTube video for free — no signup needed.