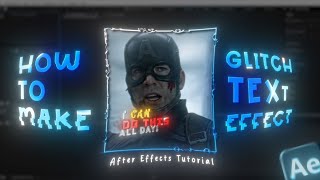

Mask Text for Glitch Effect
41sShows a unique masking technique that makes glitch text look professional.
▶ Play Clip"Delivers a clear, concise tutorial matching the title; no fluff."
This tutorial demonstrates how to create a trending glitch text animation in Adobe After Effects, covering steps from setting up text layers to applying glitch effects and 3D positioning.
The tutorial shows how to create a glitch text animation, starting with getting clips ready and typing text.
Adjust text size and values, or copy the presenter's values.
Duplicate the text layer for multiple lines and align them with dialogue.
Use the masking tool to draw a white mask, cut it, and delete extra parts of the text for each layer.
Precompose layers, create an adjustment layer, and set glitch intensity between 15-20.
Add effects like texture flux and change text color for more visual interest.
Enable 3D for the text composition and adjust position to finalize the animation.
By following these steps, you can create a glitch text animation in After Effects with custom effects and 3D positioning.
What is the recommended range for glitch intensity in this tutorial?
Between 15 to 20.
02:34
What tool is used to cut and remove extra parts of text layers?
The masking tool.
01:28
What must be enabled to adjust the text composition's position in 3D?
Enable 3D for the text composition.
03:20
What is the first step after typing text?
Adjust the size and values according to preference or copy the presenter's values.
00:17
Masking for Clean Text
Teaches a precise masking technique to isolate text for the glitch effect.
01:28Glitch Intensity Setting
Provides a specific numerical range for a balanced glitch effect.
02:343D Position Adjustment
Demonstrates how to enhance the animation with depth using 3D layers.
03:20[00:02] animation? >> I could do this all day. I could do this all day. >> In this tutorial, I will show you how to create this in After Effects. First, get your clips ready.
[00:17] Now, type your text and adjust the size according to your liking.
[00:31] want and adjust the values however you like. Or, you can simply copy my values.
[00:49] Now, duplicate the text layer and add all your text.
[01:06] And align everything according to the dialogue.
[01:28] the text look even cooler. Set the resolution to full. Select the masking tool and draw a white mask just like I do.
[01:44] Cut the mask and delete the extra parts of the text. Follow the same process for all your text layers.
[02:09] layers. Then precompose that layer again. Open the precomp and create an adjustment layer.
[02:34] Set the glitch intensity between 15 to 20.
[02:50] started to glitch. You can also add different effects and colors to your text. For example, I will add a texture flux For example, I will add a texture flux effect.
[03:07] And I will change the color of this text.
[03:20] Go back and enable 3D for the text composition. And adjust its position wherever you want.
[03:34] And that's it. Your trending text glitch animation is Let me know in the comments what tutorial you want next and thanks for tutorial you want next and thanks for watching.

⚡ Saved you 0h 03m reading this? Transcribe any YouTube video for free — no signup needed.