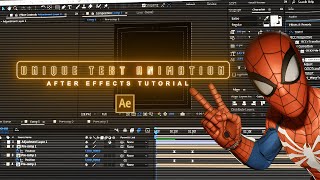

Scale & Fade Text Animation Trick
60sTeaches a core text animation technique with clear steps, appealing to beginners and intermediate editors.
▶ Play Clip"Delivers exactly what the title promises — a solid tutorial on unique text animations with actionable steps."
This video is an After Effects tutorial that demonstrates how to create unique text animations using various techniques such as animators, range selectors, expressions, and effects. The tutorial covers multiple animation styles, including scaling, position, opacity, tracking, and character offset, with detailed steps for each.
Expand the text layer, click animate, select scale, add position and opacity properties. Change Y-axis position to text size, set scale and opacity to zero.
Create keyframes for offset: start at -100%, move forward 1 second, set to 100%. Adjust advanced settings: shape to ramp up, ease high and low to 50%.
Duplicate animator 1 with Ctrl+D. Set scale to 150, position to negative half of font size. Move position offset keyframes 10 frames ahead for smooth animation.
Enable motion blur for smoother animation.
Set tracking amount to negative value of text size. Add opacity property and set to zero. Create keyframes for start at 0% and 100% 1 second later. Apply easy ease and adjust speed graph.
Expand text layer, click animate, select tracking, add position and opacity. Set Y position to half of text size, opacity to zero. Create start keyframes at 0% and 100% 30 frames later. Easy ease and speed graph.
Create black solid layer, pre-compose text and solid. Create mask covering half of text. Duplicate layer and invert mask.
Ensure new text layer is at bottom of stack. Repeat steps. Reveal keyframes, apply easy ease and speed graph.
Create adjustment layer, apply transform effect. Change rotation to approximately 8.
Create null object, link all layers to it. Adjust scale with easy ease and speed graph.
Change wave width to 500. Use expression with alt+click on stopwatch. Enable motion blur.
Apply turbulent displace effect, size 10, mode turbulent smoother. Use expression for random seed. Enable motion blur.
Set opacity to zero, create start keyframes at 0% and 100% 1 second later. Enable randomize order in advanced options. Create keyframes for random seed with value 25.
Duplicate text layer, change color to outline only. Adjust random seed keyframes to 50 for desired effect.
Add character offset animator, create keyframes at 15 and 0 30 frames later. Adjust scale.
Create white solid layer, apply turbulent noise with expression. Apply mosaic with vertical blocks 50, enable sharp colors. Set frame rate to 8.
The tutorial provides a comprehensive set of techniques for creating unique text animations in After Effects, emphasizing keyframe adjustments, expressions, and effects. By following these steps, viewers can achieve professional-looking animations with smooth motion.
What is the first step to create a text animation in After Effects?
Expand the text layer, click animate, select scale, add position and opacity properties.
00:14
How do you set up the range selector for a text animation?
Create keyframes for offset: start at -100%, move forward 1 second, set to 100%. Adjust shape to ramp up and ease high/low to 50%.
00:30
What is the shortcut to duplicate an animator in After Effects?
Press Ctrl+D.
00:44
How do you create a tracking animation?
Set tracking amount to negative value of text size, add opacity property and set to zero, create keyframes for start at 0% and 100% 1 second later.
01:36
What is the purpose of pre-composing text and a black solid layer?
To create a mask layer that covers exactly half of the text.
03:13
How do you create a zoom effect?
Create a null object, link all layers to it, and adjust the scale.
05:58
What is the wave width setting for the wave animation?
500.
07:00
What is the mode for turbulent displace effect?
Turbulent smoother.
07:33
How do you enable randomize order in the range selector?
Go to advanced options, expand it, and turn on randomize order.
08:28
What is the character offset value at the first keyframe?
15.
09:42
What frame rate is set for the posterized time effect?
8.
10:53
Basic Animator Setup
Provides the foundational steps for creating text animations, essential for beginners.
00:14Tracking Animation
Demonstrates a specific animation style that adds visual interest to text.
01:36Masking and Pre-composition
Shows how to use masks to create split-screen effects, a versatile technique.
03:13Zoom Effect with Null Object
Illustrates how to link layers to a null object for coordinated animations.
05:58Randomize Order
Adds organic variation to animations, making them less predictable.
08:28[00:14] Expand the text and click on the animate button. Select scale. Then click on add property position and then opacity. Change the position Y-axis value to the size of the text. Set scale and opacity to zero. Now expand the
[00:30] range selector. Create a key frame for offset and set it to negative 100%. Move forward approximately 1 second and create another key frame at 100%. Now go to advanced and change the shape to ramp up. Also change ease high to 50%
[00:44] and ease low to 50%. Now duplicate animator 1 by pressingtrl Now duplicate animator 1 by pressingtrl + d.
[00:56] the scale to 150. Set the position to negative half of the font size. [Music] Also move the position offset key frame approximately 10 frames ahead to get a smooth animation.
[01:18] Enable motion blur for even smoother animation.
[01:36] Set the tracking amount to approximately the negative value of the text size. the negative value of the text size. [Music] Then add property opacity and set the opacity to zero.
[01:53] Create a key frame for start at 0% and approximately 1 second ahead set it to 100%. Then select both key frames, right click, key frame assistant, easy ease. Also, make sure you are using the speed
[02:07] Also, make sure you are using the speed graph and match the graph exactly. [Music] For even smoother results, enable motion blur. Adjust the text so it is centered.
[02:31] Expand the text layer. Click animate. Select tracking. Then click add property. Select position and opacity.
[02:44] the negative value of the text size. [Music] Change the Y value of the position to approximately half of the text size and set opacity to zero. Create a key frame for start at 0% and another
[02:58] approximately 30 frames ahead at 100%. Then select both key frames, right click, key frame assistant, easy ease. Also, make sure you're using the speed graph and adjust it accurately. For smoother animation, enable motion
[03:13] blur. [Music] Then create a black solid layer and pre-ompose both the text and black solid layer. [Music]
[03:38] Create a mask layer to cover exactly half of the text. half of the text. [Music]
[03:55] Now duplicate the layer and select the invert mask option. keyboard to bring up the position. Adjust the position as I am doing.
[04:49] Make sure the new text layer is placed at the bottom of the layer stack. repeat the same steps. [Music]
[05:11] reveal the key frames. Select both key frames, right click, key frame assistant, easy ease. Again, use the speed graph and match it precisely.
[05:34] Next, create an adjustment layer and apply the transform effect to it.
[05:46] Change the rotation value to approximately 8.
[05:58] To create a zoom effect, create a null object. Then select all layers and link them to the null object.
[06:13] up the scale option and adjust it as I am doing.
[06:25] frame assistant, easy ease. Use the speed graph as well.
[06:44] result. [Music]
[07:00] text layer. [Music] Change the wave width to 500. Hold alt and click the stopwatch icon to bring up the expression tab and follow along with what I'm doing.
[07:15] Also enable motion blur for the text. [Music] Make your text layer ready. [Music]
[07:33] Then apply the turbulent displace effect. Change the size to 10 and set the mode to turbulent smoother. [Music]
[07:46] Expand evolution then hold alt and click the stopwatch icon to open the expression tab for random seed and follow what I am doing. [Music] Also enable motion blur for the text.
[08:14] [Music] Adjust the text so it is centered. Adjust the text so it is centered. [Music]
[08:28] Select opacity and set the opacity to zero. [Music] Expand range selector one. Then create a key frame for start at 0% and another approximately 1 second ahead at 100%.
[08:43] approximately 1 second ahead at 100%. [Music] Go to advanced options, expand it, and turn on randomize order. Create a key and another one 1 second later with a
[08:56] value of 25. [Music] Now duplicate the text layer and change its color to outline only.
[09:09] its color to outline only. [Music]
[09:21] Change the second random seat key frame value to 50. Also adjust both key frame value to 50. Also adjust both key frame positions to get the desired effect.
[09:42] Expand the text layer. Click animate. Select character offset. Create a key frame for character offset at around 15 and another 30 frames ahead at zero. Change the scale value for the text as I am doing.
[10:08] Now create a white solid layer above the text layer. text layer. Apply turbulent noise.
[10:24] and click on the evolution stopwatch to bring up the expression tab. [Music] Next, apply mosaic below the turbulent Next, apply mosaic below the turbulent noise.
[10:39] vertical blocks to 50. Enable sharp colors. to the text layer. [Music]
[10:53] [Music] Set the frame rate to eight. apply it above the posterized time effect. effect. Adjust the settings as I am doing.
[11:23] That's all for today guys. Also check out my presets on my pay hip. Until out my presets on my pay hip. Until then, goodbye.
⚡ Saved you 0h 11m reading this? Transcribe any YouTube video for free — no signup needed.