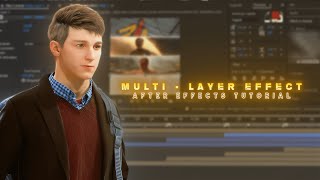

How to Fit Clips in Any Comp Size
45sPractical tip with specific settings that solves a common After Effects problem, appealing to editors seeking quick fixes.
▶ Play Clip"Delivers exactly what the title promises: a concise, step-by-step guide to a multi-layer effect in After Effects."
This tutorial demonstrates how to create a multi-layer effect in After Effects, a popular technique for adding depth and visual interest to video projects. The instructor provides a step-by-step guide, covering everything from resizing clips to applying glow effects and animating with cameras. The final result is a dynamic, beat-synced animation ideal for music videos, social media posts, or any creative project.
Change the composition settings of the clip to a height of 400. Use the motion tile effect on any clip that doesn't fit in the comp, copying the exact settings shown.
Set the position of the first clip to the topmost part of the comp. For the other clips, add 400 to their position values to stack them vertically.
Create a shape layer and cut it according to the beats by holding shift, which ensures a perfectly straight line. Set the stroke value to 5, then extend the shape layer to cover the entire comp.
Create a white solid layer with a height of 400 and cut it to the beats. Copy the keyframes from the first solid layer and paste them to all other solid layers. Then match each solid layer's position to the clip below it.
Apply the deep glow effect to both the shape layer and the white solid layers. Adjust the exposure and radius values for the shape layer as shown.
Create a null object and attach a camera to it. Enable 3D and motion blur for all clips. Animate the camera's ZV value (increasing) and Y value (decreasing) to make the clip fill the entire comp.
Select both keyframes, right-click, go to Keyframe Assistant, and choose Easy Ease. Use the value graph and copy the exact graph settings shown to achieve smooth motion.
Resize clip height
Essential first step to set up the multi-layer effect.
00:08Cut to beats
Syncs visuals with the music for a more engaging effect.
01:20Adding white solid layers
Key to creating the layered visual style.
02:06Deep glow effect
Adds a professional, vibrant look to the animation.
02:59Camera animation with null
Creates dynamic depth and movement in the final composition.
03:43Easy ease keyframes
Ensures smooth, professional-looking motion.
04:18[00:08] [Music] Open the composition settings of the clip and change the height to 400. [Music]
[00:38] [Music] If any clip doesn't fit in the comp, use the motion tile effect to make it fit. And don't forget to copy my settings. [Music]
[00:53] [Music] Do the same for the rest of the clips. Now change the position of the first clip to the topmost part of the comp.
[01:06] clip to the topmost part of the comp. And then add 400 to the other clips. And then add 400 to the other clips. [Music]
[01:20] Create a shape layer and cut it according to the beats. by holding shift. That'll give you a perfect straight line.
[01:34] perfect straight line. [Music] Change the stroke value to five. [Music]
[01:48] [Music] Also extend the shape layer so it covers the whole comp.
[02:06] Next, make a white solid layer with a height of 400 and cut it according to height of 400 and cut it according to the beats.
[02:18] frames ahead from the start. Copy those key frames and paste them to all the other solid layers. [Music] Match each solid layer's position to the clip below it.
[02:59] and apply the deep glow effect to both that and the shape layer. that and the shape layer. [Music] Then adjust the exposure and radius values for the shape layer. Create
[03:29] camera to the null. Enable 3D and motion blur for all the clips. of the null object. Place one at the beginning and one at the end of the
[03:43] layer. Increase the ZV valueue and decrease the Y value so the clip fills decrease the Y value so the clip fills the entire comp.
[04:18] Select both key frames, right click, go to key frame assistant, and hit easy ease. Make sure you're using the value graph and copy my exact graph settings. And that's it. Your animation should look like this.

⚡ Saved you 0h 04m reading this? Transcribe any YouTube video for free — no signup needed.