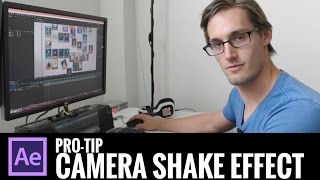

Realistic Camera Shake in 45 Seconds
45sOpens with a bold promise and a clear problem, making viewers want to learn the trick.
▶ Play Clip"Delivers exactly what the title promises — a quick, practical tutorial with no fluff."
This tutorial from Rocket Jump Film School demonstrates how to add realistic camera shake to a static shot or image using After Effects. The technique involves tracking a handheld clip and applying that motion data to a still image, making it look like it was shot with a moving camera.
The technique is useful for shots that are too hard to track, like stacked billboards, or for adding life to a static picture.
Track both position and scale to match zooming and movement.
Choose tracking points with high contrast (black and white) for best results.
If the track drifts, fix it frame by frame; small errors are invisible because you're applying data to a static image.
Create a null object (Ctrl+Alt+Shift+Y) and apply the tracking data to it.
Parent the picture to the null object so it inherits the camera movement.
Scale up the picture to hide borders, and add motion blur to sell the realism.
By tracking a handheld shot and applying that data to a static image, you can create convincing camera shake that makes stills feel like video. The key is high-contrast tracking points, a null object, and motion blur.
Track position and scale
Essential for matching zoom and movement, making the effect look real.
01:45High-contrast tracking points
Improves tracking accuracy and reduces drift.
02:10Small track errors are invisible
Because you're applying data to a static image, not moving elements.
03:26Motion blur is essential
Sells the realism of the camera movement.
05:38[00:00] What's up guys, Clinton Johns here, aka The Punisher, here with another quick tip for Rocket Jump Film School. Today we're going to talk about how to implement a realistic camera shake into a shot that was shot maybe on a tripod, or maybe it's just a picture.
[00:17] For example, I did a video a long time ago of two billboards that were stacked on top of each other, and it was too hard to track. And then I did what I'm about to show you guys, and it looks good.
[00:30] It looks real. It looks like video. This needs to have realistic camera shake. How do you get realistic camera shake? So that's what we're talking about. Let's jump in. So we've got a picture here that we want to apply camera shake to.
[00:42] This is a picture of a bunch of pictures. And we've got our footage, which we just shot. So the idea is that we shot this footage here. It's just a shot with camera shake in it. And what we're going to do is we're going to track this shot, and then we're going to apply that tracking data to that picture, or to that shot that is shot from a tripod, and it'll actually look like it was, you know, like a video, or like it was shot handheld.
[01:07] So, I'm going to grab a picture and bring it into a new comp here. What I'll do is I'll actually pre-comp the whole thing and you can hit control shift
[01:19] sweep and move all attributes in the new composition, name it whatever the heck you want to name it. Alright, so let's get to this thing. We have our picture, we have a pre-comp, let's track our footage here. So I going to drag our footage into new composition don have to worry about pre and here our footage Okay so let track this We gonna go up here motion tracking We gonna track motion
[01:45] We're also going to track the location here. And we're also gonna track the scale. Because we're zooming in, right? So let's go in here and let's find some sweet tracking spots. I'm going to set my resolution to full.
[01:58] Because you want all that resolution when you're tracking. This one here can go to the Coke bottle. So like the further your tracking points are away from each other, the better. Here, let's go right there.
[02:10] Bring that out a little bit. When you're tracking something, you want to look for areas of high contrast. Black and white. So like right here, like black and white. There's a black dot and this white circle. The program can easily see the contrast, right?
[02:24] Or like over here, you have this black circle and silver ring. So that's going to track really well. Let's hope. I'm gonna hit track forward, see what happens, see what goes down.
[02:43] Sometimes it helps popping it and then going one frame at a time. If you guys wanna go frame by frame you can do page up and page down on the keyboard. Oh, see, okay, it went off here. Alright, so this one flips because of the camera is
[03:00] blurring out a little bit, so you might have to come in here and just do a little manual to dangling, you know what I mean? Yeah, if your track flips, don't worry about it. Just go frame by frame like I doing right now and make sure that it sticking on the same point here And you know the best part is actually if the track is off a little bit it not that bad Because you not
[03:26] Remember, we're taking this camera data and we're putting it onto a picture. So no one's going to know that the track is off because nothing is slipping. None of the elements are slipping. That's the best part.
[03:38] We can save this data by making a new null. Alright so you guys if you hit ctrl alt shift y it will make a new null object here or you can just go layer new null object.
[03:50] Boom. Still in our motion tracking tab we'll go edit target and you're going to want to target that null. Hit ok. Hit apply for the extra y axis. Boom. So now we have this null object with all this tracking data.
[04:06] So if I hide our footage, you see the null zoom in and then it's going to zoom out. Right? So here's what we're going to do. We're going to take that null object.
[04:18] We're going to forget about that footage we just tracked. We don't need it. Take that null object. We'll copy it to full speed. Go back into our picture composition here. Paste the null object. And then we're going to parent.
[04:30] What we're going to do is we're going to parent the picture, right, to the null object. Boom and then it's gonna look like that, but okay, so it's a little
[04:43] Not trained up, right? We can take a couple things. So if you want to move the null object or move the like point Like zooming to it's like all the position
[04:55] Scale and rotation keyframes hitting you on the null object bring them all up clicking them selecting them and just dragging it over Now it going to take the picture with it, but then you can just move the picture back to wherever, and then you can scale it
[05:12] up a little bit because we can see the borders. Right, and then you watch it. Uh, sure. We're
[05:24] Another thing we can do is add motion blur. Motion blur is so important. You always need motion blur. If you're going to need motion, then you need motion blur. So for our picture layer, we're going to check the motion blur tab.
[05:38] And then we're going to turn on motion blur for our entire composition. Boom! So how is this useful? So let's say that Charlie didn't like his picture. Why don't we just make this whole thing Charlie?
[05:50] You can put a poster here, and then you go back into your other composition, and it'll all be tracked on, and it'll stick perfectly. So you guys get the idea, like, you can put anything on that door.
[06:05] So you can take this quick tip, I don't know how quick this tip was, but you can take this tip and put it in your pocket. I hope that these will aid you in your filmmaking endeavors.
[06:20] Thank you.
⚡ Saved you 0h 06m reading this? Transcribe any YouTube video for free — no signup needed.