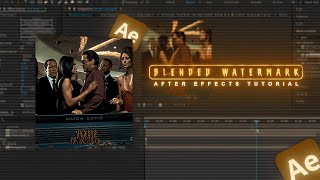

How to Track Watermarks in After Effects
43sStep-by-step tutorial on using Lockdown plugin to track a watermark, which is a highly searched editing technique.
▶ Play Clip"The title accurately describes the tutorial, but the content is brief and lacks depth, making it a solid but not exceptional guide."
This tutorial demonstrates how to create a realistic, blended watermark in Adobe After Effects using the Lockdown plugin. The process involves tracking a specific area, adding text, and applying effects like Gaussian blur to seamlessly integrate the watermark into the video.
To create a blended watermark, you need to download and install the Lockdown plugin in After Effects.
In the Effects and Presets panel, search for Lockdown and add it to your clip. Then, pop out the settings and set the value to 25 for both parameters.
Draw the area where you want the watermark to appear, select 'extremely accurate' tracking mode, and press the 'Track All' button.
Open the first pre-composition, delete the first layer, and write your text. Adjust it to fit the tracked area and match the background color.
Adjust the opacity of the text layer to make it look more blended and accurate with the background.
Apply Gaussian blur to the text layer to make the watermark even more realistic.
Select all three layers, pre-compose them, and your blended watermark is ready.
By following these steps, you can create a realistic blended watermark in After Effects using the Lockdown plugin. The key is to track the area accurately, match the background color, and use opacity and blur to blend the text seamlessly.
What plugin is used to create a blended watermark in After Effects?
Lockdown
00:02
What value should be set for both parameters in the Lockdown plugin?
25
00:14
What tracking mode is recommended for accurate watermark placement?
Extremely accurate
00:37
What effect is added to the text layer to make the watermark more realistic?
Gaussian blur
01:49
Plugin Requirement
Highlights the need for a third-party plugin, which is a key prerequisite for the technique.
00:02Accurate Tracking
Emphasizes the importance of tracking precision for a realistic watermark.
00:37Blur for Realism
Shows a simple but effective method to blend the watermark with the background.
01:49[00:02] edits? To make this, you need to download a plugin called Lockdown. First, get ready with your clip in First, get ready with your clip in Twixster. Now, pre-MP your clip. Next,
[00:14] go to the effects and presets panel. Search for Lockdown and add it to your Search for Lockdown and add it to your clip. Then, click on the pop out button and set the value to 25 for both.
[00:37] and draw the area where you want your watermark. Then select extremely accurate and press the track all button.
[00:57] this tab and click on the lock down button. button. [Music] Now open the first pre-MP and delete the first layer.
[01:11] Write your text and adjust it to the area you tracked and select the same color as the background.
[01:31] its opacity to make it look more blended and accurate.
[01:49] To make it even more realistic, add Gaussian blur to the layer.
[02:18] Now select all three layers and pre-MP them. And you're done. Your blended watermark is ready. Don't forget to like this video and subscribe to the channel.

⚡ Saved you 0h 02m reading this? Transcribe any YouTube video for free — no signup needed.