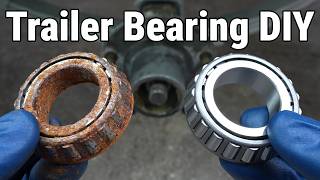

The Most In-Depth Trailer Bearing Replacement
45sChrisFix promises the most in-depth guide on the internet, creating high expectations and curiosity.
▶ Play Clip"Delivers exactly what the title promises: a thorough, step-by-step guide to replacing trailer wheel bearings, with bonus tire changing."
This video provides a comprehensive guide to replacing trailer wheel bearings and tires, covering everything from identifying the correct parts to installation and maintenance. The host demonstrates techniques using common hand tools and offers tips for home mechanics, including a manual tire changer and proper bearing packing methods.
ChrisFix introduces the video as the most in-depth guide to replacing trailer wheel bearings, applicable to various trailer types. He also mentions showing how to change tires at home using a manual tire changer.
The existing tires show tread separation, dry rot, and exposed belts, making them unsafe. New Trans Eagle tires from Priority Tire will be installed, and the video will cover finding correct tire size and load rating.
Lists common hand tools (rubber mallet, hammer, pliers, punch, ratchet, sockets, pry bars, torque wrench) and products per wheel: cotter pin, seal, two bearings, two races. Emphasizes using high-quality bearings.
Shows how to lift a trailer wheel without tools using wood ramps for multi-axle trailers. For single axle, use a jack with truck attached for stability, chock wheels, and use jack stands.
Remove dust cap, cotter pin (never reuse), axle nut (should be hand-loosable if properly installed), washer, and hub. Warns against overtightening axle nut.
Remove outer bearing, then seal and inner bearing. Shows a no-tool method using the axle as a slide hammer. Also demonstrates seal removal with a tool and self-tapping screw. Races are removed with a punch and hammer.
Find part numbers on old bearings and races (e.g., L44649 for bearing, L44610 for race). For seals, measure outer diameter, inner diameter, and width with calipers. Consider coating and lip type (double lip preferred).
Clean hub, remove burrs with sandpaper, apply thin grease coat. Use a race driver set or a socket to press races in, ensuring the wide edge goes down. Never use a punch to install races to avoid damaging the bearing surface.
Bearings come ungreased. Two methods: hand packing (force grease into cage) or using a bearing packer. Recommends repacking annually or every 12,000 miles.
Coat race, install bearing tapered end down. Use a double-lip coated seal if possible; otherwise, apply RTV to an uncoated seal. Tap seal in evenly with rubber mallet. Fill cavity between bearing and seal with grease.
Add grease to bore to prevent rust, coat race, install outer bearing. Clean axle spindle, inspect for grooves, apply grease, slide hub on carefully.
Torque axle nut to 25 ft-lbs while spinning hub, then back off 1/8 turn (45°). This allows 1-5 thousandths of an inch play. Adjust slightly to align cotter pin hole.
Bend cotter pin 90°, then flatten against axle. Install dust cap filled with grease, or install bearing buddies for positive pressure and easier greasing.
Check trailer tongue sticker for tire size, pressure, and load rating. If missing, read sidewall: e.g., 175/80R13, load index 92/88, speed rating M (81 mph).
Deflate tire, debead with tool, mount on changer, use duck head to lift sidewall, lubricate with soapy water, and rotate to remove tire. Install new valve stem, clean bead seat, mount new tire, inflate to spec (65 PSI).
Options: skip balancing, use balancing beads (3 oz per tire), or have them professionally balanced. Shows machine balancing with weights.
Torque lug nuts in crisscross pattern. Use tire covers to prevent UV degradation. Test drive shows smooth ride and confidence in reliability.
Properly replacing trailer wheel bearings and tires is a manageable DIY task with the right tools and techniques. Following the steps ensures safety and reliability on the road, and regular maintenance like repacking bearings annually extends the life of your trailer.
What is the recommended torque for the axle nut when tightening trailer bearings?
25 ft-lbs
23:39
After torquing the axle nut to 25 ft-lbs, how much should you back it off?
About an eighth of a turn (45 degrees)
24:07
What is the acceptable end-play for a properly adjusted trailer hub?
1 to 5 thousandths of an inch
24:23
Why should you never reuse a cotter pin?
It may be weakened and fail, risking the wheel coming off.
04:11
What is the part number for the outer bearing in this video?
L44649
09:47
What is the part number for the bearing race?
L44610
10:04
How do you determine the correct seal size?
Measure the outside diameter, inner diameter, and width with a caliper.
10:30
What are the two types of seal lips mentioned?
Single lip and double lip
11:12
Why is it important to replace races when replacing bearings?
Old races cause new bearings to wear out prematurely.
07:40
What is the recommended frequency for repacking trailer bearings?
Once a year or every 12,000 miles, whichever comes first.
17:59
What does the yellow dot on a tire indicate?
The lightest point of the tire, which should be aligned with the valve stem for balancing.
33:35
What is the tire pressure for the new tires in this video?
65 PSI
34:16
What is the load rating for a single axle trailer with 92/88M tires?
92 corresponds to 1,389 lbs per tire for single axle.
28:14
Never Reuse Cotter Pins
Emphasizes safety-critical practice of always replacing cotter pins to prevent wheel detachment.
04:11Replace Races with Bearings
Highlights a common mistake that leads to premature bearing failure, saving viewers from future repairs.
07:40Proper Axle Nut Torque
Provides a specific torque spec and back-off procedure that is crucial for bearing longevity.
23:27Finding Correct Tire Size
Explains how to decode tire sidewall markings and load ratings, essential for safe towing.
27:30Balancing Options
Offers practical alternatives for balancing trailer tires at home, including beads and professional balancing.
34:57[00:00] Hey guys, ChrisFix here and today I'm going to show you how to replace the wheel bearings on your trailer with the most in-depth video on the internet. So, let's get started. So, whether you have a car trailer, an enclosed trailer, a utility trailer, horse trailer, a camper, a large boat trailer
[00:16] or a small boat trailer, after watching this video, you'll be able to replace the wheel Additionally, I'm going to show you how to change your own tires at home yourself using one of these manual tire changers. I actually mounted it up to a pallet.
[00:30] That way it's portable. You can move it around. You don't have to drill into your concrete. And this works incredibly well. And the reason why we're changing the tires is because look at this. Look at how bad that is. We have tread separation there. The rubber is all dry rotted. We have the
[00:43] belt coming through and it's all rusted. These are just not safe to drive on. It's not even holding air. So, we're going to change those out with some nice new Trans Eagle tires I got from Priority Tire. They recommended these. So, I can't wait to get those in. And I'm also going to show you guys
[00:59] how to find the correct size and load rating for your trailer so you get the correct tires so it's safe to drive on. So between the new bearings and tires, this is going to be an awesome setup. And here are all the tools and products you're going to need to get this
[01:12] job done. As always, we're using common hand tools so you could do this at home yourself on a budget. So we have a rubber mallet, hammer, pliers, punch, ratchet, sockets, pocket pry bars, torque wrench,
[01:25] So, those are the tools. Here are the products. For each wheel on your trailer, you're going to need a cotter pin, a seal, two bearings, two races, and it's very, very, very important that you use high quality wheel bearings. Do not cheap out here.
[01:39] These are essential for safely trailering down the road. So, use a name brand that you could trust. And these are made in the USA. I will teach you how to find the parts numbers to all these for your specific trailer. It's actually pretty easy. That way, you could get the correct parts.
[01:53] is made for trailer bearings. We have our grease gun. And then we're going to be installing our bearing buddies. These are awesome. They help out so much because they keep a positive pressure of
[02:05] grease. Always feeding the bearings grease. That way water and dust don't get into the cutaway that I got water jetted so you can see what's actually going on. I'm a visual learner,
[02:18] so I wanted to show you this. We have our seal, inner bearing, outer bearing, and then I can teach you how to properly tighten down your axle nut. So many people make this mistake and ruin their are all the tools and products you're going to need. I'll link everything down in the description
[02:33] Now, the first thing we need to do is jack up the trailer. That way, we could get the wheel off. If you have a double or even triple axle trailer and you need to lift up a wheel with
[02:47] no tools, all you need to do is slide a couple of pieces of wood in front of the other tire to make a ramp, then drive the trailer up onto the wood, and now the other wheel is free up in the air and this is a real quick and easy way to lift your wheel off the ground, and it comes in handy when
[03:03] you have a blowout on the side of the road and you need to change your tire. So, keep that in mind. But, in this case, we have a single axle trailer and a jack. So, let me show you how to jack up the trailer. Now, the first thing I like to do is if you can have your truck attached to your trailer.
[03:17] That helps out tremendously. It provides a point of stability right there and it just makes it a lot safer to jack up a trailer. The next thing you need to do is go to the other side of the trailer and chalk off both sides of the wheel so the trailer can't roll. Now, back on the other side,
[03:30] let's break all five of these lug nuts loose with the tire on the ground. That way, the wheel done with common hand tools. With the lug nuts loose, now we can get the jack under the trailer frame. And I like to place the jack in front of the tire, which is more towards the middle of the
[03:45] trailer to keep it balanced. Now that the tire's off the ground, let's get the jack stand under the frame, in front of the tire, and behind the tire. That way, we have a nice stable platform to work on. Now, we can let the trailer down onto the jack stands. And I like to pump the jack back up so it
[03:58] lightly touches the frame just for extra backup. Good. And finally, let's remove the lug nuts and the wheel could come off. Now, we could remove the plastic cap. And with a rubber mallet, we could hit the dust cap until it comes off. Good. And the rubber mallet prevents damage to the dust cap.
[04:11] which is what prevents the axle nut from vibrating loose. And once that's straight, it should pull right out. Beautiful. Now, you never want to reuse your old cotter pin. Always replace them with brand new ones, especially on a trailer where the axle nut relies on the cotterpin to keep the wheel
[04:27] from coming off. Now, I haven't touched this axle nut, but if it's installed properly, it should be able to loosen by hand. Beautiful. So many people overtighten these, and this ruins the bearings, method to tighten this down when we install the new bearings. So, let's remove the nut completely.
[04:43] Then, there's an important washer right behind the nut that you need to remove. Don't lose this. And now, the hub should slide right out. So, with the hub removed, let's replace the seal and the bearings. Now, it's very important that you put this down in a clean workspace. You do not want
[04:56] anything that is sandy, that's gritty, that's dirty, cuz you don't want that getting into the hub, which will ruin the brand new bearings and cause this to prematurely fail. Speaking of dirty, it's also a good idea to have a lot of paper towels on hand because this could get a little
[05:09] messy with all the grease that's in the hub. So, let's get started. And real quick, to give you a better visual of what we're doing since this is kind of enclosed and hard to see, I cut out a hub so you can get a good view of the bearings inside. So, first we'll need to remove the outer bearing,
[05:23] and that'll come right out. Then, at the back of the hub, we have a seal and the inner bearing. The seal is going to take some force to pop out. I'll show you a trick on how to get that out very easily. And then we'll remove the inner bearing. And all that leaves are these two hardened steel
[05:37] races. To get those out, we're just going to use a punch and hammer it out. So, now that you have a good visual, let's get her done. And the first thing we need to do is remove the outer bearing, and that just comes right out. Then, we could flip this over, and we need to remove the seal and the
[05:50] inner bearing. Now, to remove the seal, there are a few different methods, but I have one method that requires no tools and is very easy to do. So, let me show you. So, all you do is go back to your axle, and you're going to get your hub and place it back on the axle. Just like that. Almost like
[06:04] axle nut on all the way so all the threads are engaged. Now, so you have an idea of what's going to happen, we're going to pull the hub out, and the axle nut is going to act like a slide hammer
[06:17] and remove the bearing and seal. So, we want to give this a firm yank. Beautiful. And that's all there is to it. No tools needed. And you can see the inner bearing and the seal are removed. Now, let's get the axle nut off. And then let's remove the bearing and the seal. And it's that easy. Now,
[06:33] here are two other seal removal methods I want to show you as well. And for the first method, we're going to be using the classic seal removal tool. So, get the skinny end of the tool and place it behind the seal like that. And then just use the tool to pry the seal out. Good. And
[06:46] that's all there is to it. And now you can remove the bearing. And the final seal removal method I have is to use a selftapping screw. You want to use a relatively long screw and you want to drive it into the seal. And make sure you leave a good amount sticking out. That way you could grab it
[06:58] with a pliers and pull it out. This method works great for spots that you can't use a puller in, remove the bearing and make sure you clean up any metal shavings. That way, it doesn't get into the hub. Okay, so with the seal and bearings removed, the last thing we need to do is remove the two
[07:13] races that are inside the hub. So, first you want to remove all the old grease from the hub. That way, we could clearly see the races we need to remove. And I'm just using a paper towel, pushing it all the way through to clean all the grease out. Then let's hit it with some brake cleaner to
[07:26] do a final rinse and flush out any dirt we didn't pick up with the towel. Beautiful. So with most of the grease removed now we could clearly see the races. There's one on this side and there is one on that side. And now we could go and punch them out. Let me show you how. So this is the bearing
[07:40] race or bearing cup. It is a hardened piece of steel that is pressed inside the hub. And how it works is the bearing fits inside of this and rides inside of it. So it's very important that when we replace the bearings, we replace the races. Too many people only replace the bearings and they put
[07:54] them in the old races and that causes them to wear out prematurely. It's one extra step. It's really quick. Let me show you how to do it. So, just as a better visual, we have our cutaway here. You punch like this, and we're just going to hammer along the race. And the punch is going to be able
[08:09] you want to make sure that you use a flat punch like this, not a pointed punch like that, which could damage the hub. All right, so let's get the flat punch on the edge of the race. And I'm using
[08:21] a 4-PB hammer to work my way around the race to try to evenly punch it out. Now, you really want to hit it hard to get that race out. Light taps just aren't going to move it. You're going to need a good amount of force. So, just keep hammering your way around the race to work it out of the
[08:34] hub. All right. And just like that, the inner race has been removed. Now, let's go remove the outer race. And I realize not everybody has a nice vice like this, so I'm going to show you you could get this job done with blocks of wood as well. And since we're going to remove the outer race,
[08:49] we're going to face this down, push the wood together, and now the bearing has space to pop out. So, same as before, work your way around the race and walk it out of the hub.
[09:05] Beautiful. And just like that, we remove the other race from the hub without using a vise, just two blocks of wood. So, it's out with all the old parts, the races, the bearings, and the seal, and in with the new parts. Now, you might be wondering to yourself, how do you know which
[09:18] parts you need for your trailer? Because it's not as easy as with a car where you have a year, different axle sizes, which means different bearing sizes. There's a lot of variables. So, one foolproof way to know the exact correct parts you're going to need is to take the old parts that
[09:35] we just removed and look for the part numbers. So, I'm going to clean the grease off of this bearing. This is the outer bearing. And you can see right there it says L44649. So that is the bearing part
[09:47] outer bearing. You also want to check the inner bearing because sometimes they could be different. But in this case, you could see they have the same exact part number. And just to show you, here's the new bearing, L44649. It's the same exact part. Same thing goes for the old races. There should
[10:04] be part numbers stamped onto them. And right there, L44610. Both the outer and inner races are the same part. And then if we check the new part, L44610. So, we're good to go. And finally,
[10:17] the hardest part to find a part number because usually it is mangled or it is rusted is the seal. Just to give you an idea, we have a brand new seal here. And here's the part number. Actually, that's the size of the seal. But either way, it's on the rubber. And there's no way we're
[10:30] going to read anything off the rubber on this. So, what you do is you get a caliper like this, and we're going to measure the outside diameter first. So, that is 1.98. And then we're going to measure the inner diameter where the rubber is. And that's about 1.2. And then our width here,
[10:45] which is about 0.25. And that'll give us the exact size we need. And now that you know how to find the correct seal, there's two other things to look at when you're buying seals. The first thing is the coating on the seal. Some of them have a coating on it, like this one in the blue. Some
[10:58] of them are raw metal finish, like that one right there. They're both the same size, but the coating helps it seal better when your trailer goes in the water, like for a boat. Now, most seals today are coated like that, even if it's not for a boat. But if you have an uncoded seal, I'm going to show
[11:12] you how to use RTV on this to make it so that it's like a coated one. That way, you could seal it up properly. And the second thing is the lip of the seal. There is a single lip seal and a double lip seal. So, for the single lip seal, it's exactly as it sounds. There's one lip on this seal that seals
[11:27] in all the grease and seals out all the dust and water. Now, for the double lip seal, we have two lips. We have an outer lip right here. You can see that edge right there. And then we have an inner lip. You can see that edge right there. And the outer lip seals out the dust and water. The inner
[11:40] lip seals in the grease. So when you're buying your seal, try to find a double lip and coated seal for your application. That's everything you need to know about seals. All right, so now you know how to find the correct parts for your trailer. Let me show you how to properly
[11:53] install them into the hub. So first, we want to find any burrs or scratches like that one right there inside the hub. And we probably did this by accident with the punch when we hammered the old race out. And although this is small, I can still feel the burr with my finger, which means it needs
[12:05] to be smoothed out. So, grab a scouring pad or 800 grit sandpaper. And just lightly sand it smooth. feel it anymore with your fingernail. And now we won't damage the new race when we push it in. Now,
[12:17] here, which is pretty common. This is where the seal mounts and sometimes moisture gets trapped. Again, all you need to do is grab a scouring pad or 800 grit sandpaper and smooth this down. Now, you're not going to sand so much that you get rid of the staining. it's still going to be there.
[12:32] brake cleaner and clean out the hub so there's no dirt or grit that could damage our new wheel bearings. Then I'm using a plastic bristle brush to agitate the surface and make sure we really get everything clean. And finally, we can give this one last spray down with the brake clean to
[12:46] flush out any dirt. Okay, and check it out. That looks great. So, with the inside of our hub nice and clean, now we can install all the new parts, starting with the bearing race. And to do that, there are two different methods I have. The first one is using a really nice bearing race
[13:00] and seal driver set like this. I'll link one in the description that doesn't break the bank and to your big brand part stores. Vance Auto Parts, O'Reillies, AutoZone, Napa. A lot of times they
[13:13] they're kind of incentivized. But just in case you can't find this driver set, I will also show you how to get the job done using a big socket. So, let's get started. Now,
[13:25] there are two different sides to the race. We have the wide edge side, and then we have the narrow or skinny edge side, and then it kind of tapers in. You want to make sure this wide edge side goes down into the hub like that. So, the skinny edge is facing up. Now, we could grab the correct size
[13:40] driver from the set. And you'll know you have the correct size because the shoulder of the driver needs to fit on the narrow edge of the race, just like that, and be nice and flush. That way, we could drive this all the way deep into the hub. Now, if it's too small, like this one right here,
[13:55] it's going to fit inside, and that is not good. We do not want to drive down onto this surface that the bearing rides on. And if it's too big, it's going to overhang, and you're not going to be able to drive this down deep enough. So, find the correct driver that fits right on the edge, just
[14:08] like that. Now, to set this up, let's grab the part that you hammer and put the driver on the end of it. Then, we can just finger tighten the bolt on the end like that. And this is the final setup. Now, real quick, we want to remove the race. And we need to put a very thin coat of grease on the
[14:21] inside of the bore. That way, when you hammer the race in, it doesn't gall the surface. Now, let's get the race back in. And remember, the thinner edge faces up. Now, we can get the driver on the race. And you want to begin with light taps to get it started. That way, it goes in
[14:33] evenly. And once you drive it in a little bit and see it's level, now we can hammer it in with more force. And you'll know that race is seated all the way in because it'll feel and sound different.
[14:48] Perfect. And you can see that race is bottomed out. It's seated against the lip in the hub. So, we're good to go. And just in case you were wondering why we can't use a punch to install the race, it's because if you miss the edge here and you go up against this surface right
[15:01] here and scratch that or nick it, it is ruined. This surface has to be a perfect finish because the bearing is going to sit inside of here and roll against it. So, we can't have any damage to this surface at all. Now, our driver is made of aluminum. So when it sits inside that race,
[15:16] even if it bangs up against it, it's a softer metal than the hardened steel in the race, so it won't cause any damage. So now you know how to use a driver. Let me show you the trick to using a socket to get the other race in. And this race is for the inner bearing. So
[15:30] the outside edge of this race. And then you also need to make sure that the socket fits inside the hub like this. That way it can be driven all the way in. So, just like before, add a thin
[15:43] coat of grease on the inside of the hub to prevent galling. And then fit the race into the hub with the thin edge facing up and place the socket right on that edge. And we can hammer it in.
[16:01] races are installed. We are ready for the next step, and that is to install the inner bearing and then bearing seal. Now, these bearings do not come greased from the factory. They are completely
[16:14] for nothing. So, let me show you how to properly grease a bearing. And there's two ways to do that. The hand packing method or using a bearing packing tool like this. And I'm going to show you both
[16:26] ways. And real quick, before you start packing the bearings, make sure your gloves are clean. You don't want any grit or anything on them. Make sure you have paper towels out and ready to go cuz this could get a little messy. Also have the garbage can next to your workspace open ready to go so
[16:39] that way you can throw your paper towels right in because your hands are going to be covered in grease. So, let's get started. This is the grease I'll be using. I'll put a link in the description to it. It's designed to work on trailer bearings and it won't break down if water gets in it. So,
[16:51] it in my left palm. Then you're going to get your bearing and we want to force the grease in between the bearing cage right where the rollers are. You can see there's an opening right there. Also,
[17:03] on this side, there is an opening, but that opening is smaller. So, we're going to force it into this opening until it starts coming out the top here. So, here's how you do it. All you need the bearing down and drag it against your palm to pack that grease into the bearing. And you want to
[17:19] just keep repeating this process until the grease comes out the top of the bearing, which means it's packed with grease. And if you take a look at the top of the bearing, you can see it's starting to get filled with grease. Perfect. This is exactly what you want to see. So, now we have this part
[17:31] of the bearing packed. We need to turn the bearing a little bit and repeat the process. Again, you're just scraping the edge of the grease with the edge of the bearing, pushing it into your palm, packing So, let's turn the bearing and keep packing. And for some reason, I find this very satisfying.
[17:47] We're still using an old school method that's been used since the industrial revolution. Okay. And then when you run out of grease on your palm, you could get more or in this case, there's excess grease that built up on the inside of the bearing. And this should be plenty to finish the bearing
[17:59] it's recommended to repack them using the same exact method once a year or every 12,000 mi, whatever comes first. That way, the fresh grease keeps the bearings in good shape. All right,
[18:12] and all the roller bearings. And then if we flip this over, you can see there's complete coverage of grease on the other side as well. And then any excess grease that you might have on your hand, and not dry. And that's how you pack a bearing by hand. Now, we need to pack the other bearing.
[18:30] on the bottom. So, first remove the dust cover. This is nice cuz it keeps the grid out. Then, unscrew the plunger. And now, we can put the bearing in here. And you can see there's holes center like that. Then, grab the plunger and screw it back in. That way, it centers the bearing and
[18:48] seals it off so the grease only has one place to go, through the bearing cage. Now, we need to push this down to force the grease up into the bearing. And it does take all your body weight to get this thing to work. And this is exactly what you want to see. The grease pushes right up through the
[19:01] bearing cage all at once, making this a quick and easy method. And that's it. Now we can unscrew the plunger and take a look at that. Perfect. So, while this packing tool packs the bearings very quickly and nicely, you still want to add some grease to the outside of the rollers so they
[19:15] aren't dry. All right, so now you know how to pack bearings, let's go install them into the hub and finish this up. So, first get some grease and coat the race. That way, it's well lubricated. Then, we can install the bearing tapered end down. That way, it fits into the cup of the race. Good. So,
[19:29] you want to try to find a seal that has a double lip. And you also want to try to find a seal that has a coating on it. So, this seals up perfectly. In that case, you would just put it like that and
[19:41] then hammer it in so it's flush. But just in case you can't find a seal with a coating, I have an uncoded seal here. I'm going to show you how to add your own coating using RTV. So, let's remove the coated seal. And for the uncotated seal, we're going to get a bead of RTV on the outside
[19:55] like that. And then just use your finger to spread it out. So there's a really thin skim coat all the way around. You want to make sure there's complete coverage all the way around. And again, it just needs to be a thin coat because this is a tight fit. And this coating is going to seal the water
[20:08] and dust out. Now, we want to add the seal right away. And there are two sides. We have the cupped side, and that goes towards the bearing cuz it holds the grease. And then we have the flat side, which faces up. Then we'll use a rubber mallet to carefully tap in that seal. And you want to work
[20:20] your way around the seal trying to tap it in so it goes in evenly. Good. And that's nice and flat. The last thing to do here is to fill the open area between the bearing and the seal with grease. So, double lip seal. Beautiful. So, with the inner bearing and seal properly installed and greased,
[20:38] we will add some more grease a little bit later on through the zer fitting once this is on the axle. But for now, let's flip this over and install the outer bearing. So, first I like to add just a little bit of grease to the inside of that hub. You see the bore in there right in the
[20:50] middle. There is no grease and it is completely dry. And we do not want this to rust because then flakes of rust could get into the bearing and cause this to fail prematurely. So, there's a little bit of a debate of whether or not to keep this empty or add grease. And my suggestion is to
[21:03] add a little grease. You just want like a/4 in around the entire bore. It's a little coating that is what I've always done and I've never had any problems. Now, let's add some grease to the race just like we did to the other race. And finally, we could add the bearing tapered end down
[21:19] and push it all the way in. Okay, so now that we're done installing everything into the hub, let me show you how to properly install this onto the axle. And before we slide the hub on, first thing we need to do is clean the axle. Actually, real quick, these leaf springs on this trailer
[21:31] have seen better days. They are falling apart. Look at how rusty they are. And they're definitely not safe to drive on. So, you know what that means? Out with the old and in with the new. So, now let's get back to cleaning the axle. So, get a towel and we want to remove all the old grease and
[21:44] dirt from the axle. Also, right here where that seal rides always collects dirt and grease. So, make sure you get this nice and clean as well. With the axle clean, now you want to inspect the inside of the axle right here. This is where the seal is riding. Just to give you an idea,
[21:58] here is the seal, and it will ride right on here in the hub. And this spins pretty quickly. So, it's pretty important that this surface right here doesn't have a big groove. I can't grab anything is grab my scouring pad, or you could use like an 800 grit sandpaper, and we're just going to
[22:14] lightly clean this up. And it's just going to freshen up the surface. That way, our new seal has a nice clean smooth surface to ride on. Now, if this surface is really pitted from corrosion or might have to replace the axle cuz it's probably not going to seal properly. In this case, we are
[22:30] good to go. Same thing for this surface right here. If there's a lot of corrosion or grooves, you might need to replace the axle. In this case, we have a little bit of corrosion, but nothing I let's get it installed. So, cover the axle with a coat of grease to prevent this from getting
[22:45] corroded. Good. Now we can install the hub. And remember, the studs are facing out. And also, I like to put my thumbs on the outer bearing. That way, when we install it, it doesn't pop out. So, slide the hub on carefully so you don't damage the seal. And make sure it's all the way seated on the
[22:58] axle. Good. Now, we need to make sure we install the washer. And don't forget to do this. Also, my fingernail. So, we're good on this side, and we're good on the other side. It's important this is smooth and flat because this is what sits up against the bearing. Finally, add some grease to
[23:13] both sides of this washer. Then we can install it. And now we can get the axle nut on there and handtighten it all the way down. So with our axle nut just fingertight, now comes one of the most important parts of this entire process, and that is making sure we tighten down the axle nut
[23:27] properly. If you overtighten it, you'll ruin the bearing. If you undertighten it, you'll ruin the bearing. There's a specific way to tighten down trailer bearings because they're tapered. So, let me show you. Okay, so at this point, it's just handtight. Now, get your torque wrench set to 25
[23:39] ft-lbs onto the axle nut. And then you're going to spin the hub and tighten the axle nut a little bit. Then you're going to spin the hub again. And we're spinning this that way the bearings inside see evenly as you tighten it down. Perfect. So that's 25 footbs. And the hub feels like it's
[23:51] bound up and not turning smoothly anymore, which is fine. So let's spin it and double check to make sure it's torqued. Good. Now you want to get a regular ratchet or a wrench and you want to set it to the 12:00 position. Then we need to loosen the axle nut about an eighth of a turn or 45°.
[24:07] So it's between the 10 and 11:00 position. Now, if you take a look at where the cotterpin goes, you can see the castle nut is blocking the hole for the cotterpin. So, you could try tightening it just enough so that the hole isn't blocked anymore. Now, the cotterpin could slide right
[24:23] through. And you can see the axle nut is kind of loose, which oddly enough is correct. This allows the bearing to spin freely. And the spec is for the hub to have between 1 and 5,000 of an inch of play. Let me show you. So, I set up a dial indicator on here. And let me just zero this out.
[24:36] That way I could show you guys at least visually what 1 to 5 thou looks like. So you can see the axle nut is exactly how we had it. And if you push the hub in, it goes to zero. And if we pull on it, it goes to around 3 to 4 thou, which is within our 1 to 5 thou spec that's recommended. And
[24:49] the only reason I'm showing you this is because most people don't have a dial indicator to check down to 25 ft-lbs and then back it off about an eighth of a turn. Even if you need to adjust the
[25:01] axle nut slightly to fit the cotter pin, you're going to be good to go. You're right in spec. Now, let me show you the proper way to fasten the cotterpin. First off, do not reuse your old cotter pin. This axle nut is only on here fingertight, so the cotter pin is holding this in place. That way,
[25:14] it doesn't come loose and your wheel doesn't fall off. So, first, push the cotter pin all the way in with your finger and hold it there. Then, grab a pliers and bend it outwards 90°. Now, some more leverage. And you want to bend that cotterpin as flat as possible against the end
[25:30] of the axle. And that's about all I could do. So now wedge the pliers between the axle nut and cotterpin to keep the cotterpin in place. And then tap the end with a hammer to flatten it out. Good. Now your axle nut is securely locked in place. That's not going anywhere. Now this is completely
[25:43] done. All you need to do is install a dust cap like this. You just need to fill it with grease. Take a little bit of that grease, put it around the edge of the cap like so. That way it doesn't get corroded. And now use a rubber mallet to tap the dust cap onto the end of the hub, making sure
[25:58] it goes in as straight as possible. And with that, you'd be good to go. But as you know, I like going above and beyond and showing you guys the best that you could get for your setup. And I'm going to be installing these. These are called bearing buddies. They work amazing for keeping the
[26:11] water and the dirt out. So, let's knock this dust cap off since we aren't using it. And install our bearing buddy. This thing is awesome because it is spring-loaded, so it keeps a positive pressure on here. Let me show you. So, first, get a little bit of grease on the end here. That way, it doesn't
[26:26] corrode to the hub. Now hammer it on just like the other dust cap, making sure it goes in as straight as possible. Next, let's connect the grease gun to the zer fitting and pump this up with grease. So, pump it up and watch the plate inside the bearing buddy get pushed outwards. And once you see it
[26:41] pushed all the way out and stay out, it's filled with grease. Now, I like to spread the grease around inside to prevent any corrosion and then push the dust cap on. Now, in the back of the hub, not supposed to happen. This means the fitting is bad. So, loosen it up with a 10 mm wrench and
[26:58] pushing that grease out. Then, let's get a new Xer fitting right in here. And I'm installing an angled one. That way, I could more easily add grease with the wheel on. Now, let's attach the grease gun. And we're only going to need a few pumps since we have that bearing buddy installed.
[27:13] Good. And now we're done. All right. So, now you know how to properly replace the wheel bearings on your trailer. I did the other side as well, but now we can't reinstall these old dry rotted tires. So, I'm going to show you how to use one of these manual tire changers to change your tires at home.
[27:30] But first, real quick, how do you know what the correct tire is for your specific trailer? First thing to look for is over on the trailer tongue. There is usually a sticker somewhere on the side here. You can kind of see where our sticker was. This trailer is pretty old, so that sticker is
[27:44] long gone. Now, for this trailer, I know the sticker exists. And if we take a look down here, kind of near the tongue right over here, you could see the sticker. And it gives you everything you need to know. the tire size, the tire pressure, which is very important, and also how much weight
[27:58] each axle could hold, which is important for finding the correct tire. So, since we don't have that information, what we're going to do is go off the tire that we have already. And what you want to do is look right here, and this is our tire size, 17580 R13. And then this number right here,
[28:14] 92/88M, is very important. The M is the max speed rating for this tire. And if you look at the chart, that's 81 mph. And then the 92/8892 is for a single axle trailer. 88 is for a multiple
[28:26] axle trailer. And if you look at the chart, that means our tire could hold 1,389 lbs per tire. So that's about 2,800 lb per axle, which is about right for this 19 ft boat. So we know which tire
[28:38] size we need and the tire load rating. But what brand do you go for? And I've had really bad luck with trailer tires. I don't want to talk about it. So I made a quick Instagram post asking you guys what tires you recommend from your experience. and I really appreciate all the suggestions. The top
[28:52] voted comment was from Priority Tire and they recommended Trans Eagle tires for towing. So, I went on their website and I searched for my tire size, which again 175 8013 and there are a bunch of different options. I mean, lots of tires. There's a bunch of high-end brands to more budget
[29:06] friendly options. And I took a look at the tires they recommended and it actually has a higher speed rating of 87 mph and a higher load rating. So, it's a heavier duty tire. Plus, you can't beat the price. So, I ordered three of them, and I'll explain why I got three for a single axle trailer
[29:20] it's worth checking the homepage for the special deals like these. And then there's also a discount page, which I'll link in the description for you. So, if you need tires for your car or trailer,
[29:32] you could find some really good deals on here, and hopefully that helps you save some money. So, that's how you properly find which size tire you need for your trailer. Thank you very much, Priority Tire, for the suggestion and for supporting the video. And with that said,
[29:44] the air out. So go to the valve stem and remove the dust cap. Then use a valve stem core tool. And you want to insert this into the valve stem and unscrew it. That way the core comes out.
[29:58] And check this out. You can see our core is all corroded. So that's probably one of the reasons why the tire wasn't holding air. Okay. So as the air comes out, next we need to debead the tire. So place it at the base of the tire changer. And then this piece right here needs to go between the
[30:11] rim and tire like that. Now get the handle that comes with the tire changer and insert it here. And then this gives you the leverage you need to press the sidewall down and debead the tire. So push it all the way down like this. Then you want to rotate the wheel and push it down again.
[30:24] Perfect. And you can see how the tire came off the wheel. Now we need to flip this over and do the other side. So get the tool between the tire and rim and push down. Good. And you can see the tire separated from the wheel. Now let's mount the tire to the top of the tire changer. So line up
[30:38] the lug nut hole with the hole in the base right there. Then add the wheel holder. And finally, insert the metal rod, which prevents the wheel from spinning. Now, let's tighten down the top. Then, snug it up with your tire iron. And now, we can get the duck head attachment on here. And
[30:51] wheels. And now, with everything all set up, all you need to do is lubricate the duck head with some soapy water. Then, slide your tire iron under the sidewall of the tire. And then, use leverage to lift the sidewall of the tire up over the duck head like that. Now, we want to
[31:06] lubricate the rest of the tire with soapy water. And this is very important. It makes the process a lot easier. Without lubrication, this is going to be impossible. And now we need to spin this duck head around the tire using the long metal bar for leverage. And you're going to have to use some
[31:18] force to do this. And what we're doing is lifting the tire up over the wheel like that. Good. Now, we need to remove the bottom sidewall. So, sneak that tire iron down under the bottom of the tire. idea of what's happening, here's a view from under the tire. Now, we can spray this side down with
[31:35] some soapy water. And you can't use too much soapy water, so get it really lubricated. And then the same process as before, work that duck head around the edge of the tire, and that lifts the other sidewall up over the rim. That way, we can remove this tire off the wheel. Beautiful. And just like
[31:48] that, the old tire could be removed. Now, before installing a new tire, we want to install a new valve stem. And to remove the old one, just grab a cutters and cut the base right here. Then, the valve stem should come right out. Now, we can install the new one, all you need to do is get it
[32:01] through the hole like that. Then, screw on a valve stem puller all the way. And this is designed to pull on the valve stem to seat it up into the wheel. Perfect. And that's all there is to replacing a valve stem. Now, an extra step I like to do is to clean right where the tire bead seats
[32:14] onto the wheel. So, spray it down with some soapy water. Then, use a metal wire brush and brush the surface to clean up any corrosion or old rubber or dirt left behind by the last tire. Good. Then, we can wipe it down to remove all that dirty water. And make sure you wipe down the entire wheel. Now,
[32:27] the wheel. And this is important to do so that the new tire has a nice clean smooth surface to seal to. Sometimes you could install a new tire and it could leak air through the surface, especially if there's corrosion or dirt. Beautiful. So, with the rim nice and clean on the inside where the bead
[32:42] seats, our valve stem is brand new and installed. We are ready to install our brand new tire. So, let me show you how. Okay, so now let's get the new tire up on here. And in this case, I'm going to be using this tire lubricant on the new tire. It's inexpensive and works really well. But if you
[32:56] have to do is spread it around the entire sidewall where the bead is. And now we're gonna flip this tire over and push it onto the wheel. Sometimes this easily pushes onto the rim, but this tire is
[33:08] a little stubborn and that's okay. Just get your duck head attachment mounted and then spin it around the wheel to push the bead of the tire over the rim. Good. Now, we need to use the tire iron to put the bead of the tire under the duck head. Then, we need to add lubricant around the entire
[33:21] bead and repeat the process. This is literally just the opposite of what we just did. Instead of removing the tire, we're pushing it back on. And this last part takes a little extra strength cuz we're really stretching the brand new tire. There we go. All right, beautiful. The last thing
[33:35] to do is to fill this with air. Now, before you do that, if you have a yellow dot on the sidewall of your tire, in this case, we don't have that, but if you do, that is the lightest point of the tire, and you'd want to rotate the tire to match the valve stem. So, that dot would be right here where
[33:49] the valve stem is, cuz the valve stem weighs just a little bit extra. So, it helps balance the tire. And real quick, just for reference, here is what that yellow dot looks like. So, these tires are for my barn fine restoration I'm going to be doing. And you could see right here,
[34:03] this is the light spot of the tire and it needs to be matched up with that valve stem. But since our trailer tires don't have the yellow dot, now we can move on to filling the tire with air. And I'm leaving the valve core in the stem to do this. And at your compressor, you want to set the tool
[34:16] pressure to as high as it goes. That way, it's adding as much air as quickly as possible to seat that bead. Now, you want to look on the side of the tire, and it says to inflate to 65 PSI. So, let's fill the tire up with air. And notice how you could hear that air escaping, and the tire
[34:29] isn't really filling up with air. Well, a trick is to lift the tire at different spots to press the bead against the wheel until it seals. Perfect. And now you can see the tire is actually filling with air. And that bead just seated. Okay. So, now we need to pay attention and only fill this up to
[34:42] 65 PSI. Don't overfill it. Good. Then we can get that cap on the valve stem. And now you know how to replace a tire with a manual tire changer. Now, off camera, I mounted the two other tires. So, all three trailer tires have been changed. And one last thing, how do you balance the tires at home?
[34:57] Well, the first option is you don't balance them. They're small. They're for a trailer. You might have a little vibration and in that case, these are ready to go. But you could also use something like balancing beads and these are actually pretty cool. So, what you do is they come with these
[35:09] bottles. And in these bottles are these little beads. And here's what they look like. The beads are made of glass. That way they don't absorb moisture. And you're going to need about 3 oz, which is about a third of the bottle for one trailer tire to balance it. And the third option
[35:21] balance it. So, that's what I chose to do. And this shop has some nice equipment. So, here's the process to balancing the tires. The tech mounts the wheel to the balancing machine and then lowers the hood. Then the machine spins the wheel and checks the balance. And in this case,
[35:37] you can see we need 3/4 of an ounce, which isn't horrible. That's actually pretty good. And if you look here, the laser points to exactly where you need to place the weight. And then the tech could hammer that weight onto the side of the wheel. Finally, the wheel is spun up again and tested
[35:50] to make sure it's properly balanced. And check it out. We're good to go. Now, back at home, let's get the spare tire on the trailer and torque it down. Then we could get the port side wheel on the trailer and torque that to spec. And finally, there's one last wheel to get on the trailer. So,
[36:04] let's handtighten all five lug nuts on there. Then we could remove the jack stands and drop it down so the wheel just barely touches the ground. Now, let's torque the wheel to spec in a crisscross pattern. And finally, drop it down the rest of the way. And one last thing, in order to prevent
[36:17] your tires from degrading over time if you keep your trailer outside, tire covers like this are inexpensive and easy to install, and they prevent the UV radiation from degrading your tires. So, I highly recommend it. But I don't need these right now because we're taking the boat for a ride. So,
[36:31] there you go. Now you know how to properly replace the wheel bearings and the tires on a trailer. And I'm really excited because now we could safely pull this trailer on the road and test out this project boat on the water. And man oh man, what a difference. I'm glad we did this right away. This
[36:43] trailer is riding nice and smooth, and I know this trailer is now going to be reliable. Now, hubs get completely submerged. But because we did everything properly, it's going to keep all that
[36:56] water out and keep those bearings in good shape. So, there you go. I hope this video was helpful. subscribe button for more informative how-to videos like this. As always, all the tools and products I used in this video are linked down in the description so you can easily find them. And
[37:11] now I'm off to seat trial the new project boat. She is running great and this is a job well done.
⚡ Saved you 0h 37m reading this? Transcribe any YouTube video for free — no signup needed.