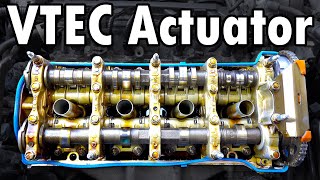

Save $900: DIY VTC Actuator Replacement
44sHigh cost savings and practical DIY appeal make it highly shareable.
▶ Play Clip"Delivers a thorough DIY guide with clear steps and tips, though some fluff in cleaning segments."
This video provides a comprehensive DIY guide to replacing a Variable Timing Control (VTC) actuator on a 2008 Honda Accord with a 2.4L engine. The presenter demonstrates a method that avoids removing the camshaft, saving time and reducing the risk of errors. The guide covers diagnosis, step-by-step replacement, and verification, emphasizing the importance of proper timing and cleanliness.
The video demonstrates replacing a VTC actuator without removing the camshaft, saving time and reducing complexity. The example vehicle is a 2008 Honda Accord with a 2.4L engine, a common problem on many Honda engines.
Symptoms include hesitation during acceleration, reduced fuel economy, and misfiring. Use an OBD2 scanner to read codes; the code 'VTC advanced malfunction' is common. Confirm by performing a cold start and listening for a rattling noise on startup, which indicates a bad actuator.
Other issues like a worn timing chain can trigger similar codes. Eric the Car Guy notes that low oil can cause timing chain wear. Check engine oil level before diagnosing. A cold start rattle confirms the actuator is bad.
Common hand tools: torque wrench, thread locker, paint marker, gasket maker, degreaser. Parts: new VTC actuator with bolt, valve cover gasket set. Dealer quote was $1000; parts cost ~$100, saving ~$900.
Remove hood prop and lift hood higher for access. Clean the valve cover area with degreaser and a brush to prevent dirt from entering the engine. Use a leaf blower or compressed air to remove loose debris.
Disconnect hoses and electrical connectors. Remove 10mm bolts holding the valve cover. Use a rubber mallet if stuck. Once removed, inspect the top end for sludge; if present, stop and clean before proceeding.
Lift the car, remove the passenger wheel, and access the crankshaft pulley. Rotate the engine clockwise to align timing marks. The white mark on the pulley aligns with the arrow on the engine block. Ensure camshaft punch marks are up and lines align.
Rotate the engine counterclockwise to release tension, insert a pin into the tensioner hole, then rotate back to TDC. This prevents the tensioner from tightening.
Use a 24mm wrench on the camshaft to hold it steady. Apply heat with an induction heater to loosen the bolt (up to 800°F). Break the bolt free with a breaker bar.
Instead of removing the camshaft, remove the exhaust sprocket to slide out the VTC actuator. Zip-tie the chain to the sprocket and mark the punch marks with paint to maintain timing.
Ensure the new actuator is in the unlocked position (keyway facing right). Slide it onto the cam, apply thread locker to the bolt, and torque to 83 ft-lbs. Lock the actuator by turning it until it clicks.
Align the chain with the punch marks, reinstall the exhaust sprocket, and torque the bolt to 51 ft-lbs. Verify timing marks align after rotating the engine twice.
Install the timing chain tensioner cover with RTV, torque to 9 ft-lbs. Reinstall the valve cover with new gaskets, torque bolts in a criss-cross pattern to 9 ft-lbs. Reconnect hoses and coils.
Drain old oil, replace filter, and fill with 5W-20 full synthetic. Start the engine, check for leaks and codes. The engine runs smoothly with no startup rattle, confirming the fix.
Replacing a VTC actuator is a manageable DIY job that can save around $900 in labor. The key is proper diagnosis, careful timing, and cleanliness to avoid further issues. With the right tools and patience, the repair can be completed successfully at home.
What are common symptoms of a bad VTC actuator?
Hesitation during acceleration, reduced fuel economy, and misfiring.
00:54
What diagnostic code is associated with a VTC actuator problem?
VTC advanced malfunction.
01:45
How do you confirm a bad VTC actuator?
Perform a cold start and listen for a rattling noise on startup.
02:26
What is the torque spec for the VTC actuator bolt?
83 foot-pounds.
19:55
What is the torque spec for the exhaust sprocket bolt?
51 foot-pounds.
21:16
Why is it important to set the engine to top dead center before removing the VTC actuator?
To ensure timing marks align so the engine can be reassembled correctly; otherwise, valves and pistons can collide in an interference engine.
13:56
What is the purpose of the pin inserted into the timing chain tensioner?
To prevent the tensioner from tightening while the chain is loose.
14:33
What should you do if the top end is sludged up?
Stop and clean the engine with an oil additive before replacing the actuator, otherwise the new actuator will break again.
09:41
What is the recommended oil type for this engine?
Full synthetic 5W-20.
29:05
What is the keyway position on a new VTC actuator?
It should be in the unlocked position, with the keyway facing right.
18:24
No Camshaft Removal Needed
This method saves time and reduces risk of errors, making the job more accessible to DIYers.
00:02Alternative Causes
Highlights that a worn timing chain can mimic VTC actuator symptoms, emphasizing proper diagnosis.
02:00Cost Savings
Dealer quote $1000 vs $100 in parts, showing significant savings for DIY.
03:45Interference Engine Warning
Critical safety tip: misalignment can ruin the engine, stressing the importance of TDC.
13:56Unlocked Position Key
A small detail that is crucial for proper installation, preventing damage.
18:24[00:02] going to show you how to replace a vtc actuator in your vehicle and the to show you you don't need to remove the camshaft that's going to save you time it's going to make the job a lot easier and it's
[00:16] going to make it a lot harder to mess up now in this case we're working on a 2008 honda accord with a 2.4 liter engine and this is a very common problem on these honda engines with millions of vehicles affected but
[00:29] honda there's tons of vehicles on the road and that means they have actuators that could go bad so this same basic process watching this video you'll know exactly
[00:42] variable valve timing actuator so let's get started is diagnose the problem we need to make sure that vtc otherwise we're throwing parts at the
[00:54] and it might not even fix the problem luckily figuring out if your vtc actuator is bad is very easy to do now in this case the owner drove the car the it felt like he had some hesitation with accelerating it wasn't accelerating
[01:08] properly his fuel economy went down and it even started misfiring so since thing to do is scan the computer and see and to do that i'm using a bluetooth obd2 scanner which plugs in
[01:20] right under the dash so find your obd2 port which is this right here we need to do is put the key in the ignition and turn it to the run position but don't start the car now we can go to
[01:32] the app on the phone and click read codes now we could read a bunch of airbag and stuff like that but we so click that it'll scan the computer and you can see
[01:45] we have one check engine light code right there so let's check it out it's a vtc advanced malfunction and it's saying the most frequently reported fix is to actuator now we can't go just off of this it's a
[02:00] but other variable valve timing problems could trigger this code for example i spoke to my good friend and fellow youtuber eric the car guy and he said when he sees these codes he finds that the timing chain
[02:12] is typically worn out especially if the owner ran low on oil so the timing chain i'll show you how to diagnose that as well but to know for sure our actuator is bad we have one more test and that is to do a cold start and
[02:26] engine rattle now by cold start the engine hasn't been started in three to six hours it doesn't actually have to be cold it's pretty hasn't been started in a while and what we're gonna do is just listen
[02:39] start the car we need to check the engine oil level because low oil could cause that actuator to make a rattling noise on startup and as it's filled to the top notch so we are good to go
[02:54] notch so we are good to go so let's start her up and listen to this of a bad vtc actuator it won't rattle like that the whole time
[03:06] and then after the engine's warmed up if you shut it off it'll take a couple hours before it does that again actuator actuator's bed let's replace it and to do that here are
[03:19] all the tools and products you're going to need now as always we're using common home yourself no problem we have a torque wrench we have thread locker a paint marker we have gasket maker and
[03:32] a strong degreaser parts wise we have a brand new vtc and it came with a new bolt and we have a valve cover gasket set because we're don't want to reinstall it and get any leaks
[03:45] stands because we're gonna have to lift the vehicle up to remove the wheel from the side the engine and that is all you're gonna need to get everything here in the description so you could easily
[03:58] find it and just so you get an idea my friend went to the dealer to get a quote a thousand dollars to get this job done a hundred dollars in parts so we're saving around 900 which is a
[04:11] and not only are we saving all that money but we're doing the job ourselves properly plus we're gonna have a good time doing it so let's get our safety and let's get started and the first thing we're gonna do is give ourselves
[04:26] we're gonna be working right over here and right now we have our hood prop in and our hood is in the way it's really not lifted up very high so a little trick i want to show you guys that you might not know is remove
[04:38] the hood prop from the hood lift the hood up even further and slide and you can see right here there's another square you could fit the hood in so now the hood prop is not in our way and also the hood is lifted up
[04:50] access to our engine next what we need to do before we remove any bolts and remove this valve cover we need to make sure we get all the dirt cover is off we have access to the internals of the
[05:03] all that stuff we don't want to get any dirt or dust in there can see this is a pretty dirty engine so get a leaf blower or compressed air out of the engine bay so it doesn't get into the engine so with all that loose
[05:18] dirt and dust blown away we still have a bunch of grease and grime and dirt in get into the engine and this is actually perfect timing because spray nine recently sent me a bunch of their heavy duty cleaner and
[05:30] clean that up so all you need to do is spray the valve let it soak for a couple of seconds and you guys know how much i like detailing brushes because they make it super easy
[05:42] to loosen up the dirt and get the area extra clean so brush and then grab an old microfiber towel and watch this all we need to do is wipe this off and holy smokes the dirt comes right off with no effort at
[05:55] all and check out this before and after what a difference so we cleaned out all valve cover so we could safely remove it without anything falling into the engine guys know me by now i can't just leave one small part clean
[06:09] and everything else dirty so although it's not necessary let's super clean the spray down the engine bay with the greaser and agitate it with a brush and crannies then just absorb that dirt away with a microfiber
[06:21] towel and check it out here's a before and after and what a difference now our spanking new and remember you don't have to do all that all you need to do is make sure the valve cover area is clean so dirt
[06:35] now i do want to thank spray9 very much for sending me out degreaser and and with our engine nice and clean we can move on to the next step and remove our valve cover now to remove the valve cover there's a couple things we
[06:48] as well as move out of the way so we're going to start right here and let's down from the valve cover using a 10 millimeter socket once that's loose now we could wedge it behind the ac low pressure line
[07:01] steering hose out of the way if we come to the other side we have evap hoses and the way as well so first let's remove this evap hose so using a pliers grab
[07:13] hoses every time is turn the hose from side to side like this which breaks it loose and then the hose will come right off of the way next up we have this vacuum hose here
[07:26] that we need to remove so same process use pliers to remove the hose clamp comes right off then we can tuck it out of the way assembly to the valve cover so remove both of these bolts and then separate it
[07:39] like that so with both sides of our valve cover cleared of everything let's take this cover off and remove the coils holding this in so remove all those and then remove the cover then there's
[07:53] removed so unscrew the 10-millimeter bolt holding in the ignition coil behind the engine do that for all four of these out of the way we don't need to remove the spark plugs but we do need to remove
[08:09] our dipstick so let's get that out of here and put that down somewhere clean and finally we have the last six bolts holding in this valve cover so let's and i really like how honda uses a lot of the same size fasteners
[08:21] in this case 10 millimeter and that makes this quick and easy to do rubber seal many times these are stuck on here they don't come up so what and you just go under like that and pry it up and they'll pop right out
[08:35] we can remove the valve cover and this one is stuck on here pretty gently tap it with a rubber mallet and now it's broken free so we can remove it and there we go we are into the engine you can see why it's super
[08:49] that falls in here gets right onto the camshafts into the valves wouldn't be good so this is the intake cam right here and you can see the valves down there and then we have our exhaust cam right
[09:03] back here and then our vtc actuator is right there that rattling sound so to get a better look at our actuator let's remove this and to do that there's two 12 millimeter bolts holding it in so remove each of
[09:16] these noting the orientation because one bolt head is longer than the other once could come out and make sure you put this down somewhere clean so we don't guide out of the way we have better access to our cam
[09:28] actuator and before we do anything else up here the top end has to be inspected sludge this actually looks really good it's nice and clean no sludge at all but to give you an idea of what an engine with sludge looks like
[09:41] gooey tar-like substance that is sludge and that's from not doing if your top end is all sludged up like that stop and don't keep doing this first you're going to use an oil additive you're going to change the
[09:56] and clean because if it's all sludged up you're just going to break that cam actuator again and you're wasting your time but in this case we look good this this is what you want to see so now we need to set the engine to top
[10:08] dead center and in order to do that we have to access the side of the engine so so chalk off the rear tires and let's get the jack under the front of the car using the sturdy cross member as a jacking point to jack her up
[10:21] the wheels off the ground then we can get our jack stands under the sturdy mounts here and slowly lower the car down onto the jacks slightly holding up the car just as a backup just in case a jack stand
[10:35] and now we can remove the five lug nuts holding on the wheel the car so if the car falls somehow it can't fall all the way down so with the car safely lifted off the
[10:50] ground and our passenger wheel removed that gives us access to the side of the right here but in this car it doesn't have one you can see the little clip out and that gives you access to the engine
[11:05] so this right here is our crankshaft pulley and this is the bolt we'll use to top dead center i'll show you how to do that in a second the timing chain tensioner that we need to remove to get to that tensioner so
[11:17] and there are three bolts holding this in and you guessed it they are 10 and then this cover is stuck on here so cover to pry it up and now the cover comes right off
[11:31] alright so that right there is our timing chain tensioner that's what keeps gears i'll show you how to loosen timing chain tension this to top dead center and to do that we have a 19 millimeter
[11:45] and right on the inside of the pulley are the timing marks so we want to spin the engine the same way it spins with the engine being on so that's clockwise out for those timing marks so you can see right there we have one set of
[11:58] timing marks that first set we don't use ignore those but right down here is our up just a little bit so you get a better view so here's a close-up of that second we need to use so we have three marks right here and then we have a separate
[12:13] right down here this separate mark is the one that we need to use we're going to align now from the factory these are painted you can see because it has 200 000 miles and that one is white and the white one is the
[12:27] that we need to use to get the top dead center good so now you know how to find pulley now let's go to the top of the engine and let me show you how to align the camshaft marks for top dead center and the marks we're gonna reference are
[12:40] take a look at the diagram there's two things we need to align there are punch marks at the top of each sprocket so both the intake and exhaust be up top and with each of those up top you can
[12:53] in the middle so when the punch marks are up top and we're at top dead center so spin the engine clockwise using a sprockets we want these two lines to line
[13:06] up and once we get close slow down and let's get these aligned good so with the punch marks up top and our two lines lined up we are at top dead center so we know our cams are at top dead center but now we
[13:18] dead center so if we come right down here you take a look right on exhaust sprocket you look all the way down to the crankshaft pulley and you can see on the engine block is a little arrow
[13:31] white timing mark on the crankshaft pulley and you can see it matches perfect now hypothetically if your timing marks don't align perfectly millimeters like this your timing chain could have skipped a
[13:43] replaced but in our case we are spot on so we're and it's that easy to set your engine to top dead center and this is very important to do you can't skip this step at top dead center all of those marks
[13:56] align so when we remove the timing chain we remove these sprockets we put the new able to line it back up which is super important if we don't line it up interference engine the valves and pistons will hit and you'll ruin your
[14:09] that because we're at top dead center and all those marks align so the next step is to remove chain tension and in order to do that let's go back under the car so we could access the side of the engine where our
[14:21] now in order to remove the chain tension this is our automatic tensioner what we need to do is rotate the engine counterclockwise the opposite of what we a little bit and you'll see this little lock right here will move
[14:33] be a hole that we could stick a pin through turn the engine counterclockwise very little and you can see the hole up pin and put it in the hole to prevent the
[14:46] tensioner from getting tight and finally turn the engine clockwise back to top like that good so we're back at top dead center and our timing chain tension is next what we need to do is break this bolt free that holds in
[14:58] we're going to get a breaker bar on here but we need to hold the camshaft in and on the cam shaft right here is a spot to put a 24 millimeter wrench we'll use a breaker bar here and we'll break that bolt free
[15:13] on the camshaft and this is a 24 millimeter which honda recommends but as you can see there's a lot of play here so instead i went down one size this is and now that's nice and solid that's
[15:26] the longer the better and we have a 17-millimeter socket on here so let's on the boat holding in the actuator and now we can break this bolt loose
[15:41] going to use some heat to try to loosen up that bolt but we don't want to use an damage this timing chain so i'm going to be using one of these induction heaters very hot without any flames it just uses electricity
[15:55] so get the coils over the bolt and hold the button down and 10 seconds later this bolt is 800 degrees fahrenheit so now let's try breaking this loose okay here goes nothing just a little bit more
[16:12] free and still very hot so loosen it a couple turns need a breaker bar and potentially some heat loose what honda wants you to do next is to remove all the fasteners holding
[16:25] in the cams and it has to be done in a certain sequence a little bit at a then they want you to take the cam out and then you can replace the vtc back in you have to oil up certain spots because there's bearings here
[16:38] at a certain torque spec and there's a lot that could go wrong there plus this is a 200 000 mile engine taking it apart putting it back together especially if we have another solution to do this and my solution is
[16:52] to remove the exhaust sprocket right here and then we'll be able to slide out the vtc actuator put the new one in put our sprocket back in tighten it to go so let's go and unbolt our exhaust
[17:04] sprocket bolt but before we do that grab a zip tie and zip tie the chain to the sprocket and become misaligned let's also mark the punch marks to the chain using a paint marker so we know exactly where the punch marks
[17:17] back together okay so now let's get our wrench and ratchet on the exhaust cam and let's break that bolt loose good and actuator so now let's completely remove the bolt
[17:31] so now let's completely remove the bolt from the actuator from the exhaust cam sprocket and now we could carefully pry the actuator out a little bit like that and then do the same thing for the
[17:43] tighter so pry on each side a little bit at a time now that we hold the chain up so it doesn't fall avoid don't do that you want to make sure you keep tension
[17:56] on this chain at all times luckily it looks like we're okay so what i'm gonna keep tension on the chain and hold it up so one bungee cord will go on the power steering hose and the other one is gonna go on the ac line to hold it up
[18:09] by sliding it out good and now out with the old and in with the and you guys know i like to compare parts and these two parts are identical now the only difference is you can see the keyway on each of these
[18:24] unlocked position the keyway is facing towards the right it's on the right side on the old one the keyway is facing towards the left that's the lock we need this to be in the unlocked position that way we can install it
[18:37] then we can lock it i'll show you how to do that but for now do not rotate this we need to make sure it is in the unlocked position otherwise we can't and these do come brand new unlocked and real quick before we install the new
[18:50] actuator something very important i want to cover you heard me say don't let the when we're taking the sprockets off you can see right now i have them bungee that way there's some tension on it and it doesn't fall down into the engine if
[19:02] you need to take the timing cover off and it's just a big mess we want to make doesn't fall off the sprockets deeper in the engine so make sure you support your timing chain have bungee cords or zip ties whatever it is ready
[19:15] and support it just like this so now let's get this installed and since there is a key way it only goes on one way so we could slide it on the cam and push it
[19:28] turn this anymore so with the actuator in place now let's first we want to make sure it's identical to the old bolt and it is and some medium strength thread locker but instead of using medium strength this
[19:43] strength removable this is still removable but it's stronger than the don't want this bolt to back out so add some high strength removable thread locker to the end of the threads and so it torques down correctly
[19:55] the bolt with some motor oil now we can install the bolt and hand tighten it and this bolt gets torqued down to 83 foot pounds lock the actuator by turning it and you heard that click that means it's
[20:09] locked now let's get the timing chain back onto the actuator and remember we punch mark so let's get that aligned on there half a link so our sprocket tooth needs to be in
[20:22] good and that's more like it and that's exactly why we marked these links and get that exhaust sprocket back onto the exhaust cam and this is gonna be back and forth just a little bit is gonna help walk that sprocket on and
[20:37] and since this is keyed the sprocket only fits in one direction so work that sprocket on there until it fits in just like that sprocket we need to make sure these are aligned so if we take a look over here
[20:50] on the chain lines up with the punch mark on the actuator same thing over here on the exhaust you can see the green mark lines and then if we look over here we have those two lines they line up towards
[21:03] so we know both of these sprockets are improperly they're timed correctly sprocket bolt so get some high strength thread locker on this bolt end as well and the rest of the bolt is pretty oiled so we could get this into place and
[21:16] and then we could torque it down to 51 foot pounds the sprocket and make sure you have a good grip on this so you don't drop it down into the timing cover all right so our sprocket is on there
[21:29] it's bolted in it's torqued down we are good to go here but you did see sprocket on i had to use some extra force this timing chain was pretty tight and sometimes it's hard to get it on so a
[21:41] that timing chain on just go under the car and all you would millimeter bolts holding in the chain and pull that chain tensioner right out that'll relieve all the chain tension
[21:54] chain so it doesn't fall down because now it's going to be even looser cam now let's remove the pin from the timing chain tensioner now we need to turn the engine over by hand and make sure that our timing marks
[22:10] line up these two lines here should line up after spinning the engine we made on the chain will not line up anymore don't worry there should be facing up when those lines are
[22:23] make sure those two lines face each other and that means it's top dead dead centered down on our pulley and if both of those say so let's spin the engine with our ratchet and everything is looking good
[22:38] so we want to spin it over at least two times and then as you get close to that top dead center slow it down and let's see if it aligns beautiful the two lines face each other and the crank pulley mark lines up perfectly with top
[22:51] so with our timing verified we are good to go here now we just need to bolt everything up then we can go starter up and see if we fix the problem and remember the bolt with the longer head goes to the left
[23:05] and these bolts get torqued to 16 foot pounds so with the top chain guide just make sure that that chain is riding in the middle of that chain guide and it and also down here it's also riding in the middle so we know that's
[23:18] all aligned next let's go and install the timing chain tensioner cover so to clean off all that old rtv to get a nice smooth surface what i not a metal scraper a metal scraper could
[23:30] way for the oil to seep out so stick with the plastic scraper to gets removed then we could wipe down the surface with alcohol to remove any oils and now this is good to go we also can't forget about the other mating surface on
[23:45] cleaned as well so shove a clean towel into the opening so the old gasket we and then we can scrape off the gasket with our plastic scraper and finally wipe it down with alcohol and remove the towel from the opening
[23:59] all right so with this surface clean and smooth and our engine surface clean and now let's add our rtv and i'm going to be using this rtv it's called the right it is a quick setting rtv so what you do is you add it on here
[24:12] five minutes you need to go and torque and then one minute later after torquing down it is ready to go in service if we were using regular rtv we'd have to add our bead then we have
[24:24] hand tighten it let it sit for an hour after an hour torque it down and then to wait for it to cure but with this we don't have to do that so i could get this car back in service today the mating surface of this piece
[24:37] don't need a thick bead but just make sure you go around the entire perimeter just like that so now this is good to and a real quick tip because we do have a bunch of rtv left in here we don't
[24:51] so what you do is you just get a little bit of rtv and you shoot it out past the just like that and that'll cure and prevent the oxygen from getting in here you just cut that tip off and you're good to use this again so
[25:04] car now this is a bit tricky because it's the fresh rtv onto anything and ruin the bead so take two bolts in already and this is going to help me align this
[25:18] could just hand tighten the three bolts in and within five minutes we need to torque these down to nine foot pounds good so with the cover torqued down and sealed now let's get the wheels back on and torque all five lug nuts down to
[25:31] and with our wheel on i'm not going to drop the car to the ground just yet change the oil but before we do that let's get the valve cover on all the gaskets on the valve cover so we don't have any leaks we have a big
[25:46] edge here and then we have four gaskets in here the spark plug wells so let's start with the spark plug well tough they're not as flexible as you think and they're
[26:00] these is to get a flathead screwdriver in between the seal and the side of the valve cover like that and then we're gonna gently tap that screwdriver in and you do want to be careful not to scratch the surface on
[26:12] once it's driven in there just pry your screwdriver outwards and you can see the and like i said these seals are pretty tough there's a piece of metal in here with the old and in with the new now a little trick
[26:27] very easily is just get some motor oil and rub it on the edge of the seal just need to lightly coat it and then watch this just get that seal centered and that seal will push right in just like that and we're good
[26:42] now we can remove the old valve cover gasket which should come right out the same orientation way into the valve cover there's a little channel it sits in
[26:54] new gaskets in we won't have any oil installed now on honda engines there's rtv they're all in the corners so there's a spot there
[27:06] spot in that corner and a spot in that corner let's take a closer look there where the engine block and timing cover meet doesn't seep through and all you need is a very little bit
[27:20] that crack and we're good to go so i added the rtv and now we could place our valve cover onto the head of the engine and you want way down next we have to tighten down the six
[27:35] and the kit comes with new washers so use them the rubber side faces down and then hand tighten the nut on top so once those are on we could torque them criss-cross pattern to evenly
[27:48] any leaks next get the four ignition coils seated onto the spark plugs and then these bolts also get torqued down to nine foot pounds and then we could tighten down the four bolts that hold this in
[28:01] until they're snug then we could get the power steering hose bolted back down onto the valve cover so it won't move so snug that down and then on the other in the evap hoses here
[28:14] both of them down so they're snug we'll finish up here with the vacuum in place and same thing with the evap hose on the right get that on there and get that hose clamp in place just
[28:28] like that and finally with everything bolted in we give it a quick wipe and then we could slide it in and with that we are pretty much done now in this car i'm going to be doing an
[28:41] 15 oil life so it's worth doing to finish so let's break the oil plug loose and let's see if we could remove this without making a mess pretty good now you're gonna let all the
[28:53] oil drain out and once it's drained out snug up that bolt and don't over tighten it now let's remove the oil filter and replace it with a brand new one which i pre-filled and i also lube the
[29:05] o-ring on the top and a quick tip is i like marking down pen that way you know when the oil was with some full synthetic 5w20 oil good
[29:19] out for drips on our freshly cleaned engine and let's check the oil level and as you can see we're completely filled so we are done so let's remove the jack stands from under the car
[29:32] stands from under the car and lower her down all the way like so completely done now moment of truth let's go start her up okay here we go let's start her up
[29:52] no startup noise at all and taking a look at our dash we don't is buttery smooth it's stable and this engine sounds great about 25 minutes you can see we're at operating temperature i double checked
[30:07] any codes at all and she is running great she's driving great as well been driving around for about 30 minutes accelerating nice and smooth and the check engine light hasn't come
[30:23] problem all right now that's what i'm talking about she starts up nice and quiet no more rattle from that old vtc actuator beautifully and that's everything you need to know
[30:38] on how to replace a vtc actuator at home using common hand tools remember to give it a thumbs up if you're not a subscriber consider hitting and as always all the tools and products i used in this video are linked in the
[30:53] description below so you could easily find them
⚡ Saved you 0h 30m reading this? Transcribe any YouTube video for free — no signup needed.