
Live2D Basics: Import & Layout
45sQuick intro to Live2D interface hooks beginners who find the software intimidating.
▶ Play Clip"The title accurately promises a guide on rigging a VTuber model with Live2D, and the video delivers a comprehensive overview of the process."
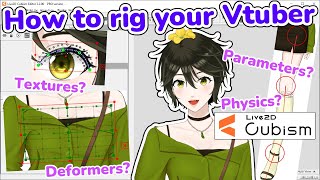
This video tutorial explains how to use Live2D to animate a VTuber model. It covers importing a Photoshop file, navigating the Live2D interface, creating deformers, rigging parameters, adding physics, and exporting the model for use with face tracking software.
The video covers how to use Live2D to animate a VTuber model, assuming the viewer has a Photoshop file ready.
Open Live2D, drag and drop the Photoshop file, select highest resolution. The layout includes Parts, Parameter, Deformer, Inspector, and Canvas areas.
Select all in Deformer window, generate mesh with standard preset. Create texture at size matching Photoshop (max 2048x2048 for free version), set margin to 30, automatic layout, check scale is 100%.
Create seven folders: Face, Eye, Eyeball, Brow, Mouth, Body, Move. Drag parameters into corresponding folders. Add new parameters for additional animations like arms, legs, etc.
Three main deformers: Warp (for X/Y/Z parameters), Rotation (for joints and Z), and Deform Path (for eyes, mouth, hair). Use more deformers rather than too few.
Start with broad parameters (body, move, face) before detailed ones (eyeball, brow, eye, mouth). Broad parameters are easier and allow easy replacement if parts are incorrect.
Under Modeling, open Physics, add and name (e.g., hair physics). Select input preset as head, physics model preset as hair length. Add output settings for hair parts. Test by clicking and moving cursor.
Under File, click Export for Runtime, export as .moc3 file, ensure physics is checked, save in a new folder. The folder is the fully rigged VTuber model ready for face tracking.
The video provides a complete workflow from importing a Photoshop file to exporting a rigged VTuber model, emphasizing the basics of Live2D and encouraging viewers to seek detailed parameter rigging tutorials elsewhere.
What are the three main types of deformers in Live2D?
Warp deformer, Rotation deformer, and Deform Path.
3:45
What is the maximum texture size for the free version of Live2D?
2048 x 2048 pixels.
2:05
What should you set the margin to when creating a texture?
30 pixels.
2:12
What are the seven recommended parameter folders?
Face, Eye, Eyeball, Brow, Mouth, Body, Move.
2:40
Which deformer is useful for joints and Z parameters?
Rotation deformer.
4:42
What is the purpose of a Deform Path deformer?
To deform textures like eyes, mouth, and hair by moving dots along a line.
4:48
What should you check after creating a texture to avoid pixelation?
That the scale is 100%.
2:19
What is the recommended order for rigging parameters?
Start with broad parameters (body, move, face) then detailed ones (eyeball, brow, eye, mouth).
6:08
How do you add physics to a model in Live2D?
Under Modeling, click Open Physics, add and name, select input preset as head, physics model preset as hair length, then add output settings for the parts.
6:41
What file format should you export for runtime?
.moc3 file.
7:24
Live2D is simple once you understand basics
Encourages beginners that Live2D is learnable, similar to Photoshop.
0:23Deformers as folders
Conceptual explanation that deformers bend all contents inside, including other deformers.
3:33More deformers is better
Practical advice to avoid too few deformers, ensuring smooth animation.
5:20Rig broad parameters first
Strategic approach to rigging that allows easy correction of part separation errors.
5:58Export folder is the model
Clear final step: the exported folder is the complete VTuber model ready for use.
7:16[00:00] hi guys it's kapaka in this video i'll
[00:03] be talking about how to use live2d to
[00:05] animate your youtuber model
[00:07] in the last two videos i went over how
[00:10] to draw
[00:11] and cut up your youtuber model you'll
[00:13] want to have your photoshop file ready
[00:15] for live 2d import
[00:16] so if you aren't sure check that
[00:18] everything is formatted correctly in
[00:20] this video live 2d might seem daunting
[00:23] at first but
[00:24] so is learning how to use photoshop or
[00:27] whatever drawing program it is you use
[00:30] what i'm trying to say is live 2d is
[00:32] simple
[00:33] once you understand the basics and the
[00:35] tools
[00:36] let's get started firstly open up live
[00:39] 2d
[00:39] and import your photoshop file by
[00:42] dragging and dropping
[00:44] and select the highest resolution to
[00:46] view your model in
[00:48] before we go any further let me
[00:50] introduce you to the layout of live 2d
[00:53] parts show all the parts of your model
[00:56] which are also called
[00:58] textures and how they're layered from
[01:00] front to back
[01:02] the farmer is where you'll be working
[01:04] most of the time
[01:05] it shows the deformer hierarchy and
[01:08] where you create deformers that
[01:10] bend your model to create movement
[01:13] inspector is where you control the
[01:15] clipping id opacity and blend mode
[01:18] of your textures parameter is
[01:21] also where you'll be working most of the
[01:23] time it has the parameters that your
[01:26] face tracking program will use and here
[01:29] you set the keyframes that
[01:30] animate your model canvas
[01:34] shows your model and this is where you
[01:36] interact with the deformers
[01:38] use the scroll wheel to zoom in and out
[01:41] and press the space bar
[01:43] and click to pan around secondly
[01:47] select everything in the deformer window
[01:49] and generate a mesh
[01:51] select the standard preset and close the
[01:54] window
[01:55] next create a texture at this set the
[01:58] width and height dimensions to match
[02:00] your photoshop document
[02:01] the maximum will be 2048
[02:05] by 2048 pixels for the free version
[02:08] of live 2d
[02:12] set the margin to 30 pixels and select
[02:15] automatic layout click on any one
[02:18] texture
[02:19] and check that the skill is 100 percent
[02:23] if it isn't the image will look
[02:25] pixelated
[02:26] click ok
[02:30] and now save your live 2d progress
[02:35] thirdly
[02:36] sort parameters into photos so that is
[02:39] neither to work with
[02:40] create seven folders for the face eye
[02:44] eyeball brow mouth body and move
[02:48] drag the parameters into the
[02:50] corresponding folders
[02:53] you can add more parameters for
[02:56] additional animations
[02:57] click on the new parameter button and
[03:00] give it a unique name
[03:01] then click ok examples of additional
[03:04] parameters are
[03:05] arms legs ears wings or tails
[03:09] key forms are poses that you set as the
[03:12] maximum
[03:13] and live2d will animate the range of
[03:15] motions between these maximums
[03:18] you can also set key forms in between
[03:20] for specific
[03:21] transition points select the deformer
[03:24] and use the first two buttons to create
[03:26] key forms
[03:27] or the fourth button to place a specific
[03:30] key form next let's start looking at
[03:33] deformers
[03:35] you can think of deformers kind of like
[03:37] folders
[03:38] a deformer will bend all the things
[03:40] inside it
[03:41] this includes textures and other
[03:43] deformers
[03:45] there are three main type of deformers
[03:48] the most common is the warp deformer
[03:51] select the textures you want to group
[03:53] together and create a warp deformer
[03:55] this deformer controls all the textures
[03:58] selected
[03:59] to animate movement select a key form on
[04:02] the parameter
[04:03] and move the green controls around to
[04:05] move stretch
[04:06] and squish parts of the textures warp
[04:10] deformers are useful
[04:11] for x y z parameters
[04:14] the second is the rotation deformer
[04:17] select the textures you want to control
[04:19] and create a rotation deformer to place
[04:22] the rotation deformer precisely
[04:24] you can move the center of rotation and
[04:27] tail
[04:27] by pressing the ctrl key and clicking it
[04:31] to animate movement select the key form
[04:33] on the parameter
[04:35] and move the center and tail without
[04:37] holding ctrl
[04:38] to move and rotate the textures
[04:42] rotation deformers are useful for joints
[04:45] and sometimes z parameters
[04:48] the third is the deform path
[04:51] select one texture and place a dot in a
[04:54] line along the length of the texture
[04:56] to animate movement select the key form
[04:59] on the parameter
[05:00] and move the dots to deform the texture
[05:04] the form paths are useful for eyes mouth
[05:08] and hair
[05:12] make sure you have a green key form
[05:14] selected
[05:15] when moving deformers or you'll just be
[05:18] editing your default model
[05:20] it's better to have more deformers than
[05:23] too few
[05:24] if the object moves in xyz parameters
[05:27] make sure one deformer for each
[05:30] parameter
[05:31] or make at least three deformers
[05:34] note that one parameter can control
[05:37] multiple deformers
[05:39] this is my template for the former
[05:41] hierarchy which is on the screen right
[05:43] now
[05:44] this is the simplified version of what
[05:46] my model uses
[05:47] the general layout is the same for
[05:49] everyone but the specific
[05:51] part deformers will depend on how you
[05:53] separated your parts
[05:54] and how many moving parts your model has
[05:58] next let's go over parameters and where
[06:00] to begin
[06:02] i like to break the broad parameters
[06:04] first before
[06:05] moving on to the more detailed
[06:07] parameters
[06:08] the order i took when rigging parameters
[06:11] was
[06:12] body move face eyeball brow
[06:16] eye and mouth i started with the broad
[06:19] parameters because
[06:21] it was the easiest to rig and if i
[06:23] realized that i had separated the body
[06:25] parts incorrectly
[06:26] i could replace them easily the more
[06:29] detailed parameters
[06:31] are more work but if you separated
[06:34] everything
[06:35] it's unlikely that you need to replace
[06:37] anything
[06:38] lastly once you're finished with all the
[06:40] parameters
[06:41] we have to add physics under modeling
[06:44] click on open physics click
[06:48] add and name it for example hair physics
[06:52] select the input preset as your head
[06:54] input
[06:55] the physics model preset as your hair
[06:57] length and click ok
[06:59] click on output settings and add your
[07:01] hair parts
[07:03] by following these steps you can also
[07:05] add physics to the movement of your
[07:07] clothing and
[07:08] chest too on the preview you can click
[07:11] and move the cursor
[07:12] to test how the physics looks like
[07:16] finally we are ready to export your
[07:18] vtuber model
[07:20] under file click export for runtime
[07:24] export as a mod 3 file check that
[07:27] physics is checked and click ok
[07:31] create a new folder and save it there
[07:34] this folder is your vtuber model
[07:36] fully rigged and ready to be imported
[07:38] into your face tracking program of
[07:40] choice
[07:42] and there you have it your very own
[07:44] feedtuber model
[07:45] you just have to find a face tracking
[07:47] program but
[07:49] fear not i'm making a video comparing
[07:51] all the free face tracking programs for
[07:53] live 2d
[07:55] so i know i skipped the rigging of the
[07:57] individual parameters
[07:59] but there are 30 minute tutorials on
[08:01] youtube for every single one already
[08:03] i wanted this video to be a tutorial on
[08:06] the basics of live 2d
[08:08] and an outline of the steps you need to
[08:10] take from start to finish
[08:13] i hope you found this helpful leave any
[08:15] questions
[08:16] in the comments and i'll be sure to
[08:18] answer them thanks for watching
⚡ Saved you 0h 08m reading this? Transcribe any YouTube video for free — no signup needed.