
Battery Tiers: Which One Should You Buy?
60sThe comparison of battery price tiers and the recommendation to buy the right one for your needs sparks debate and saves money.
▶ Play Clip"Delivers a thorough guide with practical steps, though some sections are padded with sponsor mentions and repetitive tips."
This video provides a comprehensive guide to diagnosing and replacing a bad car battery. It covers testing the battery, cleaning terminals, understanding battery types, and step-by-step replacement, including a technique to preserve car computer settings. The video also includes advanced diagnostics for alternator issues and parasitic draws.
It's crucial to diagnose whether the battery is actually bad or if there's another problem like the alternator or corroded terminals.
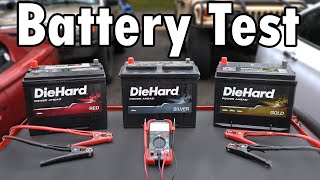
Batteries come in different tiers (silver, gold, platinum) with varying warranties and power. Choose based on your car's needs and how long you plan to keep it.
A battery has six cells, each producing 2.1 volts. A bad cell results in 10.5 volts. Vibration and heat are the main enemies, causing internal damage.
Ensure terminals are tight and clean. Corrosion can prevent proper electrical flow. Clean with baking soda and water, then sand to fresh metal.
Use a multimeter to check voltage. A fully charged battery should read 12.4-12.6 volts. Below 12 volts indicates a problem.
Charge the battery and see if it reaches 12.6 volts. If it drops back to 10.5 volts after charging, the battery has a bad cell and needs replacement.
Check the owner's manual for group size and cold cranking amps (CCA). Consider AGM batteries for vehicles with start-stop or high electrical loads.
Always disconnect the negative terminal first to avoid sparks. Never place tools on top of the battery.
With the car running, voltage should be 13.6-14.6 volts. If low, test at the alternator to isolate a bad alternator vs. a wiring issue.
With the car off, a draw of 50 milliamps or less is normal. Higher draws indicate a parasitic drain. Use a multimeter in series to measure.
Use a 9-volt battery or a memory saver device connected to the OBD port or cigarette lighter to preserve radio presets and computer settings during battery replacement.
Avoid deep discharges and keep batteries charged. Use a trickle charger for vehicles that sit unused. Sulfation from discharge reduces battery life.
A load tester applies a load to the battery to assess its health. It measures cold cranking amps and indicates if the battery needs replacement.
Proper diagnosis is key to avoiding unnecessary battery replacements. Regular maintenance, like cleaning terminals and keeping the battery charged, extends battery life. Replacing a battery is a simple DIY task that can save money and time.
What voltage indicates a fully charged battery?
12.4 to 12.6 volts
07:11
What voltage indicates a bad cell in a battery?
10.5 volts (6 cells x 2.1V = 12.6V; one dead cell gives 10.5V)
08:07
What are the two main enemies of a car battery?
Vibration and heat
09:25
What is the correct order for disconnecting battery terminals?
Negative terminal first, then positive
12:43
What is the acceptable parasitic draw in milliamps?
50 milliamps or less
18:41
What is the purpose of a memory saver?
To preserve radio presets and computer settings by maintaining 12V power during battery replacement
21:48
What is the voltage range for a properly functioning alternator?
13.6 to 14.6 volts
16:55
What is the difference between flooded and AGM batteries?
AGM batteries are more durable, withstand vibrations, and handle higher electrical loads; often required for start-stop systems.
11:12
What causes a battery to go bad?
Vibration, heat, and deep discharges (draining and not recharging) lead to sulfation and internal damage.
24:57
What is the recommended maintenance for a car that sits unused?
Use a trickle charger to keep the battery charged and prevent sulfation.
25:22
Battery Cell Voltage
Explains why 10.5 volts indicates a bad cell, a key diagnostic insight.
08:07Vibration and Heat Damage
Identifies the main causes of battery failure, helping prevent future issues.
09:25Memory Saver Technique
Provides a practical method to avoid resetting car settings during battery replacement.
21:48Sulfation Explanation
Explains the chemical process behind battery degradation, emphasizing the importance of keeping batteries charged.
24:57[00:02] diagnose and replace a bad battery in your car or truck now notice i say diagnose first because it's very important to figure out the battery itself is bad or do you have another problem in the
[00:15] you how to test your alternator how to test for clean your terminals to make sure that way you know if your battery is bad or if it's something else now if you do
[00:29] have a bad battery don't worry replacing a battery is super simple i know most of eyes closed even if you're a pro at replacing teach you something new with all the tips and tricks i have
[00:41] for example when you go to buy a battery like in this case you can see we have a silver we have a gold we have a platinum there's different tiers of battery buy the least expensive battery or do you need to buy the most expensive
[00:54] different tiers and which one is right for you another is i cut open an old battery that is bad and never do this at home the battery acid is not safe but the acid has been
[01:08] battery works this is going to be really cool to see because you normally don't there is a bad cell and i'm gonna teach you what causes a battery to go bad from vibrations from heat from discharging it too much
[01:21] prevent that from happening to your battery and then finally once we go to replace the battery i'm going to show you how to do it in a way from your car so your car's computer doesn't reset the
[01:34] radio stations you don't lose any presets it's actually a really nifty that way you don't lose that 12 volt connection which basically resets your and i do want to thank advanced auto parts very much for supporting the video
[01:47] these brand new die hard batteries that way i could teach you guys the proper link all these tools and products in the description so you can easily find them and with that let's go get started so real quick i'm
[02:01] happens when we go to start the cars with the flat batteries we'll start here with susan our previously vandalized car okay let's hit the start button and it bit let's try that again and yeah this battery is so weak it
[02:17] not even close and this is a pretty new car so what's the problem next up we hasn't been used too much because it's been a cold winter so let's go start her make sure the car is in neutral clutch in
[02:32] in try it again and he could hear it click and finally let me show you what it's like to start my duramax diesel with two batteries sometimes she starts up and sometimes she really struggles
[02:45] run position and wait for that yellow wait light on the dash to shut off and that's for the glow plugs
[03:01] three of these cars barely turn over they click when you try what's the next step well the next step is to locate the battery in most cars under the hood in the front you can see this one right here but in some cars
[03:15] located in the trunk usually in the back corner to help with battery right there and same thing with the maserati if we this little access port and you can see the battery
[03:28] your battery just check your owner's manual it'll let now once you locate your battery before you grab any tools there's two quick things that we could test out the first thing is to make sure these
[03:41] are nice and tight give them a wiggle that's not budging give this a nice wiggle see if it lifts up and that's not budging either you tighten it up and that could solve your issue even
[03:54] could cause the electricity not to flow properly and that could cause your car the next thing to look for is to make sure your terminals are clean and corrosion on them and they shouldn't look dirty these look
[04:07] want if you do see corrosion or dirt it's show you how so the dirtiest terminals i could find are on my pickup truck and they're not really dirty because they are corroded
[04:19] i go off-roading get mud everywhere but this is still a good example on how to so let me show you how to clean the battery terminal so you have a perfect on then grab a little bit of warm water and
[04:31] slurry so that we can neutralize any acid that then just brush down the post in the surrounding area and see that bubbling being neutralized if that sat there over time it could
[04:44] bad connection and that's why we use the baking soda to clean our posts remove it and tuck it away against the plastic of the battery don't let it hit removed around the terminal and it's relatively clean we want to sand it down
[04:59] to get a fresh surface to get a good connection so you could use 180 grit abrasive pads or you could use a metal wire brush so brush the terminal to reveal fresh metal and also brush the wire end
[05:11] on the outside but more importantly clean the inside where it makes contact terminal and cleaned and our terminal cleaned we have a nice fresh surface so one thing that i like to do ever since i got my drift car this came with the
[05:25] these little felt terminal protectors i didn't think anything of them but they really well to help prevent corrosion and also it makes it really easy to see color-coded plus it comes with the silicone that we're gonna need
[05:37] to make it waterproof and corrosion free inexpensive to buy install that much better and these felt pads have a chemical in them to help or vent out that way it reduces corrosion so let's
[05:50] and be sure to push it all the way down and then tighten it down so it's snug but don't over tighten it and give it a wiggle to make sure it doesn't move packet of silicone grease and get some on the terminal end and coat the entire
[06:04] it's going to prevent moisture from getting in there and causing corrosion beautiful and that's all there is to cleaning the terminals on your battery we did the positive i did the negative off camera now with both of these clean
[06:18] hard the starter's not going to work as hard the electrics in your car are going going to be a lot happier so even if your car is running fine take a quick corrosion free and they look clean i actually did a survey
[06:31] on instagram asking you to check your terminals and see if they're dirty or and 44 said they were dirty and that's over 190 000 people who answered this so sure your terminals aren't corroded all right so we're back at the white car
[06:45] terminals are clean so there's a good electrical connection that grab your multimeter if you don't have one you could find these to have especially if you like working on cars i'll be sure to leave a link in
[06:58] the description and then you're going to want to set the multimeter to 12 or more and we're good to go now you can grab your prongs red goes to positive black goes to negative and check it out we have 10.5 volts and
[07:11] do this test on your car you want to see about 12.4 to 12.6 volts that means your battery is fully charged if your battery is lower than 12 volts the car by accident and if you don't it could be a bad alternator you could have
[07:25] or the battery itself could be going bad i'll show you how to diagnose that but that specific voltage tells me battery let me show you why now this old battery was also 10.5 volts when it was
[07:39] and it's the perfect example on why a battery goes bad so i cut it open that battery and also how a battery works now i want to make at home these are filled with very strong acid i already
[07:53] but i wouldn't want you guys to get hurt so instead of cutting open a battery see this battery has six individual cells each cell creates 2.1 volts of electricity so the reason why when i saw 10.5 volts i immediately
[08:07] thought it's a bad cell is because if one cell's dead that's 2.1 you with 10.5 volts now let me show you inside one cell we'll take this cell out so this is what one cell of a battery
[08:20] of grids there's positive and negative grids in here that's what this is right here this grid actually broke off from vibration and that's what one grid looks like and behind this grid is another grid and
[08:32] very porous electrons to flow through but these two grids can't short out if each other they won't short out they're insulated now each of these grids has a
[08:47] the paste has fallen out due to vibration that's why vibration damages batteries this paste helps with the chemical reaction that falls off the less power your battery gets now the more grids you
[08:59] could fit into a cell the more cold cranking amps you'll get isn't just because one of these grids fell off i mean it's look here all of these grids are attached to this
[09:12] main piece of metal with very small very fragile pieces and if there's a little bit of corrosion due to heat well guess what over time vibrations will just break that all off and then you lose an entire cell
[09:25] so that's why vibration and heat are the enemy of a battery you want to try to avoid it at all costs and that's what ultimately caused this cell to fail and give us 10.5 volts now the last thing to do to verify that the battery
[09:37] is to put it on a charger now all we have to do is hit charge and it's going to start charging and now if this goes to that 12.6 volts that we it just needed to recharge but if the
[09:50] then we know for sure our battery is toast all right so i left it on for a and you can see we're almost at 12 volts that's pretty good but what happens when we shut the charger watch this charger is shut
[10:04] and immediately that voltage drops real quick and that'll end up settling around that 10.5 volts that we were just at so we know for sure now that our cell replace this battery so the first thing i do is i make sure i
[10:18] replacement battery this is important you want to make sure you get the and to do that you can check your owner's manual it'll tell you right in battery the old battery that's in your car
[10:30] group size right there it says group h6 and that's the size of your battery you also want to take a look down here at your cold cranking amps this is when it's zero degrees out so when it's very cold you want to make sure you have
[10:44] at least the oem number with your new battery in this case it's 600 but you cranking amps you have the more power you have reserved in your battery to and also out of simplicity you could either go to the store or go online
[10:57] input your year make and model and it'll tell you exactly what batteries fit your and finally when buying a new battery there's two common types now there is been used forever and then now we have agm batteries absorbed glass mat which
[11:12] built more durable to withstand vibrations and higher electrical loads that up to a light the engine shuts off automatically
[11:26] and then as you press on the gas the car starts and goes if your car has that it agm battery so check if oem requires an agm make sure you put an agm back in and even if your vehicle comes stock oem
[11:38] with a flooded battery you could always upgrade to an agm battery if you want especially if you're running higher electrical loads from maybe you winch maybe you have an aftermarket speaker system
[11:51] if you have anything that adds an extra electrical demand battery you're typically going to have a couple of battery size group 24 but we have the lower end the less
[12:04] expensive all the way up to the higher end the most expensive warranty and power so which one should you get it all depends on your car and how you drive for example what i like to do on my
[12:17] daily driver gets the most abuse it gets used the most i want reliability the highest end with the four year warranty is what i have in my truck and this is a good option for
[12:29] need a battery but you might be getting rid of the car it might not last save all right so now you know everything you need to know on what battery to get for let's replace it now this is super easy to do in most vehicles i have a couple
[12:43] important always disconnect the negative terminal positive terminal i'm not going to do it but pretend i'm on the positive terminal and i hit the wrench bare metal to bare
[12:57] it's going to bridge that gap and it will spark but if we hit bare metal the it doesn't matter it's just like grounding out so just make sure you disconnect the negative terminal first good and then we could remove the
[13:09] way to do it and now all batteries are held in so accident this battery is held in right down there so let's unscrew the tie down then we could remove it
[13:23] good and with this removed now we could remove the battery but i did something all the time it's a bad habit i put my tools on top of the battery and you ends of the tool bridge the gap of the battery it could cause a spark which
[13:37] you could also heat this tool up a lot which could burn you so never put your tools on top of the battery now out with the old and even though no one will see this i like to make sure it gets cleaned up so vacuum it up
[13:50] spray it down with some soapy water and wipe it down to make it nice and clean good and now in with the new now let's get the tie down in place and that's not going
[14:02] anywhere now we're gonna reconnect the positive side first get one of the red clean the terminal even though this is pretty clean then we can slide it all and tighten it down so it's snug and finally add some silicone grease and
[14:14] metal surface and one last thing i like to do this positive terminal so i always like to put the cover back over it even though prevent bare metal from touching it and shorting it out
[14:27] thing to the negative side tighten it down so it's snug and coat the terminal with silicone paste like so beautiful so with that do all right moment of truth let's start
[14:39] her up and she starts out with no problem at all and a lot of the new cars have awesome gauges they'll actually there you go your battery voltage right there 14.4 volts that's because the
[14:52] giving you the extra juice and that's perfect so there you go that's all there the easiest things to do if your car battery isn't in an easy location the model and i'd like to hear where that battery is but for most cars
[15:07] five minute job and you're good to go now what happens if you don't own a your battery or you just want the convenience of somebody else testing it well you could head over to your local advanced auto parts and they'll test
[15:19] obligations to buy anything at all they have a high end load tester it's bad and in this case just like we tested this battery has a bad cell and it won't charge above 10.5 volts so
[15:32] and just to let you know they will come out to the car as well to test the in the car that way you get an idea of how strong your battery is so you don't all right and it's that simple to diagnose and replace a bad battery but
[15:46] one scenario and in this scenario we did have a specific voltage which gave us a that 10.5 volts told us to check the battery and we did find out that the cell was in fact bad so we're able to easily diagnose it
[16:00] simple it's not always going to be that type of problem park your car and then a day later it a week later it won't start or maybe even two weeks later you go to start
[16:12] should start no problem if the battery's healthy if not and to do that it's really easy it could be a bad alternator it could be a draw or it could be a bad battery so the first thing we're going to test
[16:25] we need to start the car and in this case the battery voltage is car we want to make sure we charge the that way we could start the car and properly test the alternator so a couple
[16:39] hours later we're all charged up at 12.6 volts so now we could disconnect the battery charger and let's go start the car to charger and let's go start the car to test the alternator
[16:55] volts that's perfect you want to be anywhere between 13.6 and 14.6 volts that means your alternator is outputting the correct voltage it's 15 volts it could be a bad voltage regulator in
[17:09] so you might have to replace that and you don't want to have too many volts more voltage isn't good over 14.6 volts could damage so if you see that that's one problem now let's just say you see the opposite
[17:21] volt threshold well we're testing the voltage at the battery so that doesn't mean your alternator is bad necessarily it could between the positive post and the alternator there's a bad cable or a bad
[17:35] so how do we verify that it's actually the alternator that's bad if you see low you test the voltage at the actual alternator now you want to be careful of the wires wrapped up in the belt that's spinning that would be very bad
[17:48] but on the back here we have a positive wire and then our alternator case is our negative that's our ground so scrape it a little bit like that to get a good connection and you can see we have 14.1 volts which
[18:00] is perfectly fine so if you find your voltage is low at that your alternator is the problem if you find your voltage is normal at the alternator but low at the battery then there's probably a connection issue
[18:13] there's a wire and there's connections this connection corroded or the wire could be damaged or corroded so that's how you test an alternator super easy to do and in this case our
[18:26] great so now let's shut the engine and test for parasitic draw component in your car that's drawing on the battery when the car is shut off and the only things that should really draw on a battery when the car is off is your
[18:41] security system maybe like the clock on the radio and shouldn't be more than 50 milliamps if you have more than that your battery a couple days it could drain in a week
[18:54] me show you how to identify if you do have a parasitic draw from the first thing you're going to do off there's no interior lights on there's no headlights on and if your
[19:07] your car doesn't know the hood's open some cars have a hooded jar switch if it does press it down tape it up whatever you need to do make it think a key fob especially a keyless entry fob or your
[19:20] make sure you move this far away from the car so it could go to sleep and now what we're gonna do is we're gonna disconnect the negative terminal on the positive side i like to test on the ground side that
[19:33] way if you ground out by accident it doesn't cause any damage so unscrew and what we're going to do is we're going to bridge this gap right here need to do is we need to take this positive cable from the regular
[19:47] spot and put it into the dc amp spot and then we're going to turn the multimeter to dc amps right there you can see it's 10 amps now gap so i want to get one lead on our cable here it doesn't matter
[20:01] on our post here but to make a good connection i'm going to just use one of these hose clamps that way it's nice and tight against the post and right away you can see we have about a .07 amp draw so 70 milliamps now a
[20:15] 50 milliamps or less that varies from car to car but 50 milliamps is an since we're pretty close at 70 milliamps i'm not concerned we don't have a so 0.1 amps of a draw or higher then there could be
[20:29] a problem now we just connected this so what we want to do is we want to wait goes to sleep and then double check that number okay so 15 minutes later our draw is still the same 70 milliamps on older
[20:41] away but if you have a newer car definitely wait that 15 minutes because it needs to go to sleep to make sure that your amp draw is accurate the parasitic draw is coming from so again our draw is solo we don't have a
[20:54] as an example what you would do is you'd watch your multimeter pull out this fuse right here amperage no it doesn't okay so put the fuse back
[21:06] and let's move on to our next fuse we'll pull that fuse no it doesn't affect it until you see your amperage drop so let's pretend i pull this fuse and our amperage drops well now we know whatever this fuse is for that is where
[21:20] our problem is located so take a look there the other thing is and you still have a big draw check this cable on the alternator pull this cable off disconnect it completely and see if your draw stops sometimes
[21:33] and you wouldn't be able to find it just by pulling fuses now we know the don't have a parasitic draw so that leaves us with a bad battery so battery without actually disconnecting it from the car you're not going to lose
[21:48] disappear your clock doesn't reset any presets in your car won't reset works if we take a look at the clock you can see it says 216 if the battery
[22:01] o'clock and also if you look at my channels here favorite radio channels they are those channels will reset so let me show you how this works first
[22:15] get your new battery and put it nearby next you're gonna need some high quality the only parts of the alligator clip that is actually conductive conductive the handles here are not conductive they're coated and
[22:28] we do not want these to touch and it's also a good idea to have a second person helping now we take our first cable the black ground bare piece of metal on the car next grab your red and connect it to the
[22:43] positive side of the battery on the cable if you can try not to get it on it'll make it easier later on you'll see why and finally with our last two post and the black to the negative post and
[22:55] be very sure not to mix this up okay so let's do a quick review real fast we have our old battery right here i disconnected the battery tie down that battery out also the terminals are slightly loosened
[23:07] off so we have our red to the positive we have our black to a chassis ground and then battery and then black to negative red to
[23:21] positive and right now if we disconnect our battery here we still have juice going to the car with our new battery so basically now we just transplant it to remove the positive wire from the battery and you can remove the negative
[23:34] and then remove the old battery from the car make sure that positive wire is held in place and doesn't come in contact with any metal parts otherwise it could so now with the new battery still remotely connected to the car carefully
[23:46] connect the negative cable first and don't remove the jumper cable until the like that same for the positive make sure you get good contact and then slide then we can remove the positive jumper cable and finally remove the negative
[24:01] jumper cable from the chassis ground now tighten down the negative cable and tighten down the positive cable and finally tighten down the tie down going anywhere you could always add your silicone right after this i'm just super
[24:13] going to do this live i'm not going to do any cuts here we're gonna get right in the car excuse the camera shakiness okay turn it to the run position and check it out
[24:27] we have our clock here good we have our radio stations boom we didn't lose any connection at all that is awesome old battery go bad and i'm pretty confident the reason why
[24:43] trickle charger and all winter long it was basically there was no electricity i forgot to disconnect the battery so over time that did the parasitic draw test that is gonna drain the battery and
[24:57] batteries don't like getting drained and not recharged when a battery sits and you decrease the lifespan of the battery and the reason why is because lead battery and that won't let the chemical reaction
[25:09] inside the battery happen efficiently the lead sulfate crystals block the and you lose cranking amps and your battery degrades so you always want to charged and since this is a nice new battery i
[25:22] so what i suggest is at least once a not only is it good for the battery but it's good for the car too cars are meant in a few minutes you actually want to go for a ride and have that battery charge
[25:36] these trickle chargers that way you just plug it in after you charger it's actually really easy this part doesn't get installed this stays at this little connector right here is what gets installed very simple
[25:50] the positive so get the black ring terminal on here and then get a nut on place same with the positive use a nut and all you need to do is plug in your trickle charger when you go to park your
[26:03] so i highly recommend setting up a trickle charger for cars you don't use you can set it up just like that nice and easy to do that way when you go to your battery won't be dead it'll start right up and that battery will last for
[26:16] years to come alright so as you saw multimeters give diagnose a bad battery but the one thing they don't do is load test the battery an example and i'm gonna show you how to use a load
[26:29] let's run through this real quick just like any car we're gonna start by good and now let's disconnect the positive terminals beautiful and now all we need to do is remove that bracket so now both of our batteries
[26:43] before we do that i want to show you how to load test these and we're going to be basically a cheaper version of the good load testers they use at the parts store so connect the tester to the battery like so this is a regular flooded
[26:56] then pick sae for our measurement of coal cranking amps and this battery is rated for 800 cold cranking amps so set it to that and you can see it tells us that we need to replace our battery we have about 350
[27:08] cold cranking amps compared to the 800 that we should have and this also is telling us to replace the battery according to this this is 70 cold cranking amps compared to the 800 the battery charge is a little bit
[27:21] than that but at least it's telling us these batteries are bad and need to be so out with the old and in with the new now don't forget to add some silicone and with two brand new batteries installed there's one last thing to do
[27:36] all right moment of truth let's see what we got we got oh man she starts right up no lag at all that's even better than when i got the hummer so there you go that's my
[27:48] ultimate guide on how to diagnose and replace a battery in your car battery that you just replaced well anytime you go buy a new battery a core charge and you get that money back when you bring back
[28:02] new battery so you don't have a core charge but you do have an old battery recycle it and make some money bring it to your local advanced auto parts and gift card you can bring it to your local scrapyard they'll pay you for it because
[28:14] batteries are filled with lead which is valuable and easily recycled car batteries are one of the world's most recycled items 99 of a battery is recyclable so it's a good thing to do plus you make some
[28:27] now i hope this video was helpful remember you want to try to avoid avoid heat and avoid draining your battery and keeping it drained always and that'll keep your battery lasting a good long time hopefully the video was
[28:40] if you're not a subscriber consider hitting that subscribe button and all video are linked in the description below
⚡ Saved you 0h 28m reading this? Transcribe any YouTube video for free — no signup needed.