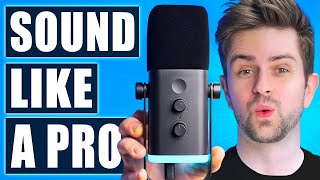

Make Your Mic Sound Expensive WITHOUT OBS
43sAddresses the common frustration of needing OBS open for mic effects, offering a standalone solution.
▶ Play Clip"Delivers a solid VoiceMeeter tutorial that can improve mic quality, but the promise of 'expensive' sound is somewhat exaggerated without professional gear."
This tutorial demonstrates how to use VoiceMeeter Potato to apply audio effects—denoiser, EQ, compressor, and noise gate—to any microphone, making it sound significantly better for streaming, voice chat, and recording. The video provides a step-by-step workflow from installation to final output in OBS Studio and other applications.
Many users ask if OBS effects work outside OBS; VoiceMeeter allows you to apply effects system-wide for games and voice chat.
Download the largest version (Potato) from the official website; it has more features needed for this tutorial.
After installation, set A1 to your headphones via MME, and ensure Windows audio device is set to your headphones, not VoiceMeeter.
Focus on the top input column for your microphone, the middle for effects, and bottom outputs (A1 for monitoring, B2 for applications).
Enable 'System Tray' and 'Run on Windows Startup' from the menu so VoiceMeeter runs in the background automatically.
Speak into the correct side of your mic; proper positioning reduces distant/hollow sound and background noise.
Adjust microphone gain via hardware knob or Windows sound settings (levels) so your voice peaks around -10 dB in VoiceMeeter.
Use the denoiser to reduce background hiss; start with a low value (2-3) and adjust after other effects.
Apply a simple 4-band EQ: low cut at 80 Hz, boost at 120 Hz (+3 dB), cut at 1 kHz (-5 dB), boost at 5 kHz (+2 dB).
Use compressor (ratio 2:1) to level volume: set input gain so quiet speech hits -10 dB, then lower threshold to prevent peaking. Set noise gate threshold so only speech opens the gate (attack 0 ms, hold 500-1000 ms, release ~125 ms).
In OBS, set microphone to 'VoiceMeeter Out B2'; in Discord/games, select the same device so processed audio is used everywhere.
If audio sounds too processed, reset compressor: input gain to 0, threshold to the right, ratio to 2; then re-adjust.
VoiceMeeter Potato is a powerful tool that, once configured correctly, can dramatically improve microphone audio quality for all applications. The tutorial provides a repeatable process—gain staging, denoiser, EQ, compressor, noise gate—that works with any microphone.
What is the first effect applied in VoiceMeeter in this tutorial?
Denoiser
06:39
What frequency is used for the low-cut filter in the EQ?
80 Hz
07:56
What are the three adjustable knobs in the simplified EQ?
The decibel levels at 120 Hz, 1 kHz, and 5 kHz.
09:32
What ratio is recommended for the compressor?
2:1
10:52
How do you set the input gain on the compressor?
Talk quietly and turn input gain up until quiet speech reaches about -10 dB on the meter.
11:05
What does the hold time on the noise gate control?
How many milliseconds the gate stays open after speech stops before beginning to close.
14:00
What should the attack time on the noise gate be set to?
0 ms
14:00
Which output (B1, B2, etc.) is used for sending processed audio to applications like OBS?
B2
15:57
What is the recommended setting for the Windows microphone level as a starting point?
80 (out of 100)
06:01
Microphone Positioning Matters
Many users overlook proper mic technique, which significantly affects sound quality regardless of processing.
04:29Correct Gain Staging
Setting correct input level is crucial before applying any effects; this avoids distortion and noise.
04:55Simple EQ Curve
A 4-band EQ with low cut, bass boost, mid cut, and high boost can dramatically improve clarity and warmth.
07:56Compressor Levels Volume
Compression evens out loud and quiet speech, making the microphone usable without constant volume adjustments.
10:26Noise Gate Eliminates Background Noise
Proper noise gate settings (threshold, attack, hold, release) prevent keyboard clicks and room noise from being transmitted.
13:15[00:02] make your microphone sound better with OBS Studio. However, half the comments are asking if you need to keep OBS open for the effects to work. So, that means microphone sound better, but not only to stream in OBS Studio, but also to use in
[00:17] voice chat with your friends or in games. And because of that, I wanted to make a tutorial on VoiceMeeter. And yes, this looks very complicated, but most of need. So, I'm going to explain in a very simple way how you can make your
[00:31] microphone go through VoiceMeeter, add effects to it, make it sound better, and it's to OBS Studio to use on your [music] whatever. And before I forget, the
[00:45] sponsor of this video is FIFINE with their FIFINE AM8. But of course, this has no impact on the tutorial itself. VoiceMeeter is a standalone program. It need to go to. I will put it in the description, or you can just copy it.
[00:59] And then on this page, you will see there are three versions of VoiceMeeter. There's the normal one, then Banana, and then Potato. This is the biggest one. We are some features that this has which the others don't. So, we are going to
[01:12] install this right here. Just download, and then just run the installer. Click installed it, there are two things you need to remember to do in case you don't hear me anymore. The first one is you go to A1 right here. You click this.
[01:25] >> Then you go to MME, and then you search for your audio device. For me, it's my then as you can see, it will be selected as a hardware out. And then the second audio device. It will probably have been changed to VoiceMeeter VAIO3. We want to
[01:42] going to do that. We'll just select our my headphones. So, at this point, you should have VoiceMeeter Potato opened. The A1 output is set to your headphones.
[01:54] And then your normal audio device is also [music] whatever your headphones are. And I just realized I selected the wrong headphones. It should be this one. audio, then you just go to your audio devices, you change it to something
[02:07] your headphones, and then it should work. Now, quickly, I know this looks very complicated, but we're really only going to use this column right here, and then this right here for the output, and that's really all we're going to do in
[02:20] this video. That's enough to send our microphone to Voice Meter. Actually, it it, and you can just select your microphone. For me, it's this one, FIFINE microphone. By the way, you can right-click on the title, and then you
[02:33] can just call it mic, for example. So, my microphone comes in right here on the top. I just selected it, FIFINE microphone. It comes in from the top into Voice Meter. Then these effects, which we will set up in this video,
[02:45] that's what this video is about. These effects here will be applied, and then after that, on the bottom, it is being sent to A1 and to B2. A1 is our headset, which we select here on the top right. This is our speakers or whatever you're
[02:59] monitoring with. And then it's also sent to B2, and B2 is whatever you select in your game, in Discord, wherever. And so, right now, as you understand how this the microphone that will make any microphone sound good. I will take you
[03:13] through a step-by-step process, but it's super important that you do not skip anything. I've made this type of tutorial for OBS Studio. People always say that it really works, and it works because it's a specific process. If you
[03:25] skip one step, everything might be messed up. And so, to make this a bit more clear, you can just right-click the titles and then add a slash there, these titles. But for now, we're just going to focus on the microphone. This
[03:38] is what the microphone also sounds like. It's again the FIFINE AM8. And before I that you need to know is you go to menu need to enable. The first one is system tray, and then you just click menu
[03:51] again. It will now be enabled. And the second one is run on Windows startup. So, you also click that again. And then now, if you close Voice Meter Potato, it will still be right here in the system tray or right here. You can always click
[04:03] to open it. And now, it will also start when your PC is booting. However, if you it right here. What I like about this USB microphone specifically is that it's pretty tall, which means that it's not far from your mouth. So, even without a
[04:16] microphone arm to bring it closer to your mouth, it sounds pretty warm. Some they're very far from your mouth, which means that it sound very distant and hollow, and that also introduces background noise. You need to speak into
[04:29] it like this, and it's really important. So, let's start with the whole sequence that you need to talk correctly into your microphone. For example, this one, I could talk into it like this from the front. Maybe I think that's the way, and
[04:42] then I do this a whole time. But, secretly, I've been doing it wrong, and you really hear the difference. You would be surprised how many people talk the specific microphone that you're using. Now, the only thing left before
[04:55] we start doing the EQ is that we need to make sure that right here your microphone is showing a correct starting balance. So, right now when I'm talking, it's a bit too quiet. I'm talking pretty loudly, and I should be about right here
[05:09] on the mixer. And so, before you start using this to boost your volume, for do, you will either need to look for a gain knob on your microphone if you have one, or use the Windows sound settings. And actually, the sound settings are
[05:22] always a starting point. So, you should right-click your sound settings, go to Windows 10 right here, I think. You might not find it there. You might have just open them like this. And now, when you scroll down on Windows 11, you will
[05:36] find something like advanced sound settings. It will look like this, but it it's sound control panel now, because for some reason I'm still on Windows 10. And there we go. So, you want to go to recording, then you want to find your
[05:49] microphone. For me, it's right here, FIFINE Microphone. You double click it, then you go to levels on top, and I just want to make sure that this isn't set to something like 10 or 20. In theory, you should be able to set it to 100, but for
[06:01] some microphones, this might give you a hiss and a bad sound. So, a safe thing hiss and a bad sound. So, a safe thing to do is to set this to 80, for example. point, what you do depends on whether you have a gain knob or not. I, for
[06:14] example, have one. It is right here. It's the top knob. And if you look at the volume mixer, if I increase the gain, it will also go up right here. If your microphone, you will have to do everything right here in the properties.
[06:27] And basically, you just start out at 80. If it's way too quiet, you set it to 90, maybe 100. Or if it's peaking for some reason, you can always lower it, click on okay, test again. Just make sure you're about in this area right here.
[06:39] Okay, 80 for me. And so, then the first effect we want to do is the denoiser. Basically, you should just stop talking. Make sure that A1 is enabled so you can hear yourself. So, you just listen to the background noise and hiss and and
[06:51] whatever you're hearing, and then you increase the denoiser by clicking and don't really hear the background noise anymore. Do keep into account that the more you move this up, the stronger the effect will be also while you're
[07:04] too much. And to be honest, you can also set this to two or three, then do all of the other effects, and then at the end, you can always tweak a bit with the denoiser because everything might change once we applied all the other effects.
[07:17] to do the EQ, after that the compression, and the noise gate, which is these settings, but don't worry, I will make it very simple. It is very So, I will turn this off. By the way, I right-clicked right here to open the
[07:31] custom settings. And the same thing is for the EQ. If you click it, you will enable or disable the EQ. If you right-click it, then you will open the settings. So, we're also going to make this very simple. We're going to disable
[07:43] for a simple setup. So, for the first one, you do two things. You move the slider up till about 80. It's hard to aim. I think you can double No, you can right-click. Yes, and then you just select 80, enter, and then you click
[07:56] this right here. This is just a local filter that will remove rumble sounds. This frequency sounds really bad into your voice. If you want to understand what this is, it's basically a frequency graph of your audio. The last one is low
[08:10] sounds, bass sounds. The mid is the midtones, and the high is the high-pitched sounds. So, the first column is done. You just set this to 80 Hz. You select this right here for a low cut. Then the second column, you want to
[08:22] set this to about 120. So, just click and drag down till about 120, or well, right-click 120. Then the decibels, as a starting point, let's just do plus three. And then the last one right here, you want to drag this to two. Then the
[08:36] third one, right-click on it, set it to 1,000. The decibels, drag them down to about minus four minus five. We will adjust some things later, but I will just have a few knobs to tweak instead of doing everything. And then the last
[08:51] knob, you want to set this to about two. Actually, let's drag it to one. So, 1,000 minus five and one. And then the fourth column, you want to set this to fourth column, you want to set this to 5,000. Let's do this plus two plus
[09:03] three. I'll do plus two to be safe. And then drag this down to about one to want you to keep in mind that I'm heavily simplifying this, and it won't be perfect for everyone. I just give you a curve right now that will boost your
[09:19] bass sounds a bit. It will take away the mids, which will make the mic sound less muddy. And then it will boost the highs a bit, so you sound a bit more crisp. And you can also hear this is what I sound like without the EQ, and then this
[09:32] important, if you want to make adjustments, there's only three things you need to change. It's this knob right here, this decibel, this decibel, and then this one. So, the middle one, if you move this down, you will sound way
[09:45] more like a professional broadcaster. If you do it too much, it will sound very muddy. If you move this too high, you will sound very hollow, like you have a will sound very hollow, like you have a cheap microphone or you're in a badly
[09:58] treated room, something like that. So, I usually like to move it down a bit under zero. The left will be for your bass sounds. Now, we'll will sound very flat. you just search for the perfect one right here for you. And then this column
[10:11] will be for the highs. If I do it too much, s- s- it will be too crisp. If I do it too low, that also won't sound good. So, just adjust these three knobs that point, close the settings. It is right here. You can disable them. You
[10:26] can enable them. And then after that, it's time for the compressor and the gate. And this is really interesting because that will level all your sounds. If you talk really quiet, it will boost the volume. If you shout, it will pull
[10:38] right-click either of these two. It opens the same settings. This right here is the compressor. And then this one on the bottom here is the gate. We want our audio to be as high as possible right here between zero and the minus 10,
[10:52] whether we are talking very quiet or we are shouting or talking normally, it should be all around here. So, what you should do is pretty simple. Make sure the input gain is set to zero. Make sure the ratio is set to two. Make sure
[11:05] threshold is all to the right. Then you talk pretty quiet, like I would never talk quieter than this on stream. So, then I move the input gain to the right and I will keep moving it to the right till this quiet talking is going above
[11:19] minus 10. I probably will have to boost 20 decibels. And then this quiet sound is still going very high. And so, right now, if I talk too loud, you will see that it's speaking, especially when I say test,
[11:32] you will see it's completely peaking. So, now we want to take the threshold. We want to take this slider right here, and then we move it to the left until our loud sounds will not be peaking anymore. Now, we're talking about normal
[11:44] more loud, you will see that it's definitely not peaking. Maybe when I say okay, that was speaking, but we don't want to do this too much. You don't shout on stream too often. If you're very loud on stream, for example, or if
[11:58] friends, you might be more or aggressive right here by moving it to the left. But, when I'm talking pretty quiet right now, as you can see, it is often going Then, when I say, "Hey!" it is barely peaking. And then, when I
[12:11] talk normally like this, it is between minus 10 and zero, and that's actually perfect. Now, my sound will always be loud enough. And so, the next thing we going to adjust the threshold first because then you will understand what it
[12:23] does. And after that, I will quickly explain these three settings on the bottom because then you can customize it to how you want it because that really slider, the threshold, will basically decide the threshold of how loud sounds
[12:37] need to be in order to trigger the noise gate, open the noise gate. And this will make it so quiet sounds like happening around your microphone will not trigger the mic. But, from the moment that you talk, even quiet like this, it will
[12:49] will trigger the microphone, and it will start recording. So, for example, this threshold, if I move it too much, then when I talk quiet, you will see that my volume isn't moving now because it's just not recording the microphone.
[13:02] Hey! When I shout, you see that it did trigger, but other sounds won't. So, you move it completely to the left, and I talk very quiet like I would never talk this quiet on stream. I probably don't want this to trigger the microphone. So,
[13:15] I move my threshold to the right, and I keep moving it till at some point it will stop recording, it will stop triggering. Move it a bit more. Okay, I think I kind of reached this
[13:28] mic will not trigger it. We will test if this line moves. first okay didn't trigger like the okay probably didn't get recorded.
[13:43] So I'm going to move it a bit to the left like a minus 40 is pretty safe. talking it will close the gate. From the moment you say anything it will trigger settings on the bottom, what are they doing? Very simple. The attack time will
[14:00] decide that once your microphone hears a specific threshold, once you say something. Let's say you don't talk and then suddenly you say test. The first T, and it will open the noise gate and then the attack time is basically a fader
[14:13] that decides how many milliseconds it takes to go from completely blocking sound to being completely opened. I set it to zero because the first sound that it hears I want it to record it or otherwise when I say test the first T
[14:25] will be kind of faded. You will maybe not even hear the T. Then the next is the whole time and this decides once the noise gate triggers, once it hears my voice and it's loud enough and the noise gate opens, how many milliseconds does
[14:37] gate opens, how many milliseconds does it take before it closes in case it doesn't hear anything anymore. So if I say test, then when I stop talking then it will start counting. 500 milliseconds later it will close the gate. And that's
[14:50] actually perfect. If you move it too much to the left it will be very short. For example, hey guys, what's up? Between hey guys and what's up there's a much to the left it will close the gate in between and then it will sound very
[15:03] jittery and very weird. You might have heard this with some creators. So just move it to about 500 to 1,000 milliseconds. You can take 1,000 to be sure. That means when you say test it takes 1
[15:15] gate will completely close. And then the release time, this is like the attack. It's the The attack is the fader in the beginning. How long does it take? How completely opens? And then the release
[15:28] completely close the gate? So, if you say test and then you stop talking, it takes 100 milliseconds of hold time to close the gate and then it will now take 125 milliseconds to go from gate completely opened to gate
[15:44] completely closed. If you move this to 0 milliseconds, then after 1 second, it will just go to complete silence. That usually doesn't sound that good, so release time just ask yourself. That's all right now, our microphone is coming
[15:57] in from the top. The EQ curve is being applied. The background noise is being removed. You can play around with this until it's perfect, the balance between blocking enough noise or suppressing enough noise, but also not really
[16:10] also leveling the sound with the compressor and the gate. And after all of this has happened, it will be sent to B2 right now, which means that in any B2 right now, which means that in any program, Discord, your game, OBS Studio,
[16:24] you can now select VoiceMeeter B2 as your sound device. Again, for example, in OBS Studio, we go to settings uh audio, and then right here, I selected it so I can record it. VoiceMeeter out B2. This will be your microphone with
[16:38] these effects applied. If at this point you feel that you sound very produced, robotic, like too much like booster too much, right click on your compressor and your gate. To be honest, the noise gate, you can completely copy this. Just take
[16:50] minus to be safe. I'm giving you safe settings. Copy the other things here. This is like a quick just in case just in case it sounds bad. Move the input gain a bit until normal talking will be like about minus 10, for example, like
[17:03] And then just move the threshold a bit until hey, test. This will be a safe right now. I'm telling you if you feel like it got messed up, that's a way to quickly save it. Now, as mentioned before, I will link the FIFINE AM8 in
[17:17] the description. It's a great microphone. There is also a microphone kit, the AM8T. They sent me the pink kit, but this is a microphone with a boom arm. They will both be linked in the description. The mic is available in
[17:29] white, black, and pink. You can check on Amazon how many people are buying this microphone and this kit. Probably 20,000 people or more every month across the listings that they have. It's a really popular product, and I honestly love
[17:42] that much. If you have any questions, put them in the description. I do read them, and I do use them in my next tutorial to make things even more clear. Thank you so much for watching, and I hope that I will see you in my next
[17:55] video. Have a nice day.



⚡ Saved you 0h 17m reading this? Transcribe any YouTube video for free — no signup needed.