
7-Figure T-Shirt Seller Reveals AI Design Method
45sHigh-earning creator teases exclusive AI design method, triggering curiosity and desire to learn the secret.
▶ Play Clip"Delivers on the promise of a scalable AI design workflow, though some parts are promotional for ListingView."
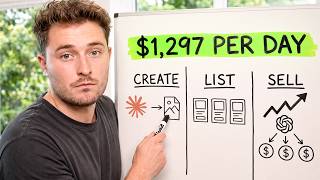
This video demonstrates a complete AI-powered workflow for creating and scaling print-on-demand t-shirt designs. The creator shares their method for finding profitable niches, generating designs in bulk using AI tools, and preparing them for sale, emphasizing the importance of building a system rather than creating single designs.
The creator has made multiple seven figures selling t-shirts and will show how to find profitable niches, use AI prompts, and prepare designs for high-quality final products.
The method allows generating 20 to 100 designs in under 20 minutes, using prompts and AI models like ChatGPT and NanoBanana.
Shops with over 250 listings average nearly 20 times more sales than those with fewer, highlighting the need for a system to create many designs.
The design contributes to about 60% of product success, with mock-up at 20%, marketing/SEO at 10%, and pricing/branding at 10%.
Use Etsy search and sort by sales/revenue to identify passionate niches; examples show teacher and nurse niches outperform accountant niche.
Look for specific slogans or concepts within a niche, like 'off to do nurse things', and check for multiple shops selling variations to confirm demand.
Break down designs into niche, scene, layout, and art style to remix proven designs into original ones.
Developing the ability to identify what makes designs sell is crucial; compare good and bad designs to build this skill.
ListingView's canvas allows connecting prompts and reference images to generate designs in parallel, scaling up production.
Connect multiple image generator nodes to a single prompt to generate multiple designs simultaneously, increasing efficiency.
Insert a text generator node to analyze reference designs and output more detailed prompts, improving design quality and control.
Use your own original designs as references to avoid copyright issues and ensure sellable products.
Upscale designs, remove backgrounds, crop, and position them on product placeholders to ensure high-quality final prints.
Use the bulk create tool to generate mock-ups, titles, descriptions, and tags automatically, speeding up the listing process.
Use Option+drag to duplicate nodes, group selection ports for batch connections, and Command/Control+drag to replace images quickly.
The video provides a comprehensive, scalable system for creating AI-generated print-on-demand designs, emphasizing niche research, design hacking, and efficient preparation. By following this workflow, creators can produce high-quality designs in bulk and turn them into profitable listings quickly.
Volume Drives Sales
Shops with over 250 listings average nearly 20x more sales, emphasizing the importance of scale.
01:31Design is 60% of Success
Quantifies the impact of design on product performance, guiding effort allocation.
02:11Design Hacking Framework
Provides a structured method to remix proven designs into original ones.
07:50Pattern Recognition is Key
Emphasizes that understanding what makes designs sell is a skill that can be developed.
09:35Print Preparation Steps
Outlines the essential steps to ensure designs look good on physical products.
23:18[00:00] I've been multiple seven figures in sales selling t-shirts alone and in this video I'm going to show you how I come up with and make best-selling designs using AI. I'm going to show you how I find the most profitable niches, the exact prompts I use to generate designs in bulk,
[00:15] and how to prepare those designs so that they look super high quality on the final product to ensure that the customer is going to love it. This tutorial is going to show you the prompts that I use as well as the logic behind them that help me generate anywhere from 20 to 30 all the
[00:31] way up to 100 designs in less than around 20 minutes from start to finish and I've never seen anyone show this method before. The first thing you need are prompts to remix and generate new designs. If you want to get mine completely for free you can download them from my Merch Zero
[00:47] community on school. It's completely free to join. It has all my downloads and resources so if I mention something in this video is going to be in the school community. These prompts are designed to work with AI models like ChatGPT and NanoBanana. So although using these models isn't
[01:03] always free, you can use them directly inside ChatGPT or even Gemini, but you can also use those same models inside of a platform that gives you access to them like Canva, Kittle, or the
[01:15] platform that I'm going to be using today, which is ListingView. When you make designs by hand, not only do they typically look worse, but they also take you 15 to 20 times longer to make than using AI. Shops that make more designs and post more listings increase their chances of earning
[01:31] revenue over time. On average, the shops that pass 250 listings average nearly 20 times more sales than shops with less than that. The thing that nobody tells you about making designs is that
[01:44] you should never plan to make one design. You should always work towards building out a system that allows you to create lots of good designs. To do that, you need three things. A niche to target, great design references that are proven to sell,
[01:58] and the ability to generate and prepare those designs at scale. Starting with getting a niche to target. This is your research step, and it's still to this day where most people go wrong. If you saw my AI print-on-demand course that I released last week,
[02:11] you'll know that the design that you put on your product makes up for about 60% of your product success. with only about 20% being the mock-up and maybe 10% marketing and SEO
[02:24] and another 10% for pricing, branding, strategy, and all those things. But building out a great design and putting it on a proven-to-convert mock-up means nothing if it isn't targeted towards a highly profitable niche.
[02:37] A niche is simply a person's specific interest, and the more passionate that someone is about that interest, the more likely they are to spend money on it. You can make money targeting pretty much any interest imaginable,
[02:50] but the more passionate that people are about that specific interest, the more money you'll make when you target it. And interests can be broken into smaller categories and groups to make it easier to understand, like sports and physical activities, professions and trades, like people's jobs, even seasons and holidays.
[03:08] Anything that someone can be interested in can be a niche. So let's say that you want to make designs in the professions category. You can make designs targeting basically any profession, but just remember that some people are more passionate about their profession than others.
[03:24] Ultimately, the only reliable way to figure out who's truly most passionate about their interests is to look at the sales data behind those products on a marketplace like Etsy. So if we make a search on Etsy for something like an accountant shirt, we're going to see a bunch of different t-shirts with designs related to that specific niche.
[03:43] Now, if we sort these by either sales or revenue, we'll start to see some of the top performing designs right up here at the top of the page. You'll notice that the top listings on this page are making a few sales per month, but definitely nothing crazy.
[03:55] But if we make a similar search for something like a teacher shirt, and then we sort these by revenue, what you'll notice is that the income and sales potential for this niche is a lot higher.
[04:07] The top products on this page of search results are on average making a few hundred sales. If I make another search for something like a nurse shirt, and then once again filter these either by revenue or sales, once again you can see that right off
[04:21] the bat, these products, although they're not maybe as crazy as the teacher niche, are still making a lot more sales than we saw in the accountant niche. Now I've personally made sales selling products in the accountant's niche, not because it's the most passionate or profitable,
[04:37] but because a large catalog that targets as many interests as possible and that covers as many interests as it possibly can makes more sales over time. So although we definitely want to gear our efforts towards the niches and concepts
[04:51] that make the most amount of sales, a larger catalog, even if it targets smaller, more obscure niches like this one, will still make more sales over time than someone who overanalyzes every single design they make.
[05:05] An approach tip for you is you don't have to stop at the high-level niche. For example, we made a search for nurse t-shirts. As you scroll through this page, you can try and identify which specific listings are the best selling.
[05:17] If you have ListingView, you can use the browser plugin to filter this page of search results by sales, revenue, and so on. This can help you identify sub-niches and individual trends within that interest group.
[05:30] For example, you might notice a design like this one. It says off to do nurse things and it's making around 17 sales a month. What you can then do is make a new search for that specific slogan or concept in the search bar.
[05:43] And then once again, filter these by sales or revenue. And what this will show you is if there's a lot of different shops all targeting the same theme or concept. And in this case, you can see there's several different variations of this design that are all making a decent amount of sales per month.
[06:00] Even if your listings are only making a few sales, like this one's only making five sales per month, but if you build up a catalog of a few hundred t-shirt designs like this one that all bring in four to five sales per month, that can be a significant income over time. Once you've
[06:15] identified a profitable category and possibly a profitable sub-niche within that category, like we found right here, the next step is to start saving some successful references so you can use them when you go to create your own designs. Now, I have to be clear here. This does
[06:31] not mean you want to copy someone else's design. You simply want to use it as a reference and as inspiration for when you go to create your own completely original design. Luckily, AI can help us do that, but AI also has the power to copy someone's product entirely. And if you do that,
[06:49] not only are you technically stealing from someone else, but you're also setting yourself up for failure because shops that do this always get shut down. Make sure you're always creating original designs when you go to make something and post it for sale. From here, we can start saving successful
[07:05] best-selling products as design references to use later on. I'm going to be showing you how I do this inside of ListingView. So if you have an account and you use it for product research, it makes it an almost no-brainer since you get access to the design canvas as a part of your subscription. The
[07:21] prompts and everything I'm going to show you will pretty much work in any design tool that you choose to use So you should test a few of them out and then decide which one is best for you But to actually save a reference design I typically just like to take a screenshot of it
[07:35] and then paste that screenshot into some kind of whiteboard or design canvas like the one that I have here. You can also take a screenshot of some of the sales data if you want to keep that there as a reference, but the main thing we're trying to pay attention to are the specific designs that
[07:50] are selling well. Design hacking is about breaking an existing design into its four core elements. First is you have the niche. Now this is the specific person that the design is created for.
[08:03] In this case, this design is obviously targeted to someone who's a nurse. Next you have the scene. The scene is the slogan and or the characters of that graphic in the design. In this case,
[08:16] our scene is a goose that's walking over to the right with a slogan written above his head. The layout is essentially how the elements in that scene are constructed and put together. In this
[08:28] case, we have a scene of some ghosts in, I guess, what would be an ER with the slogan position below it. So it's a similar abstraction of the same scene with a different layout. And number four
[08:40] is the art style, which is the actual visual style of the design that it was created in. This would be a distressed 2D graphic of a buffalo. This would sort of be a vector-style graphic of some goats with a typewriter-style font.
[08:56] This would be a varsity-style font with an arch, maybe some distressing, and obviously a cheetah print. The really cool thing about print-on-demand is that you can take any reference design and come up with infinite new possibilities simply by changing one of the elements in each category.
[09:13] And what makes this so cool is that you can transmute a design that's already proven to sell into something completely original. AI changes the game because now you're able to take a best-selling design, change out the niche, theme, layout, or art style, and create a completely new design that still has at least most of the successful elements that drove sales in the first place.
[09:35] Doing this exact process and being able to label out the specific elements that make up any given design, that pattern recognition is your skill and it's what enables you to create good designs in the first place.
[09:48] When you just start out, you don't know what makes a good design and what makes a bad design. You have to look at a lot of good designs that sell really well and a lot of bad designs that will never sell and visually compare them, label out the elements from each of these four categories, and you'll start to notice patterns over time.
[10:05] You can think of it like if you were trying to become a chef. Let's say you never made an egg roll. It might seem really overwhelming or almost impossible because you don't even know what ingredients go in. You don't know the steps you'd need to take to actually cook it.
[10:18] Like, you don't know what you don't know because you've never done it. But if you broke it down into a list of ingredients and a list of steps that you needed to take to make it, all of a sudden you'd be able to create your own egg roll and it starts to feel attainable.
[10:32] And after you do it the first time, it becomes even easier the next time. With print-on-demand, it's even easier than cooking because while you might think a design doesn't look that great, it really doesn't matter what you think. It's all about what the customer actually wants.
[10:46] And because you're able to see sales data behind the actual design, You can skip the part where you make a bunch of bad designs as long as you're building designs based on what's already proven to work. Now we can finally get into the actual designing, and this is going to look really easy, but try not to confuse easy with simple.
[11:03] Your ability to build up that pattern recognition and understand why specific graphics sell so well and why others don't, that's what makes you money in this business. A lot of people get frustrated because they spend time working on the business, but they're not actually building up the skill that helps them determine what a good design and a bad design actually look like.
[11:22] Customers will buy good products whether AI makes them or not. AI can definitely make good graphics that customers want to buy and are happy wearing, but it can also make really bad graphics.
[11:34] And if that's what you're making, you're not going to make any sales. The reason I use an AI node-based canvas like the one that's inside of ListingView is because we can use AI to help us with all four of these design hacking categories all at the same time.
[11:48] So just to give you a really quick rundown of how this actually works, you'll see this toolbar at the bottom. And if we just slap down an image generation node, you can see it's this little box on the canvas that we can drag and move around.
[12:02] And we have a prompt box over here on the right. This is where we describe to the AI what we're trying to create. So we could say something like, write a funny nurse-based text design in a typewriter font that I can print on a t-shirt.
[12:15] I like using the ChatGPT image to model, and I usually leave the resolution at 1K with the quality at medium or even low, because it doesn't take that many tokens to generate an image.
[12:27] Here you can see it gave us basically exactly what we asked for. It's a funny nurse-based design in a typewriter style font. This one's on a white background. Now it's visually not too bad.
[12:39] We didn't give it any sort of reference, so it didn't know how we actually wanted to make the design. So we can start to steer the AI using a combination of these nodes. I've got a new reference design right here.
[12:52] This is a frog that says easily distracted by books, so it's targeting the book niche. but maybe we want to remix this design into something for the nursing niche. So what I can do is I can add another image generator node onto my canvas,
[13:07] and then if I click and drag this little port, I can connect these two together. So now our image generator node can reference our fraud design when it goes to create our new one. And instead of coming in here and writing out a prompt directly inside the image generator node
[13:22] every single time we create a new one, we can also just add a prompts node into the canvas, and then I can connect this to our image generator as well. This is how we can start to guide the image generator, and we can say something like, remix this design into a new design for the
[13:38] nursing niche. And now when I select my image generator node, you can see it's picking up that image as well as the prompts that I wrote in the prompts box. So now when I hit generate, It picked up our prompts as well as the reference image, and it gave us a brand new design that's perfectly targeted towards the nursing niche.
[13:58] We kept the scene, the layout, and the art style the same, and we just changed the niche, and we were able to come up with a brand new design. Now, you might be thinking, cool, but I could already do that. But the reason that you might want to use a node-based canvas is because it allows you to design and generate at scale.
[14:14] And so if we come back in, I've got this ghost design where the ghosts are sort of reading some books. Once again, it's sort of targeted towards the book niche. I can drag this out and we'll create a new image generation node.
[14:26] And for this one, I'm going to flip it so that it's a little bit more horizontal. That way, you know, the image will generate in a similar aspect ratio. Here, I can connect that same prompt up here to this node.
[14:38] And now we've got one prompt feeding two different image generators. And so what's really cool about this is I can select both and hit run workflow and it'll generate both at the same time.
[14:50] You can see how I'd be able to scale up this operation. I could add as many different reference designs as possible and decide what niche I want to generate that day select all my generation nodes and just hit run workflow It using the same model as you get inside of chat
[15:06] GPT or nano banana whichever one you want to use but it allows you to do a lot of them in parallel all at the same time. You can see now we've got a brand new nursing themed ghost design looks pretty decent and it's you know styled
[15:19] in the exact same way. Once again we only changed the niche and we got another version of our frog design. The next way that this helps you actually scale up your designing operation is you can add text generator nodes directly onto the
[15:32] canvas. So we'll create a new pipeline using this reference design and this time I'm going to add a text generator node onto the canvas. This allows me to add extra custom instructions so that we can hopefully get even higher quality
[15:47] designs every time we run the workflow. So with our text generator on the canvas I'm going to connect my reference image into it and also going to connect my prompt into the text input.
[15:59] There is a text input and a system prompt input, but you only really need to worry about the text input for now. Here I'm going to select the image and the text generator and we'll output both of their outputs into a new image generator.
[16:14] This is what the new workflow looks like. And so to sort of explain what's going on here, we have our reference design, which is the same as before. We also have our prompt, but instead of connecting both of these directly into our image, what we're going to do is we're going to connect both of them into this text generator, which is then connected into our image along with our reference design.
[16:36] And so I want to remix the prompt a little bit. This time it says analyze the incoming design and output only a prompt that remixes it towards the niche below. And then I just wrote that the niche is going to be nursing and medical.
[16:48] So from here, it's really easy to run this. I just select the text generator as well as the image generator and I hit run workflow. You'll see the text generator starts running. It's able to see our design and the output is simply a prompt describing in more details
[17:05] than I wanted to write in my own prompt what the image should be. This just adds one more step so that whenever we run this pipeline, it's going to add a little bit more effort to actually remix the design for us.
[17:17] There you go. Now you can see we got a brand new design. This time is just slightly more tailored towards the niche. And we didn't have to sit there and write out a specific prompt to generate this design. So these are essentially the two workflows.
[17:29] You can either connect your prompts directly into the image output nodes, or you can add a text generator in between. That allows you to add even more controls. This middle step is sort of optional.
[17:41] It allows you to add more instructions or customization in between your prompts and what the actual output is. So if you had a system prompt where you wanted to control some of the colors or maybe you wanted to add different effects, you could do that inside the system prompts here.
[17:57] And that would always get picked up every time you ran this specific workflow. These are the two workflows. But either way, the idea here is for you to be able to quickly scale up your design workflow pipeline so that as you build these out, you can write a prompt once, select all of the images that you want to generate, and generate them in parallel.
[18:17] so that you can quickly create a bunch of different designs based on concepts that are already proven to work. Now, keep in mind it's best to have your own original designs as the references because you're just screenshotting someone's design and uploading it as the reference.
[18:31] When you go to create your own version, it's going to be too similar and you're not going to be able to sell it, which just causes you more headache. This right here is the simplest way to get started. It's a prompt connected to your image nodes, which all have a reference design.
[18:44] You can scale this up and create as many of these nodes as you want. And any time you change your prompt, if you wanted to target a new niche, you'd change it out once, select all your designs, and run the workflow.
[18:57] And so from here, there's two ways that you can scale up your design operation. You can either add more rows. So you can add more reference designs. And that way, when you run the workflow, you're going to get more outputs. The more rows you add, the more designs you can generate all at the same time just from writing one new prompt.
[19:14] The thing is that your prompt needs to be just generic enough so that the image nodes can pick it up and actually understand the image that you're trying to get. The second way you can scale this up is by targeting a different element from our design hacking.
[19:26] So right now we built out a pipeline targeting the niche, but we could also target the layout, the art style, or the scene. And so if I just select this whole pipeline, I can duplicate it and create a copy.
[19:39] And now we can call this one new scene, for example. And this time we want to write a new prompt because we're not just changing the niche. We're basically trying to change the scene or some other visual element in the image.
[19:52] Here you can see my new prompt. I just said remix this design into a new design for the nursing niche. If there is a slogan or words in the design, change it to off to do nursing things. And now I can select all of these, run the workflow.
[20:07] Now we've got four new designs with our new slogan. You can see all of these designs say off to do nursing things. and it's also updated to target the new niche. This is where you'll also start to see the importance of the text generator node.
[20:20] Some of these designs did not already have a slogan, and the image generator went ahead and added it in. If you add the text generator in between, it makes it a little bit more intelligent. I changed the prompt to say if the original has no text, remove it from the new image,
[20:36] and now when I generate these, it's first going to analyze that image. It adds that extra layer of intelligence before it makes it over to the image node. And this time, because it's just a little bit smarter, it's able to create the new designs without adding the text.
[20:51] You can tell the design that has the text generator is just slightly smarter than the one where the prompt was thrown directly into it. But honestly, both designs look pretty good. The main difference here is that if you add the text generator nodes, they do cost a couple tokens.
[21:07] So it'll use up your tokens a little bit faster, but depending on the type of design you're trying to create, sometimes it's worth it. So now you can see all the different pipelines I've created. I'm going to scale this up a little bit, and then I'll show you how everything comes together.
[21:21] You can see I've scaled this up a bit. I've added some more best-selling references. These are just some variations that I created on my own. And what this allows you to do is just move quicker. Once you have your new references all connected to that original prompt, you can select them all at the same time.
[21:37] and generate a brand new batch all simultaneously in parallel. You can also select one row at a time. So if you wanted to generate just one new design, you could select those and run them without having to run the whole batch over again.
[21:51] Hopefully this shows you just how quick it can really be. We're able to generate tons of new designs, referencing sort of the original style, adding your new slogan, all in parallel, all in bulk. If some designs aren't going to turn out well,
[22:04] I would probably not post this for sale in my shop, but I'm willing to pay a few extra tokens to generate as many designs as possible, as quickly as possible, so that I can find those few that are actually gonna look good once I get them posted.
[22:17] Once you have one of these pipelines built out, you're able to select all of them at the same time. If you hold down the option key, you can duplicate that pipeline and this just gives you a direct copy So now I could come back into this one and we could change this out for maybe the teacher niche So we created a new scene I can select
[22:36] all of these and hit run workflow. We give it just a few seconds and this is the output that we're starting to get. So you can see that all of these designs are now essentially remixed into the
[22:48] teaching niche. So I could choose the ones that I like. I could update the prompt. I could run this through our more intelligent workflow if I wanted to. By the way, now you can see how you're able to truly generate really high quality and original designs at scale. I haven't found a better way
[23:04] to just quickly create this many high quality designs than using a workflow like this one. But just creating these high quality designs is only part of the problem because with AI, the main
[23:18] difficult part is actually preparing those designs and getting them ready to sell so that they look good on your product. To get these designs print ready you have to upscale them so that they're as high quality as possible so that when they're printed on the product they're not blurry. You
[23:31] have to remove the background, crop out any negative space around them, and get them sized and positioned on the actual product that you're selling. So those are the steps you have to take. Now let me show you how I like to do that. So I'm going to come through and just select a few of the
[23:46] designs that I like that I want to try and sell. You can select as many as you want. I'm just going show you with about eight that I liked from these that we were able to create here. So I'm going to select them and then I'm going to send them into the
[23:58] prep studio tool and just hit send. This just lets me run through five quick actions to get these designs prepared and print ready hopefully a little faster than before. First is your placeholder which controls the size and
[24:11] position. Now you can select anything you want here or you can even leave it blank if you'd rather, but in this case since I'm selling the Comfort Colors 1717 through this listing, I can select to use that product as a placeholder so that
[24:26] when I size my designs I know that they'll look good for that product. Then I can choose the design alignment, so maybe I want them aligned to the top, maybe I want them about 80% of the width and maybe one or two percent down from the
[24:41] top of the print area so they're not you know printed all the way at the top of the net. From here I can upscale and this is going to upscale all of these designs simultaneously so they're all really high quality when I actually go to post them for sale and when they're all
[24:55] upscaled we can then remove the background. Now you can try and remove the background in bulk but what I typically find is that I still need to go one by one just to make sure that everything looks great. So I'm just going to click into each design and we'll just double check that everything still
[25:10] looks good on some different background colors. This one looks perfect and then we can click through and just take a look at some of our other designs. When you need to make a change you can drop down any one of the click actions and each one of these has various settings. So for example
[25:25] if for the background removal we're just removing a color from the background with that color selected I can control the tolerance or how much of that color is actually removed. So at the very
[25:37] bottom you can see hardly any of it's removed and the more tolerance I add the more of that background gets removed from the design. So I think this is going to look pretty good and then I just want to do that for each design. So I'm going to come through make sure that each design looks the
[25:52] way that I want it to. A little pro tip is some designs are going to look better when you select to keep only one color. So in this case I could keep just the black color from the text and once
[26:04] again you can control how much of that color you want to keep. So instead of removing, in this case we're keeping. Let's say you also typically sell lighter designs. Well we can add a color overlay to change the color of that design so that it'll look good when it's actually printed on darker
[26:21] color products. That works especially well for really complex backgrounds like this one where it almost used like a t-shirt texture as the background. I'd want to select to keep the dark color instead of trying to remove all those green elements from the background. When you open up any
[26:36] design and you make changes to it it'll save it so it's an override so it doesn't affect the other designs in the batch. So if I want this one to be smaller on the t-shirt I can scale it way down and it won't affect the other designs unless I scale those ones down as well. Once the backgrounds
[26:51] are removed you can adjust the colors if you want and then I'm just going to finish by cropping all the designs down and from here we're essentially done. You can see all eight of our designs are prepared. They're starting to look great and so now I can just save these files. With the pipeline
[27:06] built out now we'd be able to switch out the niche or the slogan or come up with a new concept, rerun the whole pipeline and create a brand new batch of designs in genuinely a matter of seconds.
[27:18] At this point the limit is really your creativity and your prompting ability to generate super high quality design. Not every design is going to be perfect and they're not always going to look as good as they look right here and it's ultimately up to you to still come up with really high quality
[27:34] designs, concepts, and prompts so that this actually works when you go to use it. But as you've seen, the AI is more than capable of creating really high quality designs as long as you know how to drive it and steer it towards the output you're looking for. Now, if you're still watching this
[27:48] video, congrats. I'm going to show you a few things that make your life so much easier if you're actually going to use this. When you're done preparing your designs and you have a preset created, we created one of these presets in the previous video, you can hand all of your prepared
[28:04] designs directly into the bulk create tool, which will pick up all of those designs, generate your mock-ups, and it'll allow you to run the view AI, which will generate your product title, product
[28:16] description, and tags for each of those designs by reading what the design is and trying to come up with the most searchable terms and the best, most optimized tags that it possibly can. This is the
[28:28] quickest way to turn your designs into listings. You can see it applies our designs to all of our mock-ups, our custom high quality mock-ups that we already know convert. And when it reads the design, it'll come up with the most searchable terms, putting those first, followed by all the other
[28:44] popular searches that customers are making on platforms like Etsy. Like I just don't know of a faster way to create listings that look this high quality than using an automation like this. All of these designs that we made in just a matter of minutes look pretty good if you ask me. And
[28:59] just a couple things that you should know before you use the design canvas that'll improve your quality of life. First is if you select nodes and you hold the option key and then you click and drag, it'll duplicate those nodes while maintaining all of their connections. Next is if you select
[29:17] multiple nodes at the same time, you can see this group selection has its own port. This allows me to connect all of those nodes to a new output like an image generator. That makes it a lot faster
[29:29] than manually connecting each one of these ports one by one every time you add a node. Finally, if you have a normal image node, so this is not an image generator node, you can hold the command
[29:41] or control key and drag it into an existing image node and it will replace the image. That way you can swap out the references really, really quickly. So yeah, hopefully you can see why this is my preferred way to build out designs in bulk.
[29:54] If you want more details on how I'm listing products like this in bulk, you can check out this video next. And yeah, that's about it. So thanks for watching.
⚡ Saved you 0h 30m reading this? Transcribe any YouTube video for free — no signup needed.