
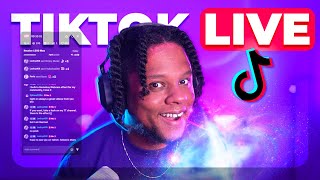
I Streamed to NO ONE for 20 Minutes
60sThe relatable and funny mistake of streaming to zero viewers creates an engaging hook that viewers will want to share.
▶ Play Clip"Delivers exactly what it promises: a step-by-step overlay template tutorial, though it's padded with live stream banter."
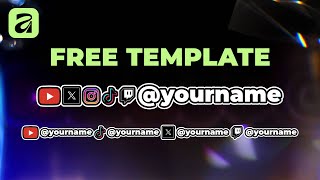
In this live stream, G Level demonstrates how to create social media overlay templates for streamers using Affinity, a free software. He walks through the process of designing bold text with outlines and adding platform logos, then exports the files as reusable templates.
G Level introduces the tutorial, explaining he will use Affinity to create social media overlays similar to those seen on streams by Kaisenat, Fousey Tube, and Aiden Ross.
He starts by creating a new file in Affinity and uses the rectangle tool to create a dark background rectangle to avoid blinding viewers.
He uses the artistic text tool (T) to add text, selects all with Ctrl+A, and increases the font size. He recommends using a bold, readable font like Montserrat.
He imports logos from Google Images with transparent backgrounds, drags and drops them into the canvas, and resizes them while holding Control to scale from the middle.
He demonstrates masking the TikTok logo using the rectangular marquee tool, then inverting the mask to hide unwanted parts.
He groups all elements with Ctrl+G, then adds layer effects: a black outline and a white outline with increased radius for a bold look.
For logos like Twitch and Instagram, he adds individual white outlines to improve separation, and copies effects to other layers using Alt+drag.
He crops the canvas with C, then exports as PNG with transparency by deleting the background rectangle.
He saves the file as a template so users can simply edit the text and export their own overlay.
He creates a second template for users with different names on different platforms, duplicating text with Alt+Shift+drag.
He exports the second template and shares his personal dislike for the design, but notes it's functional. He also mentions Affinity can do everything Photoshop can.
The video provides a straightforward, practical guide to creating social media overlay templates in Affinity, emphasizing simplicity and reusability. It's a valuable resource for streamers looking to customize their overlays without complex software.
What tool in Affinity is used to create artistic text?
The artistic text tool, accessed by pressing T.
02:11
How do you resize an object from the middle in Affinity?
Hold Control while dragging to resize from the middle.
04:04
What is the recommended font for overlays according to G Level?
Montserrat, because it's bold and readable.
03:17
How do you mask out part of a logo in Affinity?
Use the rectangular marquee tool to select the area, then add a mask layer and invert it.
05:58
What keyboard shortcut groups selected layers in Affinity?
Ctrl+G.
08:30
How do you copy layer effects to another layer in Affinity?
Hold Alt and drag the layer effects onto the target layer.
11:13
What is the maximum bitrate recommended for Twitch streaming?
6000, though technically you can go up to 7500, but it may cause buffering.
19:34
Free software for overlays
Highlights that Affinity is a free alternative for creating professional overlays.
00:19Font choice matters
Emphasizes the importance of bold, readable fonts for overlays.
03:17Layer effects for outlines
Demonstrates a key technique for adding outlines to text and logos.
08:30Templates for reuse
Shows how to save time by creating reusable templates.
16:49Affinity vs Photoshop
States that Affinity can do everything Photoshop can, making it a viable free alternative.
24:48[00:07] live on YouTube. Say hi to YouTube chat. [laughter] Are we live? Yes, we are. Welcome. Welcome. Nice. All right. Um, so people
[00:19] watching this in the future and people watching this right now. Hi, my name is G Level. I will be your host today. And today we're going to be using Affinity, that free software, to create some social media overlays, like little
[00:32] social media panels you probably seen on streams like Kaisenat, uh, Fousey Tube, Aiden Ross, like that type, right? Very simple, just the bold letters with that outline. And um, yeah, we're going to get right into it. We're going to do the
[00:46] whole thing live. We'll do it live. We'll do it live. And if you hear TTS, that's my Twitch stream. So, um, so yeah. All right. So, in Affinity,
[00:58] what you can do is do a file, new. [music] >> If you want to return to RP, the cartel's door is open. [music] >> Oh, I'll um I'll consider it. I'll say I want to I want to get back into RP into
[01:13] want to I want to get back into RP into GTA RP, but I want to I need to get the momentum going again, you know, log in like daily and stuff and making it happen. All right, once we have our canvas, uh we can kind of
[01:26] doesn't really matter. We can make it pretty big at the end of the day. I'm going to go to my rectangle tool and I'm going to create a background rectangle. We're going to make sure top left, we're going to make sure that it's dark so we
[01:42] we don't blind anyone. And um and this part is fairly easy. You just need to bring in a couple of uh >> I can ask the city has been hitting 80 >> Oh yeah, I saw the I saw the numbers on the
[01:58] I saw the numbers like it's pretty cool. Ever since it got back, it started getting u pretty good numbers. All right. So, with the text tool, you All right. So, with the text tool, you can press T for that. Or is it T
[02:11] or T a second time until it shows you the artistic artistic text tool. Let me actually remove my camera so you can see. Uh, right there. Artistic text
[02:24] see. Uh, right there. Artistic text tool. You want to go in or if you want to format it before, I know I want it to be wide. So, I'm going to click on the A here, just like Microsoft Word or
[02:36] Google Sheets, and I can type whatever I want to type. tiny, I'm going to press Ctrl+ A to select everything. And then I'm going to
[02:50] select everything. And then I'm going to go to the font size up there and go to the font size up there and bring it up. Bring it up. Bring it up. So, [music] if you have the same name on all social media platform, I'm going to
[03:05] go and select my move tool here so I can move this around. If you have the same name on multiple social media platforms, then it's easy. You only need to put it once and then put all the platforms that you have that name on. Um, I'm going to
[03:17] change the font a little bit. I'm going to change it to Mont Mont Serat. It's my favorite font. But, uh, all you need is something bold and very readable. All right. very legible. Legible. There you go. Just
[03:33] like that. Now, I happen to do this for a living. I actually have a folder with a whole bunch of stuff.
[03:47] So, every time I need to do something like this, I have um I have all the icons already uh saved. Where did I get them in the first place? Uh, simple Google images. Just find the ones with um
[04:04] with uh transparent background. Look at that. Drag drop. It's in there. And we are going to size them down. Hold control to size from the middle.
[04:28] believe I have more. There you go. That's better. culture? >> Hell yeah.
[04:41] Monzerat. I have it like all of my thumbnails are uh the same font. All of thumbnails are uh the same font. All of my YouTube thumbnails are Monserat.
[04:55] will actually mask this out cuz I don't want like the mask this out cuz I don't want like the bottom part. keyboard in order to drag from the middle. It's just faster that way.
[05:09] Instead of dragging like that, you can drag like that. size without being too precise or too meticulous about it. Uh, what else do
[05:22] meticulous about it. Uh, what else do people have? Twitch, right?
[05:46] Okay. Okay. So, for the Tik Tok in order to get rid of like if I color. I was going to turn it off. I don't want it to be that white. Anyways,
[05:58] so we want to select the Tik Tok in the layers over there. Right here. We want to go and select our mask, our rectangular marquee tool. Just rectangular mask. and then mask out
[06:20] Okay. Now, while the layer is selected, you want to go down under the layers list until you find mask layer. It's that rectangle with a circle in the middle and click once. It's going to show you only this, which is fine. You
[06:35] show you only this, which is fine. You want to press Ctrl D to deselect. And you want to go all the way up to pixel and invert. And just like that, we masked out your um text on the Tik Tok logo. Twitch logo
[06:51] is a little big. I'm going to select the move tool.
[07:05] Um, I guess X would be one. I guess X would be one. Do I even have that?
[07:19] I have it, but it's not the right format. Or is it? I'm going to keep it like that, actually.
[07:36] I'm going to put it before Instagram. We're going to bring YouTube here. And now we're just going to carefully space them.
[07:51] to move them around [music] while you have the move tool selected. measurements and stuff, but don't do it by measurements. Do it by feel. Do it by
[08:03] by measurements. Do it by feel. Do it by eyeball. Eyeball it. want the logos to be bigger, you can just select all of them, put them in a
[08:18] something like that. But what I'm going to do now is put all those all these elements in one group. I'm going to hold shift on my keyboard while I have the bottom one selected. Click on the top one. All of them are selected. Now I'm
[08:30] going to press CtrlG for group. And at the bottom of my layers list, I'm going to go for layer effects. Okay, if you watch my other videos about Affinity, you should know about this. And then from there, we're
[08:45] going to add an outline. Okay, we're going to tick the box for outline. Click on outline. Uh, check the color here. We want the first outline to color here. We want the first outline to the first outline to be black.
[09:09] I don't even remember what it looks like uh in the first place. Yeah, we sure do. We sure do. First out first outline is black.
[09:35] you'll see a little plus that duplicates the effect. You can click on the bottom the effect. You can click on the bottom one. You can set that one to white. And then you can bring up the radius again.
[09:48] And there you go. Now, if you have any issues in your spacing, this is usually where it it really really stands out. All right, which is really stands out. All right, which is fine. You can just close this um expand
[10:01] fine. You can just close this um expand your group and then fix that. Fix it up.
[10:14] have um you know something like Twitch here where where it was already like uh dark and we added like a black outline to it so it just looks thick or um if
[10:26] the color is not separating enough like the X logo or the Instagram, I can go and individually add an extra like little outline. So, with my Twitch,
[10:43] I'm going to go down to effects. Just like before, we're going to add an >> We're going to make sure this one is white. radius. And we want something pretty thin. Just like that.
[10:58] thin. Just like that. Okay. is that it will add the word effects next to your layer. So, what you can do is hold Alt on your keyboard and then click and drag that effect on something
[11:13] Instagram, let's say. So, I'm holding Alt, clicking on the layer effects, and dropping it on Instagram. Boom. I'm going to do the same thing for X, hold Alt, click, drag, drop. And there you go. It just adds like a little bit more
[11:29] go. It just adds like a little bit more um of a separation. Makes it look a little bit better. Um, I think I'm pretty satisfied with the spacing. I'm going to select all the
[11:41] logos and I'm going to bring them to the text a little bit. >> I might separate the YouTube and X a little bit. little bit. And then X from Instagram.
[12:01] arrows on my keyboard. holding control and scrolling to zoom in and out. And yeah, now I can collapse the group and move it around.
[12:15] Right. I can press C to open up my crop tool. Crop the whole canvas. I'm holding C here. I'm holding control here. Sorry.
[12:31] Hold control. Bring it in. joined [music] the stream. >> Hey, welcome to the stream. I'm using >> Hey, welcome to the stream. I'm using Affinity.
[13:10] it is it on members only? Is that what's happening?
[13:24] up that bad. I mean, either way, it's going to be uh the goal is to upload it for everyone to see. Yes, it is on members only. Oh my
[13:36] god. No. affinity window to the left side of my screen.
[13:48] >> To be fair, I wasn't uh I didn't like The goal here is to not have a live stream. The goal is to is to definitely have a video out of the live stream for later on. But damn, I've been uh I've been streaming to
[14:03] members only the whole time without noticing. I just checked my analytics and it was like zero concurrent viewers the whole time. I like wait. Thought I was doing something wrong. So,
[14:16] um I turned off my background here and we can already go to file export. we can already go to file export. And just like that,
[14:34] transparent background. Oh, there's one way to find out, Okay, now the viewers are coming in. [laughter]
[14:54] But it's fine. It do not matter as long as people watch it afterwards. Like I'm as people watch it afterwards. Like I'm I'm cool with it.
[15:10] social media overlay one. This is in stock.
[15:22] I don't know why it's not transparent. If I go top right and I click export PNG
[15:55] Let me delete the I'm going to completely delete the rectangle. Well, I can export directly from here, which is pretty cool. I like that. I
[16:10] which is pretty cool. I like that. I like that feature in um Affinity. Is it Ioku Pedro? What's up? How you doing?
[16:36] We're going to override this. Nice. There it is. Easy clap. Easy clap. Just like that. So, what I'm going to do right now is I'm actually going to save it as a template so that
[16:49] all you have to do to put your name is um actually, you know what I'm going to do? I'm going to crop it out a little bit so it's easier for you guys. bit so it's easier for you guys. I'm going to bring it up
[17:07] So, all you have to do when you get the file is find the text [music] is at the bottom. Press T and then type your
[17:22] your real tag, right? And then export. real tag, right? And then export. That's all you'll need to do.
[17:36] show the transparency. I believe it is. I just need to find I believe it is. I just need to find where that is.
[17:50] And there should be something about transparency somewhere here.
[18:03] Booya. There you go. I'm fine. And you? How are you doing? I'm doing I'm doing pretty good. I'm having some like pretty severe allergies have my camera on, but um we're [music] making it we're making it work. We're
[18:17] making it happen. I wanted to make a video, but I decided to do it live. I I'm going to have this video out basically tonight is to basically tonight is to is to actually have this um as a live
[18:32] video. So, I'm going to export as template and I'm going to save it. Um, social media media overlay
[18:52] and then I'll I'll put the I'll put the link in the description to download it. And now what we're going to do is directly like modify this one. Oops.
[19:09] what will be what will be video bit rate max for Crispy? Um what platform are you streaming on? Also uh thank you for the follow.
[19:22] >> Dioku Pedro. >> Thanks for following. >> Thank you for following. Um if you're streaming on Twitch, the maximum bit rate is 6,000 anyways. So, I I'd say like
[19:34] um I'd say YouTube I'd say like I'd say 6,000. Also, you can go higher, but if you have like too high of a bit rate, I guess YouTube like adapts. YouTube has a
[19:46] better encoder in general. So, yeah, something like six six to 10,000 should be fine. But then, um yeah, I don't know how how good and stable your internet how how good and stable your internet is. You might uh you might start having
[20:00] is. You might uh you might start having issues. do 7,500 on Twitch. >> Yeah, technically can do 7,500 on Twitch, but >> Twitch has crappy bit rate. So, if you don't have um quality controls, uh
[20:16] you. Basically, you're going to be buffering for everyone.
[20:28] I'm going to remove Instagram here. just to just to get some uh just to get some space. We're going to do that.
[20:47] to a royalty-free planet. It's a YouTube channel with royalty-free music. channel with royalty-free music. I like them particularly because um they had issues with them. All right. In order to duplicate the text with the
[21:01] the text. I'm going to hold alt on my keyboard. Click and hold shift so it doesn't go, you know, it doesn't move too much. It stays horizontal. And we're
[21:14] going to drag it like that. Oo. Thank you for the YouTube new YouTube subscriber. You know, I have my YouTube alerts on and every time I um I was uh recording a tutorial, I kept hearing this this bass and I couldn't figure out
[21:29] what it was. And then I realized later on, oh yeah, it's YouTube. It's a YouTube uh notification. The YouTube alert. YouTube alert. Completely forgot I had that on.
[21:52] >> Oh, hey, 31 31 months. Mom was gaming, thank you so much for the sub. Appreciate that. That's wild. That is wild. I believe I also have some Twitch alerts going off at the same time. So,
[22:07] like, yeah, my my alerts are a mess right now. All right, let's bring this closer. So, the second template is for uh people So, the second template is for uh people who don't have the exact same name.
[22:24] me turn off Twitch for now. Let's select this. Hold shift uh hold alt first click. Hold shift drag. And there you have it.
[22:38] All right. Turn on Twitch again. Of course, if you get the template, you can do whatever you want with it. Turn things off, turn things on. Ri ribbar ribbar stream is that Thank you so much for the five, dude.
[22:52] Appreciate that. Thank you. Thank you. Surprised there was no uh was there no alerts for that. Wild. I don't think I have alerts turned on for a super chat. I am so not expecting super chats to be fair.
[23:07] Thank you. Thank you so much. absolutely appreciate it. don't stream on YouTube enough for that. But uh this might be a
[23:22] But uh this might be a a new reoccurring thing cuz um well cuz I need to I need to uh it's been kind of hard lately to find motivation to actually record and edit. So this is my new
[23:35] solution. Just go live. Just do it live. Just do it live. Just do it live. Hold alt, hold shift, drag. Boom. Crop it as you wish. Enter.
[23:51] Nice. They're all in one group. So if you want to move them around or whatever. Actually, this is fine. Now we can go top right and export as PNG. Boom. Export.
[24:18] Isn't that nice? I personally do not like this. Um, I personally do not like this. Um, like design-wise, I actually hate this. It's not that bad, but too many people use it, and it seems like that's all
[24:33] wants to be like a little creative and make theirs look a little bit better. Oh >> Gail. Can Affinity [laughter] do masking for photos? >> Affinity can do everything that Photoshop can do. Um and Photoshop can
[24:48] content creators, streamers are >> Yeah. >> E yo super chat hype. >> Thank you so much for that super chat. Appreciate it. Yeah. Thanks for the good
[25:02] videos, bro. Appreciate that. Thank you. Thank you. Thank you. Um, so yeah, Affinity can do everything. Absolutely. Everything you can think of if it used to be done like with Photoshop or anything, Affinity can do it. Yes,
[25:17] there's no difference. Just like Photo P, you know, I get a lot of questions Yes. >> Yes. But also please watch my videos on that >> there are in many streams anyway more
[25:31] >> there are in many streams anyway more [music] Gale streams for the [laughter] my please watch like this is going to be my fifth video on Affinity I think or my fifth video on Affinity I think or fourth and I and I demonstrated masks uh
[25:46] fourth and I and I demonstrated masks uh already. See this sound? I don't know what this sound is. This is a rare treasure train. What the heck is a treasure train? Thank you for the treasure train.
[26:00] Oh, is that the Tik Tok type of thing? Is that the Oh, I'm actually only clicking on the drop down for that. Anyways, uh what was
[26:15] I doing? Where was I? Oh, yeah. >> Like a hype train. >> We're going to export this as a template. I honestly [music] try to template. I honestly [music] try to watch the majority of your videos.
[26:27] >> So, we boost [music] your stream. >> Oh, that's cool. Wait, that boosts my stream? That's cool. That's awesome. Appreciate it. And boom. Two templates Appreciate it. And boom. Two templates recorded. Recorded. Saved.
[26:49] There it is. Template here. Template there. This is here. That's all there is to it. That's how easy it is. Uh, yeah, that's all it is. [laughter]
[27:04] yeah, that's all it is. [laughter] Watch my other videos on Affinity. Um, check the links in the description. I will upload them right now and put them in the description so that anyone watching this after or after the stream
[27:16] templates. Just download them, double click on the text, and change them, and then they're yours. All right, thanks for watching. Uh, YouTube peeps, we're going to say bye. Uh, Twitch peeps, we're going to
[27:30] stay on a little bit a little bit longer.
⚡ Saved you 0h 27m reading this? Transcribe any YouTube video for free — no signup needed.