AI Summary
A woodworker documents the process of transforming a free pallet from Facebook Marketplace into a custom-made desk. The project involves salvaging hardwood, resawing boards, gluing a slab, finishing with varnish, and ultimately delivering the desk for a profit.
Chapters
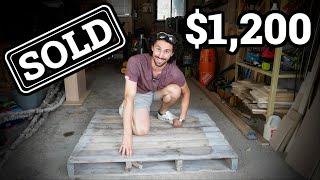
The builder picks up a free pallet from Facebook Marketplace, hoping it contains usable wood despite unknown condition.
The builder tracks all time spent on the project to calculate hourly earnings after sale.
Half the pallet is softwood (cracked, nails pulled through), other half is dense hardwood (nails hard to pull).
The builder posts on Instagram about the project to find a buyer in advance, leading to a custom desk order from McKenzie.
The boards are arranged, glued in two halves, then joined together to form the desk top.
Aluminite clear cast epoxy is poured into knot holes, using CA glue to seal cracks to prevent bleeding.
The tabletop is trimmed at 90 degrees, sanded to 220 grit, and beveled to preserve the December 2019 embossing from the original pallet.
Total Boat Halcyon clear varnish applied in gloss then satin coats for a classy look.
Gold metal legs from Amazon are mounted to match the buyer's home decor.
Total time: 12 hours. Material cost: $170.23. Sale price: $1,200 (buyer added $200 bonus) → Profit: $85.81 per hour earnings.
The pallet desk project demonstrates that with effort and skill, a free pallet can be transformed into a high-value custom piece, earning ~$86 per hour while satisfying a pre-arranged buyer.
Clickbait Check
80% Legit"The title accurately reflects the core story (free pallet becomes a $1,200 desk), though the final profit is $1,200, not the desk itself sold for $1,200."
Mentioned in this Video
Tutorial Checklist
Study Flashcards (8)
What tool did the builder use to cut ends of the pallet during disassembly?
easy
Click to reveal answer
What tool did the builder use to cut ends of the pallet during disassembly?
Circular saw
01:23
How many hours total did the desk project take?
easy
Click to reveal answer
How many hours total did the desk project take?
12 hours
22:13
What was the total material cost for the desk project?
medium
Click to reveal answer
What was the total material cost for the desk project?
$170.23
22:27
What finish did the builder use on the tabletop?
medium
Click to reveal answer
What finish did the builder use on the tabletop?
Total Boat Halcyon clear varnish (gloss then satin)
17:59
How many coats of gloss and satin varnish were applied?
hard
Click to reveal answer
How many coats of gloss and satin varnish were applied?
3 coats gloss, then 2 coats satin
18:44
What method was used to seal the knot hole crack to prevent epoxy bleeding?
hard
Click to reveal answer
What method was used to seal the knot hole crack to prevent epoxy bleeding?
CA glue (super glue) applied under the knot hole
14:34
How much did the buyer pay for the desk?
medium
Click to reveal answer
How much did the buyer pay for the desk?
$1,200 (agreed $1,000, buyer added $200 bonus)
22:41
What was the profit per hour for the builder?
hard
Click to reveal answer
What was the profit per hour for the builder?
$85.81 per hour
22:54
💡 Key Takeaways
Hardwood vs Softwood in Pallet
Demonstrates the importance of wood selection in pallet reclamation, directly impacting difficulty and final quality.
02:23Beautiful Wood Grain Revealed
Visual proof that salvaged pallet wood can be as beautiful as new lumber, motivating similar projects.
04:46Pre-Sale Strategy
Turning a speculative build into a custom order by offering presales on social media reduces financial risk.
08:31Cutting Through Nail with Table Saw
Practical demonstration of safe handling of embedded nails without damaging the blade significantly.
05:55CA Glue to Seal Knot Hole
Innovative fix to prevent epoxy from bleeding into cracks, saving time and material.
14:34Full Transcript
[00:00] So I'm on my way to pick up a free palette that I found on Facebook Marketplace. It looked pretty nice in the photos, but you never know what these things. Fingers crossed, it's a good one.
[00:31] Hi. Hello. Good, how are you? Good. Did you wait a little bit for it? Yeah, I just ended up curiosityed you. What did it come with? I think we saw it, like, 80 bags of like phones. Oh, okay.
[00:43] Boy, over. Thank you. Thanks a lot. Oh, it just fits. RIP interior of my car.
[01:00] So picking up that palette took 40 minutes.
[01:23] I'm keeping track of all of the time I spent on this project. So at the end, when I sell it, I can figure out how much I made per hour. But first things first, we got to take this thing apart. Since a lot of these ends are already split, I think I'm just going to run my circular saw along the ends.
[01:37] And then I have to take all of these nails out the middle. Let's do it. All right. One down.
[02:11] Oh, my God. There were so many nails in there.
[02:23] There's actually still some more nails to take out, but I had to stop early because I had to go move my car. So I got good news and bad news. The bad news is that about half of these boards are a really junky softwood. A lot of them cracked. The nails pulled right through.
[02:35] But the good news is that the other half of these boards are a very dense hardwood, including these two big beams. This one still has some nails in it, but as I mentioned, I have to go with my car in about three minutes.
[02:48] It's funny, the difference between hardwood and softwood is so obvious when they're in the same palette. The nails were pulling right through these ones. The boards were cracking super easily, but these guys did not dent. It was really hard pulling the nails out, and I still have a bunch more to pull out.
[03:04] But I think it's going to be worth it. Anyways, for now, got to go move my car in tomorrow. I'm going to figure out what I'm going to make out of this stuff.
[03:16] All right. It's a new day. Got a good night's sleep, a filling breakfast. Let's get the rest of these nails out. So after another 40 minutes of work, I got all of the nails out except for one.
[03:45] The head snapped off. I tried to hammer it all the way through, and it just wasn't coming through the other side. It's annoying, but I think I have a plan. Hopefully it will work. But for now, I want to plane a little bit off the face of these boards so we can see the beautiful wood that lies underneath.
[04:00] Let's go see. So I'm going to start with a super shallow pass to remove a tiny bit of wood so we can reveal what the wood is underneath all this grime. Let's see.
[04:22] Oh my gosh. Check out the grain on this. This wood is beautiful. So here is the total wood haul from the pallet.
[04:34] We got four wide boards, four slats, and two of these big beams. You can see back there in the trash, all of the pine boys that I threw out. And from that first planing, this wood looks really nice.
[04:46] Like, check out this grain. It's so pretty. So if I stack all of these pieces together, it makes ten inches of height. The shortest pieces are 42 inches long.
[04:58] And at this point, I'm thinking of doing similar to my last pallet project. That is ripping these pieces in half to get some extra width and then gluing them together into a beautiful slab. Now, the exciting thing about this pallet is that we have these extra wide pieces.
[05:13] These ones are five and three quarter inches wide, and everything else is three and three quarter inch wide. So three and three quarter divided by two, 1.875 minus 0.125 for the curve. That gives us one and three quarter inch of thickness if we rip these in half.
[05:28] Now, for the wide ones, if we rip those pieces into thirds, one and two third inch. So at the end of the day, I feel like we can end up with an inch and a half thick table top. An inch and a half is nothing to sneeze at.
[05:41] Let's start ripping these down. So now, it is time to rip these big boys in half, and like you already know, there's at least one nail still in these.
[05:55] So here's the game plan. I switched out my nice finish blade for the construction grade blade that came with this saw. And I'm going to just cut right through the nail. This might sound like a bad idea. It's definitely going to dull the blade, but I'm confident that the blade should be able to cut right through it.
[06:10] So I'm starting with the board that doesn't have a nail in it. At least I don't think it does just for practice. And then we'll move on to the other one, which has the nail still inside.
[06:34] Now I'll flip this over and go through the other side. All right, time for the one with the nail.
[07:10] All right, I don't know if you saw it, but there's definitely a little spark there. And there is our nail. So the saw got through it, no problem. And what are stock table saw blades for if not cutting through nails?
[07:22] All right, that looks awesome. This wood is so beautiful. Look at this grain, this is unreal. Now that we have one flat edge on all these boards, I'm going to rip them all to the same width and put a flat edge on the other side.
[07:39] So there are all of our boards re-sawn to the same width. This wood is so beautiful. I'm so excited to put finish on.
[07:51] We're almost ready to glue this into a slab, but first these dirty faces won't make for a very good glue joint. So I want to run all the boards through the planer this way. Just take a tiny bit off again to get a nice clean flat face for gluing.
[08:04] Let's do it. All right, it's a new day and a lot has happened.
[08:18] Let me bring you up to speed. So last night, I was thinking about the last palette table that I made. I built that entire table start to finish before finding a buyer. Luckily, I did find a buyer. I sold the table to Michaela and her husband for $550.
[08:31] But I was thinking, what if I just make a post on Instagram that I'm working on another table? And if anyone is interested in buying it in advance to just send via message. That way, they can customize it. They can get the table that they want rather than me designing something on spec.
[08:46] And it worked. Michaensie reached out to me. She was super interested in getting this table made into a desk. We traded some ideas back and forth and locked it in. This table will be a desk for Michaensie.
[08:59] She's in Toronto. It's absolutely perfect. She wants exactly the look that this palette would provide. I'm so excited. I cannot believe how well this worked out. So I think we're ready to glue this baby up.
[09:12] Let's get to it. So I spent some time arranging all the pieces. I think that this layout is going to look super good. And I'm going to split the glue up in half so that I can fit the two halves through my claim. So I'll glue these ones up first, then these ones, and then glue them together.
[09:36] So I was kind of hoping to leave these nails embedded in the wood.
[10:00] But I really don't want to send these through my planers. I think they would damage the blades. So I think we got to hammer these through. So that big hole is from when we originally tried to hammer that nail through with a nail set.
[10:16] That was when this was still in one piece. And now that nail is somewhere in the middle. But it should be well out of the range of the planer. So we should be okay leaving it in there. And then just the tip of this is now sticking through.
[10:30] That's definitely progress. Let me show you what this looks like now. So that's a fair amount of protrusion. I think we might be able to get that out with pliers.
[10:42] Alright, so we just snapped off the tip. So yeah, we'll just hammer it back inside and it will be embedded in there out of range of the planer blades. There we go.
[10:55] Out of sight, out of mind. Let's play in these bad boys. By the way, I don't run these at the same time because I'm pretty sure I'll blow the circuit breaker.
[11:11] And I don't have access to it in my apartment. So I have to call my neighbor and ask them to reset it. Now just give it a beat.
[11:35] The grain on this is so cool. I think we're ready to glue these two halves together.
[11:47] Here's the stuff. What a beauty.
[12:00] So I want to fill some of these knot holes with clear epoxy. But first, I have to fix a mistake. There is what looks to be a big gap between these two boards. What it actually is is one of these boards is actually tapered towards the top.
[12:14] I should have caught this before the glue up and flipped it over and glued the other flat side. But this board was probably on the edge of the pallet. It had a really worn edge. And so when you look from the top, it looks like a big, ugly gap.
[12:26] And if we were to fill this knot hole with epoxy right now, all of that epoxy would flow into that crack, which we don't really need to do. So before doing the epoxy, I'm just going to fill that crack with sawdust and wood glue. But before we do that, I need some sawdust.
[12:39] Time to sand. I'm going to fill the crack with this glue and sawdust mixture. I'm realizing now that some of the epoxy might flow under this as well.
[12:54] But hopefully this will at least reduce the amount of epoxy. So there's the knot hole that I want to fill with epoxy. So just on either side, I'm going to fill the crack with this glue and sawdust mixture.
[13:06] I'm realizing now that some of the epoxy might flow under this as well. But hopefully this will at least reduce the amount of epoxy we have to use to top up this crack.
[13:22] So the glue and sawdust started doing this as I was sanding it, which tells me that it's not fully dry. So I'm going to stop sanding for now and switch gears to filling the knot holes with epoxy. Then we can just sand everything after that's all cured.
[13:35] So I'm filling the knot holes with aluminum light, amazing clear cast epoxy resin. You just mix up equal parts of the A and B. So I'm only adding a small amount of epoxy to start just to seal the knot holes so that it doesn't all bleed right through the wood.
[13:52] Then once this cures, I'll come back with a second coat and fill it up all the way. Just need a little bit. So the epoxy has been curing for about a day and what I was afraid might happen happened.
[14:07] So pretty much all of the epoxy in the knot hole next to the crack ended up flowing into the crack itself. We coated the inside of the knot hole, which is good, but if we pour any more epoxy in there, it's just going to continue flowing into the crack.
[14:19] So instead of adding more and more epoxy and just waiting to fill up the crack, I'm going to seal the bottom of this knot hole with CA glue. So we can be sure that this next coat of epoxy will be the final one.
[14:34] So I think that's good there. This activator will force a set. All right, hopefully I won't see the level of epoxy go down in this knot hole at all. The bottom should be fully sealed now.
[14:47] These big knot holes are going to look so cool with clear epoxy in them. All right, the epoxy is stable. Get the bubbles out. 24 hours later, the epoxy is all cured.
[15:03] Time to sand. So I got this baby sanded up to 80 grit and now I want to trim the ends at 90 degrees.
[15:17] I laid down some masking tape to prevent ship out. Let's do this. Good thing this wood is really hard. That would have dented. Beautiful.
[15:39] We're almost ready to put on the finishing touches, but first, more sanding. Oh yeah, that should be plenty of sawdust to fill the rest of the cracks and nail holes on the table top.
[15:59] You already know what I'm going to say, more sanding.
[16:23] So I got this sanded up to 220 grit. It's looking amazing and now I want to bevel the edges. McKenzie and I both really want to preserve this December 2019 embossing on the front face. It's from the original palette. It just looks really cool.
[16:36] But as you can see, it goes right up to the top edge. So if I do too heavy of a bevel on the top, I'm going to hide some of that embossing. However, I do have a lot more room on the bottom. So I think I'm going to do a dramatic chamfer on the bottom edge and then a more subtle chamfer on the top.
[16:51] Let's do it. Ooh, that looks clean. I love it.
[17:15] Beautiful. There you go. Knocks off the sharp corner, but still reveals the 12 2019. We're now ready for one of my favorite parts of every woodworking project raising the grain.
[17:27] All this really is wetting the wood so that you can sand off the fuzzies. But for the first time, it reveals the natural beauty of the wood. Let's do this.
[17:44] Oh shoot. I just poured a bunch of water on my foot. Good thing there weren't any electronics down there. I cleaned off all the dust with a rag soaked in mineral spirits and we are finally ready for finish.
[17:59] I'm going to be finishing this with Total Boat Halcyon Clear. This is a rugged, clear varnish. Full disclosure, this was sent to me by Total Boat, but I'll be including the full retail price in the final cost breakdown at the end of this video.
[18:11] I'm super excited to see how this stuff looks, so let's get to it. So I actually moved the tabletop inside to avoid any dust floating around the garage getting caught in the wet finish. So I have the Halcyon finish in gloss and satin. I ultimately want a satin finish, but Total Boat recommends doing the first few coats in gloss and then finishing up with a satin.
[18:29] Let's do it.
[18:44] So I ended up doing three coats of the gloss, giving it a light sanding with 220 grit and then finishing up with two coats of the satin. And this thing looks incredible.
[18:57] I'm so happy I went with the satin finish. I feel like gloss wood tabletops can look a little tacky and the satin finish just looks so classy. This thing is super smooth, very happy with the Halcyon finish.
[19:09] Again, there will be a link in the description for that, and we're now ready for the final step of this build putting on the legs. You might have noticed these guys behind me for about half of the video. Kenzie and I decided on these gold metal legs to match the decor of her home.
[19:22] I got them for about $120 on Amazon, and I think they're going to look so awesome with this tabletop. Let's put them on. It is Saturday, August 13th, 2022. We're on our way to drop off the desk to Mackenzie.
[19:49] There it is. Carlos, never fails. Oh, yeah, it's Mackenzie. Good to see you. Yeah, just barely fits.
[20:03] Here we go. Yeah. So here's the embossing in the front. It looks so much better than the first one. Thank you.
[20:15] One big change from the first was that I used a new finish. It's like a marine varnish. The other one was a polyurethane, which is nice, but I think this one is like legitimately a nicer finish. I think this wood is also harder than the last wood. You'll see in the video.
[20:27] Getting the nails out was like, it took me like three times as long as the last one. There you go.
[20:42] This one right here? Wow, that is an amazing deer. I don't know where you want it, but I'll just put it here. I'm not sure it is.
[20:55] That's awesome. So I'm going to put an eco-shooting kind of on the plank. I did embarrassing enough plants. Nice. So I have something I need to tell you. I fully assumed from your name that you were a female.
[21:11] I do a lot of people do. Technically, technically, 52%. McKenzie is a female now, which is who we're losing the battle. Oh no. So in the video, I do say she all the time.
[21:24] I'm sorry. That's fine. All right. Did you see if that any super glue? I don't want to leave you a broken. Yeah, I saw it. Did you get the shot of me breaking it? I think so.
[21:36] And when I look at me, it's not coming out. Oh no. You can't know that you're not perfect. No, that's the point. How do we do it? We're good. So if it comes off, just let me know. And I'll 3D print you and me one.
[21:49] And I'll just buy one. Because it's easy plastic. I'm going to try to finish the video up today. I'm going to get it posted tonight. But it's not a little too long. That is a great turn around. Yeah.
[22:01] We'll get out of your hair. Thank you so much again. All good. So it took 40 minutes to deliver the desk to McKenzie, bringing the total time spent on this build to an even 12 hours.
[22:13] Now for our material costs, the legs cost $135.59 after task. We used $22.60 worth of the Halcyon finish. I weighed the pouches before and after using them. About $9 worth of glue, $3 worth of epoxy,
[22:27] bringing the total material cost of this project to $170.23. When McKenzie locked down the project, we agreed on a purchase price of $1,000. I just checked my phone and he ended up transferring me $1200.
[22:41] I texted him. This was not a mistake. He liked the table so much that he decided to pay $200 extra. He is such a kind and generous person. Thank you so much, McKenzie. I appreciate it so much.
[22:54] So taking all of that into account, we ended up making $85.81 on this project, which I am very happy with. As I mentioned, there will be links to everything I used in this project in the description. And before I go, I would like to give a big thank you
[23:07] to my top supporter on Patreon, my mom, Kathy Kurt. And if you would like to learn more about my Patreon page and gain exclusive access to my behind-the-scenes Instagram page, head on over to patreon.com slash morallykirt.
[23:19] Thank you so much for watching and I will see you in the next video.