
Old Laptop to Home Server?
45sShows an instantly relatable problem (broken old laptop) with a surprising, high-value solution, sparking curiosity.
▶ Play Clip"Title accurately describes the content; the video delivers exactly what it promises."
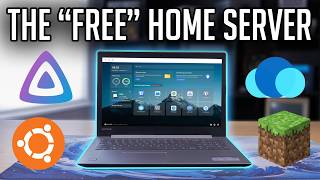
Matt shows how to turn an old, broken laptop into a functional home server. He covers hardware upgrades, installing Ubuntu Server, and setting up Jellyfin for media streaming, Immich for photo backups, and a Minecraft server using Crafty and playit.gg.
Matt received an old laptop with an 8th gen Intel Core i3-8130U, 8GB DDR4 RAM, and a failing 1TB 5400RPM hard drive. He recommends SSDs for better performance.
Replaced the mechanical drive with a SATA SSD. 8GB RAM is sufficient for basic server tasks. Upgrades should only be done when needed.
Download Ubuntu Server ISO and use Balena Etcher to flash it to a USB drive.
Boot from USB, configure language, keyboard, network, storage (disable LVM), set up user profile, enable OpenSSH server, and complete installation.
Edit /etc/systemd/logind.conf to prevent the laptop from suspending when the lid is closed. Change HandleLidSwitch, HandleLidSwitchExternalPower, HandleLidSwitchDocked to ignore, and LidSwitchIgnoreInhibited to no.
Use SSH to connect to the server, run sudo apt update and sudo apt upgrade, then reboot.
Run the CasaOS install script from the website. CasaOS provides a web UI for managing apps and files.
Create folders in CasaOS, share them over the network, and access them via file explorer using the server IP.
Install Jellyfin from CasaOS app store. Configure libraries for movies and TV shows. Enable Intel Quick Sync hardware acceleration for transcoding.
Install Immich (without machine learning) from CasaOS. Create an account, then use the mobile app to back up photos automatically.
Install Crafty from CasaOS. Create a Minecraft server (e.g., Fabric 1.21.10) with 2-4GB RAM. Access locally via IP:25565.
Install playit.gg using a script. Create a tunnel for Minecraft Java, get a shareable address, and share it with friends without port forwarding.
An old laptop can be repurposed into a capable home server for media streaming, photo backups, and game hosting. Start with what you have and upgrade only when necessary.
What CPU does the laptop have?
Intel Core i3-8130U (8th gen, dual-core).
01:13
Why is an SSD recommended over a mechanical drive for a home server?
SSDs are faster and more reliable, improving system responsiveness.
02:16
What command is used to update package lists on Ubuntu?
sudo apt update
10:33
How do you prevent a laptop from suspending when the lid is closed?
Edit /etc/systemd/logind.conf and set HandleLidSwitch, HandleLidSwitchExternalPower, HandleLidSwitchDocked to ignore, and LidSwitchIgnoreInhibited to no.
08:58
What is CasaOS used for?
It provides a graphical user interface to easily install applications and manage the server.
11:43
What hardware acceleration does Jellyfin use on Intel CPUs?
Intel Quick Sync.
18:15
What is the default port for a Minecraft server?
25565
25:18
How does playit.gg allow external access without port forwarding?
It creates a tunnel that routes traffic through their servers, providing a shareable address.
27:08
What is the purpose of Immich?
To back up photos from a phone to a home server as an alternative to iCloud or Google Photos.
19:49
What is the recommended upgrade rule of thumb?
Only upgrade components when you know you need them, not preemptively.
02:43
Failing Hard Drive Diagnosis
The 15-second delay to login screen clearly indicates a failing drive, a common issue with old laptops.
01:13Hardware Acceleration Fix
Enabling Intel Quick Sync drops CPU usage from 100% to 45%, making media streaming viable on low-power hardware.
18:00Secure Minecraft Access with playit.gg
Using playit.gg avoids port forwarding, providing a safer way to host a public server.
29:29[00:00] Hi everyone my name is Matt and like many of you watching this video I'm the tech guy in my family and while this does sometimes come with minor annoyances one benefit is every once in a while I become the beneficiary of old tech that they're getting rid of. An example of this is this laptop
[00:16] right here that a family member gave me after they upgraded recently. I was told it's broken and while this machine isn't ancient by any means it's certainly not modern being that it uses the CPU released around 7 years ago.
[00:28] And I think this is a good example of the type of PC many of you might have lying around. So in today's video I'm going to see what I need to do to get the system working and show you how you can use an old laptop like this one or any old PC you have lying around
[00:41] and turn it into a basic home server. I'll show you what kinds of upgrades you may want to make and I'll show you how to set up stuff like Jellyfin for media streaming, image for photo backups, and even how you could use a system like this to host a Minecraft server for you and your friends. The first thing
[00:57] I did was try and boot the system up. It did take quite a while but it did eventually boot into Windows but it was incredibly unresponsive. Like I pressed the enter button to get to the login screen which should take a second or less but here it took around 15 plus seconds which to me meant
[01:13] there was either something wrong with the OS or more than likely a failing hard drive. Then I went ahead and boot it into BIOS to confirm the specs. In terms of the CPU, this laptop's rocking an 8th gen Intel Core i3-8130U. This is only a dual-core CPU, but it's modern enough for a ton of home
[01:30] server applications, and anything Intel 7th gen or newer has the necessary iGPU to transcode most media for Jellyfin or Flex. This system also has 8GB of DDR4 RAM, and looking up the hard drive
[01:43] product code we can see it's a 1TB 5400RPM mechanical drive. Once all that was confirmed, I went ahead and opened the laptop up, which wasn't too bad, and then removed the old mechanical drive and installed an SSD that had Windows on it. Looting to the SSD, I was able to see temps,
[02:00] which were perfectly fine. If they weren't, I would have replaced the thermal paste, but again, they're fine, so this saves me from having to do that. Once that was done, I replaced the Windows SSD with an empty 1TB SATA SSD that I had on hand, but even something like a 256GB drive
[02:16] would be a fine starting point, which would give you enough space to play around with and not break the bank. Also important to note, the new drive will be wiped when we install our new OS, so make sure nothing important is on it.
[02:28] It's also good to point out that you could totally use a mechanical drive for this, but an SSD is recommended. Also, the 8GB of RAM this system came with is plenty for basic server applications. and with the current cost of memory it doesn't make sense to upgrade something like this
[02:43] until you know for sure you can take advantage of the extra memory. And I think this is a good rule of thumb as other than swapping out failing components like the hard drive in this case, you shouldn't make any upgrades until you know you need them. Also if you don't have a system
[02:57] lying around you can get a comparable one to this for like 50 bucks on ebay and I'll leave links to a few options below. Once the new SSD was installed and the bottom panel put back on, I was ready to start turning this old laptop into a home server. The first thing we need to do is make a bootable
[03:13] USB installer which will require a USB flash drive and a PC to make it. So now I'm going to hop onto my main PC that has my empty USB flash drive plugged into it. Alright so the first thing we need to do is make the installation USB and to do that we're going to need our base OS ISO as well
[03:30] as a way to flash that ISO to our USB. You could go with something like Debian but for me I'm going with Ubuntu Server and you can go ahead and head to the link in the description and select the download Ubuntu server option.
[03:43] Then you can select to download the latest version and this will take a little bit of time as it is a 3 gigabyte download. And while that's downloading you can head to the other link in the description titled Bolina Etcher and select the download Etcher option.
[03:57] You'll be presented with these different versions. We're going to go ahead and select the one for Windows and let it download. And once those are downloaded you can go ahead and select to open the Bellina Etcher setup. And once Bellina Etcher is open you can select the flash from file option.
[04:11] Then you can select the Ubuntu server ISO that we just downloaded. Once that's selected we can select our target. I'm going to pick my 64GB USB that I just plugged in. Finally hit flash.
[04:23] Also please remember that anything on this USB will be deleted during this process so So if you have important files on them, please back them up before you do this. This will take a few minutes to flash the USB, so just wait until it's done.
[04:37] And once the flashing process is complete, you can exit out of Belena Etcher, eject your flash drive, and bring it over to the device you're going to be using as your new home server. Once your USB is ready, I would recommend taking your desktop or laptop to where it will stay
[04:50] indefinitely, which probably is going to be by your router, and make sure it's plugged into both power and ethernet. As it's ready, plug in your USB and turn the system on. It should boot right into the installer, but if it doesn't, you should try and load into
[05:04] the boot menu. To know what key to press, I just googled Lenovo laptop boot menu key and found that it's F12. So with the laptop off, I pressed the power button, then immediately started hitting the F12 key until I got to this menu here.
[05:18] Then I highlighted my USB from the list and hit enter to boot to it. Alright, now you should be at this screen right here where we will configure and install Ubuntu Server. On this page you select your language. For me it's English so I'm going
[05:30] to hit enter. On this page you select your keyboard configuration. Mine are already in there by default so I'm going to hit enter to continue. Here we're going to select our installation type. I'm just going with the default Ubuntu Server so again I'm going to
[05:44] press enter. This is the network configuration page. It is recognizing my ethernet connection and you shouldn't need to mess around with anything on here so you can go ahead and press enter. We don't need to deal with the proxy configuration so again press enter. I'm using
[05:59] the default mirror address for the mirror configuration and you should too so just hit enter. And on this page is where we are going to configure our storage. I'm going to leave everything default except for under here set up this disk as an LVM group. I'm going to press enter
[06:13] to deselect it. If this was a system that we were going to say expand a lot over time you may want to go with LVM but it does add a little bit of complication which I don't think we need right now so once that's deselected I'm going to go to the bottom to done and hit enter this page is giving
[06:30] us an overview of how our storage is configured everything looks good so I'm going to hit enter and this is the point of no return where it will install Ubuntu server onto that drive that we put into the laptop and it's going to erase anything that's on there so I'm sure that I don't have
[06:45] anything on there I need so I'm going to hit continue by pressing enter. On the profile configuration page I'm going to enter my name. You can name your server for me I'm just going to call it laptop. For my username I'm also going to go with Matt.
[07:01] And then I'm going to pick a strong password. Then I'm going to tab down to done and hit enter.
[07:14] We don't need Ubuntu Pro so I'm just going to hit continue. We're now on the SSH configuration page. We definitely want to install OpenSSH servers so we're going to select that by hitting enter
[07:27] and then we're going to go down to done and hit enter. On this page the installer gives you the option to install a bunch of different services and software. We don't need any of these and you could always install them in the future if you need to so
[07:40] I'm just going to go all the way down to done and hit enter. Now it's going to go ahead and install Ubuntu server onto our drive based on the configuration settings that we just put in. This will take a few minutes so just be patient.
[07:52] Now after 2 or 3 minutes the installation is complete and we can go down to the reboot now option and hit enter. It now telling us to remove installation media which is the USB drive we have in there so I going to go ahead and pull that out now and once the USB drive is removed I going to hit enter Once the system has rebooted you should
[08:15] see this screen here with the laptop login option we're going to go ahead and enter in our user name hit enter and then enter in our password. Once you input your password you can hit enter and it
[08:29] should log us into the server. One important thing to note right now is the IPv4 address in the middle of the screen whereas it's 192.168.0.141. You're going to want to go ahead and write that down or
[08:43] take a picture of it. Now one last thing to do if you are using a laptop like I am is to type in sudo space nano space forward slash etc forward slash systemd forward slash login dot c o n f
[08:58] then press enter. Type in your password and hit enter. That will bring you to this ring here. You're going to want to arrow down to this section right here and delete the pound sign in front of handle lid switch, handle lid switch external power, handle lid switch docked, as well as lid
[09:15] switch ignore inhibited. Then you want to change the two that say equal suspend to ignore and change the equal yes to no. Then you can press ctrl x to exit capital y to save and then type in sudo
[09:31] reboot to reboot the system and what we just did is make it so your laptop will keep running even with the lid closed. Now with that complete and with making sure you wrote down the ip address you're able to close the lid and put it where you want. You could rest it under a router or
[09:45] even lean it up against the wall just make sure you're not completely restricting airflow and now you can head back over to your main PC. Alright so I'm back at my main machine with a command prompt window open and to connect to our server we need to type in ssh space our username which for me is
[10:02] matt at the server IP whatever it is for you for me it's 192.168.0.142 and then I'm going to hit enter It's going to ask if you're sure you want to connect. I am so I'm going to type in yes and hit enter.
[10:19] And then it's going to ask for our password. And once you enter in your password you hit enter. And we are into the server. And basically anything we type in here is like we're typing it in directly at the laptop itself.
[10:33] The first thing we're going to do is check for update. So sudo app update and then hit enter. And then enter our password. and hit enter again and it's going to look for updates. Then to install any
[10:49] necessary updates we're going to type in sudo app upgrade and hit enter. We are going to want to continue so we're typing Y and enter and it's going to do all
[11:01] those updates. So about a minute later all those packages are installed and it's a good idea to restart the system now and to do that we type in sudo reboot and hit enter. Then we can give it about a minute to restart. So about two minutes later the system
[11:16] should be rebooted so we can re-ssh into it by again typing in ssh, face our username which for me is matt, at the server ip which is 192.168.0.141 and then hitting enter. It's going to ask for a
[11:31] password again and hit enter. So now that we've done all those packages we are now ready to install KasaOS which is a nice looking graphical user interface that will allow us to easily install
[11:43] applications, services, and manage our server further. To do this all you have to do is head to the link in the description to this page right here the KasaOS website and copy this command down
[11:55] right here. Once that's copied to your clipboard you can go back to your command prompt window and right-click to paste it in and then hit enter. It's going to ask for your password and then hit enter.
[12:10] And now it's going to go through and install CostOS to our system. It's now about two minutes later and CostOS has successfully installed and we're done with the command prompt for now. And to visit CostOS all you have to do is type in the server IP address into a browser. So I'm going to
[12:26] open up Chrome and I'm going to go to 192.168.0.141 and hit enter. And we are now at the setup screen for CosaOS. I'm going to hit the go button and then it's
[12:41] going to ask for a CosaOS username again I'm just going to call it Matt and then a password and then confirm the password and then hit create. It's going
[12:55] I'm going to ask if you want to show the newsfeed for the CasaOS vlog. I'm going to accept you don't have to. And now we are inside of CasaOS. As you can see we've got the date and time. We've got system statistics like CPU usage, power usage, RAM usage, how much storage is
[13:12] being taken up, network status, as well as files and the app store that we can access. We'll solve it by going to the files. Now if we want to create a folder that we can access over the network, all we have to do is right click and hit new folder we can call this whatever we want I'm going
[13:27] to call it Matt's files and I'm going to hit submit and then if we want to access it over the network we click these three buttons right here and hit the share button and then to be able to access it all we have to do is copy this right
[13:43] here hit got it and then open up our file browser click the address bar here paste it in and hit enter. It's going to ask for our credentials which is the username and password we just created and enter those in. We are now inside of
[14:02] that file that is on the server and what we can do is just open up and pull over a random file and as you can see if this was a relatively small file so it
[14:14] transferred over pretty quickly and now if we go into here that file is right here and now you have a place that you can upload files onto your server from other PCs on your network. Obviously you can make as many folders as you want. Now
[14:29] I'm going to go back into the files and go into media and these movies music and TV shows I'm going to go ahead and share all three of these and now that all three are shared we can see all the shared folders down the bottom left by
[14:44] pressing the share button and for example this movies if you want to know the network path for any of these you just right click them and hit get network path and then we can copy it and again go back into our file explorer
[15:01] paste it in and go. I'm gonna pull a random movie from my personal storage server over into here so that we can use it for later and this is a pretty big
[15:13] file so it might take a little bit to transfer over because this is only going over gigabit network speeds. And about a minute later that file is transferred over. Just to confirm it we can go back to data, media, movies, and it's right there.
[15:29] So now that we have a few shared files that we can access and transfer files and media to, we're now going to look at the app store. Now KostOS has a ton of different apps that you can install. I'll show a few of them pretty quickly.
[15:42] One that's very popular is called Jellyfin which is similar to Plex if you've ever heard of that and basically it's a way of hosting your own media server. So to install it I'm just going to press the install button and it's a one click install.
[15:57] And now that it's installed we can click to open it and we get the Jellyfin setup screen. My language English is already selected so I'll hit next. Then it'll have you set up a username and password.
[16:09] And after those are inputted you can just hit next This screen is where we set up our media libraries so just add the plus button Content type the first one I do is movies
[16:21] Display name is movies that's fine and right here folders this is where we will point it to our movies folder. So add it under media select movies and hit okay. And once that's done everything
[16:36] else can be left to default and press ok. We'll do the same thing for our shows. Again hitting folders, going to media, going to TV shows and hitting ok. You can
[16:50] organize this however you want. You could add another folder for anime, another folder for like foreign films. Again it's up to you however you want to do it. For me shows and movies is fine so I'm going to hit next. You'll select your
[17:03] preferred metadated language mine is already in there so hit next set up remote access we're going to leave this to default and hit next and we're all done now it'll bring us to the sign in page where we can type in our username
[17:17] and our password and then hit the sign in button and we are now inside of jellyfin and if we want to watch a movie say the one we just transferred over we can select the movies folder and select on the movie we want to watch now as you
[17:32] can see it's loading pretty slowly right now and when we try to play it it's going to look super choppy. So if we try and go drag through the timeline as you can see it's taking forever to load. I can actually hear the fan spinning up a little bit and that's because it's trying to
[17:47] transcode this media entirely with the CPU cores itself which is not something that we want and as you can see it's still not loaded. Now thankfully because we have an 8th gen Intel CPU we can remedy
[18:00] this by using hardware acceleration. So if we go back we select this head right up here. We go down to dashboard. We select playback. We select transcoding and then under here hardware
[18:15] acceleration we want to go down to Intel quick sync because we want to use the Intel iGPU. You have the enable hardware decoding for these default options should all be fine. I think I
[18:27] might have some HEVC movies and TV shows so I'll select those and then once you've selected everything you want you scroll to the bottom and hit save then you just select got it and if we go
[18:39] back to our media server go to movies select the movie that we were just watching it should take a little less time to load it still might take a little bit to load because this is a very large
[18:51] file but as we can see we can scrub around and performance should be a fair bit better. And if we play this and go back to costOS now you can see the CPU percentage is only at 45%
[19:05] versus the 100% it was at before. Obviously one question you might be asking is how do you get this media? That's not something I'm going to go over in this video. I'll leave a link to a tutorial
[19:18] for I believe it's from TechHut on how to use what's called the R-Suite. So stuff like radar, prowler, sonar, and all of these are just ways of automating the procurement of media. Now this
[19:35] does involve in most cases sailing the high seas but that's going to be a personal decision for you to decide if that's something you want to do. Again I'll leave information on that stuff in the description. So we set up a media server in just a couple of minutes so
[19:49] now I'll show you an application that allows you to backup photos from your phone onto your home server as an alternative to iCloud or Google Photos and this is a good way of being able to save a lot of money by hosting this stuff
[20:02] locally. So if we go into the App Store and we type in image for some reason the The main image app wasn't working for me, it might work for you, but the image without
[20:16] machine learning worked fine so I'm going to install that. And a few minutes later image is installed and we can go ahead and open it up. This will bring us to the setup screen. We'll hit the get started.
[20:30] You're going to want to input an email address along with an admin password. Confirm your password and then input a name. For me again I'll just do Matt and hit sign up.
[20:42] Now it will bring you to the login screen where you can input your email and password and hit login. Now we can select our theme. I'm going to go with dark mode.
[20:55] Select my language which is English, server privacy. I'm going to leave everything to default. Go to user privacy. I'm also going to leave this to default storage template. I'm going to leave this to default as well.
[21:07] to backups and this is just giving you a reminder that you want to use a 321 backup system where you have three copies of the file two local copies on different devices and one off-site copy so if
[21:21] you have these files on your phone and here ideally you want another copy of those photos somewhere off-site especially if they're photos that you never want to be able to lose so then we'll select
[21:33] Next to go to mobile app and this is where you'll need to get out your phone and download the image app. Once downloaded you can open it up. Then inside of your browser you can hit done.
[21:45] And up here the server IP address is what you will input into your phone on the image app. So I have one number off so I'll change that to 192.168.0.141 colon 2283 which is what
[22:01] is in my browser. So I'll hit next and then it's going to ask for my username and password. And then once that's inputted I will hit the login option on my phone. It's going to ask you to select photos to upload.
[22:16] So I'm going to hit select more photos and I'll select a few random photos to upload. Obviously you can allow it to access all your photos that will update all of them.
[22:29] We're going to press this upload button at the top and we're going to select enable backup and then this should start to back up the phone to the server and as you can see one of the files already showed up and under albums we can select
[22:44] what we want to back up so I'm just going to select all and it should start to upload those other photos and now we have access to the photos that we
[22:57] uploaded. And it's only the few photos that we gave Image access to. Obviously you could give it full access to your device so that it can back up all the photos that are on your device. Now from my understanding you do need your phone hooked up to the same network as the server to be able to do
[23:13] these backups but you can set them to go automatically so without any thought on your end they'll be uploaded to Image and you'll have backups of all the photos on your phone without having to pay for google photos or iCloud. So now we have a media server set up for movies and tv shows
[23:30] we have a way of backing up the photos from our phone so now i'm going to do another example which is how to set up a minecraft server on the system so we're going to go into the app store and we're going to use something called crafty and i'm going to select this one right here and hit install
[23:46] this is just telling you where to find the default credentials i'll show you in a minute You can now hit next steps and it will install Crafty. And about a minute later Crafty is installed and we can click to open it up.
[23:59] You can just ignore this your connection is not private just hit advanced and then proceed. And now we are able to enter in a username and password. The default username should be Crafty but the password is going to be a very long string of
[24:14] characters that is going to be inside of the file system So if we go back to POSOS We go back to files We can then go to app data We can go to crafty we can go to config and then we can go to default credits
[24:28] Right here is the default password, as you can see it's very long and complicated so you're just going to want to copy it. Go back into crafty controller, paste it in, and then hit login.
[24:40] And actually I was wrong about the default username, it is actually admin, so we will type in admin and then hit enter. We are now inside of Crafty controller and in here is super
[24:53] easy to spin up servers so what I'm going to do is hit this create server button. I'm going to select a server type which is going to be Minecraft servers. You could go with something like vanilla
[25:05] or paper you can even do forge or neo forge for me. I'm going to go with a fabric server. I'm going I'm going to select the server version which actually I'm going to go with 1.21.10. I'm going to name this text.
[25:18] And then we can set up how much RAM we want the server to use. I'm going to set a minimum of 2 and a maximum of 4. And then it's also important to note this server port which is 25565.
[25:31] You even have the option to do stuff like import an existing world or server. But I just want a new one from scratch so I'm going to hit the build server button. and then to start up the server I'm going to press this play button it's going to ask us to
[25:46] agree to the Minecraft Eula I'm going to hit yes and then this is telling you if you want to access the server from outside of your network you want to port forward this but I'm going to show you a
[25:58] very quick easy different method to give your friends access to this server so I'm going to press OK and now we can click on this test to see what's going on with it as
[26:10] you can see it is creating the server and while it's doing that I'm going to open up Minecraft. I have Minecraft open I'm going to go to multiplayer I'm going to go to a direct connect and then I'm going to type in the server IP which is
[26:23] 192.168.0.141 and then the port which is colon 25565 and then hit enter and now we are inside of our Minecraft server and even though this
[26:39] isn't a very high-powered server that we're running it should still perform pretty well and as you can see chunks are loading absolutely fine which is sometimes a problem and this is also part of why I would go with fabric is it
[26:55] is a little more performance than vanilla at least in my experience and that's while maintaining basically the same mechanics as vanilla so all your farms and stuff should work perfectly fine. So we are connected to our server locally over the
[27:08] network but what if you want to be able to have your friends join the server as well? To do that we're going to use a free service called playit.gg and to set it up it's going to be very simple
[27:20] thanks to a script provided by aborddev on github. So all you have to do is go to the link in the description, scroll down to this top command right here, copy it, we're going to go back into command from. We're going to paste that in and we're going to hit enter. We're going to type in our password
[27:39] and hit enter. And then it's going to go ahead and set up playit.gg on our server. It's going to ask us to confirm by typing yes and hit enter. And then it's going to give us
[27:54] a code that we can copy. Now it's very important not to press ctrl c. You can just highlight it and right click it to copy it and then we can go back into our browser paste it in and hit enter
[28:09] you will need a playit.gg account which is free to make so i'm just going to sign in and once signed in i am going to repaste that link actually and go to it
[28:22] and now it is connecting to our server we're going to select continue We're going to select add agent and then we're going to select the create tunnel button. Now
[28:37] there are premium paid options but we're just going to go with the global anycast because it is free. We're going to select tunnel type and we're going to do Minecraft Java and then we're going to add tunnel now we need to update the server address locally which is 192.168.0.141
[28:58] we're going to make sure the port is correct the this is a default one two five five six five so we can leave it that and we can hit the update button now we can take this shareable address right here and give it to our friends i'm just going to copy it i'm going to go back into minecraft i'm going
[29:15] select direct connect and then I am going to paste in that address. And now we are connected to the Minecraft world actually outside of the network. So
[29:29] basically your traffic is being routed through playit.gg and we don't have to expose any of our ports to the outside world which is normally what you'd have to do with port forwarding to give friends access to your server. So this is
[29:41] a much safer and more secure way. In my experience performance is pretty good and it's free so it's definitely worth checking out. So now we have a Minecraft server set up and available for our
[29:53] friends to use. We have a way of backing up the photos on our phone. We have a media server set up and that was all within maybe an hour or two of total time invested. Those are the three examples I'm going to show today. Other things you could look into are stuff like Piehole which is for
[30:10] network-wide ad blocking, as well as another one I'd recommend looking into is Tailscale, which allows you to access your server easily, freely, and remotely from anywhere in the world.
[30:22] I have it set up on my main storage server, and it's super nice because I can open it up on my phone and grab whatever files I want. I'll leave tutorials on how to set those up in the description down below. But as you can see, setting up a home server with a basic system is actually pretty easy.
[30:38] And in just a few short hours you can set up a ton of stuff. Again, we have a media server, we have a way of backing up the photos of our phone, and we have a Minecraft server that we can give an address and have our friends play on.
[30:51] Now this was a pretty basic Minecraft server setup. I'm thinking about doing a larger tutorial as a follow-up to my $100 Minecraft server video where I used slightly better hardware and used this method to set up a Minecraft
[31:05] server and show you all the different ways of installing stuff like mods, mod packs, plugins, backups, all that sort of stuff. So if that's something you guys would be interested in, let me know in the comments below. I'll also be doing a video on pterodactyl panel,
[31:21] which is something you guys asked for, so stay tuned for that. So yeah, as you can see, this stuff really isn't super hard. It doesn't take a ton of time investment, and even a cheap older laptop like the one I'm using for this video can give you a surprising
[31:36] amount of functionality. Now depending on what you're gonna want to do you may need more storage than just a 256 gigabyte SSD but my recommendation is using that old piece of hardware you have until you run into hardware
[31:50] limitations and then at that point once you know what you want to do you can start planning out a server and really for like three four hundred bucks you can get a pretty good do-it-all home server with a fair amount of storage. If you guys are interested
[32:06] in getting into home servers and home labbing, I'll leave some links in the description for more resources along with links to all the stuff mentioned in this video. So yeah guys, I think it's time to wrap this video up. I hope they showed you that even with a basic system, you can set up a
[32:20] decent home server fairly quickly and easily. If you guys enjoyed the video, give it a thumbs up and consider subscribing and as always this is matt from tech by matt signing out
⚡ Saved you 0h 32m reading this? Transcribe any YouTube video for free — no signup needed.