
AI Summary
This is a screencast walkthrough of how the creator has set up their product sales and logistics using Gumroad, ConvertKit, and Zapier. The video demonstrates the configuration of a paid product on Gumroad, the creation of a '10 Days to Better Design' course in ConvertKit, and the automation that links purchases to the email course.
Chapters
The creator has two products on Gumroad: a main version for $15 and a basic version without Photoshop files for $10. Pre-sales were run to gather initial feedback, yielding nine sales.
A cover graphic, price, and copy are set on the product page. A text file currently explains the pre-order instructions, but will be replaced with the first lesson. The launch discount is used to give customers 20% off.
A course called '10 Days to Better Design' is set up in ConvertKit, with lessons planned for each day. The course is currently a placeholder and will be filled with exercises.
Zapier zaps connect Gumroad to ConvertKit, adding a new subscriber to the email course whenever a purchase happens. This automates the process of enrolling buyers in the course.
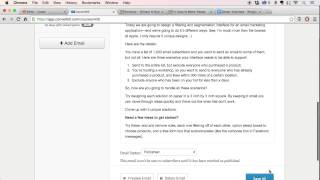
The creator demonstrates adding the first lesson to ConvertKit, setting it to publish on day zero. Formatting often needs cleaning up when pasting from other sources. An image is uploaded and positioned, and the lesson is set to go out on day one.
Lessons can be reordered by dragging and dropping, with updates happening automatically. The creator plans to fill out the remaining lessons and will move all content creation from a Google Doc into ConvertKit going forward.
Mentioned in this Video
Tutorial Checklist
Study Flashcards (4)
What are the two product tiers on Gumroad?
easy
Click to reveal answer
What are the two product tiers on Gumroad?
Main version for $15, basic without Photoshop files for $10.
What discount is applied to the launch?
easy
Click to reveal answer
What discount is applied to the launch?
20% off.
01:12
What is the purpose of the Zapier zap?
medium
Click to reveal answer
What is the purpose of the Zapier zap?
To add a new subscriber to ConvertKit when a purchase is made.
02:00
How can lessons be reordered in ConvertKit?
medium
Click to reveal answer
How can lessons be reordered in ConvertKit?
By dragging and dropping them.
06:21
💡 Key Takeaways
Zapier Automation
Shows a concrete example of connecting sales to email workflows without manual effort.
02:00Lesson Formatting
Highlights the tedious but necessary step of cleaning up imported content in ConvertKit.
02:30Reorder by Drag-and-Drop
Illustrates an efficient way to manage course sequences, a practical UX win.
06:04Full Transcript
[00:00] Alright, I'm going to give you a quick walkthrough of how I've got all the product sales and logistics stuff set up. So, first we've got Gumroad. I've got two products inside of Gumroad.
[00:15] The main one for $15 and then the basic version that doesn't include the Photoshop files for $10. I ran a few pre-sales yesterday in order to get some initial feedback.
[00:30] and that went well so that's what those nine sales are. If we click into one of these I've got a little cover graphic, the price set and then some copy that. Here's a text
[00:45] file that I had to explain the pre-order and instructions so that'll be removed and replaced with the first lesson. Let's see under options
[01:00] I've got you know the URL of the product we limit the sales if we were doing that but we're not anymore and then the pre-order discount and
[01:12] Also this This one here the launch discount is what we're going to use to give everybody 20% off So let's take a look at that page
[01:24] If I click through and do that You can see it going to be instead of and that good So I can customize all of that if I wanted Now so that the product in Gumroad
[01:44] Then inside ConvertKit I have a course called 10 Days to Better Design. I'm going to build this out in a little bit, but this is just to fill the context. You can see Day 1, Day 3, etc. So I'll fill that out with each exercise.
[02:00] And then in Zapier, I've just got these zaps connecting up Gumroad to ConvertKit and just adding a new subscriber when that purchase happens and then filling it all into ConvertKit.
[02:16] So that way when someone buys this box on Gumroad, they automatically get added to this course. So I just need to build this out and yeah, I'm not sure I can do that right now.
[02:30] I'll show you a little bit more about using ConvertKit. I'm just pulling it from over here.
[02:43] Let's just add that first lesson. We want to send this out on day zero because it's immediately after the subscription.
[02:55] and alright that didn't bring over the formatting so we are just going to need to
[03:09] clean that up a little bit and little bit Perfect Then I will set this to publish on day zero and then I can hit save
[03:39] There we go. There we go. So this will go out as soon as they subscribe. There will be a slight delay just because it'll take maybe 10 minutes to process that. But in the future it'll go out straight. So in this one I set day one.
[03:56] and then paste this in
[04:12] and clean it up okay so we've got this image right here. I actually have that image on my desktop
[04:25] Alright, so I'm going to, on my other monitor, go find that image.
[04:48] and some of these insolvent lines are dragging back and forth I to try it to the same monitor and see if that helps There we go
[05:04] So this will upload. How big is this file? My internet is dreadfully slow today. That image is now 1KB. So anyway, that will upload,
[05:18] drop it in right in place. Perfect. Then I can edit where it links to, that kind of thing. I should have it linked to a larger version. But what I'm going to do is just scale this
[05:33] a little bit. Okay so as you... um
[05:52] there we go now it's formatted perfect and that comes out on day one
[06:04] oh i need to fill this up but you get the idea um That's the last one. I'm going to go fill out 8 more of these and it will all be set up. Oh, the other thing is, let's say I want to swap out so that this one comes in the first day.
[06:21] I can just drag and drop to reorder those and if you give that a second, they update automatically. So, it's pretty cool. And I'm going to take everything from this Google Doc and start doing it inside of ConvertKit from now on.