Transform Bad Video to 4K with Color Correction
60sDemonstrates a dramatic before-and-after improvement in video quality, appealing to creators seeking quick fixes.
▶ Play Clip"The title promises 'video editing' and the video delivers a solid fundamentals tutorial — but the heavy promo at the end and rushed explanations keep it from being exceptional."
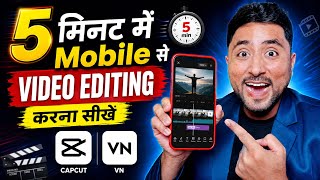
This video is a beginner-friendly, mobile-only tutorial for video editing using the VN app. The creator walks through fixing video quality with color correction, removing background noise, adding screen recordings, and overlaying logos and text. Along the way, he hints at a future CapCut tutorial and promotes his paid course.
The video is for total beginners, promising to turn you into a capable editor using just a smartphone. The creator plans to teach VN and later CapCut.
To start editing, open VN, tap Home, then the plus icon, and choose 'New Project' to import your footage.
The first major improvement is fixing bad video quality through color correction. Use the built-in filters or manual adjust to tweak exposure, contrast, brightness, saturation, etc.
To remove background noise, extract the audio from the video and apply the Denoise feature. You can also increase the audio volume up to 200%.
You can add a screen recording to your video by tapping the photo/video icon and selecting your recording. Then you can move, zoom, and crop it to fit your needs.
The video demonstrates adding a YouTube logo and subscribe button as elements, and animating them using the motion presets (In, Out, Loop).
Text overlays are added via the 'Text' button; you can edit the text, choose a font, and move the text layer by dragging it.
At the end, the creator promotes his paid course 'Activ Rahul' for monetizing YouTube channels, encouraging viewers to subscribe for future tutorials.
What are the first steps to start a new video project in VN?
Open the VN app and tap the Home button.
01:49
How do you start a new project in VN?
Tap the plus icon, then select New Project.
02:16
List the different ways to do color correction in VN.
You can use built-in filters or manually adjust exposure, contrast, brightness, saturation, vibrance, temperature, sharpness, hue, highlight, shadow, and noise reduction.
05:35
What is the first step to remove background noise in VN?
Tap the video, extract the audio, then select the audio track and apply Denoise.
10:55
How do you crop a screen recording in VN?
Select the track, tap 'crop', and choose 'free' mode to crop your screen recording.
13:28
How do you animate a logo in VN?
Add an element from the Element tab, then adjust its motion: In, Out, and Loop.
15:37
Does the video fully match the title's promise? Explain.
The title says 'Video Editing Kaise Kare' (How to do Video Editing) and the video teaches basic VN editing, but the end has a promo for a paid course.
19:30
Color Correction Basics
The video establishes a repeatable formula for enhancing any video's visual quality, a core skill for content creators.
03:23Audio Denoising Process
It offers a simple, two-step way to clean audio, which is often more impactful than visual fixes for viewer retention.
10:40Adding and Customizing Screen Recordings
This demonstrates how to build complex tutorials by inserting and cropping screen captures, a common need for educational channels.
12:22Logo and Branding Animation
Shows how to add professional touches like logo animations and subscribe buttons, which increase brand recognition and viewer engagement.
14:43[00:02] quality and sound of this video is very bad. The quality of the video was very bad and there was quality of the video was very bad and there was background noise in the audio but now look here the quality of the video has become very good and the audio of the video has become very
[00:15] You don't see any background noise. And I will also tell you how to show any screen recording in your video. How to apply animations here. How do you show the logo here? How to add a subscribe button. How
[00:29] can you make more transactions here? You can enhance your video even more and make the quality of your video as high as 4K. How can you convert HD quality video into 4K? How can you make even the worst video into a good one?
[00:42] So in this video I will make you a great editor in a complete and good way. I will make you a great editor in a complete and good way. After this, you can edit any of your videos and
[00:55] you have to download an application in your mobile. Today I will tell you about VN application. After this, I will tell you next in capcut. So if you want to learn in Capcut also then subscribe for it and press the bell icon.
[01:10] After this I will tell you in capcut. So subscribe to the channel and press the bell icon. Only then will you keep getting further videos. So first of all you have to open your VN application like this. Now if
[01:22] you see, I mostly edit most of the videos in my VN. I edit it in CPCT and I also edit it in the background. But when I have to edit a video, that is, make and shoot a video immediately, then mobile is the easiest
[01:34] and it is very easy to make, edit and upload a video from mobile. make videos by editing them on your mobile. So what do you need to do first ? This is how to open your VN application. look here, you will see a plus icon. Here you can see Home. The
[01:49] search is visible here. This button is visible here again. All this does n't concern you. You have to tap on Home. And after tapping on Home, the plus icon that you see here, you will see it on the plus icon here.
[02:01] look what is written here? As you can see in your project and project, 10 is written. So whatever videos you edit, they will be you have to click on the project. After clicking, if you look here, it is
[02:16] written New Project and what will you see written here? Photo edit, beat clip, create template, overlay, stories. So all you have to do is edit the video. So I After this, you will gradually start learning on your own. Gradually, when your mind starts opening up,
[02:29] you will understand what other things happen and how. So look here, you have to click on New Project. After clicking, it will appear in front of you like this. Recent stock and subtitle will be written here. So you have to click on Recent
[02:41] where you have recorded your video. So now you have to click on this. After clicking, look here, it will appear in front of you like this appear like this. So here you will see all the videos and photos and if you click like this
[02:55] then all the folders will be created here. So what do you have to do simply ? As soon as I click on the video, So now here, suppose I have made three videos.
[03:09] 1 2 3 Three videos have been made. So now suppose I show you the first video, let's take this one. Took it. Now after taking it, if you see it, the quality of its video is not good. So we have to color correct it first.
[03:23] What will we learn first? Color correction. After color correction, we will then learn how to remove background noise from voice. What will we learn after this? Will learn many more things. So what do you need to do first ? When
[03:35] what you have to do first is you have to come to the last one here. Here you will see that there is a black colored image here. You have to remove this because the VN After selecting, you will get a delete option here.
[03:50] deleted. Correct? Now what do you have to do after this when you start your video, you take some take or the other. Well, it means you make yourself fit, you make yourself completely correct, you set yourself.
[04:04] After this, when you start speaking, you can see that part here. If you look at that part here, this part from where you can see this graph means that speaking has been started from here, so you have to simply
[04:17] bring it here and after this, see here, there is an option of split given below, you have to click on the scissors option, see, that part of mine is the unwanted part which I do not want, it has been cut. After this, you simply have to select it
[04:30] will see that it is deleted above and also below it is deleted. You have to click on the delete option. It got cut. Correct? After this, you have to parts which you may not want. You have to do it the same way. Have to select.
[04:43] And after this you have to select it again. You have to click on the delete option. click on the delete option. Your unwanted part has been deleted. Now see, suppose you want to zoom it or zoom in, like you want to
[04:56] After selecting, you have to zoom a little like this. Look, it has zoomed in. Now we have to do color correction. So simply we will select this. After selecting, you
[05:08] look below, you will see many options here. Some of them include filters, trim, FX, split, copy, speed, volume, fade, crop, rotate, mirror, flip, fit, BG, border, blur,
[05:23] mirror, flip, fit, BG, border, blur, opacity, denoise, zoom, extract audio, captions and many more. I will explain it to you one by one. So, first learn color correction here. If you select this, you can do color correction in two ways.
[05:35] Now here you are given many filters for free which you can use. So you can try choosing here. Select and see which filter you like best here. You have to select the filter which you like.
[05:50] Now after selecting, suppose I move it to C1 or beyond, then you will see many more filters here. Whichever filter you like, you have to select that filter in this way. So like let's say
[06:02] which one is me. You have to check yourself which filter you like the most here. So suppose I have this filter or the I have this filter or the filter that was shown in the beginning, A2 or A1, then
[06:15] you have to select it here like this. For example, suppose I liked C3 or I liked C1. I liked it. What do you have to do after this? If you look here, an adjust button is given. You have to click on Adjust. Now
[06:27] after clicking, you can do color correction manually from here. If you learn manual color correction then you can edit any video very easily and at a very good level. So what will you do with Simple ? Now look at what is exposure,
[06:42] what does exposure mean, if you increase it then you can see that this light will reduce and if you increase it, sorry if you decrease it then you can see that its lighting has reduced a little. The more you decrease it, the
[06:55] less lighting it becomes and the more you increase it, you can see that the more lighting it becomes. So increase it as per your requirement. Then you see here there is an option Contrast. What happens with this? If you reduce it like this, you can see
[07:09] that it's becoming a little bit dusty type. Meaning it is becoming a foggy type. And if you increase it a little, you can see that it has got a little bright color. Then there's brightness. Brightness simply means it will become brighter. It will become
[07:22] increase this, you will see that the light is increasing. And after this, if you reduce it, you can see that the light is decreasing. So you can increase or decrease it a little bit. So let me reduce it a little bit. After this saturation. What saturation is, if
[07:37] area behind, the background, will become more red. Meaning, its color will be more. And if you reduce it, you can see that the back has become black and white. So you can increase or decrease it from here. Correct? After this, here
[07:52] you see vibrance. What will happen with this is that if you reduce it, the color behind it will fade and if you increase it, the color behind it will be enhanced a lot. What is the temperature now? If you reduce the temperature, you
[08:07] can see that blueness will appear. A little bit of blueness has appeared, which if you increase it too much will increase it more then you can do it this way. If you do it a little, a little bit of the natural color will come out. And if you increase it more then you can see that it will become red type.
[08:21] you can see that it will become red type. Ok? So look at it here in this way. Ok? After this, now look, till now, if I type this once. was and what the current video is? Only color correction can enhance the video.
[08:36] Correct? So what to do next? It is HCL. What is it that you should not learn it now? Because if you start learning this then you will get troubled. There are many things to do in this. So these are the basic things you need to do to improve your video,
[08:51] this has become a little advanced level. When you go to see many colors, you do not have to read into it. What do you want? You have to make your video good. Make it good upload it on Facebook. Upload it to Instagram. Correct? So don't pay attention to this right now.
[09:04] After this come to vintage. So what will happen with this? If you increase it, you can see that the color has increased on the sides. The brightness has increased. The light has become too much. And if you reduce this, you will see that it has become
[09:17] dark all around. You can see it in the middle. So you sharpness. Sharpness means that your video will become sharp. can see that it has become sharp. So too much sharpness is not good. Sharpen it a little. Next up
[09:32] is Hue. What will happen with this is that you can see that as I that the background behind my face has become purple in color. After this, as soon as I increased it here, the color has become a little bit more saturated in hands.
[09:47] Ok? So you can also increase it. No, what does highlight mean? Now highlight means that it is not that it will be highlighted. As you do this, you can see that the color has become dim and some of the
[10:00] things in the background are getting highlighted a little. Ok? So you increase this slightly by one point here. Then there's Shadow. If you increase this, you can see that the increase this, you can see that the shadow on the face has gone away but the
[10:12] background behind it does not look good. So don't touch it at all. You can increase it a little or do one or two. Noise reduction. One here is noise reduction. What this means is that whatever noise is there in the image or video which
[10:25] makes zigzag movements, if you do this on the sides then you will see that it will reduce a little but it should not be done too much. So now see, so much has happened. Now let me look at the previous video and now look at the previous video and now
[10:40] look at it, there is a huge difference. Now here you will see that now I will here you will see that now I will play this video once. background noise. How to remove this? So first of all you
[10:55] can remove it in two ways. You can extract the audio from this video. How to separate? Simply tap on it. After tapping, tap on it. After tapping,
[11:09] here, you will look below and you will get an option. Look at this extract audio, you have to extract it here. Now your voice is removed from the video. It has separated. Ok? Now that it's separated, what's there here now from Simple? Look,
[11:24] when you separate here, you will get many options in it. Volume, Fade, Denoise, Copy. So first of all you enhance its sound a little. For example, suppose it is 100%, then what should you do with it? Pay 150%.
[11:37] Ok? In this way you can do 200 as much as you like, whatever your voice should be like. Again you have to select this and here you can see that de noise is written. After clicking, look here, you will see a button. You have to turn this button
[11:53] on. As soon as you turn it on, the background noise in your video will be removed immediately. Now after this, you can see here that this has been removed by de-noising it. Now listen to the sound of the video once. Friends, look carefully.
[12:09] This is the quality of the video right now. Now you see how much the sound of your video will be enhanced by doing it this way. So you learned two things. Color correction means enhancing the poor quality of the video and
[12:22] removing background noise from the video. Both the things are important. What do you have to do after this? Now suppose you want to show anything in your video. Ok? Suppose you want to show screen recording in the video here, then what do
[12:35] you have to do simply ? You must have done screen recording in your mobile. So see here, there is another option, you have to click on this one above this video and see here, you have to click on the photo option. If
[12:47] screen recording video that you have done will be visible here. Now suppose I want to add this screen recording here. I need to add a screen recording video.
[13:00] and look here are the photos and videos. Here I will come to the video section look here I added this screen recording video. Now I have come here. So how will you bring it to the side now ? You have to place your hand on it like this. You have to
[13:15] place your hand on it like this. And by placing your hand here, you have to move it aside. After moving it to the side, zoom it a little like this. Now suppose you want to crop this. How will you crop it? So simply look here and
[13:28] select it. After selecting, come down here, come down to this one below. option here. Click on this crop option. After clicking, watch the original for free here. So if you do it on original then it will not happen. Look, this way things will get
[13:42] messed up. Ok? So you have to click on the free section. If you do it on the free one then you can crop your photo or image from anywhere. For example, suppose I have to crop this much. After cropping, you will see a tick
[13:54] After clicking, you have to put it here like this. That's it. Now suppose you have to give background and side border on this. Black border has to be given. So how will it happen? You have to click on this. After clicking,
[14:08] look down again, you have to come to this one. And after coming here you will see a border. Look at this border. You have to click on this border option. And look here you will see many colors. So select the black one here
[14:20] and after selecting it, make its width 2 or 3. You can see that border starting to appear here next to my screen recording. Now take a look at the video and see how
[14:32] good it looks. Feeling like it, right? So what have you learned so far? Learned color correction. Learned background noise. How to remove? After this, here you learned how to add any screen recording in it. Now here, suppose you have to
[14:44] add a logo. For example, suppose you have to what you have to do is simple, where you have to
[14:56] how will you add it here, you have to come simply and after coming here you have to search, you have to select this one. After selecting, now look you have to select it and after selecting, you will see an option of an element here.
[15:11] you will see an option of an element here. see many elements. Look at this, you will see many things. Now suppose look here, I have selected this. After selecting, see here my
[15:25] YouTube logo has appeared. But if you see now, my video is playing here. And that's how the YouTube logo came about. I did not enjoy it. So to bring fun, to bring good, we have to select this again. After selecting,
[15:37] look here, if you touch on it, select it, then many things like replace, motion, key frame etc. will appear in front of you. So look here you have to click on motion. Here you will see an option called Motion. You have to click on this motion option.
[15:49] Now after clicking, you will get many options here. In-out loop. What does it mean? What do these mean ? How will this logo come in? What does out mean? That when this logo will be removed then how will it be removed and what does out mean,
[16:04] total means what does out mean, how will it be removed and loop means that till the time this logo is visible then how will it appear, so what kind of thing do we want in it, for example suppose how should our logo appear, see this way or this
[16:18] you like, you have to select that way here. For example, suppose I like this, then I will select it and make it available here. So you just see how my logo will appear. Look how our logo came and
[16:34] after this, if we want to flicker the logo throughout the video, then we have to select it again, go to motion and do it in loop. After clicking on the logo, here you will see blinking, look our logo [coughing sound]
[16:53] you can give animation to your logo here. And after this, now suppose he is out. can give animation to your logo here. And after this, now suppose he is out. Click on motion. And after coming to the out option here, you have to
[17:07] click on the slide. If you see, this YouTube logo of mine will go here very easily. Look, he came, blinked and then look, he went down the slide. So in this very nice way, whatever element you want from here,
[17:19] you will get many elements here. For example, suppose a subscribe you will click on the subscribe button. Will you subscribe? Ok? Now if you want to add bell notification here, then you will again
[17:33] click on this element. After clicking, you will see that the bell notification has arrived here. You will put the bell here like this. Correct? If you look at this, the subscribe button is there. Bell notification has been activated. Now suppose you have to write some text here.
[17:46] How will you write? So look here you have got a button of text. You have to see the title here. You have to click on this title option. Look, Now suppose you want to make a video in this video, suppose
[18:01] what is in this video, then your logo has come here and you will see here that you have to write something in it, now see, Blog One is coming in it, so you have to write something in it, how will you write it, you have to select on this, here you will see that an option of edit has come,
[18:14] whatever title you want to write here, whatever title you want to write, you can write it here, whatever font you want to write, you can write it here, title, your title, okay, if you do it like this then you will see that your
[18:30] font has come here. Ok? Now in this way you can do all these things. So today I have taught you the basic level editing that is required in this video. I am teaching you one more thing. For example, suppose you have this text which you want to move forward or backward.
[18:44] How will you do that? So you have to hold it like this and move it this text of mine that has come forward. Now look, look, you can do all these things. So, to become a video creator,
[19:02] watching this video and learning this editing, you will edit any of your videos and upload them on YouTube, your video will look very good. It will look very professional. Ok? That's all the editing you need for now. After this,
[19:16] in the next video I will teach you many more things and if you want to learn in Capcut then press the bell icon. And friends, one thing I want to tell you is want to earn money from YouTube very quickly, want to monetize your YouTube channel,
[19:30] want to monetize Facebook and you are worried that you are not able to earn money from YouTube, then you should join the Activ Rahul application. Join the course and learn very quickly and within one to one and a half hours you can monetize your YouTube channel
[19:43] and Facebook. Lakhs of people are Earning money by learning. So don't delay at all. You also join and See you in the next video with a new topic.
⚡ Saved you 0h 19m reading this? Transcribe any YouTube video for free — no signup needed.