You Don't Need Math for Arduino!
45sChallenges the myth that advanced math is required, making electronics accessible and encouraging beginners.
▶ Play Clip"Title accurately reflects content: a beginner guide to workbench essentials for Arduino."
This video is a beginner's guide to essential tools for Arduino projects, covering everything from the Arduino board itself to advanced tools like oscilloscopes and 3D printers. The creator shares personal recommendations and emphasizes that you don't need all tools at once, starting with basics like an Arduino Uno, breadboard, jumper wires, and a multimeter.
The video covers all tools needed for Arduino projects, accumulated over many years, but beginners don't need everything.
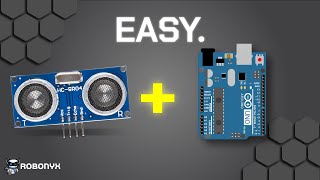
Arduino Uno is recommended for beginners due to its versatility, speed, protection features, and fair price. Genuine vs clone Arduinos: genuine supports the company, clones save money.
Breadboard with power rails and a center gap is essential for prototyping. Jumper wires come in male-to-male, female-to-male, and female-to-female types; solid core wires are neater for complex circuits.
Starter kits with Arduino, breadboard, jumper wires, and components are recommended for beginners to learn skills.
A cheap multimeter is sufficient for beginners. Key features: voltage measurement, current measurement, resistance measurement, diode test, and continuity test.
For permanent connections, you need a soldering iron (Weller WE1010 recommended), solder (60/40 rosin core 0.8mm), flux, solder sucker, solder wick, wire strippers, and heat shrink.
Level 3 involves designing PCBs. A reliable power supply with adjustable voltage and current is important. An oscilloscope (like Keysight DSOX1204A) is useful for complex circuits. 3D printing (BambuLab P1S) helps with mechanical aspects.
Start with the basics: Arduino Uno, breadboard, jumper wires, and a multimeter. As you progress, add soldering tools, a power supply, and eventually an oscilloscope and 3D printer for more advanced projects.
Arduino Uno
tool
Breadboard with power rails
tool
Jumper wires (male-male, female-male, female-female)
tool
Multimeter (Ferrex digital multimeter)
tool
Soldering iron (Weller WE1010)
tool
Solder (60/40 rosin core 0.8mm)
tool
Flux
tool
Solder sucker
tool
Solder wick
tool
Wire strippers
tool
Heat shrink
tool
Heat gun
tool
Power supply
tool
Oscilloscope (Keysight DSOX1204A)
tool
3D printer (BambuLab P1S)
tool
Robonic Academy
service
What is the recommended Arduino board for beginners?
Arduino Uno.
00:57
What are the three types of jumper wires mentioned?
Male-to-male, female-to-male, and female-to-female.
02:11
What are the five key features of a multimeter?
Measuring voltage, current, resistance, diode test, and continuity.
03:50
What is the purpose of a continuity test on a multimeter?
To detect wiring issues, such as a broken wire, by emitting a beep if current can flow.
04:13
What soldering iron does the creator recommend?
Weller WE1010.
04:54
What is the difference between a multimeter and an oscilloscope?
A multimeter measures voltage a few times per second, while an oscilloscope measures billions of times per second and plots voltage over time.
06:31
Intimidation addressed
The creator acknowledges that building epic projects looks difficult and intimidating, but promises to make it easier.
00:14Cheap multimeter lasts 3 years
The creator shares that a $20 supermarket multimeter has lasted 3 years, showing that expensive tools aren't necessary.
03:36Oscilloscope overkill
The creator admits the Keysight oscilloscope is overkill for most, adding humor and honesty.
06:58[00:00] This is a guide for all the tools you need to build cool Arduino projects and beyond. Every tool that I mention in this video is what I personally use to build Arduino projects. It looks like a lot and that's because it is. I've been accumulating these tools over many years.
[00:14] However, you don't need to purchase everything I have. Building epic sh** looks really difficult and it might feel intimidating. But that's why I make these videos. To make it easier to start. You don't need to know advanced math or physics.
[00:28] Arduino makes electronics really easy with clear instructions and easy connections. Also, the Arduino programming language is very easy to learn. All it takes is one weekend to learn these skills. With that said, these are the essential tools needed to build epic Arduino projects and beyond.
[00:45] The first thing you need is the Arduino itself. An Arduino is a circuit board that you can connect other components to and then you can write code to control these components. There are a bunch of different kinds of Arduino boards,
[00:57] Some are little, some are big, some are average. If you've never bought an Arduino before, buy the Arduino Uno. It's versatile, fast, has lots of protection features, is fairly priced and that's why it's the most popular Arduino.
[01:09] There exist genuine Arduinos and clone Arduinos. If you're looking to support the company, buy a genuine Arduino. But if you're looking to save money, buy a clone Arduino.
[01:21] The next tools you need are a breadboard and jumper wires. These two items allow you to create electrical circuits quick and easy. Jumper wires are basically wires that have a hard end to them, this is called a pin. The breadboard has a bunch of holes and each hole has a spring contact that will clamp
[01:36] down onto things that are plugged into it to create an electrical connection. In the breadboard, horizontal rows are internally connected and the rails on the side are vertically connected. Components also normally come with pins, so they can be inserted into the breadboard and
[01:50] jumper wires can be used to form electrical connections between them. This is useful for prototyping circuits quickly and connecting them to the Arduino. You should get a breadboard with power rails on either side so not something like this Also make sure that there a gap in the middle This gap means that you can connect parts that have pins on either side like this motor driver or even this Arduino Nano
[02:11] A smaller breadboard is fine if you don't need the extra space. For jumper wires, you should get three different kinds. Male to male jumper wires, female to male jumper wires, and female to female jumper wires.
[02:23] The most popular kinds of male-to-male jumper wires are ones with the circular rubber coating, ones with the plastic square housing, or one that's a solid core of wire. They're all good options. However, for more complex breadboard circuits, using a solid core jumper wires can be neater.
[02:41] An Arduino, breadboard, and jumper wires is everything you need to start making electrical connections. What about the components that you need to build projects? It's best to start with an assortment of different components. You can play around with each of them and learn the necessary skills along the way.
[02:57] Here are some of the most commonly used components. You can spend your time buying each component individually or you can just get a starter kit. It doesn't really matter which one you get, just get one that has an Arduino, Redboard,
[03:09] Jumperwise and a bunch of cool components that you'd like to play around with. A starter kit that I recommend is under the description below. A tool that is super necessary is a multimeter. You can't see electricity with your eyes and a multimeter allows you to see electricity.
[03:24] Multimeters can be really cheap or really expensive. For your first one, get one that is really cheap. If you feel that your multimeter is launching you, then upgrade. But you don't want to spend money on an expensive tool that you won't use.
[03:36] I'm using the digital multimeter from Ferrex and it's okay. I got it for like 20 bucks at a supermarket and it's not amazing, but it does the job and it's lasted me 3 years so far. Here are the 5 features that make the multimeter a must-have.
[03:50] First is measuring voltage. We can probe anywhere in the circuit and see the voltage at that point. Second is measuring current. Using the probes to connect the multimeter in series with a load will tell us how much current the load is drawing Third is measuring resistance Connect both sides to the multimeter and it will tell you the resistance of a component Fourth is a diode test It used to test the polarity of a diode
[04:13] A diode is a component that only allows current to flow in one way. So you gotta know the polarity when using it. Fifth is continuity. This is the one I use the most. It tries to send a small current through its sleeve and if it can it'll emit a beat.
[04:27] a beat. This can help you detect wiring issues, for example if there's a broken wire in your project. With these components, you'll have everything you need to get started. Now here's more tools that I regularly use that you don't need when getting started,
[04:40] but they do make your life a lot easier. If level 1 of building circuits is making them on a breadboard, level 2 would be making them on a protoboard and soldering wires to create permanent connections. The tools that you need to do this are a soldering iron.
[04:54] I used the Weller WE1010. This one is really good. I've used a bunch of cheap soldering irons before and I felt that it was limiting me. So I invested in a good soldering iron. Next you'll need the solder itself. I used 6040 Rosencore 0.8mm solder.
[05:10] Then you'll need flux. This will help the solder to flow in the way you want it to. You'll also need a solder sucker to remove solder and a solder wick to also remove solder. For permanent connections, I don't use jumper wires.
[05:22] I use a standard roll and will cut and strip them to the length I need using wire strippers. With these tools, you can make permanent electrical connections. Epic! This stuff is underrated. Basically, heat shrink goes around an electrical connection,
[05:36] and when heat is applied to it, it shrinks down and creates a tight hold. To apply the heat, I use a heat gun, but a lighter works fine too. So, if level 2 is making permanent protoboard connections,
[05:48] then level 3 would be designing and assembling a printed circuit board. I won't go super in depth into ccbs but pretty much it's better in every single way and definitely a skill to learn if you want to build epic projects.
[06:02] Having a reliable power supply is like the back burner of 4k You can power things using the Arduino but that can only supply 3 volts and 5 volts and only with a small amount of current You can use a battery but as it gets depleted the voltage changes and also the battery can
[06:17] run out. This is why having a reliable power supply where you can change the voltage and current limit is really important. The next item that I regularly use is the oscilloscope. What it does is visually represent voltage over time.
[06:31] The difference between this and a multimeter is that a multimeter measures the voltage a couple of times a second, while an oscilloscope measures billions of times a second and plots it on a nice graph. This allows you to analyse complex electrical waveforms with a lot of
[06:45] details. The Arduino is serial printing gobble gobble to my computer and that's what it looks like electrically. Super epic. I'm gonna be honest, you only need an oscilloscope when you start building complex circuits. And even then, you don't need one this good. This
[06:58] This is the DSOX 1204A by Keysight and it's really overkill. 3D printing is super important for anyone who wants to make projects that have mechanical aspects. It's really a game changer for building epic projects because you get to summon ideas from your imagination into the real world.
[07:15] You have to learn how to use a 3D modeling software like Season 360 or Onshape, but it's really worth it. To actually print my stuff I used the BambuLab P1S and it's pretty good. And so that wraps up this quick guide on all the components and tools I use, which hopefully
[07:31] helps when you start building your workbench for all your engineering and electronics stuff. By the way, if you're struggling with Arduino and want to learn all the basics in a weekend, this could be cool. No prior knowledge needed, no 20 hour courses, no scouring across YouTube for fundamentals,
[07:46] everything you need all in one place so you can actually understand Arduino. Wait, I just dropped this starter course for Arduino. video walkthroughs, components, diagrams, theory, troubleshooting and a community of
[07:59] people blazing the same path as you. So if you want a quick and practical course to get started with Arduino, check out the Robonic Academy, links in the description. But anyways, thanks for watching and I'll see you soon.
⚡ Saved you 0h 08m reading this? Transcribe any YouTube video for free — no signup needed.