
AI Summary
This video presents three professional smart money trading strategies for forex and crypto markets, emphasizing the use of the Price Action Toolkit indicator to automate the identification of key concepts like market structure, fair value gaps, liquidity grabs, and equal highs/lows. The strategies are designed to remove guesswork by providing mechanical rules for entries, stop-losses, and targets.
Chapters
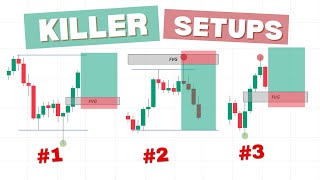
The video addresses the problem of too much noise on price charts and a lack of a specific trading strategy. It promises to provide three exceptional smart money setups with mechanical rules, leaving no room for guessing.
The strategies rely on the Price Action Toolkit indicator to automatically identify market structure, fair value gaps, liquidity grabs, and equal highs/lows, eliminating the need for manual chart marking.
This strategy uses two timeframes. On the higher timeframe, traders analyze market structure (BOS, Choch) and mark fair value gaps. On the lower timeframe, they look for a liquidity grab as an entry trigger.
BOS (Break of Structure) indicates momentum continuation, while Choch (Change of Character) signals a potential reversal. The indicator also labels 'Choch Plus' for a stronger, more confirmed reversal signal.
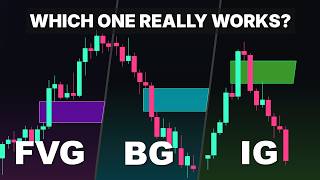
Fair value gaps represent imbalances on the chart. The indicator can automatically mark them, and increasing sensitivity removes smaller gaps. Price often returns to fill these gaps, making them key areas of interest.
Liquidity grabs are marked with red and green circles. A bearish liquidity grab occurs when price wicks above a swing high, and a bullish one when it wicks below a swing low. These highlight areas where stop-losses are swept.
The suggested timeframe combination is 1-hour and 5-minute. The process involves identifying market direction on the HTF, marking FVGs, waiting for a pullback into a gap, then switching to the LTF to look for a liquidity grab and entry.
This strategy focuses on buyside and sellside liquidity. Smart money targets these zones to fill large orders. The indicator automatically marks these important liquidity zones on the chart.
Enable the buy/sell side liquidity zones in the indicator. Wait for a sweep (false breakout) of a zone, then look for a fair value gap on the lower timeframe as an entry. Stop-loss is placed beyond the sweep extreme.
This single-timeframe strategy uses equal highs and lows as liquidity pools. A sweep of these levels, combined with a fair value gap, creates a high-probability trading opportunity.
The video emphasizes that more trades do not equal more profit. Waiting for high-probability setups and filtering out low-quality ones is a skill that requires time and discipline.
The video provides three distinct smart money trading strategies, all leveraging the Price Action Toolkit to automate the identification of key concepts. The core takeaway is to trade with the trend, enter at key zones, and use liquidity concepts to align with smart money, while emphasizing the importance of discipline and risk management.
Mentioned in this Video
Tutorial Checklist
Study Flashcards (9)
What is a BOS (Break of Structure)?
easy
Click to reveal answer
What is a BOS (Break of Structure)?
A BOS occurs when price breaks recent highs or lows, indicating momentum continuation. A bullish BOS suggests upside continuation, while a bearish BOS suggests downside continuation.
02:20
What is a Choch (Change of Character)?
medium
Click to reveal answer
What is a Choch (Change of Character)?
A Choch is a potential reversal signal. A bullish Choch forms when price breaks a recent low (bearish BOS) and then immediately breaks the swing high that led to that BOS. A bearish Choch is the opposite.
02:48
What is a fair value gap (FVG)?
easy
Click to reveal answer
What is a fair value gap (FVG)?
A fair value gap is an imbalance on the price chart where there is a gap between the fair value of the price. Price often returns to fill these gaps, making them key areas of interest.
03:39
What is a liquidity grab?
medium
Click to reveal answer
What is a liquidity grab?
A liquidity grab is when price wicks above a swing high (bearish) or below a swing low (bullish), sweeping stop-losses before reversing direction. These are powerful signals for trade entries.
04:20
What is the suggested timeframe combination for Strategy 1?
easy
Click to reveal answer
What is the suggested timeframe combination for Strategy 1?
The suggested combination is the 1-hour and 5-minute time frames, but you can use other time frames as long as the lower time frame is at least two times lower than the analysis time frame.
05:01
What is buyside and sellside liquidity?
medium
Click to reveal answer
What is buyside and sellside liquidity?
Liquidity above a high or group of highs represents buyside liquidity, and liquidity below a low or group of lows represents sellside liquidity. Smart money targets these zones to fill large orders.
07:37
What is a liquidity sweep?
medium
Click to reveal answer
What is a liquidity sweep?
A liquidity sweep is a false breakout where price breaks out of a liquidity zone and then quickly closes back inside the range, indicating smart money has collected liquidity and is preparing to move price in the opposite direction.
09:56
What are equal highs and lows?
medium
Click to reveal answer
What are equal highs and lows?
Equal highs and lows are levels where the market has reacted multiple times without breaking through. They are often psychological zones where retail traders place stop-losses, making them liquidity pools for smart money.
11:36
What is the high-probability bearish setup in Strategy 3?
hard
Click to reveal answer
What is the high-probability bearish setup in Strategy 3?
A high-probability bearish setup forms when price sweeps liquidity above equal highs while resting below a bearish fair value gap.
13:12
💡 Key Takeaways
Mechanical Rules for Entries
This is the core value proposition: providing a clear, rule-based framework that removes guesswork from trading decisions.
01:11Fair Value Gaps as Key Zones
Explains a fundamental smart money concept and how to use it as a practical entry/exit area.
03:39Smart Money Liquidity Targeting
Reveals the institutional perspective on why price moves the way it does, which is crucial for retail traders to understand.
07:37Discipline Over Frequency
A crucial reminder that patience and filtering are more important than taking every trade, which is a key principle for long-term success.
13:26Full Transcript
[00:02] too much noise on the price chart and not having a specific trading strategy. That's why in this video we will walk you through three exceptional smart money trading setups along with mechanical rules leaving no room for
[00:15] guessing. These strategies combine key concepts from price action in smart money, including market structure, fair value gaps, liquidity grabs, equal highs and lows, and trading psychology. If that's something you're interested in,
[00:28] as always, smash the like button to show your support. And let's get started. Like I mentioned, these strategies focus on market structure, fair value gaps, liquidity grabs, equal highs and lows, and multi-time frame analysis. But
[00:44] here's the best part. We are not going to mark these manually on the chart. Instead, we will use the price action toolkit indicator to automatically identify them for us. So without wasting any time, let's start
[00:57] with the first setup. In the first trading strategy, we use two time frames. On the higher time frame, we analyze market structure to determine the market direction and trade along with the trend. This includes marking
[01:11] breaks of structure and changes in character. Then we highlight the fair value gaps, which serve as our optimal trading zones. Next, we zoom into the lower time frame to find the entry trigger, which is
[01:23] typically a liquidity grab. Once we spot it, we simply enter the trade and set our targets. Now, why does this strategy work? By combining these three concepts, you make sure that you are trading with the trend, entering at
[01:37] key supply and demand zones, and gaining extra confirmation from lower time frame So, let me show you how it works on the price chart. Like I said, we use the price action toolkit to mark all of the concepts
[01:51] automatically. So, let's start by applying this tool. From the indicators tab, type price action toolkit and click on the indicator provided by flux on the indicator provided by flux charts.
[02:06] see many options to apply to the chart. But for now, let's mark the BOS chalk and chalk plus in the market structure section. These are the basic elements of the market structure framework. Here we have the basic diagram showing
[02:20] the market structure labels within the indicator. The BOS label represents a break of structure which happens when the price breaks recent highs or lows. A bullish BOS indicates bullish momentum and suggests a possible continuation to
[02:34] the upside. On the other hand, a bearish BOS signals bearish momentum and suggests a possible continuation to the downside. Next, we have the change of character or chalk labels. A typical bullish chalk
[02:48] happens when the price first breaks a recent low, creating a bearish BOS and then immediately breaks the swing high leading to that BOS. This forms a regular chalk and can indicate a possible reversal to the
[03:01] upside. Similarly, a bearish chalk occurs when the price first breaks a recent high, creating a bullish BOS, and then quickly breaks the swing low that led to that BOS. This signals a potential reversal
[03:14] to the downside. However, the price action toolkit has an extra feature. The indicator can also detect when the market forms a lower high before breaking the bullish structure. This is labeled as chalk
[03:26] plus, which means it is a stronger or more confirmed change of character and more confirmed change of character and can be a better signal for reversal. Next, we have the fair value gaps. If you enable this option in the indicator
[03:39] settings, they will appear automatically on the chart. The fair value gaps represent the imbalances on the price chart where there is a gap between the fair value of the price. In the settings tab, increasing the sensitivity removes
[03:52] smaller gaps and only shows the larger ones. later returns to fill these gaps as the price looks for balance. We will use these gaps as key areas of interest expecting possible price reactions.
[04:07] Finally, we have liquidity grabs. When you apply it to the chart, you'll notice red and green circles appearing. These represent bearish and bullish liquidity grabs, respectively. When the price wicks above a previous
[04:20] swing high, the indicator identifies it as a bearish liquidity grab, signaling a as a bearish liquidity grab, signaling a potential downward movement. Similarly, swing low, it is marked as a bullish liquidity grab, indicating a possible
[04:34] Liquidity grabs highlight areas where the market sweeps stop- losses before reversing direction. These signals can be powerful for trade entries, concepts. If you decrease the pivot length and
[04:48] wick body ratio, the indicator identifies more liquidity grabs because it becomes more sensitive. This means it will catch smaller wicks and more price movements that could be signs of liquidity being taken.
[05:01] Now let me show you how this trading strategy works on the chart. This trading strategy uses two time frames. Our suggested combination is the 1 hour and 5 minute time frames, but you can use other time frames as well. Just
[05:15] at least two times lower than your analysis time frame. step is to identify the market direction. You can do this by identifying market structure concepts. For example, if the price keeps making
[05:31] higher highs and higher lows, breaking the previous market structure, this shows a clear uptrend and we are bullish until we get a change of character. step is to mark the fair value gap areas. On the higher time frame, these
[05:47] gaps are more powerful and can act as strong support or resistance levels. Once you mark these fair value gaps, wait for the price to pull back into one of them. When the price enters the gap zone, switch to a lower time frame to
[06:00] look for an entry. On the lower time frame, you want to see signs of a possible reversal. One strong signal is a bullish liquidity grab. This happens when the price moves below a recent low, takes out stop
[06:14] losses, and then quickly reverses up. If this move also breaks a short-term bearish structure on the lower time frame, it gives more confirmation. In other words, it forms a change of character.
[06:27] Finally, it's time to open the trade. You can place your stop loss below the low of the liquidity grab and your target can be the next important level in front of the price on the higher time frame.
[06:44] time frame by confirming a downtrend with lower lows and lower highs. Then mark the fair value gaps as possible supply zones. When price pulls back into one of those gaps, switch to the lower time frame and look for a bearish
[06:57] liquidity grab above a recent high. Enter the trade after confirmation. Place your stop-loss above the liquidity grab and aim for the next key level below. With all that being said, make sure to
[07:10] use proper risk management to protect your capital. Stick to your plan and avoid emotional decisions. This strategy works best in trending markets, not in choppy conditions. Keep learning and reviewing your trades to improve over
[07:24] time. Now, let's move on to the next trading strategy. The second trading strategy also uses two time frames and combines the concepts of buyside and sellside liquidity, liquidity sweep, and fair
[07:37] value gaps as an entry point. So, what is buyside and sellside liquidity? Liquidity above a high or a group of highs represents buyside liquidity and liquidity below a low or a group of lows represents sellside
[07:51] liquidity. Now what happens around these levels? Institutional traders or smart money often target these liquidity zones. For example, if smart money wants to buy an asset, it needs a lot of sellers in the
[08:04] market to fill their large buy orders. So where are the sellers in the market? We know that if the price taps into a key support level, many retail traders or even institutions will go long. They will place their stop- losses, which are
[08:18] basically sell orders, somewhere below that area. Smart money will push the price lower to grab that sellside liquidity and activate those stop- losses. This gives them enough selling pressure to fill
[08:30] their large buy orders. Also, breaking below this level will market thinking the price is about to drop further. But in many cases, after smart money grabs the liquidity, the price quickly reverses and moves higher.
[08:47] This traps both early buyers and breakout sellers. The same logic works in reverse for buyside liquidity. If smart money wants to sell, they need buyers. So, they push the price up above a key resistance
[09:01] breakout entries, and then reverse the price downward after collecting enough liquidity. With all that being said, some liquidity levels are more important than others. Certain criteria can help you spot the
[09:15] stronger ones. For example, liquidity around major swing highs and lows, higher time frame levels, or areas with multiple equal highs or lows tend to be more significant. Now, the best part with the price action
[09:28] toolkit, these important liquidity zones appear automatically on your chart, showing you exactly where institutions are likely to hunt next. This makes it where the smart money might be targeting.
[09:42] Now, let me show you how the second trading strategy works on the chart. First, apply the price action toolkit and from the settings tab, turn on the buy side and sell side liquidity zone options. Once enabled, you will see the
[09:56] major liquidity zones marked clearly on your chart. Now, wait for the price to break out beyond one of these zones and then quickly close back inside the range. This shows a liquidity sweep or false breakout where smart money has
[10:11] preparing to move the price in the opposite direction. Then zoom into the lower time frame and look for fair value gaps that formed right after the sweep. These gaps show imbalance and can act as entry zones. If
[10:25] it's a bearish scenario, for example, after a sweep above a buyside liquidity level, look for a gap and signs of a reversal. Once confirmed, you can open a short trade. Place your stop loss above the high of the sweep and target the
[10:40] next key level or sellside liquidity below. The same concept applies to the bearish scenario. We focus on the sellside liquidity below key lows which the indicator automatically marks. When the
[10:54] price sweeps this level and closes back inside the range, it signals a bullish liquidity grab. Then we zoom into the lower time frame and wait for the indicator to highlight a bullish fair value gap that forms right after the
[11:07] sweep. This gap is used as the entry zone. Enter a long trade from the gap. Place your stop loss below the sweep low and target the next buyside liquidity level. This simple process helps you trade with smart money, not against it.
[11:22] Now let's continue with the third smart money trading strategy. This setup uses only one time frame and combines the concepts of equal highs and lows, liquidity sweep, and once again, fair value gap entry.
[11:36] So, what are equal highs and lows and why are they so important? where the market has reacted multiple times without breaking through. For instance, when the price touches the same high two or more times and fails to
[11:51] break above it, it forms equal highs. These levels often become psychological zones where many retail traders place their stop-loss just above the highs anticipating a downward move. Smart money traders on the other hand see
[12:06] these levels as liquidity pools. These are areas filled with pending stop orders where price manipulation is likely to occur. When price makes a sharp move to take out these equal highs or lows, it is called a liquidity sweep.
[12:19] This move often signals that a reversal is near, especially to the downside after equal highs are taken. But what happens if a fair value gap forms just above those highs? That creates a perfect trading opportunity.
[12:33] The sweep grabs the liquidity and the fair value gap provides an ideal entry zone to open a short position. To apply this setup on the chart, we start by enabling the equal highs and lows option in the settings tab.
[12:46] The price action toolkit does a great job of automatically identifying and marking these levels on the chart. By increasing the ATR multiplier in the settings, the indicator will detect and highlight more equal highs and lows by
[12:58] accounting for wider variations in price swings. We also activate the fair value gaps and wait for all the conditions of our trading strategy to be met. A high probability bullish setup occurs when price sweeps liquidity below equal
[13:12] lows while resting above a bullish fair value gap. Likewise, a high probability bearish setup forms when price sweeps liquidity above equal highs while resting below a bearish fair value gap.
[13:26] Remember, more trades do not mean more profit. Waiting for high probability setups to appear and filtering out lowquality ones is a skill that takes time and discipline to develop. With all being said, if you'd like to use the
[13:39] price action toolkit with 15% off, make sure to check the link in the description. Thanks for watching and see you in the Thanks for watching and see you in the next one.