
DIY LED strip install needs just ONE tool
45sViewers love satisfying DIY hacks, and the reveal that only wall tack is required is a surprising hook.
▶ Play Clip"Title promises a complete guide but delivers only the final installation segment; useful but narrower than promised."
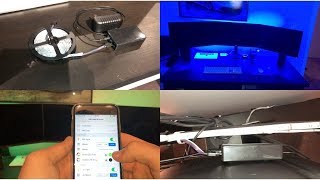
Matt from MKSmartHouse demonstrates the final installation of an LED strip control system behind his monitors, powered by an ESP8266 and controlled via a mobile app. The video covers everything from planning placement and wiring to mounting the strip and configuring colors, all with simple tools like wall tack and optional zip ties.
The only essential item for installation is wall tack. An optional DC jack extension cable helps route power neatly to the LED strip control box.
Matt chooses to place his LED strip behind his monitors to create a nice glow, emphasizing the importance of selecting a spot before installation.
To plan power routing, he checks where the nearest outlet is. His desk has two power strips, one always-on for chargers and an Amazon Echo.
Because the power strip is far, he connects the DC jack extension cable to the power strip, then to the control box.
The control box is placed on the right side of the monitors and secured using wall tack on its back.
After connecting the LED strip to the control box, he pulls back the adhesive backing and lays the strip along the desired path.
Because his monitor mount is not exactly flat, he uses zip ties to secure the LED strip in addition to the adhesive.
Opening the mobile app reveals the LED strip item. The color picker lets him choose any color, and the down button turns the strip off.
The LED strip installation is simple enough for any DIY enthusiast, requiring minimal tools and just a few minutes. The final result looks impressive and can be customized via a mobile app, with parts and kits available from Matt's website.
What is the only required item to install the LED strip?
Wall tack
00:15
What optional accessory helps route the power cable to the LED strip control box?
A DC jack extension cable
00:28
Where did Matt decide to place his LED strip?
Behind his monitors to give it a nice glow
01:01
What did Matt use because his monitor mount is not exactly flat?
Zip ties to secure the LED strip
02:19
How do you turn off the LED strip in the mobile app?
Press the down button
02:46
Where can you buy a kit, PCB and parts to make this device?
At mksmarthouse.com/shop
03:02
Minimal requirements
Shows that a smart home lighting upgrade can be done with a single simple tool, lowering the barrier to entry.
00:15Using an extension cable for clean routing
Demonstrates a practical technique for managing power cable placement when outlets are far from the installation spot.
01:33Adhesive-backed LED strip installation
Highlights the simplicity of mounting LED strips with built-in adhesive, making the process fast and accessible.
02:07App-based color control
Shows the final payoff: instant customization via a mobile app, which is the core appeal of smart lighting.
02:33[00:00] Hey guys Matt here from MKSmartHouse.com and in this video I am going to show you how to install the LED Strip Control in your house. [Intro]
[00:15] First up let's go over what we are going to need to install the LED Strip. The only thing required in order to install it is wall tack. One optional thing is this a DC jack extension cable, I need this because I would like to
[00:28] niceley route the power cable to the LED strip control box, but the cable from the power The links to all the materials, tools and parts are over on my website, the link is Speaking of links in the description, follow @mksmarthouse on twitter, instagram and snapchat
[00:46] because those are the place where I give sneak peaks on when videos are releasing and also where I ask for your input on topics and future videos. Anyway next, we have to decide where the LED strips are going to go.
[01:01] My LED Strip is going to go behind my monitors to give it a nice glow. After that you have to figure out where the nearest outlet is so you can determine where My desk consists of 2 power strips one of them is a normal power strip that is always
[01:18] on, I use this for chargers and the Amazon echo. there will be a guide for it coming out soon.
[01:33] Anyway for the LED Strip I will be plugging it into the normal power strip. Since the power strip is pretty far I will connect the DC jack extension cable to the You can find this extension cable, PCB and Kit to make this device over at mksmarthouse.com/shop.
[01:52] Then connect the Control box to the dc jack and determine the best place for it, I decided mine is best to the right side of the monitors. So take the wall tack put it on the back of the control box and stick it to where you
[02:07] Next up is to mount the LED Strip, so connect it to the control box, pull back the adhesive backing and start laying it down.
[02:19] Since my monitor mount is not exactly flat I also decided to use some zip ties to secure It is now fully installed!
[02:33] Open up the mobile app and find the LED strip item. If I press the color picker I can choose any color I want.
[02:46] Lastly when I press the down button the LED strip turns off. I love how the led strip looks behind my monitors and looks even better when the lights are Whenever someone new comes into my room they always say “Wow how did you do that!”
[03:02] I simply just tell them watch my youtube videos and you can do it too, it's very easy. If you need any of the parts shown in the video you can buy a kit, the PCB and other parts to make this device as well as other devices at the link in the video description.
[03:18] section below or head over to mksmarthouse.com/forum. Good Bye!




⚡ Saved you 0h 03m reading this? Transcribe any YouTube video for free — no signup needed.