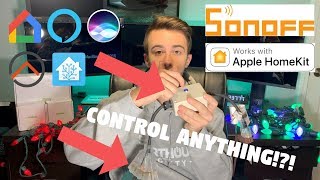

I Made a Waterproof Alexa Smart Plug
60sLive voice control and a waterproof outdoor twist create an instant 'I need this' reaction.
▶ Play Clip"An honest part-one demo, but the 'Complete Guide' label oversells since actual build instructions are deferred to future videos."
This demo video, the first in a four-part series, introduces the Sonoff Basic R2 DIY smart plug — a water-resistant device that lets you control any plugged-in appliance via voice assistants, apps, or home automation platforms. The host explains its design, safety limits, common use cases, and the wide range of control options, from stock eWeLink firmware to Tasmota-powered integrations with Home Assistant, openHAB, and HomeKit.
This is the first of four videos covering the Sonoff Basic smart plug: demo, hardware, software, and deploy. The demo focuses on what the device is, how it works, use cases, and control methods.
The Sonoff Basic smart plug lets you turn anything plugged into it on or off, demonstrated by voice-controlling three Christmas lights with Alexa.
The device is made water-resistant, so it can be used outdoors for things like Christmas lights; indoor use also works.
You can choose different input and output plug styles; output can be a single socket or a triple socket for multiple devices, though all sockets switch together simultaneously.
Suitable for Christmas lights, Christmas trees, outdoor spotlights, lamps, TV power, coffee machines, and charging stations that you want to cut power to.
The plug handles a maximum input of 250V and maximum load of 10A, so be mindful of what you connect.
Top has male end; waterproof cable glands keep water out; waterproof enclosure houses the module; manual button with LED ring, and output end can be single or triple socket.
The three output sockets are not individually controllable; the device switches power to all three simultaneously.
Live and neutral wires feed the Sonoff module; the ground cable is joined directly from input to output, bypassing the switch; a separate cable connects the manual button and LED.
Construction is simple: cut an extension cord in half, wire one end to the input, the other to the output, and join the ground wires; full details come in the hardware video.
With stock firmware, you can control the plug via Amazon Echo, Google Home, the manual button, and the eWeLink app; the blue LED doesn't toggle on the stock firmware.
Flashing Tasmota adds Home Assistant, openHAB, and HomeKit/Siri support while keeping all stock methods, and the LED indicator works.
Tasmota communicates with Home Assistant and openHAB via MQTT, enabling flexible automation.
The device uses high voltage; respect the maximum load and read the included documentation before proceeding.
What are the maximum voltage and current ratings of the Sonoff Basic smart plug?
Maximum input of 250 volts and maximum load of 10 amps.
04:08
Which two firmware options can run on the Sonoff Basic?
The stock firmware or Tasmota firmware.
08:04
Which platforms can control the Sonoff Basic with Tasmota firmware?
Home Assistant, openHAB, HomeKit/Siri, Amazon Echo, Google Home, and the manual switch.
10:14
How does Tasmota communicate with Home Assistant and openHAB?
Through MQTT.
10:28
What happens to the ground wire inside the device?
It bypasses the Sonoff module via a simple joiner, connecting input to output directly.
05:32
Can each socket on the triple output be controlled individually?
No, the three sockets are not individually controlled; the device controls power to all three simultaneously.
05:19
What is the purpose of the waterproof cable glands?
They tighten around the cable so no water can get in.
04:24
Why doesn't the DIY kit include an extension cord?
Because shipping is international and different countries use different plugs; also to keep options open for indoor/outdoor or multi-plug cords.
06:43
Electrical safety limits
Defines the safe operating envelope (250V, 10A) for anyone building or using the device.
04:08Simple build concept
Shows that converting an extension cord into a smart plug requires only cutting, wiring, and joining the ground.
06:00Firmware flexibility
Tasmota unlocks open-source ecosystems like Home Assistant and openHAB, far beyond the stock eWeLink app.
08:56MQTT integration
Explains how Tasmota devices talk to automation hubs via MQTT, enabling seamless multi-platform control.
10:28High-voltage caution
Reminds viewers that mains voltage is dangerous and maximum loads must be respected.
11:07[00:02] in this video we're gonna be talking about the new series which is covering this device which is based on the sound off basic artoo so I'd like to first
[00:30] of that home assistant video that I did last week I gained a lot of subscribers and I'd like to welcome all of you to our home enthusiasts to my channel where we just focus on Smart Home content so I called this device the son of basic
[00:45] smart plug the son of basic smart plug is a cheap DIY smart device that I show you how to make which means there will be four videos demo hardware software be four videos demo hardware software and deploy this is the first video the
[01:00] demo video where I'm going to explain what the son of basic smart plug is how the device works and details about it different use cases for the device and show every possible way you can control the device there's a lot one easy detail
[01:13] about the sawn-off is that it is on a PCB an amazing PCB company I've been using recently is PCB way as you can tell I ordered quite a bit from them but what is PCB way well PCB way is your one-stop shop for everything regarding
[01:27] PCBs they do PCB prototyping PCB assembly PCB stencil and much more right now they are on phase three of their holiday festival of 2018 and this phase 3 runs from November 21st to November 23rd and within this time frame you can
[01:42] get five hundred beans which you can redeem to get free gifts such as the esp8266 no temps to use light rings ultrasonic sensors temperature sensors a bunch of cool little Arduino parts that are great for prototyping also if you
[01:56] use the cash code on the screen now or in the description you can get five dollars off your order on PCB Wacom so you can get a free gift and five dollars off which if you get five dollars off you can get 10 PCBs for free because 10
[02:09] PCBs is $5 so check out PCBU a calm and then descript below and I think PCBU a for sponsoring this video so what is the sound off basic smart plug well it's basically a device where you can turn anything on
[02:21] and off that you plug into it Alexa turn on Christmas light one check it out so right now I have three Christmas lights plugged into this Sun
[02:35] just one way you that you can control from it Alexa stop well what's good about this device is that I have made it water-resistant so you can use it outdoors I'm going to use this device to control the Christmas lights around my
[02:48] house both in the front and in the back it all depends on the extension cord extension cords you can use it both inside and outside but if you use an just use it inside another useful feature is that not only can you choose
[03:02] choose the edge so you can chew if you're in a different country you can use completely different ends you can also have a different end on the bottom for example on this one I just have a single end but on this one over here I
[03:16] single end but on this one over here I have a triple end so I can plug in three devices into it so I have three different sets of Christmas lights going to it so what are some use cases for this device well you can use it for
[03:28] Christmas lights you can use it for turning on and off your Christmas tree you can use it for even decoration outdoor lights such as a spotlight you you have a lamp in the corner you can have it turn on and off you can control
[03:42] TV power so if you don't want power going to your TV you can just turn it off you can use it for certain coffee machines you can also use it for a charging station say you have a bunch of chargers plugged into one power strip
[03:55] you can plug this the power strip into this and then you can turn on and off not running all the time but the possibilities are endless because it is a normal u.s. plug so you can literally plug in anything you can think of you
[04:08] just need to keep in mind what power the sawn-off is capable of doing it is which is maximum input of 250 volts and maximum load of 10 amps all right now let's take a tour around the device so on the top here you have your male end
[04:24] source again you can choose to whatever you want then we have a waterproof cable gland so what this does is it tightens our on the cable so no water can get in then we have a waterproof enclosure right here
[04:38] so no water can get in and then on the top we have a manual button that way if phone or any of the devices you can control from it you have a manual button control from it you have a manual button so you can turn it on and off from the
[04:52] button and the button has an LED ring so if it's off the LED ring is off but if you turn it on the LED ring turns off letting you know that it is off and then you have another waterproof cable Glantz no water gets in and then here you have
[05:06] your end which you can choose to whichever one you want this one like I mentioned before has the three plugs so that way I can plug in three devices now these three devices are not individually controlled it just controls power going
[05:19] to all three of them simultaneously and this this one is outdoor rated so I can use this in my front yard with the Christmas lights but now let me show you Christmas lights but now let me show you how this device looks on the inside so
[05:32] right here we have the Sun off basic and then here which we have the live and the neutral wires going into it and then I have a simple joiner right here that connects the ground cable that comes from here from the input to the output
[05:46] so that way it doesn't go through this on/off then I have this cable coming out of the Sun off which goes to the button on top so it controls the input of the button as well as the output of the LED so overall it is a pretty simple device
[06:00] and it won't take too long to make so as you can see from the inside it's simple to make all you do is take an extension cord of your choice with whatever ends that you want you cut it in half and then you just put in one end here one
[06:17] the other connected to the Sun off and join the ground cable its overall gonna be a very simple build and we'll be covering all of this in the next video which is the hardware video for your convenience @mk smile accomplished shop
[06:31] you can pick up a kit with all the parts that you need to make this device except for the extension cord but I will leave a link to the different extension cord description of this video I don't include the extension cord for two
[06:43] reasons number one I ship worldwide so that means it's international so people they have a different plug in people in the US provide their own because they because different countries use different plugs also I want to have it
[06:58] open so you can choose whichever extension cord you want indoor/outdoor 3 plug 4 plug whatever you want you can even use a power strip options are I only provide this box part so that way you can just install it on whatever you
[07:11] cord whatever you want to do make it as universal as possible so you can pick up a kit over at MK smart osa calm slash shop the link is in the description I don't have many of these available so if you want one don't wait because they
[07:24] could be gone by the time you look I also have an assembled option where I put everything together for you all you do is connect your extension cord ends bunch of time and you can get this project done faster there is also an
[07:37] option regardless of assembled or not where I will flashed has mode a firmware onto the device for you if you pick up a kit you can follow along with the next videos I will be making oh yeah I have fast USA shipping so the link to
[07:50] um kiss mark on saw shop will be in the description speaking of links in the on Twitter Instagram and snapchat because that's where I give you sneak peeks on future videos and also I post things that a true smart home enthusiast
[08:04] would appreciate so let me show you the device in action and every single way control it depend on the firmware that you have on it you can either keep the stock firmware that the sound off basic comes with or you can do my favorite
[08:17] firmware so with either firmware you can control it from the Amazon echo and the Google home ok Google turn off Christmas light one Christmas
[08:30] light one Alexa turn on Christmas light one also with either firmware you can use the manual override button the only difference is with the stock firmware
[08:42] difference is with the stock firmware you will not see the blue LED turn on and off but with the Taz motor for work you will see the LED indicator the only you keep the stock is from the e we link app that comes
[08:56] with this on/off so here is the app I can tap it turn on and off from this little button right here but if you flash it with Taz motor firmware you can control it from three more things which is home assistant openhab and home kit
[09:12] Siri because home kit Siri you can use on openhab or home assistance let me go alright so first I'm gonna open home assistant then I'm going to scroll down and as you can see I have an item called Christmas light one go and turn it off
[09:28] Christmas light one go and turn it off and I can turn it on so it's fully controllable through home assistant now let's jump over to openhab oops that was
[09:40] top secret alright and then we have Christmas lights one I can turn it off Christmas lights one I can turn it off and on so it's all controllable through a home assistant and open hem well let's go ahead and try out Siri alright I
[09:55] realized that I didn't have home kit set up on that phone but as you can see here we have an item called Christmas light one I can turn it on and off this is often the home app and I can also do this turn off Christmas light one as you
[10:14] can see you can control the most with the Taz mode of firmware because you can control from openhab home assistant home kit Amazon echo Google home and the manual switch which has the LED indicator if you have Taz mota so the
[10:28] weight has modal works is it is flashed on to the Sun off basic and it talks to on to the Sun off basic and it talks to home assistant open app through MQTT so throughout the video but this is the device that has the stock firmware and
[10:42] then this one has the Taz mota firmware personally I really like the tasmad flashing this one with Taz moana after this series is over because I really don't have any use for using the stock firmware so if you want to make this
[10:55] device and follow along with my video series pick up a kit over at M case marcom slash out over on M case mars-like home slash shop I also have kits to make blinds control sprinkler systems LED strips
[11:07] door sensors fire sensors which are all compatible with openhab and home assistance this device uses high voltage so proceed with caution also be mindful of what you plug into the device because there is a maximum of how much power it
[11:20] can handle read this on/off box it comes with for more information alright thank you guys for watching and I hope you're excited about this sawn-off smart plug if you like this video click that like button and if you're a smaller than thys
[11:34] you have any questions leave in the comment section below or head on over to em kiss marcom slash forum goodbye [Music]




⚡ Saved you 0h 11m reading this? Transcribe any YouTube video for free — no signup needed.