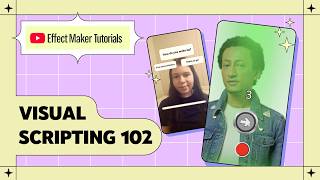

What Are Visual Scripting Variables?
42sVariables are the gateway to interactive AR effects, and this beginner-friendly intro makes a complex topic instantly clickable.
▶ Play Clip"Delivers exactly what the title promises: a hands-on visual scripting tutorial with a complete working project."
This tutorial walks through creating an interactive tap-to-cycle-color AR effect in Effect House using visual scripting. It covers variable management, node connections, list handling, and debugging, giving creators a practical foundation for building interactive effects without code.
Variables store information for later use in visual scripting workflows. They enable effects where user choices are saved and referenced, such as selecting answers and calculating results.
The variables panel (opened via the X-like button on the left panel) lets you add, delete, and manage all variables in your effect. Click the plus button to add a new variable.
Each variable has a type (number, text, boolean, 2D vector, 3D vector, color, asset) and a value type: single value or list of values. A list is an ordered collection of items.
To read or write a variable, you add get variable and set variable nodes. You can right-click the variable in the panel or add them from the Objects and Properties category.
Add a text object and use a set property node to control its text. Because a number can't connect directly to a text property, insert a number to text node to convert the value.
An add node from the math category sums two inputs. Connect the variable's value output to input one, set input two to 1, and feed the sum into set variable to increase the count on each tap.
Add a color variable and switch its value type to list of values. Add five colors; each item gets an index starting at zero. Use get variable plus get from list to retrieve a specific color.
Compare the index to the list length using a greater than or equal to node, and use an if node to reset the index to zero. Get list length automatically updates the comparison when the list changes.
Display number values on screen with a text object to debug. Narrow down bugs by isolating which part of the logic fails — e.g., if tapping changes text but not color, the issue is likely in the color-tint logic.
Sign in to the same YouTube account on your phone, click preview on device, scan the QR code with the camera app, then test in the YouTube camera. Submit the effect with an icon, description, and optional instruction.
The tutorial walks through building a complete tap-to-cycle-color effect, covering variables, lists, node connections, and debugging — giving creators a solid foundation for interactive AR effects in Effect House.
What data types can visual script variables store?
Number, text, boolean, 2D vector, 3D vector, color, and asset.
02:03
What is the difference between a single value and a list of values?
A single value holds one value; a list of values is an ordered collection of items such as numbers, words, or images.
02:29
How do you add get/set variable nodes for a variable?
Right-click the variable in the variables panel and select Get Variable/Set Variable, or right-click in the visual script and choose them under Objects and Properties.
03:11
Why do you need a Number to Text node to display a number in a text object?
Because a number value can't connect directly to a text property; the number must be converted to text first.
05:22
What is the first index of a list of values variable?
Zero.
08:45
What does the Get From List node do?
It retrieves a specific value from a list based on the index property.
09:41
Which two nodes can reset the index to zero when it reaches the list length?
A Greater Than or Equal to node feeding into an If node, with the true output connected to a Set Variable node set to zero.
13:20
How does Get List Length help when changing the number of colors?
It automatically updates the maximum comparison value, so you don't have to manually edit the threshold when the list changes.
14:23
What is a recommended way to debug number values in Effect House?
Display the number values on screen using a text object with the method shown earlier.
15:36
How do you test your effect on a mobile device?
Sign in to the same YouTube account on your phone, click Preview on Device, and scan the QR code with your camera app.
16:17
Why Variables Matter
Variables unlock interactive effects by storing values like user answers for later calculation, a core concept in AR effect design.
00:16Lists vs. Single Values
Understanding the list of values value type is essential for managing collections like multiple colors or images.
02:29Type Conversion for Text
Connecting a number to a text property requires conversion, a common pitfall for beginners in node-based scripting.
05:22Zero-Based Indexing
List positions start at zero, a key detail when retrieving elements with Get From List.
08:45Narrowing Down Bugs
Isolating which part of the logic fails (e.g., text updates but color doesn't) makes debugging visual scripts much easier.
15:50[00:02] going to learn how to create a plant top effect with visual scripting using In this tutorial, you'll be learning how to use variables in your visual scripting workflow in Effect House. Variables store information for your
[00:16] be creating an effect where [music] you can tap on the screen and loop through different spotlight colors. With variables, many more options open up as they allow you to store values that you can reference at a later time in your
[00:29] For example, if we're making an effect where the user gets to choose between different answers and receives the results, then we could use a variable to >> and then reference them at a later point to calculate that result.
[00:44] Start creating, let's first navigate to our visual scripting panel. We can either add a node through the visual scripting hand icon located on panel. Or by easily clicking on the change
[00:57] layout button located at the top right of Effect House. I'm going to click on the change layout button.
[01:09] panel located on the left, there is a button that has a symbol that looks similar to an X. We can click on it to open a variables This panel is where you can manage all the variables that are currently in your
[01:22] You can also add and delete variables here. Visual script variables can store many different types of data, including numbers, vectors, text, booleans, colors, and image assets.
[01:36] displayed on the screen, and when the user taps on a button, it increases by one. To begin, we'll need to use a variable. As you can see in our variables panel, there are currently no variables in our
[01:50] Let's click on the plus button at the top right of the variables panel to add a variable. An edit panel will appear. added variable, the data type,
[02:03] value type, and the value that it is holding. The type property of a variable controls the type of data that this variable can hold. Data types that are currently supported include number, text, boolean,
[02:17] supported include number, text, boolean, 2D vector, 3D vector, color, and asset. controls whether the variable is a single value or a list of values. A
[02:29] a list of values is an ordered collection of items, such as numbers, words, or images. For right now, we'll focus on using a single value variable. I'm also going to keep the type of this variable set to number,
[02:44] variable set to number, and rename our variable to index count. When finished, we can click on the back button that is right next to the edit text at the top of the panel. Our index count variable is now visible
[02:57] in our variables panel. If we want to get or set the value that it holds, we will need to get the corresponding nodes. One way is to right-click on the variable that you want to get the nodes
[03:11] for in the variables panel, and then select the get variable or set variable options. The second way is to right-click in our visual script panel as if we're adding any other visual script node, go to the
[03:24] objects and properties category, and click on get variable or set variable from there. Let's add a get variable node and a set
[03:36] Let's add a get variable node and a set variable node to our graph. Let's also go to the triggers category, and add an object tap node to our graph.
[03:49] the next execution output of our object tap node into the start input of our set variable node. We need to give our object tap an object to detect taps on. So, I'll right click in the objects panel and just add an
[04:03] in the objects panel and just add an image. just added for the object property of our object tap.
[04:24] it will set our variable. But, why don't we see any change? Our variable is currently only represented in our script and not being value that we're giving it is currently
[04:38] still zero, the same as our variable's default value. Let's fix the first issue and display our variable's value on the screen. our variable's value on the screen. To do this, we can add a text object.
[04:55] Next, we want to control the text content of this object in our script. panel. Go to the objects and properties category and add a set property node.
[05:09] We want to assign the object that it sets as our text object that we just added to the scene. And select the property we're setting as the text property. Because our index count has a type of
[05:22] number and the text property has a type of text, we can't directly connect the output port of our get variable node to the input port of our set text node's We'll need to convert the number value
[05:37] to a text in order to display it on the screen. We can go to the time and utility category and add a number to text node category and add a number to text node to convert our number to text.
[05:51] node into the number input of the number to text node. Next, connect the text output of the number to text node to the text input of number to text node to the text input of our set text node.
[06:08] actually set the value to our text, we need to trigger it. Connect the next execution output of our set variable node to the start input of set variable node to the start input of our set text node.
[06:23] we can see that the text displayed changes to value zero. Great work. However, since we want to increase the number and don't want it to permanently stay at zero, we need to add to it every time that the user clicks on the button.
[06:37] We can do this by adding an add node from the math category. together and then outputs the sum. Ideally, we want to add one to whatever
[06:52] our index counts variable's value currently is. So, let's connect the value output of our get variable node into the input one port of our add node. We can manually change input two's value to be one.
[07:07] Then, let's connect the value output of our add node into the value input of our our add node into the value input of our set variable node.
[07:20] on the image, our variable will increase by one and display on the screen. Test by one and display on the screen. Test it out. It works. still need to adjust our code to loop through different colors for spotlight
[07:34] image. To do this, we will add functionality where we alternate through whenever the user taps on an image button. A variable that can hold a list of different color values would be perfect
[07:48] for this task. Let's open up our variables panel and Let's open up our variables panel and add another variable. color options and set the variable's type to color.
[08:04] list of multiple different color values instead of only storing one color, we will need to switch the value type from single value to list of values.
[08:18] As you can see, once we select this option, the value of our variable turns to list of values and an add button appears. We can click on this add button to add more color values to our list. Let's click on the add button and add a
[08:32] total of five color values to our color options list. If you look closely, the position of each item in a list of values variable is indicated by its number. The first item is zero, it has an index
[08:45] of zero. The second item is one, it has an index of one and so on. We can select the color squares on each of these values and change each color value to one of our preferred colors.
[08:59] code. Once you're satisfied with the color values and color options variable, you can click the back button to exit editing the variable. Now, we need to get all of the color
[09:12] options variable. We can right click on the color options variable and add a get variable node to our script graph. Getting the value of a list value variable is slightly different than a
[09:27] single value variable. When using a get variable node for a variable of value type list of values, it retrieves an entire list of values instead of only a single value. Therefore, we have to add another node
[09:41] that specifically retrieves which value we want from the list. We can navigate to time and utility category category and add a get from list node for this.
[09:54] Connect the output value of the get variable node to the list input port of the get from list node. The index property of the get from list node determines exactly which value we
[10:06] want to get, so the value's position in the list. I'm going to keep the index at zero for right now. Our get from list node is correctly retrieving a value from our color options list. Now, we need to use the value that we're
[10:20] retrieving to change the color tint of our spotlight. Let's quickly add in our spotlight asset texture via the asset tab and upload texture via the asset tab and upload button.
[10:36] imported, we can go back to our objects tab, tab, add an image object, and then select our spotlight asset as the asset to apply to our image.
[10:53] image button in the objects panel to be layered behind and ensure that the image button will be able to detect taps. We can also adjust our spotlight's We can also adjust our spotlight's position and sizing.
[11:09] color changes and button taps. First, we'll add a set property node to First, we'll add a set property node to our graph as our spotlight image. Next, select the property that is being
[11:26] set on the image as the color tint property. This will transform it into a set tint node that accepts color value types to set the color tint of an image. Connect the output value port of our get from
[11:40] list node to the color tint input port of our set color tint node. Then, let's reference our previous code with the button taps. Let's move our set color tint node in between our object tap and set variable
[11:55] between our object tap and set variable nodes by connecting our object tap's next execution output port into the start input port of our set color tint node. And our set color tint node's next
[12:08] execution output port into our set variable node's start input port. Now, when we tap on our image button in the preview panel,
[12:22] of our first value in our color options list. The color of our image doesn't change beyond the first click. So, let's We can connect the output number value of our old get variable node that is
[12:36] retrieving our index count variable and connect it to the input port of our get connect it to the input port of our get from list node's index property. Now, whenever we tap on the image, our spotlight's color tint changes
[12:50] between the different colors. There is only one more issue left. When we reach the last color in our list, the color tint stops changing. Ideally, we want to loop back to the first color at index zero when our index
[13:04] count variable reaches the same number value as the color option list variable's length. To do this, let's add a few new nodes. First, we'll want to add a greater than or equal to node from the logic category to compare our index
[13:20] count's current value with a maximum value. Then, we'll add an if node from the control flow category. Connect the greater than or equal to node to the if node's condition input.
[13:34] And connect the get variable node for our index count variable to input one of our greater than or equal to node. We could also adjust input two to be a value such as three. We should now connect the output
[13:49] execution of our set text node into our if node. Let's duplicate our index count old set variable node, change its value to set as zero, and connect if node's true execution output
[14:05] into the set variable node's start input execution. Now, whenever our index count variable reaches the same value, that is, whichever value is input two in the greater than or equal to node,
[14:23] We could either manually edit input two and adjust it to be the number of colors that we have in the list every time we update our colors list, or we could add functionality where it automatically updates the length of what our list can
[14:38] I want to go with automatic option, so I will go to time and utility and add a get list length node to retrieve how many values our list variable is storing. Connect the color options get variable
[14:55] node's value output into the get list length node's list input. Next, connect length node's list input. Next, connect the get list length number output port into the second port of our greater than or equal to node.
[15:10] We can also turn off the visibility of our text, so all that is seen is our Now, when we tap on our button, our spotlight correctly changes colors and loops back around. Great work. We've finished the
[15:24] functionality of our effect. The more complicated your script, kids, the more of a chance that you may run into bugs where some of your nodes aren't executing as expected, or the values that are being output are not what is
[15:36] For debugging number values in Effect Maker, one of the best solutions is to display the number values to the screen using the text object in the same method explained earlier. To find and fix any bug in general, a
[15:50] helpful tip is to identify and narrow down what could possibly be causing the For example, if you have a button that is working to change numbers in your text, but you're also supposed to be changing the color of a light, and that
[16:03] color isn't changing, then most likely the bug is going to be somewhere in your logic for setting the color of the light or how the set color of light is triggered, and not in your logic that triggers your button. We should test our
[16:17] effect on our mobile device. First, make sure that you're signed in to the same YouTube account on your phone as you're signed in to with Effect Maker. Then, you can click on the preview on device button that is located at the
[16:30] very top of the screen. It will open a pop-up that shows a QR code. Open up your camera app on your mobile device and use it to scan this QR code. It should load your effect inside the YouTube camera on your phone. This will
[16:44] allow you to test out your effect and ensure that it meets full expectations before publishing. Once we're happy with our effect, we can click the submit A submission panel will appear where we can add an icon for our effect.
[17:05] and also add a description for our effect. that allows the user to interact with it, you'll be given the option to choose an instruction for it. Instructions appear on the effect when
[17:20] what is needed. It's always best to add instructions so users can clearly understand how to use your effect. Finally, we can click submit to finalize and send our effect out for review.
[17:34] Want to explore and create more amazing interactive effects? You can check out some of that makers already made effect templates to learn and discover how you effects. For more info on how to use effect maker, check out the links in the
[17:48] description below. Thank you for watching and don't forget to subscribe watching and don't forget to subscribe for even more news and updates.
⚡ Saved you 0h 17m reading this? Transcribe any YouTube video for free — no signup needed.