
Essential Audio Filters for Karaoke Streaming
45sPractical audio tips are highly sought after by aspiring streamers, and the compression explanation is clear and actionable.
▶ Play Clip"Delivers a solid quickstart guide with actionable steps, though some sections are brief."
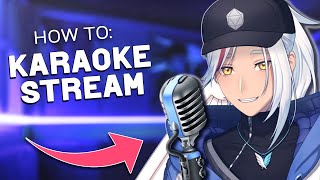
This video is a quickstart guide for setting up a karaoke stream in OBS. It covers essential audio filters like compression and reverb, timing calibration, finding karaoke tracks, and pitch shifting songs to fit your vocal range.
Sound is the most important thing for streaming, especially for karaoke. Two filters are recommended: compression and reverb.
In OBS, add a compressor filter to your mic source. Recommended settings: ratio 6:1, threshold -14 dB. This prevents clipping and ensures vocals are heard during quiet parts.
Use TAL Reverb 4 plugin. Download the older version that supports VST2 for OBS compatibility. After installation, restart OBS to see the plugin.
Adjust reverb to sound like an empty room. Small rooms have less reverb, large rooms have more. Enable monitor on the mic in the audio mixer to hear yourself.
To fix audio sync issues, use a metronome video, record a clap on beat, and check the recording. If mic is early, increase offset; if late, adjust desktop audio offset or decrease mic offset. 100 ms = 0.1 seconds.
If you are a VTuber, add a render delay filter to your source to match audio timing perfectly.
Use YouTube for karaoke videos. For Japanese songs, search with 'Romaji lyrics' to get readable lyrics.
Do test recordings to balance audio levels. Keep desktop (backing track) just below the orange part and mic levels just above it.
Use a free Chrome browser extension to pitch songs up or down to match your vocal range. Use transpose settings, not pitch settings, for vocal range adjustment.
The video provides a complete checklist for setting up a karaoke stream: compression, reverb, timing, audio levels, and pitch shifting. With these steps, you can ensure a professional and enjoyable karaoke experience for your viewers.
What are the two recommended audio filters for karaoke streaming?
Compression and reverb.
00:13
What compression ratio and threshold are recommended in OBS?
Ratio 6:1, threshold -14 dB.
00:43
Which plugin is used for reverb and what version is needed for OBS?
TAL Reverb 4, the older version that supports VST2.
01:09
How do you calibrate audio timing in OBS?
Use a metronome video, record a clap on beat, check sync, and adjust offsets.
01:50
What is the recommended way to find karaoke tracks for Japanese songs?
Search with 'Romaji lyrics' to get readable lyrics.
03:10
What is the pro tip for pitch shifting to match vocal range?
Use transpose settings, not pitch settings.
04:30
Compression is key
Prevents clipping and ensures consistent vocal levels, essential for karaoke.
00:13Timing calibration method
Simple three-step process to fix audio sync issues, a common problem in streaming.
01:50Pitch shifting for vocal range
Allows non-singers to comfortably sing songs by adjusting pitch to their range.
03:49[00:01] streams? Well, let me show you how in this quick step-by-step guide. Feel free to skip on ahead, but if you're here to stay, let's get started. Sound is arguably the most important thing for streaming and even more so for streaming
[00:13] audio is working well. You want your viewers to vibe after all and not have their eardrums explode. So, here are two filters that I like to use. Compression your mic from getting too loud or too
[00:26] helps your vocals to be heard even during quieter parts. If you don't know the sound input is way too loud and exceeds what it's built to handle, you've ever been on a multiplayer gaming lobby, you've probably heard it before.
[00:43] >> To add this on OBS, head over to your mic source, right click, filters, and defaults are a bit too strong and you lose a lot of vocal dynamics. So, I like to go for a 6:1 on ratio and a minus14
[00:56] on threshold instead. Without going too deep into the terminology, ratio is how ratio, the weaker it is. And threshold gets triggered. Lastly, if your mic sounds way quieter, you can bump up the
[01:09] don't go crazy with it. Now, it's time for the plugin that everybody wants. Reverb. This one is through TAL Reverb 4, and it's quite a bit more when you're downloading it, you download the older version because that's the one
[01:22] that supports VST2 and therefore is compatible with OBS. After that process, in OBS. And if you don't see it but already had OBS open, just restart the program and it should be there. To get started quickly, all you really need to
[01:36] like an empty room. If your room is small, like a bathroom, it'll have less reverb. If it's big, like a cathedral, then it'll have more reverb. Also, if mic on your audio mixer and turn monitor on. Now that we've got your audio
[01:50] settings done, let's go into calibration and timing. What can sometimes happen is a disconnect between your mic and your desktop audio in OBS. So, you might be your timing could be totally off on stream, and unless someone calls you out
[02:03] on it in chat, you might not be able to find out until the very end, to which So, to avoid that, we need to do some quick timing checks. What I like to do is a very simple three-step process because I'm very lazy. I open up a
[02:17] metronome video on YouTube. I hit record and I either clap or make a sound on beat up. Then I check the recording and if my mic is too early, then I increase the offset to add some delay. Conversely, if
[02:30] my mic is too late, then I either add an offset to my desktop audio or minus offset on my mic. 100 ms is approximately 0.1 seconds, so play around with it until you get the timing correctly. Bonus tip, if your VTuber
[02:43] render delay filter to your source so that it matches up perfectly. All right, so let's go through the checklist. Compression check, reverb check, and timing check. Almost everything we need to do in OBS is basically done. Did you
[02:56] get all that so far? Now, it's time to actually sing some songs. And to do videos. My number one go-to will always be YouTube. There's so many karaoke most niche songs. And if your desired
[03:10] always look up the lyrics online. Bonus tip, if you want to sing a Japanese song because you're either a VTuber, weeb, or both like me, then look up the song you want to sing and add on Romai lyrics, and it turns them all into readable
[03:24] know I said that everything in OBS was done, or at least most of it, but the last thing missing is actually checking your audio levels. You don't want to j all. So do a few recordings to ensure that your audio levels are balanced
[03:36] parts of the song. Personally, I like to keep my desktop levels, so my backing track just below this orange part and my mic levels just above it. But play Now, there's one last thing I want to show you, and it's a very important
[03:49] thing that not a lot of people actually know about. It's pitch shifting your songs. But before I get to any of that, if any of this was useful to you at all, hit that like button and subscribe to the channel as it would really help out
[04:01] a ton. Thank you. All right, back to pitch shifting. Say you want to sing high for your range. Most of us aren't trained singers, so unless we want to ourselves to sing well out of our range, we'd want to pitch it accordingly to be
[04:15] comfortable. So, how do we do that? On Google Chrome, there is this browser completely free and it allows you to pitch a song up or down to match your and tempo if you're doing something like practicing a song. Just a pro tip. If
[04:30] you want to adjust the pitch for your vocal range, do so using your transpose vocal range, do so using your transpose settings and not the pitch settings.
[04:43] fine-tuning. As with everything else, play around with it to find something should be all done with the setup. But what if you actually want to improve value in watching this video where I learned how to sing for 30 days. Cow.
⚡ Saved you 0h 04m reading this? Transcribe any YouTube video for free — no signup needed.