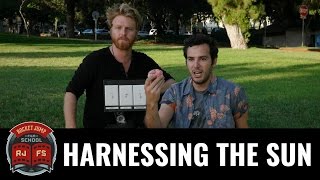

The Sun is the Ultimate Lighting Tool
33sOpens with a bold, engaging comparison that hooks viewers and promises a valuable tip for filmmakers.
▶ Play Clip"The title promises a fun, informative guide to natural lighting, and the video delivers exactly that with practical tips and clear demonstrations."
This video explains how to harness the sun as the ultimate light source for filmmaking. It covers planning with tools like compasses and apps, shooting at different times of day, and using simple equipment like bounces and sheets to control light.
The sun is the perfect light because it lasts all day, requires no power, and looks cool, but it can't be controlled.
Use a compass and clock (or smartphone) to track the sun's path. Check sunrise/sunset times for the specific day and location.
Apps like Herios and Sunseeker show the exact sun position. Weather apps help anticipate conditions, as used by professional DP Roger Deakins.
Sunset provides beautiful backlighting. Use a bounce (Foamy Core, under $5) to fill shadows on the subject's face.
A thin white sheet can diffuse light, making it softer and more flattering. Test softness by checking shadow sharpness with your hand.
Noon light is harsh, causing raccoon eyes, but can be used for war films or westerns. To soften it, use an overhead sheet and add a bounce for contrast.
Magic hour (15-30 minutes after sunset) offers beautiful light. The film 'Days of Heaven' shot all scenes during this time by rehearsing and shooting quickly.
The Sun as the Perfect Light
Establishes the sun as the ultimate light source, setting the foundation for the entire video.
00:18Tracking the Sun's Path
Provides a practical method using a compass and clock to plan shoots around natural light.
00:45Using a Bounce for Fill Light
Shows a cheap, accessible way to control sunlight and improve shadows.
02:10Diffusion for Softer Light
Explains how to soften harsh light with a simple sheet, a key skill for flattering shots.
02:40Magic Hour's Limited Window
Highlights the brief but beautiful lighting opportunity after sunset, with a real film example.
04:08[00:00] Hey everybody. So in a previous video I compared various pieces of lighting equipment to weapons. For example, a source for a lego is like a sniper rifle, or a china ball is like a grenade. Well user Demetha asked, what is the tactical nuke of lighting? To which Joey correctly answered...
[00:18] That's right, the sun is the perfect light. It lasts all day, it doesn't require any power, and it looks cool. But the obvious problem is we can't control the sun. The sun doesn't care what you're shooting. It rises and sets when it wants to and can be affected by random things like the weather or your location.
[00:33] But if you're smart about it and you plan every way you can, you can harness the sun to your advantage. And it's way simpler than you'd think. One of the most important things to do when you're checking out a new location is to pay attention to the path of the sun.
[00:45] For this, we'll need two ingredients. A compass and a clock, or in modern parlance, a smartphone. So out here, it's about 5.30 p.m., and when I Google sunset Los Angeles, I see that the sun sets at about 8 p.m.,
[00:58] which means I have about two and a half hours of usable sunlight to shoot my scene. It's always important to check the sunrise and sunset for the specific day you're shooting because it changes throughout the season. But now, if we look at our compass... We know that the sun rises in the east and sets in the west,
[01:12] which helps us to get an approximate idea of where the sun's going to be throughout the day. But if you want to be more specific, there are apps like Herios and Sunseeker that can show you the exact position of the sun during the hour that you shooting You can also use WeatherApps to anticipate on a minute basis what the weather is going to do And if you don believe real VPs use their smartphones ask Roger Deacon I just did a film that was in New Mexico with a lot of exteriors
[01:34] and it was like monsoon season, so I was on the phone constantly figuring out what the weather was going to do. Now we're going to show you what the sun looks like at different times of day.
[01:46] I work hard all day just to get a bite of you, Mr. Donut. Pause. Notice that the light is very low in the sky, which backlights Joey and his delicious fresh donut beautifully, popping him out from the background.
[01:58] This kind of lighting can make a lot of things look beautiful, especially baked goods. To cast some more light onto the shadows of Joey's face, we're going to use a bounce, which bounces the sunlight directly back up at him.
[02:10] You can find a bounce at any large hardware store, and it's called Foamy Core, and it's usually under five bucks. It comes with a shiny side, and a white side. Backlighting in the sunset isn't your only option either.
[02:24] You can also use side light or front light. Using a thin light bed sheet to block the light will give a much more flattering look and be easier on your actor. In the film industry, what the sheet is doing is called diffusion. It means using a fabric or a paper to break up the light and make it softer.
[02:40] You can study how soft the light is by passing your hand very close to the subject and looking at the shadow it makes. As you can see sunset can be a very beautiful light to shoot in But let look at something a little more challenging I work hard all day just for a bite of you Mr Donut
[03:01] Pause. So in most parts of the world, noon means the light is directly overhead. This is usually associated with unflattering harsh light. Notice the shadows under the eyes, often called a raccoon effect. Now, just because it's harsh doesn't mean you can't use this light
[03:14] for certain scenarios. For example, a war film. Or a western. But what if you still want that sunset romantic feel, but in the middle of the day? Well, if you're just getting started in movies
[03:26] and you don't have a lot of access to film equipment, here's a few handy tricks you can use. First, let's use our same sheet, but this time we're going to put it overhead. This softens the light and makes it more flattering, but it also lacks contrast. So if you want to bring some more definition and contrast back in,
[03:40] take your bounce that we used before and just add it in. But if you want to create a feeling like the direct light of a sunset, you want to use the silver side, also called the hard side, like this. If you don't want to use the sheets, you can recreate the same effect by shooting in the shade.
[03:56] Well, there's one more kind of light we should discuss, and that is the proverbial magic hour.
[04:08] Oh, I work hard all day just to get a bite of you, Mr. Donut! Pause! Magic Hour is the time after the sun sets when you get 15 to 30 minutes of beautiful usable light The film Days of Heaven managed to shoot all of their scenes at magic hour by rehearsing and blocking them throughout the day then shooting several scenes back very quickly while the sun set
[04:27] Without having to use any equipment, magic hour is a beautiful time of day to get off a few shots. But remember, it's more like magic 20 minutes. So that covers most of the lighting scenarios you might encounter outside. Hopefully this helps you to work towards harnessing the sun yourself.
[04:41] And we encourage you to go outside and start filming, even if you just have an iPhone. And pay attention to what the sun is doing and the kind of effects it has. And please, please, please, if you have any questions at all, please post them on the forums because it's very likely the next video we do
[04:55] will be based on one of your questions. So, happy shooting. Should we let Joe eat his donut? I don't know. What do you think? I killed Mr. Donut!
[05:07] I killed him! I can't help it. It would be my fault.
[05:20] It would be my fault. It's so... It's so... It's so... It's so... It's so... It's so...
[05:40] © BF-WATCH TV 2021

⚡ Saved you 0h 05m reading this? Transcribe any YouTube video for free — no signup needed.