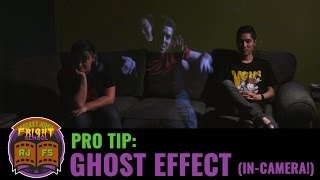

Actor 'dies' for ghost tutorial
45sThe comedic and surprising opening with Joey 'dying' hooks viewers instantly.
▶ Play Clip"Delivers a solid, practical tutorial on the Pepper's Ghost effect, though the title's promise of a 'ghost tutorial' is met with a lighthearted skit that adds little value."
This video is a tutorial on creating the Pepper's Ghost illusion, a technique dating back to the 1500s, used in effects like Disney's Haunted Mansion and modern teleprompters. The hosts demonstrate a practical setup using a light, a sheet of glass or plexiglass, a dark background, and a second light for the ghost, explaining the principles and advantages of doing the effect in-camera rather than with VFX.
The hosts introduce the tutorial with a humorous skit where one pretends to die to demonstrate a ghost effect, setting up the topic of creating ghost illusions.
Pepper's Ghost is an illusion technique dating back to the 1500s, famously used in Disney's Haunted Mansion ride and modern teleprompters.
The setup requires one light, a large sheet of glass or plexiglass, a dark background for the ghost, and black duvetyne to cover the seat so it doesn't appear in the image. A second light is needed specifically for the ghost.
The glass is placed at an angle, with the camera filming the main subject while the ghost appears on the glass. The glass must be equidistant between the two subjects so they appear the same size.
Doing the effect in-camera allows both actors to be in the same space at the same time, and the camera can move freely without tracking markers or plates, enabling real-time following of actors.
The setup is not one-size-fits-all; viewers are encouraged to adjust the glass angle and other elements to suit their specific scene. The video concludes with a lighthearted thank you.
The video provides a clear, practical guide to creating the Pepper's Ghost illusion in-camera, emphasizing the importance of positioning and experimentation. It highlights the benefits of this technique over VFX for certain shots, such as real-time camera movement and actor interaction.
Pepper's Ghost Historical Context
Provides a quick historical anchor, showing the technique's long-standing use in entertainment.
00:24Material List
Gives a clear, actionable list of items needed, making the tutorial easy to follow.
00:50In-Camera vs VFX
Highlights practical benefits of practical effects, such as real-time interaction and camera freedom.
01:40[00:00] Lauren! God, Joey! It's me. Is the seat taken? What happened to you? I died. How? Why did you die?
[00:12] Because we're doing a tutorial on ghosts. Joey, you don't have to kill yourself to do a tutorial on ghosts. That's what the tutorial is for. Now you tell me. Now what? I'm stuck.
[00:24] Oh my god. Well, let me show you how we were going to do this. So I'm going to turn on the lights. Ah! Where'd it go? You're right over there, Joey. Oh. I'm not dead.
[00:36] Yeah, congratulations. Pepper's Ghost is an illusion technique that dates back to the 1500s. You might have seen this effect on Disney's Haunted Mansion ride.
[00:50] And the same principle is used on modern teleprompters. So here's how we did it. So we actually used one light, a large sheet of glass or plexiglass, and a dark background for your ghost. And we covered the cushion that Joey sits on
[01:03] with black duvetyne as well, so it wouldn show up in the image And the last thing you need is another light for your ghost specifically Okay so those are all your materials but how do I actually set it up so I can get the image I want
[01:16] Well, let me show you a diagram. So notice here that our glass is actually at an angle. So while we're filming me back here, we're also recording Joey appearing on the glass. Another thing to keep in mind is how close
[01:28] and how far the subjects are from the glass. So we had to have the glass equidistant between the two of us, so both of us appeared to be the same size. So why do this effect in camera instead of with VFX?
[01:40] For one thing, you can have both of your actors in the same space at the same time, running lines like me and Joey did. Another advantage is you can move your camera around during the shot and not have to worry about tracking markers or plates or anything like that,
[01:52] so you can follow your actor around in real time. So this is the setup that worked for us, but no two setups are gonna be the same. Play around with it, change the angle of the glass if it's not working, and figure out what's right for your scene.
[02:05] Well, that was fun. Thanks.
⚡ Saved you 0h 02m reading this? Transcribe any YouTube video for free — no signup needed.