What is a Stream Deck?
45sExplains the device and its customization in an engaging way, appealing to creators looking to boost productivity.
▶ Play ClipThis video demonstrates how to use an Elgato Stream Deck to control video recording, teleprompter functions, and OBS, boosting productivity. The creator shares a personal setup for talking-head videos, including custom buttons for prompter control, screen recording, and timers.
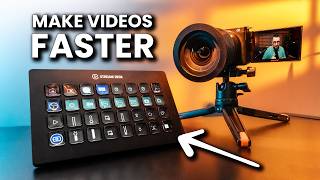
The Stream Deck is a customizable controller with 32 buttons (or fewer on other models) that can control various applications and workflows.
Connect the Stream Deck to your computer, install the software, and update it. The interface allows profile management and button customization.
Install the Camera Hub plugin from the Elgato marketplace. Buttons can start/stop auto-scroll, adjust brightness/contrast, set margins, and change scroll speed.
Set vertical margins to specific percentages (e.g., 52% and 79%) using the prompter appearance function with 'set' type for quick switching.
With a camera connected via Cam Link 4K, a button can toggle the prompter display between text and live camera preview.
Buttons can turn the prompter screen on/off and switch between script mode and display mode (for video calls).
Install the OBS plugin. Buttons can start/stop recording, pause/resume, switch profiles (4K, Full HD, laptop screen), and open the recordings folder.
Use hotkey buttons to capture full screen (Cmd+Shift+3) or portion (Cmd+Shift+4) on Mac. QuickTime screen recording via Cmd+Ctrl+N.
Set timers for 15, 30, or 60 minutes using the timer function. A clock plugin from the marketplace shows the time on a button.
The Elgato Stream Deck, combined with the Camera Hub and OBS plugins, dramatically speeds up video production by placing essential controls at your fingertips. Customizable buttons for prompter, recording, and productivity tasks make it a powerful tool for content creators.
"Title accurately reflects content: the video shows exactly how the Stream Deck transforms video production with a detailed setup guide."
What is the Elgato Stream Deck?
A customizable controller with buttons (6, 15, or 32) that can control applications and workflows.
00:33
Which plugin is needed to control the Elgato Prompter?
Camera Hub plugin from the Elgato marketplace.
02:18
How do you create a button to launch an application?
Drag the 'Open' function from System, then select the application from the file browser.
02:32
What function is used to start/stop auto-scroll on the prompter?
Prompter Control function with 'Play/Pause' selected.
03:01
How do you adjust prompter brightness by a specific percentage?
Use Prompter Display function, set type to 'Adjust', vertical, and step size (e.g., 5%).
03:18
How do you set a button to jump to a specific margin percentage?
Use Prompter Appearance function, set type to 'Set', and enter the desired percentage.
04:43
What is required to use the 'Preview to Prompter' feature?
A camera connected via Elgato Cam Link 4K capture card.
06:47
How do you toggle the prompter between script and display mode?
Use Prompter Mode function with toggle states: one for 'Display', one for 'Text'.
07:50
What hotkey combination captures the full screen on Mac?
Command + Shift + 3.
09:51
How do you set a timer on the Stream Deck?
Drag the Timer function, set the duration and sound, then press the button to start.
10:58
Stream Deck as Productivity Tool
Introduces the Stream Deck as a versatile controller that can speed up video production workflows.
Camera Hub Plugin for Prompter Control
Key plugin that enables control of Elgato Prompter features like scrolling, brightness, and contrast.
02:15Margin Presets for Efficient Recording
Demonstrates how to set specific margin percentages for different recording scenarios, saving time.
04:31Preview to Prompter Feature
Allows checking camera framing directly on the prompter screen, useful for solo recording.
06:20OBS Integration
Shows how to control recording, profiles, and folder access from the Stream Deck, streamlining OBS use.
08:20[00:00] you want to take the easiest way to
[00:02] record your videos If you use an Elgato
[00:04] prompter or if you record your videos
[00:06] directly on your PC using OBS what I
[00:09] will show you will make your life easier
[00:11] even when you want to increase your
[00:13] productivity or record your display to
[00:16] inspire you I will show how I use the
[00:18] Elgato stream deck and how I set it up
[00:21] of course this is a matter of preference
[00:23] and you can use it in many different
[00:25] ways for many applications but my method
[00:28] is to inspire and show you what you can
[00:30] do with this great device briefly if you
[00:33] don't know what a stream deck does it is
[00:35] a controller created by Elgato with 32
[00:38] buttons 15 or six with knobs there are
[00:42] multiple versions of this controller and
[00:44] you can set them up as you like I will
[00:46] make this entire demonstration using the
[00:49] version that has 32 buttons stream deck
[00:51] Excel if you have a smaller version the
[00:54] only difference will be about the number
[00:56] of buttons and some models also have
[00:59] knobs or small displays I consider this
[01:02] big one the best for me because I can
[01:05] have everything I want at the Press of a
[01:07] button and by the way this video is not
[01:09] sponsored I bought all the equipment
[01:11] presented in this video with my own
[01:13] money all the buttons are customizable
[01:16] via the stream deck software and if you
[01:18] are creative you can control almost
[01:21] everything with this device the buttons
[01:23] are small screens and you can also
[01:26] customize the graphic on them it's crazy
[01:29] useful now now how I use it for talken
[01:31] head video creation and how I set it up
[01:34] of course connect the stream deck to
[01:36] your Mac or PC and install the software
[01:39] and all the updates this is what the
[01:41] software looks like in the upper left
[01:43] corner you can select your device if you
[01:46] use multiple ones and under that you can
[01:49] save and select your profiles if you
[01:51] want to create multiple ones in the
[01:53] middle you can see the buttons this is
[01:55] different according to the layout of
[01:57] your stream deck if you have another
[01:58] version on the right right side you will
[02:00] see a ton of functions and you can
[02:03] install more we will get to that
[02:04] immediately how do I use it to record my
[02:07] talking head videos mainly it helps me
[02:10] to control the Elgato prompter and
[02:13] speeds up the workflow incredibly well
[02:15] on the Elgato stream deck software go to
[02:18] the Elgato market and install the camera
[02:21] Hub plugin after the installation you
[02:23] will see on the right side the camera
[02:25] Hub and various function I like to have
[02:28] a button that starts the camera H
[02:30] software to open any application from
[02:32] your computer on the right sidebar go to
[02:35] the system and drag the open function on
[02:38] the preferred button on the tab app
[02:41] files click on the folder and choose the
[02:43] application from your application folder
[02:46] or program files on Windows you can also
[02:49] add a name if you want that and now when
[02:51] you will press this button your chosen
[02:53] application will be launched in my case
[02:56] camera Hub I use the button above to
[02:58] start and stop automa atic scrolling I
[03:01] drag from the right sidebar the prompter
[03:04] Control Function and select play Das po
[03:08] when I press this button the automatic
[03:10] scroll will start and when I press it
[03:12] again it will stop I use the next two
[03:14] buttons to increase and decrease the
[03:16] brightness of the prompter screen from
[03:18] the camera Hub plugin I drag and drop
[03:21] the prompter display function I click on
[03:24] it and at the settings tab I choose
[03:26] brightness type adjust and select how
[03:29] you like it to be static and that will
[03:32] increase or decrease the brightness with
[03:34] the selected amount or slider horizontal
[03:37] or vertical I like it vertical so the
[03:40] first one I want to increase the
[03:43] brightness by 5% now I will copy this
[03:46] button select it press command C go to
[03:49] where you want to paste it and press
[03:51] command V and change the value to
[03:53] decrease the value by 5% now you will
[03:56] see a slider and increase or decrease
[03:58] the brightness by by 5% this is so
[04:01] useful I use the next two buttons to
[04:04] increase and decrease the contrast of
[04:06] the prompter display because we can
[04:08] select that with the same function I
[04:10] will copy the buttons from the
[04:12] brightness and at the settings tab I
[04:14] will choose contrast instead of
[04:16] brightness at type select adjust
[04:19] vertical and increase it by 5% on the
[04:23] next one the same but decrease it by 5%
[04:26] and now I can increase and decrease the
[04:28] contrast EX extremely fast with the next
[04:31] two buttons I like to set two different
[04:34] vertical margin size sometimes I like to
[04:36] have the margins at 52 and sometimes at
[04:40] 79 to set this I need to use the
[04:43] prompter appearance function I will drag
[04:45] it to the button at setting I will use
[04:48] vertical margins you can use it for many
[04:50] other things also at type I will select
[04:54] set because I want it to jump to a
[04:56] specific percentage not to increase or
[04:58] decrease with a specific amount I want
[05:01] to jump directly to 52% and set the
[05:04] value at 52% next I copy this function
[05:08] above and set it to 79 and now when I
[05:11] press the button to trigger 52% I will
[05:14] set the margins to 52% and when I press
[05:17] the 79% button it will set the margins
[05:21] at 79% with the next two buttons I like
[05:24] to increase or decrease the scroll speed
[05:27] but gentle with 1% for this I use the
[05:30] prompter scrolling function type adjust
[05:33] I can style I like it lighter vertical
[05:36] and step size I want it to increase the
[05:39] speed by 1% I will copy this one below
[05:42] and set it to decrease the speed only by
[05:45] 1% now when I record and for some
[05:48] phrases I need a lower speed I decrease
[05:50] it and increase it as I want with the
[05:53] next two buttons I like to scroll up and
[05:56] down sometimes I need to repeat
[05:58] something and I need to go back back a
[05:59] few lines or scroll faster a few lines I
[06:03] use the prompter Control Function again
[06:05] at the setting I select scroll and
[06:08] choose to scroll up by 1% I copy the
[06:12] button and set it to scroll down by 1%
[06:15] now I can move the text faster up and
[06:17] down on the next button I like to use
[06:20] preview to prompter from the camera Hub
[06:22] functions what does this do if you have
[06:25] a camera connected to the camera Hub via
[06:28] capture card like Delgato coming 4K you
[06:30] will see in the camera tab the live
[06:33] image from the camera and if I press
[06:35] this button it will change the prompter
[06:38] display from the prompter mode where I
[06:40] see my text to the preview mode and I
[06:43] can see myself on the screen of the
[06:45] prompter remember that to have this
[06:47] preview you need to have the caming 4K
[06:50] to connect the camera to your PC the
[06:53] capture card is around $79 at the time
[06:56] of publishing this video I will add
[06:58] affiliate links in the description
[06:59] destion for the stream deck caming 4K
[07:03] the Elgato prompter and my other
[07:05] equipment if you want to invest in
[07:06] something if you click on my links
[07:08] you're not going to pay anything extra
[07:10] but I will earn a small commission and
[07:11] this will help me keep sponsors away
[07:13] from this Channel and create more
[07:14] valuable content for you thank you with
[07:17] this button I can now simply change the
[07:19] view from prompter to preview my camera
[07:21] and check if everything is okay with the
[07:23] button above I turn on or off the
[07:26] prompter screen there are some moments
[07:29] when I I have it connected and I take a
[07:31] break and I want to have it off to not
[07:34] disturb me or redirect my attention for
[07:36] this I use the prompter display function
[07:40] and at setting I choose power now with
[07:43] this button I switch between the script
[07:45] mode where I see the text and display
[07:48] mode where I use the prompter as a
[07:50] secondary display this is useful when I
[07:52] have a video call and I use it as a
[07:54] display to put the person that I'm
[07:56] speaking with on the prompter and look
[07:59] into the lens while speaking for this I
[08:01] use the function prompter mode type
[08:03] toggle State One display and state two
[08:06] text and here I need to select one
[08:08] script the next button I use is to go to
[08:11] the next page of the stream deck if I
[08:13] want more functions and I don't have
[08:15] enough slots you can add this from
[08:17] navigation and next page this is how I
[08:20] control my Elgato prompter easily and
[08:23] fast with the buttons above I also
[08:26] control my OBS Studio when I record the
[08:29] video using OBS the first button will
[08:31] launch the OBS you can set it the same
[08:34] as you set it to launch the camera H and
[08:36] to have the functions for OBS install
[08:39] also from the marketplace the OBS plugin
[08:42] with this button I like to start and
[08:44] stop the recording I just drag it here
[08:47] and with the next one I pause and resume
[08:49] the recording with the next three
[08:51] buttons I trigger my OBS profiles I have
[08:54] one with all the settings to record 4K
[08:57] another one to record full HD D and want
[09:00] to record my laptop screen so from the
[09:02] OBS functions I drag the profiles
[09:04] function and choose what profile I want
[09:07] to trigger you need to have the OBS open
[09:09] to see the profiles the next button will
[09:11] turn on and off my search with the
[09:14] camera and the last one for OBS just
[09:17] opens the folder where I have my
[09:19] recording from the system I use the open
[09:22] function and choose the fold I have a
[09:24] full tutorial about how I record my
[09:26] videos in OBS if you are interested in
[09:28] this topic and I will add a link in the
[09:30] description this is all I control when
[09:33] it comes to OBS player simple and fast
[09:36] with the buttons above I create print
[09:38] screens and I record my lepton screen
[09:40] fast and if you find this video useful
[09:42] until now don't forget to press the like
[09:44] button and maybe consider subscribing
[09:46] thank you with the first one I create a
[09:48] print screen of the full display on Mac
[09:51] you need to press command plus shift
[09:53] plus three to do that so I drag and drop
[09:56] a hot key click on hot key and press the
[09:59] buttons combination and now when I press
[10:01] this button it will press three buttons
[10:03] for me and directly make a PR screen if
[10:06] I want to capture just a portion of the
[10:08] screen on Mac you need to press command
[10:11] plus shift+ 4 so I have another hold key
[10:14] with this combination I press the button
[10:17] and select the portion that I want to
[10:19] capture with the next button I will
[10:21] launch the QuickTime Player if you press
[10:23] command plus control+ n you will create
[10:26] a new screen recording so I press button
[10:29] to open Quick time and another one to
[10:31] create a new screen recording I press
[10:33] enter on the keyboard and it will start
[10:35] to record my laptop screen the last four
[10:38] buttons are for productivity I have
[10:40] three buttons that set timers for 15
[10:43] minutes 30 minutes and one hour
[10:46] sometimes I take a short break and
[10:48] sometimes I want to take a break to read
[10:49] for an hour so I will just press one
[10:52] button go to my reading chair and after
[10:55] one hour this timer will alert me to set
[10:58] this timer go to stream deck drag a
[11:01] timer set the amount of time and choose
[11:04] a sound now just press a button and the
[11:06] timer will start running and on the last
[11:09] button I have a clock I installed a
[11:11] plugin from the market called surprise
[11:14] clock dragged it to the button and
[11:16] selected a face you can customize much
[11:19] more things play with them and find your
[11:22] style but you can have the stream deck
[11:24] control everything have a ton of
[11:27] shortcuts and still record the video in
[11:29] a longer session than you wish this is
[11:32] why the Elgato prompter it's a blessing
[11:34] and I will give you a dedicated video
[11:36] where I show you how I use it and what
[11:39] you can do to speed up your recording
[11:41] sessions like crazy this device is Magic
[11:44] check it and transform your workflow
[11:46] into something incredibly fast
⚡ Saved you time reading this? Transcribe any YouTube video for free — no signup needed.