
What Is a Demand Zone?
43sClearly explains a fundamental concept that many traders get wrong, making it highly educational and shareable.
▶ Play Clip"Delivers practical methods to gauge trend strength, but some filler and repetition reduce impact."
This video explains how to determine if a price trend will continue by identifying supply and demand zones. It covers two main identification methods and provides a practical chart analysis using candlestick patterns and Andrius's Pitchfork.
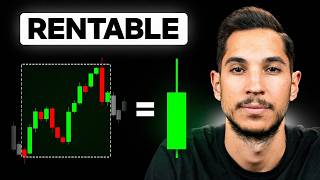
Supply zones are areas of strong selling activity forming resistance; demand zones are areas of strong buying activity forming support.
1) Support/resistance levels held on two or more occasions, 2) Large-bodied candlestick openings/closings, 3) Candlesticks with long shadows.
A long upper shadow indicates sellers overpowered buyers; the candle's high serves as a supply line.
Andrius's Pitchfork helps measure exhaustion and project price moves, e.g., a low aligning with the center line.
No indicators needed; only candlestick analysis in supply/demand zones to predict price behavior.
The opening of a large bearish candle defines a key supply zone.
When price breaks above a supply line and it holds as support, it signals a trend shift to upside.
Reading price action without indicators gives an edge; candlestick types reveal supply/demand dynamics.
After a bullish trend shift, look for demand zones to enter the trend.
Mastering supply/demand zone reading is essential for long-term profitability regardless of other methods.
Identifying and interpreting supply and demand zones through pure candlestick analysis allows traders to predict trend continuations and reversals effectively, providing a crucial competitive edge.
What is a demand zone?
An area where strong buying activity has been observed, forming support or bullish rejection.
01:34
What is a supply zone?
An area where strong selling activity has been observed, forming resistance or bearish rejection.
01:49
Name two methods to identify supply/demand zones.
Using support/resistance levels held on two or more occasions, and large-bodied candlestick openings/closings.
03:11
How does a long upper shadow indicate a supply zone?
The shadow shows buyers pushed price up but sellers reversed it, so the high becomes a supply line.
05:27
What is Andrius's Pitchfork used for?
To measure exhaustion and project price moves, such as finding a low at the center line.
06:12
What does it mean when a former supply line acts as support?
It indicates a trend shift from sellers to buyers, suggesting upward continuation.
09:54
Why is pure price action reading important according to the video?
Because it focuses on supply and demand zones without indicators, giving a competitive edge.
10:51
Three Identification Methods
Provides clear, actionable techniques for finding zones on any chart.
03:11Supply Line from Long Upper Shadow
Illustrates a specific method with a chart example, making it easy to replicate.
05:27Role Reversal of Supply Line
Key insight: a supply line turning into support signals trend change, a powerful concept.
09:54Pure Price Action Edge
Emphasizes the fundamental skill for profitability, cutting through indicator noise.
10:51Core Skill for Profitability
Stresses that without this skill, other methods fail, underscoring its importance.
12:47[00:01] practical tips so you can tell if the price will maintain an upward or downward trend, a previous high or low, or a support or resistance level. It's very
[00:13] common for traders to observe a trending market, for example, but when they try to apply the same impulse, pullback, and continuation principle that has worked on other occasions,
[00:30] the technique fails in the next market move. The key to all of this lies in understanding the concept of supply and demand zones. So, in this video, I'll explain what supply and demand zones are, why they are so important, and
[00:47] the two ways to identify them. I'll also support everything practically by analyzing a candlestick chart. So, once you've watched this video, you'll be able to tell if the price intends to
[01:02] break a level or, on the contrary, if it intends to reject it. This way, you'll not only stop losing money in similar situations but money in similar situations but also start making it. I'm
[01:22] and demand zones are, since understanding the basics of all this is crucial for efficient analysis.
[01:34] In theory, any chart shows a demand zone as a specific area where strong buying activity has been observed, potentially forming some kind of support or bullish rejection. Conversely, a
[01:49] supply zone is a specific area where strong selling activity has been observed, potentially forming some kind of resistance or bearish rejection. Going
[02:02] more practically, we can see that here a kind of support has formed. As I said, it's not a specific level, but rather a zone, an area of the chart, simply because there is more demand than supply. The
[02:17] result is that the price is not only unable to break down through that support level, but it ends up rejecting it to the upside. On the other hand, here rejecting it to the upside. On the other hand, here we have a resistance zone that
[02:32] has formed simply because there is more supply than demand. The price is not only unable to break through that specific zone, but specific zone, but the market directly forms a
[02:46] downward rejection. So, this would be the theoretical and practical way to determine what a supply zone is and what a demand zone is. But
[02:58] the reality is that all of this is much more complex. As we've discussed, there are many more important aspects to consider when analyzing a chart for trading. We'll get to the latter shortly.
[03:11] But first, I want to show you how to find supply and demand zones. There are three main ways to identify these levels. With that said, we'll move on to the second part of the video, where I'll
[03:25] show you practically how to analyze a chart using these levels to more accurately predict whether the price will rise or fall. As I mentioned, there are three
[03:39] main ways to find supply and demand zones. The first is through support or resistance levels—levels that have held on two or more occasions and therefore act as strong
[03:55] supply and demand zones. The second is through large-bodied candlestick openings and closings, indicating significant accumulations of buyers or sellers. The third is through candlesticks with long
[04:10] shadows, representing situations where bulls or bears were winning during the candlestick, but a strong opposing current reversed the situation. Next, I'm going to teach you step by
[04:26] step how to analyze a chart so you can anticipate what will happen with supply and demand levels. This way, you'll not only know if it's a better time to buy or sell, but this knowledge will also
[04:41] allow you to be profitable traders. You have to remember that in every significant price movement, you can usually detect a market point where buyers or sellers have won the battle against the
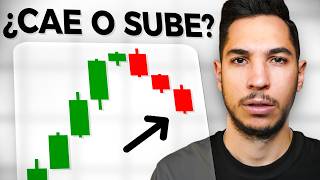
[04:56] opposing side. This is precisely what, in the long run, will give you a competitive advantage over other traders. For example, in this chart, you can see how in the price movement from number three to number four, the price
[05:11] drops a little at the beginning, but there is some selling action in the candles with the longer upper shadows. We could place a horizontal line at the most defined point, which is simply the candle with the
[05:27] longest upper shadow. In this case, notice that at some point during that candle, buyers pushed the price up to the candle's high, but sellers appeared and caused the candle to close at its lower range.
[05:43] This is how you identify the supply zone, or in this case, the supply line, since it's not It's not just a zone, it's literally the peak of this large shadow. Eventually, the price drops to form low number
[06:00] four, and then the sellers exhaust their energy because, as you can see, a clear lack of strength and a reversal form, which obviously encourages the price to
[06:12] start rising. Once that happens, one way to measure this exhaustion is by using Andrius's Pitchfork. To project low number four, you would draw the Pitchfork at points 1, 2, and 3. In this case,
[06:28] since it's too vertical, we would double-click and use the modified version I mentioned. Low number four occurs more or less on the center line of the Pitchfork, and it's not the best projection in the world, but in this
[06:43] case, it's good enough. Also, notice how low number four is marked by a fractal candlestick pointing upwards. Once the price starts to rise, you'll start wondering if the supply line can sustain the
[06:57] price action or not. This obviously implies the discipline of waiting for the price to reach the levels you drew earlier without altering them. So, the point here is that we have to remember that we continue with this line. As the
[07:12] price moves, we can see that when the market It reaches the level that when the market It reaches the level of the upper shadows, so high that we have marked, a clear reaction forms. Notice how the volatility drops in
[07:26] the bullish candles and then how the price creates a bearish candle with greater volatility twice at the levels that have been pre-established before continuing. Just one detail: notice how this is pure chart reading, pure
[07:41] price action reading, no moving averages, no Bulllinger bands, no volumes, no strange lines, no different story, just candle analysis, just analysis of what is happening
[07:55] in those supply zones and in those demand zones. Once again, the projection here is based on placing a trident at the extremes 3, 4, and 5, and as the
[08:08] price advances, we can see how the center line perfectly captures the perfectly captures the bearish exhaustion with this accuracy. The important detail here is in the price movement between point number five and
[08:21] point number six. Here we need to establish the point at which the sellers won the battle and moved strongly downwards. In this case, it is quite clear. Notice this massive bearish candle out of nowhere that has
[08:36] Moving the chart from point C to point 6, the new supply zone, or in this case, supply line, is again right at the opening of this very large-bodied candle. We've discussed this before, and in this case, it couldn't be
[08:52] clearer: sellers have won the battle against buyers. But there will be other situations where it's not so obvious. Now we know that if the price returns to this level in the near future, from point
[09:05] number six, which we've indicated and
[09:26] price behavior is, and what type of candle forms when we reach the opening of that large bearish candle. As the price starts to rise, you must pay close attention to how the price reacts to
[09:40] that level. Once the price eventually reaches it, it gives you a subtle clue about what's going to happen. Notice how the buyers break through that level without any problem, and beyond that... The supply line, which was supposed to
[09:54] The supply line, which was supposed to act as resistance, is now acting as support. All of this is happening before the price breaks the five-figure high. So, if you couldn't identify the supply line of that large bearish candle, you might
[10:09] think that sellers are about to appear. Those who were able to detect that new supply line in the form of resistance have now realized that it's no longer
[10:24] acting as resistance; it's acting as support. Therefore, the trend is no longer with the sellers but with the buyers. On the other hand, those who weren't able to
[10:37] detect that new zone are now waiting for the price to continue that bearish trend, unaware that the underlying supply and demand dynamics have already shifted.
[10:51] Note that we're not dealing with volume indicators, momentum indicators, Smart Money indicators, or anything like that. We're dealing solely with pure, unadulterated price action focused on the type of candlesticks. This is very
[11:05] important because it demonstrates that it's an incredibly powerful tool that, in and of itself, can tell you what might happen next. Obviously, adding other ingredients and extra elements can give us
[11:19] more certainty about what will happen and can also allow us to execute specific trading strategies based on specific rules. But reading the price, reading what will happen
[11:32] next, can be done without any problem through this type of analysis I'm proposing. As we move a little further, we see that the trend direction has indeed changed drastically to the upside. So from this
[11:47] point, you should start looking for demand zones, or as we've done so far, demand lines, in order to not only determine the ideal moments to join this currently bullish trend but
[12:03] also to know at what specific moment the trend is changing again. I assure you that without this ability to literally read what moves the market— liquidity, supply, demand—which is what
[12:17] moves the market, preceded by human emotion, agreed, but if there's no liquidity, no supply, no demand, it doesn't matter how much emotion there is. If you don't press the button, if you don't mark buy zones and sell zones,
[12:31] the market won't move. Without being able to... Analyzing, detecting, and processing a chart with its purest, most natural, simplest, and easiest—yet undeniably difficult and complex—is the only way to be profitable. It doesn't matter if
[12:47] you're a whiz with Elliott Wave Theory, indicators, Smart Money, or anything else. Without being able to correctly and efficiently read the
[13:01] purest part of the market—the candlesticks and these supply and demand zones—you'll never be profitable in the long run. Remember that below, in the description of this video, you'll find more links of interest, such as
[13:15] courses, tutorials, training, and other profitable trading strategies. All content is 100% free so you can continue learning as a trader without investing your own money. I'll leave this video here. I hope you liked it and that it was
[13:29] helpful, which is the important thing. If so, like, subscribe, share it with friends and family, and I'll see you in the next video. family, and I'll see you in the next video. Goodbye.
⚡ Saved you 0h 13m reading this? Transcribe any YouTube video for free — no signup needed.