Stop Recording Vtubers in Portrait (Do This Instead)
45sShorts creators expect portrait mode, so this counterintuitive landscape tip challenges the format while promising better quality and less wasted resolution.
▶ Play Clip"Delivers a practical end-to-end Vtuber editing workflow, though 'outstanding' oversells a fairly basic pipeline."
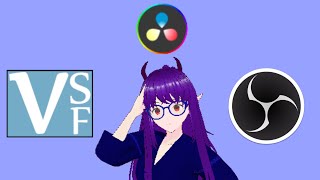
This video is a practical tutorial by a Vtuber creator, walking through the entire workflow of producing edited Vtuber content using VSeeFace for live rendering, OBS for recording, and DaVinci Resolve for editing, compositing, audio cleanup, and exporting. It covers landscape recording, green-screen setup, Fusion node compositing, and Fairlight audio polishing, ending with a direct upload to YouTube.
Start with a finished script. For 3D models, use VSeeFace to render the avatar; the advice can be adapted for 2D tools like VTube Studio, though not covered in depth.
Landscape gives 920 lines of resolution for yourself instead of 180 in portrait, allowing more room to reposition and less wasted space in saved files.
In OBS, create a new scene with a clean Audio Input Capture, a Game Capture pointed at VSeeFace, and a green Color Source dragged to the bottom so the model appears in front of it.
Most video codecs cannot capture alpha channels, so a green screen is easier. If the model has a lot of green, use a blue background instead.
Create a new project, go to the Media tab, import the video into the media pool, and set the frame rate to match the source when asked.
The Cut page is more useful with custom hardware; for regular editing, use the Edit page. Drag the clip onto the timeline.
Remove errors, unpleasant mouth sounds, and awkward silences using the Razor tool (Shift+B) and the Delete button.
Drag an Adjustment Clip onto the layer above the footage, stretch it to cover the section you want, and open it in Fusion.
In Fusion, use Shift+Space and type 'Delta Keyer' to add the node, set its background color to match your green, and adjust the gain to fix discoloration at the edges.
Use a fixed PNG, an animation, an OpenEXR sequence, or even another timeline as the background; plug it into MediaOut.
Add a Merge node and plug the Delta Keyer into the green input to overlap yourself over the background. Adjust the angle to undo landscape rotation, then reposition and scale.
Inside the Merge node, set a keyframe, move forward in time, change the element's position, and DaVinci Resolve interpolates the motion between keyframes.
Select all clips with Ctrl+A, right-click, and normalize to keep audio levels consistent. Use Voice Isolate if there is background noise.
Apply a Channel Dialog Processor, remove the expander, and use an EQ preset that compensates for the room's audio characteristics.
Go to the Deliver tab (rocket icon), choose YouTube, set a filename and title, add chapters from markers, upload a thumbnail, pick a category, add to the render queue, and render.
Why should Vtuber recording be done in landscape mode?
Because landscape gives 920 lines of resolution instead of 180 in portrait, offering more resolution and less wasted space.
00:39
Why use a green screen when recording VSeeFace in OBS?
Most video codecs can't capture an alpha channel, so a green screen is a simpler alternative.
02:22
What should you do if your Vtuber model has a lot of green?
Use a blue background instead.
02:34
Which DaVinci Resolve page does the creator recommend for editing Vtuber content?
The Edit page, not the Cut page, unless you're using custom hardware.
03:35
What keyboard shortcut activates the Razor tool in DaVinci Resolve?
Shift+B.
04:22
What does the Delta Keyer node do in Fusion?
It is the way Fusion does green screens, letting you key out the background color.
05:59
What types of backgrounds can be used in Fusion compositing?
A fixed PNG, an animation, an OpenEXR sequence, or another timeline from DaVinci Resolve.
07:22
How does a Merge node work in Fusion?
It overlaps two inputs; you plug the keyed footage into the green input to composite it over the background.
08:04
What shortcut selects all audio clips in Fairlight for normalization?
Ctrl+A.
11:57
What does the Voice Isolate feature in Fairlight do?
It uses an AI filter to isolate out your voice.
12:25
What does the creator remove from the Channel Dialog Processor?
The expander, since it doesn't really help.
12:51
How do you add YouTube chapters from DaVinci Resolve?
Use the 'chapters from markers' button in the Deliver tab's YouTube settings.
15:02
Landscape recording for resolution
A simple recording switch that dramatically increases usable pixels and simplifies later compositing.
00:39Why green screen is used
Explains the technical limitation of video codecs that makes alpha channels impractical.
02:22Fusion node graph as a pipeline
Core mental model for understanding how visuals flow and get modified in Fusion.
05:32Keyframe animation in Merge nodes
Shows how to create smooth motion without any external animation software.
10:21Normalize and clean audio
Underrated step that raises perceived video quality more than most visual tweaks.
11:45[00:01] edited vtuber content that looks good well this is a tutorial for you first I'm going to assume you've already written your script if you haven't do that first if you are using a 3D model you are most
[00:14] likely using VC face to render your model so startup VC face and select your avatar I'm sorry but I don't know a bit enough about 2D to give
[00:26] don't know a bit enough about 2D to give steps for setting up vtube Studio or the like but I'm sure this advice can be adapted for them when you are recording adapted for them when you are recording scripted content I recommend
[00:39] you record it in landscape mode the reason for this is you get 180 lines of reason for this is you get 180 lines of pixels to represent yourself in portrait pixels to represent yourself in portrait but in landscape you have 920 this means
[00:53] you get a lot more resolution to muck about with and at the same time less about with and at the same time less wasted space in your saved files you want click on the rice asterisk button to
[01:09] hide the UI and then space to remove the rice asterisk button we are going to be using OBS to do the recording within obs set up a new scene
[01:25] add audio input capture I'm just going to use my existing clean audio input capture clean means clean audio input capture clean means that it doesn't have any
[01:40] that it doesn't have any effects applied to it then we add a game capture
[01:53] I'm just going to go to a VC face then at the bottom go to a VC face then at the bottom after your game capture for zc phase you add a color source of green
[02:09] and it might pop up at the top if that happens just drag it down to the bottom happens just drag it down to the bottom so you're in front of it
[02:22] green screen in the background is because most of the video codexes can't capture and Alpha Channel so it is a lot easier just to have a
[02:34] so it is a lot easier just to have a green cat screen if your model has a lot green cat screen if your model has a lot of green in it try using a blue of green in it try using a blue background
[02:51] now start up DaVinci Resolve and create a new project then click on and create a new project then click on the media Tab and go to your videos directory it might take a while if you've got a lot of videos for it to
[03:06] load in then copy the video you're interested in working on into your media pool It'll ask you if you want to set this frame rate at this time I actually do
[03:20] so we'll change the frame rate to match then we can edit our footage in DaVinci Resolve we have two options for doing this we have the cut page
[03:35] or the edit page the cut page is more useful if you are using Uh custom Uh custom Hardware so we will be using
[03:50] Hardware so we will be using the edit page for this tutorial so just grab your clip drag it into here
[04:10] is remove any errors unpleasant mouth sounds or errors unpleasant mouth sounds or awkward silences
[04:22] shift B the Razer tool and then deleting the the delete button
[04:59] editing go to adjustment clip go to adjustment clip and pull it over into the next layer up and you should stretch it out as far as you need to
[05:20] layer by going open in fusion page
[05:32] node graph functions a bit like a pipeline where the visuals flow from media in along this Arc
[05:44] to Media out so if we want to make changes we can add nodes to filter and modify our visuals as they go through the first thing I will do
[05:59] the first thing I will do is go shift and space and request a is go shift and space and request a Delta Kia
[06:12] the Delta care is the way that Fusion does green screens so if we hold down shift now and put that if we hold down shift now and put that over the top of our Arc
[06:25] we can then go in here we set the background color background color to be the same as our green and I'm just going to zoom in and look at the edges and you can see that this
[06:38] is a bit of discoloration here discoloration here you can adjust the gain the handy thing
[06:54] handy thing is if you have your model have sort of like a little bit of a black edge around it it makes this compositing stage a lot easier now
[07:07] now you'll want to add a background so let's you'll want to add a background so let's get a background that I prepared earlier your background image you can use
[07:22] either a fixed PNG or you could use an animation or you or you could use an animation or you could use an open ex R sequence could use an open ex R sequence it's all up to you you can even use
[07:36] it's all up to you you can even use another timeline from DaVinci Resolve another timeline from DaVinci Resolve we are now going to plug this we are now going to plug this into the media out so you can now see my
[07:49] background image we are going to then add we are going to then add a merge node
[08:04] the merge node is the way we can overlap things in DaVinci Resolve so we copy into there
[08:17] our Delta care we plug it into this green knob there and that overlaps ourselves into our background
[08:32] we can then go into the merge node itself go up into this inspector and adjust the angle to undo the landscapification of ourselves
[08:49] landscapification of ourselves we can then move ourselves into position we can then move ourselves into position just our size so that we the way we want to be there we go
[09:05] we can then add some more elements some more elements for example
[09:19] which we then can add as a foreground element the quick way of adding a new merge node is to go like that is to go like that and a new merge node will pop out
[09:32] and a new merge node will pop out and again we can adjust the size and again we can adjust the size and location
[09:49] bit sensibly in front of myself
[10:05] elements into according to our script and what we want to visually convey also if we go back into the merge node we can click on
[10:21] this button here to establish this as a keyframe to establish this as a keyframe and then if we move forward a bit
[10:35] ourselves across the screen and DaVinci Resolve and DaVinci Resolve will intropolate between those keyframes
[11:16] and up to get a sort of a silly text but to get a sort of a silly text but computers process data to get a very computers process data to get a very silly
[11:31] after I've finished doing my editing and adding my doing my editing and adding my adjustment layers I go to the fairlight tab and click on it
[11:45] brings me into our sound editing software so the first thing I'll do is use control a
[11:57] is use control a to select everything right click and normalize all of the sounds which basically
[12:12] adjusts all the audio levels so that they are consistent not too loud and not too soft if I was sounds which we'll just check do you want to
[12:25] content nope if there was I'd use this voice isolate voice isolate feature which uses an AI filter to
[12:39] isolate out my voice but we don't need it in this case we are going to add some effects here gonna go Channel dialog processor that's
[12:51] normally okay I take off the expander since it doesn't take off the expander since it doesn't really help
[13:06] sounds good next I'll go into the EQ select that I've got a special
[13:18] EQ here which fixes the audio of my room a little bit so if we play that now you've already written your script if you haven't do that first that
[13:33] looks good okay apply those changes okay apply those changes and we are all ready to go and we are all ready to go you have your video you have edited it
[13:48] you have your video you have edited it in the edit tab you've used Fusion you have composed it in the fusion Tab and you've refined the sound in the fairlight tab now hit on delivery which is this rocket
[14:02] looking tab and you use this to upload it to YouTube hit on YouTube give it a file name
[14:17] tuber tutorial [Music] and and browse
[14:39] you just cast it off this you would give it a title dude thank you and in
[15:02] we go those chapters with the chapters from markers button
[15:17] and you could use this to upload your thumbnail as well category add it to your render queue
[15:37] button it will render the video and upload it to YouTube and at that time the only other thing you have to do is turn to your audience and say
[15:52] if you enjoyed this tutorial please consider subscribing consider subscribing thank you very much goodbye
⚡ Saved you 0h 16m reading this? Transcribe any YouTube video for free — no signup needed.