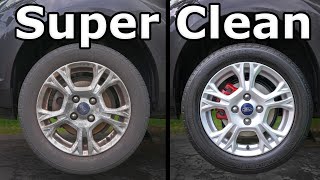

2 Years of Brake Dust: Can It Be Saved?
45sThe dramatic challenge of cleaning 2 years of neglect hooks viewers with a satisfying before-and-after promise.
▶ Play Clip"Delivers on the promise of a thorough wheel cleaning guide with detailed steps and real results, though some sections are padded with repetitive encouragement."
This video demonstrates a comprehensive five-step process for deep cleaning and protecting car wheels and tires, transforming heavily soiled wheels with years of brake dust buildup into a like-new condition. The presenter emphasizes the importance of using the right tools and techniques to avoid damaging wheel surfaces and provides tips for maintaining the results.
The video aims to show how to super clean wheels and tires, removing brake dust and deep embedded stains to make wheels look brand new. It also covers protecting tires and wheels for easier future cleaning.
The presenter intentionally did not clean the wheels for 2 years and over 20,000 miles to demonstrate the effectiveness of the cleaning process on severe buildup.
The process applies to most vehicles, including daily drivers, cars with painted brake calipers, and race cars, with the same five steps.
The five steps are: 1) rinse off loose dirt, 2) use cleaners to deep clean wheels and tires, 3) dry the surface, 4) remove stains, and 5) protect wheels and tires.
Needed items include running water (pressure washer or garden hose), a good wheel cleaner with iron decon, soapy water (dish soap), bug and tar remover, brushes, microfiber towels, clay bar, compound, ceramic detailing spray, tire gel, and safety glasses.
Rinse wheels and tires with high pressure to remove loose dirt and brake dust, preventing it from becoming airborne. A pressure washer is more effective than a hose.
To clean the barrel and behind the face, the wheel is removed using a jack and jack stands. Lug nut sockets with plastic shields prevent damage to the wheel paint.
Spray wheel cleaner on the entire wheel; it turns purple as it dissolves iron particles. Use a detailing brush to agitate, paying attention to lug nut wells, valve stem, and other tight spots.
Tires are cleaned with soapy water and a stiff nylon brush to remove dirt and anti-ozonant (blooming) that causes brown tint. This prepares the tire for dressing.
The back of the wheel and spokes are cleaned with wheel cleaner and brushes, removing tar and brake dust. Some permanent damage may be visible, but cleaning improves appearance.
Tar spots are treated with bug and tar remover and a heat gun to soften the tar, making it easier to remove with a brush and microfiber towel.
The wheel is dried with a clean microfiber towel to prevent water spots. Any remaining dirt is wiped off during drying.
A clay bar is used with a lubricant (wheel cleaner) to remove embedded contaminants from the paint. The clay is kneaded to expose a clean surface.
For stubborn stains in lug nut wells, a rotary tool with a wool buffing wheel and compound is used. This is faster and more effective than hand polishing.
Permanent damage at the base of lug nut wells is fixed with a wheel touch-up paint pen, matching the factory color and adding metallic flake.
Optionally, compound is buffed into the entire wheel to enhance gloss and remove minor stains, making the paint look deeper and shinier.
Wheels are protected with a ceramic detailing spray, and tires with a tire gel. The tire gel provides UV and ozone protection, preventing dry rot.
Tire dressings are slippery; avoid getting them on the tread or brake components. For track cars or motorcycles, do not use tire dressings on the sidewall as it reduces grip.
Tire gel is applied with a microfiber towel or foam pad, working it into the sidewall and tight gaps. After soaking, it is buffed to achieve desired gloss (matte to wet look).
The wheel surface is cleaned with alcohol, then a ceramic detailer is sprayed on a towel and buffed into the wheel to provide a protective layer against brake dust.
A damaged center cap is replaced with a new one, which is inexpensive and improves the overall look.
The wheel well is cleaned with soapy water and a brush, then protected with a ceramic trim restore. The brake caliper is sanded and painted red for a custom look.
The wheel is reinstalled, lug nuts tightened in a crisscross pattern, and the car is lowered. The final result shows a dramatic transformation from dirty to brand new.
To maintain the results, perform a lighter cleaning monthly: rinse, spray wheel cleaner, brush, rinse, and apply protectant. Special tools can clean the barrel without removing the wheel.
The video successfully demonstrates that even severely neglected wheels can be restored to a like-new condition with the right tools and techniques. The five-step process—rinse, clean, dry, remove stains, and protect—provides a comprehensive solution for wheel maintenance, with the added benefit of making future cleaning easier.
Pressure washer
tool
Garden hose
tool
Wheel cleaner with iron decon
tool
Dish soap
tool
Bug and tar remover
tool
Detailing brushes
tool
Microfiber towels
tool
Clay bar
tool
Compound
tool
Ceramic detailing spray
tool
Tire gel
tool
Safety glasses
tool
Lug nut sockets
tool
Jack and jack stands
tool
Rotary tool with wool buffing wheel
tool
Wheel touch-up paint pen
tool
Heat gun
tool
Ceramic trim restore
tool
What are the five steps to super clean wheels?
Rinse, clean, dry, remove stains, and protect.
01:24
Why does the wheel cleaner turn purple?
It contains iron decon that dissolves iron particles embedded in the paint.
06:14
What is the brown tint on tires called and why does it appear?
It's called blooming, caused by anti-ozonant that migrates to the surface to protect the tire from UV and ozone.
10:01
Why should you avoid using tire dressings on track cars or motorcycles?
Because the sidewall is used for grip, and tire dressings make it slippery, increasing the risk of sliding out.
22:10
What is the purpose of using a clay bar on wheels?
To remove embedded contaminants from the paint surface.
16:23
What tool is recommended for removing stubborn stains in lug nut wells?
A rotary tool with a wool buffing wheel and compound.
18:01
What is the benefit of applying a ceramic detailing spray to wheels?
It provides a protective layer that makes brake dust easier to remove and prevents it from embedding into the paint.
25:22
What is the recommended maintenance frequency for wheels?
About once a month, depending on driving habits and brake dust buildup.
29:23
Five-Step Process
Provides a clear, structured framework for wheel cleaning that is easy to follow and remember.
01:24Iron Decon Reaction
Explains the chemical reaction that helps dissolve brake dust, making cleaning more effective.
06:14Understanding Tire Blooming
Clarifies that the brown tint on tires is a protective anti-ozonant, not dirt, and explains why it must be replaced with dressing.
10:01Safety Warning on Tire Dressings
Highlights a critical safety consideration for track cars and motorcycles, emphasizing the importance of grip.
22:10Ceramic Protection
Demonstrates the value of using ceramic coatings to make future cleaning easier and protect the wheel surface.
25:22[00:02] going to show you how to super clean the wheels and tires on your vehicle so that brake dust and also I'm going to show you how to clean those deep embedded stains that are in your wheel that could be difficult to remove that way we could
[00:15] get this wheel looking brand new and after it looks brand new I'm going to the next time you clean the wheels the brake dust comes right off and finally I'm also going to show you how to clean and protect the tire surface that way
[00:28] not only do your tires look brand new but they are also protected so that they wheels are incredibly bad you do not want your wheels to get build up like damage the wheels surface and no amount of cleaning is going to fix that You'
[00:42] case it's like that because I actually didn't clean the wheels for 2 years and over 20,000 Mi specifically for this video so I could show you guys if we new you'll have no problem cleaning your wheels and making your wheels look brand
[00:56] new another thing is I decided to pick this car to clean because this is a typical daily driver it's a four-door sedan it's used to go back and forth to sometimes used to go on vacation and that's how the brake dust builds up now
[01:09] car for most of the video this process applies to pretty much any vehicle out with painted brake calipers or a race car you take to the track or just a video you'll be able to clean your wheels and make them go from this to
[01:24] wheels and make them go from this to this or this to this or this to this and amazing results you just saw there are five simple steps the first step is to any loose dirt off the surface the second step is to use your cleaners and
[01:38] deep clean those wheels and tires then after that the third step is to dry dry surface to work on then our fourth step is to remove any stains from the wheels and then our fifth and final step is to protect both the wheels and tires
[01:51] so they stay looking great and they're easier to clean and maintain and to everything you're going to need so you're going to need some running water pressure washer pressure washer definitely works better but not
[02:04] regular garden hose to show you guys you could get awesome results with just a hose then you're going to need your cleaners now this is very important get a good wheel cleaner that works on all different types of Wheels this is safe
[02:16] on every single type of wheel Chrome aluminum painted painted brake calipers this won't damage any wheels at all so you don't have to worry about it some of wheels and stain them and you just
[02:28] good also has iron Decon in it which is great so this is the wheel cleaner I'll be using then we have our soapy water which is just a little bit of dish soap because it's slightly basic and it cleans tires very well and then we also
[02:42] have our bug and tar remover to remove the tar that's commonly found inside the cleaning we're going to be using brushes to agitate all that dirt and get that for getting into those tight spots if you've never used brushes before pick up
[02:56] a set trust me it's inexpensive and it gives you that extra clean they just everything's clean we'll rinse it down and then we need to dry it and to dry we're using microfiber towels and these are old towels don't use brand new
[03:09] towels they're clean but they're stained and old use your new towels for your paint work use your old recycled towels for your wheels after everything's dry then we'll remove all the stains on the wheels using clay bar and compound I
[03:21] perfect and then finally after everything's all clean We'll add our protection layer which for our wheels will be a ceramic Det detailing spray and for our tires will be a tire gel and this has UV protection and ozone
[03:34] protection so your tires don't dry rot and then the last thing we need to do is get our safety glasses on so these are all the tools and products you need to get the job done I'll be sure to make it really simple for you and Link all them
[03:46] in the description so you can easily find them and with that said let's go find them and with that said let's go get to rinse down your wheels and tires to remove any loose dirt debris brake dust
[03:59] the wheel so when rinsing off the wheel and tire just use whatever the highest and don't worry about making it look clean the whole point is to wash away any loose dirt or brake dust so it's easier to clean in the next step and so
[04:12] the brake dust doesn't get airborne that way you're not breathing it in as you work now you can see how a garden hose doesn't remove this caked on brake dust well watch what a pressure washer could do and what a difference so if you have
[04:26] pressure washer to rinse this down you'll get so much more breake dust off using a regular hose that way I could show you guys we could still get awesome results so we're done rinsing this down let's move on to the next
[04:43] use our cleaners and clean the wheel but this is a super clean video so we want of the wheel where the barrel is and behind the face of the wheel so in order to do that let's remove the wheel so chalk off the rear tires slide your jack
[04:56] under the lift point on the car and Jack the car up so the tire comes off the ground then you could slide a jack stand under the frame of the car like so and weight of the car is on the jack stand
[05:08] up so it's slightly touching the lift point and this is just a safety backup once the car is safely on jack stands I always like to grab the car and give it a good shake to make sure it is nice and solid and it is we have the Jack as a
[05:22] backup we're good to go here so let's remove the wheel and I want to give you these lug nuts without damaging the wheels by accident and that is using lug nut sockets like this so a regular socket is made of uncoated metal if you
[05:35] go to put it on the lug you could see that if we hit over here on the wheel we because the metal is harder than this paint so they have something called wheel socket has this plastic shield on
[05:47] against the wheel if you hit against the wheel nothing happens so we'll use these instead that way if this hits the Wheel by accident we don't damage the wheel good so now we can remove all the lug nuts using the lug nut socket
[06:01] it to where we're going to work and one last thing we want to do is make sure we that way we could clean inside of it all you need to do is push from the back and it pops right out like that all right so now let's clean the wheel and all you
[06:14] detailing brush so spray the wheel cleaner on the whole wheel and this cleaner has iron Decon in it so you're going to notice it turned purple as it dissolves the iron particles embedded in the paint of the wheel and this is
[06:26] buildup so spray down the entire wheel and then spray the cleaner into your detailing brush to lubricate the brush now it's as simple as brushing down the middle by the lug nut Wells since it's a big flat surface and then I like to
[06:40] brush around the rim of the wheel and one spot many people Miss is the tight your brush and work that cleaner in there it's very easy for breake dust to damaging the paint on the wheel so clean it out good so work your way around the
[06:54] entire rim and don't be afraid to brush down the tire as well to clean off any on it another spot that doesn't get cleaned well is over by the valve stem because the valve stem gets in the way and this is where the brush truly shines
[07:06] brake dust and work that cleaner in there and if you need switch to a spots like around the valve stem so work that cleaner in there and let's rinse it what to expect look at all that brake dust we removed that was 2 years of
[07:21] brake dust buildup you can see we do have some staining right there but don't removal step more importantly you could see where most people Miss around the valve stem we got that nice and clean
[07:33] this cleaning step is simple I like to use the larger brush to clean more area quickly like on the face of the spoke and then where the large brush doesn't spokes I switch over to the smaller brush and that fits in here perfect now
[07:47] the nice thing about these brushes is they have a plastic base and a wooden damage the paint as you brush down your wheels so now as you clean your wheels use brushes and a good wheel cleaner the 2-year-old Caked Up brake dust just
[08:01] melts away with a few swipes of the brush and it's just so rewarding to see guys don't get boarded let's speed up through this cleaning process and get the rest of the wheel done this is a really easy job when you have the right
[08:13] you work that cleaner into every part of the wheel with the brush and you're beautiful we brushed down the entire wheel now it's very important that you because it could stain the wheel and that wouldn't be good so after brushing
[08:27] wheels so it doesn't dry and you can see all that sudsy brake dust just melt off all that sudsy brake dust just melt off the wheel and wash away and holy smokes we're not even done cleaning yet so another spot that people tend to forget
[08:41] about cleaning is inside the lug nut Wells this is a difficult spot to get to inside of there so spray each of the wells down with a wheel cleaner and then and clean out that brake dust you can
[08:54] also don't forget to clean the center cap hole and I'm using a toothbrush rinse all that Dirt away and unfortunately these lug nut Wells are I have some tips and tricks in the stain removal step that'll make these look
[09:09] that a lot of people forget about are the lug nuts you can see there's a lot your brush with some wheel cleaner and brush away that brake dust after you brush it on all sides then we can rinse it off and look at how clean this lug
[09:23] it's attention to the little details like this that's going to make your wheels look super clean when you're done so let's brush down all the log nuts and then rinse them off and now these are clean and good to go all right so with
[09:36] definitely some stains in here I'm going to show you how to remove those don't worry the next thing we need to do is anytime you want to clean your wheel you could add your tire dressing you don't want to add Tire dressing to a dirty
[09:49] tire but when you clean your tire you're going to remove the protective coating so you see how this tire has a slight Brown tint to it and most used tires have that brown Tint that's really not dirt We just cleaned this off with some
[10:01] and then rinsed it off yet it's still Brown the reason why tires get brown is because that's anti oate that's built into the tire and then anytime the tire to the surface in a process called blooming and that anti- oate has a brown
[10:16] that's on there because it prevents the tire from dry rotting it prevents UV rays and ozone from damaging your tire and guess what we're going to clean it idea and it wouldn't be if you didn't replace that protectant with another
[10:30] protectant so this is going to make our tires look new and still protect them so just keep that in mind anytime you clean your tires you need to add a protective spray it down with some soapy water and if you look closely the sidewall of a
[10:43] tire isn't a smooth flat rubber surface it has designs letters and numbers which dirt so we want to deep clean into the texture to get that dirt out and while great to spread the soapy water onto the tire surface a nylon brush like this
[10:58] with stiff bristles works really well for getting deep into the textured surface and cleaning out all the dirt and anti oate so start with your soft bristle brush and spread the soapy water across the whole sidewall of the tire
[11:10] soapy water is slightly basic which makes it really good for cleaning rubber like your tire so after you brush it down let it soak and dissolve away the brush it down with that stiffer nylon brush and notice the white suds are
[11:24] oate coming off that's what you want to see this will clean the tire really good so the dressing could bond directly to the tire's surface and that'll help make slinging off the tire when your wheels are spinning so the front of this wheel
[11:38] and tire cleaned let's flip it over and do the back now we don't need to clean see this so just let that anti- oate stay on there and do its job but we do part which you can actually see there are stains from tar and also breake dust
[11:53] spokes I don't think these ever been cleaned look at how dirty those are that's crazy so let's see see what we could do back here so use the wheel wheel as well as the spokes and notice how quickly this turns purple that's
[12:06] from the brake rotor comes off and embeds itself onto the paint of the dirt on the wheel and work that cleaner in there and after you're done brushing it all down you can rinse it all off and you can see how much cleaner it's
[12:20] say the back of these spokes have probably never been cleaned since the car was new which is unfortunate because these will be really stained and probably permanently damaged and honestly that's a lot better
[12:32] than what I was expecting check out this before and after so you can see how clean we got that one spoke but this is the perfect example of permanent damage get it not everybody's going to clean the back of their wheel and how often
[12:44] are you actually going to do this but you could see that brake dust is embedded in there and then it corroded and that's just not good so this is a super clean video I am going to quickly well quickly for you guys very long time
[12:56] for me clean the back of all these spoke so here's a before and after now let me and you can see we have a bunch of tar right here so spray it down with the bug and tar remover and work this in there with a stiff bristle brush and the stiff
[13:11] which is usually stuck on the wheel pretty good so take your time and really work that tar remover in there and then when you're done rinse it off and you can see all the tar we removed here's a before and after all right so that came
[13:24] right here unfortunately that is bare might have been brake fluid from maybe a service at the dealer where the brake wheel and just kind of pulled here and then the brake dust and tar accumulated
[13:38] there's no more paint there either way it's cleaned up now and this is looking look at the barrel of the wheel you can see we have some tar here here and here there's these little black specks those are all little tar specs that we could
[13:53] much better so just get a brush with some tar remover on it and brush it into the tar spots then we can get in there with our microfiber towel and rub those wheel now these tar spots are on there pretty good and they aren't coming up
[14:07] with our towel but don't worry I have a trick to make this easier and that trick up all the tar spots and let me show you how amazing that works so get your heat and what this is going to do this is going to soften that tar it's going to
[14:21] the tower remover just be careful you don't heat up the wheel too much cuz you should be able to touch it no problem it shouldn't be super hot good let's brush in some toar remover and already you can see it's coming off a lot easier then
[14:34] this off and don't be afraid to use that there to pull up that tar and beautiful look at that it looks brand new I mean look at this before and after so the inside of this wheel is looking way
[14:48] are stained and don't worry I will show you how to remove them in the stain removal step but overall this is looking a lot better than what we started with cleaned up up now we can flip it back over give the face of the wheel one more
[15:02] wheel is clean so we're ready for our next we don't let any of the water or even the chemical air dry onto our wheel
[15:16] because it'll leave behind water marks which stain the wheel so use a clean dry microfiber toel to dry the wheel down and as you're drying you might notice the cleaning step but don't worry it should come right off with your drying
[15:28] towel like that so wipe down the entire wheel to dry it and at the same time might have missed then flip the wheel over and repeat the process on the back side of the wheel as well so with the wheel completely dry just take a look at
[15:41] how awesome this wheel is coming out it is looking absolutely amazing and we're not done yet you can still see we have some staining here which is definitely an eyesore we need to get rid of that so let's move on to the next
[15:57] pretty simple and we have two ways of doing this first we have our clay bar going to start out with our clay bar and there's different types of clay bar we then we have our mild and then we have our most aggressive on this side you
[16:11] always want to start out with the least aggressive so let's start with this so let's start by removing this stain right here and you don't need this entire clay bar just pinch off a little piece like that now it's important to understand
[16:23] how clay bar works this is a soft synthetic clay material as you rub it against your paint it's going to going to pull out any contaminants embedded in going to embed into the clay now anytime you use clay bar you always want to use
[16:36] directly on a painted surface because you could Mar your paint most clay bar this and that would work perfectly fine but since we're working on the wheels lubricant and it'll also help clean and remove that brake dust as we clay so
[16:51] then get your clay bar in there and with medium pressure work it back and forth little bit harder then get in there with a microfiber towel to clean it out and check this out that's what we started with and here's the stain removed not
[17:06] bar you can see all those black specks in our clay bar that's all the contaminants that we just took out of the paint and transferred into our clay and after you get all those contaminants in there what you do is called kneading
[17:20] you just knead this so that you get a nice new clean surface you can see how can go and use this clay bar on the next stain over here without scratching the wheel cleaner so we can lubricate our clay then rub the clay back and forth to
[17:34] it's pretty narrow in here so you might have to get a little creative with how the area clean with your microfiber towel and look at that here's a before dirt and break dust that was embedded in these Wheels I mean look at that so now
[17:49] the wheel face is stainfree and looking great and while the spokes and face are looking great look at these lug nut Wells they are super stained and look going to get these clean so our clay bar did a pretty good job but that's pretty
[18:01] out so now let's move on to the compounds which hopefully will be able to get these nice and clean now as you can tell these lug nut Wells are very stained so stained that doing this by hand is just not efficient it's going to
[18:14] you have an electric rotary tool like this this is going to save you a ton of time and get you great results let me show you so your rotary tool is going to come with a kit like this and in the kit there's going to be an adapter with
[18:27] almost like a screw at the end to grab that and grab one of these wool buffing wheels now you just want to screw the adapter into the buffing wheel and screw then slide that buffing wheel and adapter onto the rotary tool and tighten
[18:41] that down perfect now just get a little bit of compound on your finger and rub it into the lug nut well and then get your rotary tools starting on slow and start compounding the sidewall here to remove all that staining if you want you
[18:53] go crazy you don't want to damage the paint underneath and you don't want to overheat it it's better to take a little bit extra time and not damage your wheel then after buffing out the stain let's get in here with our microfiber towel
[19:06] and clean it up and check out these results here's a before and after this came out great so I'm going to repeat this process in the rest of the lug nut to make this come out so clean I mean just take a look at the difference
[19:20] before and after now unfortunately even after the stains are removed you can see there is permanent damage at the base of the well so the fix is to use a wheel touch-up paint pen and I already wiped this area down with alcohol so that the
[19:33] just squeeze the paint pen and push the tip into the area that you want the paint isn't specific for this Ford silver wheel but it matches almost perfectly to the factory silver it even has some metallic flake in it which
[19:47] helps the touch-up paint blend in nicely so work that paint pen around the entire perimeter and look at the results before and after what a difference now as we let these dry there's one more thing you can do you don't have to but you can do
[20:00] it to make your wheel look super glossy and that is to get some compound on a towel and buff it into the entire wheel if your wheel has glossy paint like this when you compound it you could buff that paint to make it look even glossier and
[20:12] compound into the entire wheel with medium pressure and once you do that part of the towel and wipe down the wheel to remove any compound residue that way we have a nice clean glossy surface this will only take a few extra
[20:26] minutes to do and is totally worth it cuz it makes a big difference now while small chips on the face of the wheel so let's touch this one up right here and while this isn't a perfect fix it does make that damage almost disappear
[20:38] especially from a few feet away and I saw another small chip right over here so let's touch that up perfect all right so the front of the wheels completely cleaned all the stains have been removed and now this paint workor is super
[20:50] glossy look at that shine that metallic is standing out so much more now this yet with the protection step where it's going to add another layer of gloss and let's flip this wheel over and you can see how stained and discolored this
[21:05] Barrel looks so let's fix that so get some compound on your Rag and just like compound into the paint work and not only will it remove the stains but it's going to give the paint a deeper gloss just look at that now there are a decent
[21:17] barrel like this right here so you can touch them up and make them less visible plus this helps prevent future corrosion now is that perfect no but once it dries remember this is the inside barrel of a wheel you're not really going to be able
[21:31] to see it very easily and I just want to remind you guys of what we started with about 8 years worth of brake dust buildup so with all the stains removed from the inside of our wheel that is looking super clean and all the stains
[21:43] that's also looking super clean let's that's also looking super clean let's move on to our last here because these wheels and tires are looking super clean and this looks
[21:57] more thing we need to do and that is protect our Wheels with a ceramic detailing spray and protect our tires with Tire dressing so let's start with the tire dressing first now real quick I do have a very important safety concern
[22:10] are very slippery it's important that components if you do spray it down with some soapy water and wipe it away to clean it off also if you have a car that you take to the track or a motorcycle
[22:24] it's very important you do not use Tire dressings at all the sidewall of your tire specifically this top portion right here is used for grip in your race cars see how it's all rough and you do not want to make that slippery cuz then
[22:38] motorcycle whether it's on the track or the street the sidewall is actually used want to slide out by accident because you use tire shine and I just wanted to cuz I thought it was very important now when applying a tire dressing I prefer
[22:53] using a tire gel over a spray the gel gives me a lot more accuracy I could get worry about overspray or getting it on the driveway and I could control the do I want it to look soaking wet and super glossy and to apply the tire
[23:08] dressing what you could use is a foam applicator pad like this or what I like to use is a microfiber towel folded to the same width as the sidewall so the across the entire width of the towel like that and then you want to rub the
[23:21] dressing into the towel that way when we apply it it goes on evenly now applying along the sidewall working that dressing into the tire so that it evenly covers the surface now a spot a lot of people tend to miss with their Tire dressing is
[23:34] tight Gap right here and that just doesn't look good so a little trick is and then get your brush and then work your tire dressing into that Gap so you don't miss any spots and the gloss is nice and uniform across the entire
[23:48] detail when you're doing a super clean that much better and you could also use that brush to work Tire dressing into the sidewall of the tire again the gold just to not have any dry spots and coat
[24:00] this is really simple and I think you understand what needs to get done work the whole tire so that you have one uniform glossy sidewall and no dry spots that you let it soak in for a few minutes so it absorbs into that rubber
[24:16] kind of built up over here that's going to sling that's going to shoot off when the tire spins so even if you want it super glossy we have to lightly buff look just lightly buff the Tire to even
[24:29] on the surface and now you have that dripping wet look now if you want more of a matte finish instead just buff the tire with more pressure and remove more matte finish the dressing is still absorbed into the tire and still on the
[24:42] surface protecting it but it doesn't have that same glossy shine so it so you have a better idea of what each finish looks like this is the original clean but undress tire and here's that matte finish and then here's that
[24:55] do either of those or anything in between it all depends what you prefer so I personally like the look in between the two extremes I don't want it to look matte but I don't want it to look soaking wet so I have a slight gloss on
[25:08] here it makes the tire look new but you could also tell that it's been taken care of not only that it has a layer of protection on here so UV rays and ozone tire protected let's go protect our wheel and to protect the wheels we're
[25:22] using a ceramic detailer and a new microfiber towel so before we add our wheel with alcohol and this makes sure the wheel surface is clean there's no wheel cleaner there's no tire shine no compound or anything like that it's a
[25:35] clean bare surface for our ceramic detailer to bond to now a few minutes spray down the microfiber towel with the detailing spray and then work that detailer into every nook and cranny in that wheel and as you're doing this make
[25:48] the tire so you don't get tire shine on your towel same thing with the barrel of the wheel clean it with alcohol then spray down your towel with the ceramic detailer and buff the entire Barrel to coat the surface so it's protected from
[26:00] brake dust and so it comes off easier in the future good and the last thing to do is do something about this center cap unfortunately you can see it's all bubbling up here there's nothing we could really do besides replace it with
[26:13] a nice new one these are very inexpensive to buy so out with the old and in with the new so let's get this lined up and snap it in place good and then my favorite part peeling the protective plastic off and that looks so
[26:26] much better just look at how clean this whole thing looks unbelievable the attention to detail is what a super clean is all about little details like this really make all the difference and now we've officially finished our fifth
[26:39] this stuff is great but don't think it's going to prevent break dust from getting collect it's just going to make it a lot protect it so the brake dust doesn't embed into the wheels as easily so now
[26:53] let's go get this installed on our car and see how it looks but real quick this this is looking old and Rusty and dirty and the same thing with the wheel well disgusting and we could clean that up real quick to make it look that much
[27:06] brand new wheel on here and have that looking bad now cleaning your wheel well rinse down all the dirt off these plastic liners then get your soapy water and spray it down and use your brush to agitate the dirt and work that soapy
[27:20] water in there then rinse all that off and dry it with a microfiber towel so finally we're going to be using a ceramic trim restore so not only are we going to be bringing back that dark Rich plastic color but we're also going to
[27:34] add a layer of protection so the plastic doesn't get as dirty as quickly so buff the product into the plastic and check it out here's a before and after and this isn't just for looks water beads up on the liner now which makes it so that
[27:47] dirt doesn't stick as easily and it also makes them easier to clean so let's do beautiful so with the plastic trim cleaned and protected it is looking cleaned and protected it is looking great now we have one L thing we need to
[28:00] do so I think you guys know me pretty well by now I can't keep Parts looking old dirty and Rusty I have to clean them up especially since we have these brand new looking super cleaned Wheels going on here so what I did is I sanded down
[28:12] with some black spray paint and then I sanded down the brake caliper and I hit Red's going to look really good with this dark gray also red gives you like something like that so they look awesome got some new brakes on there and check
[28:28] out how good it looks with the super clean wheel installed what a difference down the lug nuts in a crisscross pattern good and then we can lift the car up a little remove the jack stand and then lower the car to the ground and
[28:42] remove the Jack from under the car and there you go those are the five steps to super clean your wheels look at how amazing these came out they look brand spanking new and remember what we had to work with these wheels were not cleaned
[28:56] for over 2 years the dust was Caked Up There were stains everywhere and now take a look at it this is a transformation you could be proud of and it just makes driving your car around that much more enjoyable when you get
[29:09] that much more enjoyable when you get amazing results like wheels you want them to stay clean so to do a super clean every single time you clean your wheels you might never
[29:23] how much you drive and how quickly the brake dust builds up maybe once a month or so rinse down the wheel get your wheel cleaner spray it down get your detailing brush into those tight nooks and crannies you can't normally get into
[29:36] keeping the wheel on they make these things which go in here so you can clean the inside barrel of your wheel without taking it off rinse it all down and then finally hit it with a protectant so it stays clean and looking amazing so there
[29:49] wheels and the results speak for themselves as always I hope this video it a thumbs up if you're not a subscriber consider consider hitting that subscribe button and all the tools and products I used in this video will
[30:02] be linked down in the description so you could easily find them I'll also put a link to all the other super clean videos including how to super clean your paint super clean your engine bay and how to super clean your interior
⚡ Saved you 0h 30m reading this? Transcribe any YouTube video for free — no signup needed.