

Why Retail Traders Fail at Supply & Demand
55sChallenges common retail trading habits and promises institutional secrets, sparking curiosity and engagement.
▶ Play Clip"Delivers exactly what the title promises—a detailed and actionable course on institutional supply and demand zones, with minimal fluff."
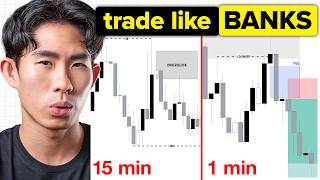
This video explains the logic behind institutional supply and demand zones, showing traders how to identify areas where large order flow creates imbalance and drives price. It teaches two practical drawing methods (range and pivot), defines what counts as a valid mitigation, and emphasizes how to combine zones with market structure, liquidity, and timing for higher-probability trades.
Most traders randomly draw support, resistance, or supply/demand boxes, then get stopped out. Institutional zones are where price exploded from with real intent and order flow imbalance, not arbitrary levels.
Success in trading requires the right trade idea, at the right location, at the right time. Supply and demand zones are the location piece, while market structure shows who controls price.
A demand zone is where buying pressure entered aggressively enough to push price higher. A supply zone is the opposite—selling pressure aggressively pushed price lower. They mark the origin of institutional order flow.
Price tends to gravitate toward these origin points. Institutions may still have unfilled orders, so when price returns to their entry, they deploy the rest, causing reactions at the zone.
Using the box tool, mark the entire consolidation that led to the imbalance move—the full high/low range—and extend it to the right. This works when there is a clear consolidation range.
If there is no clear consolidation, mark only the pivot candle that directly caused the breakout or reversal. It is much more refined, giving higher risk/reward but a greater chance of missing the trade.
Test the range and pivot method over 100 trades each to see which one suits your style and stick consistently. The winner will be based on your statistical results, not random preference.
Use the fib retracement tool to find the 50% level of the zone. A pullback only counts as a valid mitigation if price reaches the 50% level; otherwise it is just efficient noise and the zone might still hold.
Unmitigated zones (not yet reached the 50% level) are likely to be respected in the future. Mitigated zones may already have a large part of institutional orders filled, so price may blow through them on a revisit.
Do not blindly enter on a zone. Wait for other confirmations: bullish/bearish market structure, liquidity sweeps, a plausible volume shift, or a lower-time-frame structure shift to confirm entry timing.
Institutional supply and demand zones aren’t lines to draw randomly, but the origin points of critical order flow. Mastering both the range and pivot methods, applying the 50% mitigation rule, and layering in confluence—structure, liquidity, and entry confirmation—can turn a static zone into a high-probability trading plane.
What is the definition of a demand zone?
An area where buying pressure entered aggressively enough to push price higher.
02:24
What is the definition of a supply zone?
An area where selling pressure entered aggressively enough to push price lower.
02:56
What makes a zone institutional rather than retail?
Institutional zones are the origin points of strong, unbalanced order flow where price exploded with real intent, not random support/resistance.
00:29
What are the two methods taught to draw supply/demand zones?
The range method (draw the full consolidation) and the pivot method (mark the specific pivot candle that led to the breakout).
10:20, 14:38
How do you determine whether a level has been 'mitigated'?
Pulled back into the zone, it must reach the 50% level of the zone (using fib retracement) to be counted as a valid mitigation.
23:30
What’s the trade-off between a pivot refinement and a range zone?
A refined pivot zone gives higher risk/reward and precision but also a greater chance of missing the trade because price may not enter the zone.
16:21
According to the trainer, what is the biggest mistake retail traders make with supply/demand?
They draw random boxes everywhere and trade them without considering order flow and the actual origin of the institutional move.
00:01
Why should you combine supply/demand with market structure?
Because structure tells you who controls price (buyers/sellers), and zones tell you where price is likely to react. Combining helps filter low-probability zone signals.
01:38
Real institutional zones are not literal boxes
Shifts focus from drawing random levels to understanding origin points of the move — the core mental model of CTFM.
00:29Definitions: demand vs supply
Contained the clearest 3‐sentence definition of the two building blocks, making it easy to teach to beginners.
02:24The 50% mitigation rule
Gives a quantitative trigger to judge if price has truly reached a zone, preventing guesswork and false signals.
23:30Mitigated vs unmitigated zones
Explains why some zones hold forever and others break on the next conditional visit; integrates the core order-flow logic.
26:40Confluencing contrast insights
Warns against trading zones in isolation, emphasizing the need to stack structure, liquidity, and confirmation for a high-probability setup.
30:42[00:01] demand is just drawing random boxes on the chart. So, they mark up every little zone they see, wait for price to pull back, and then they get destroyed when the level fails. But, real institutional supply and
[00:16] But, real institutional supply and demand is not about drawing more zones. The market leave clues, and some of the most important clues are the zones where the price exploded from with real intent.
[00:29] Not random support and resistance levels, not random retail supply and demand zones, not weekly or pullbacks just like this. I'm talking about the just like this. I'm talking about the areas where imbalance entered the market
[00:41] so aggressively that price had no choice but to move. That is the real logic behind institutional supply and demand. And once you understand that, you stop marking noise and useless support and
[00:55] resistance levels and zones that don't matter, and start focusing on the levels that price will actually respect. So, with that being said, welcome to episode five or four. I I kind of lose track of like which episode this is. I just know
[01:10] that it's a freaking awesome episode. And it's time for us to talk about one of the most important concepts in trading, and that is institutional supply and demand zones. This is the location piece of the puzzle. I
[01:24] fundamentally believe that success in trading requires you to get the right trade ideal at the right place at the right time. And this fits into the right place. This is the
[01:38] today we're going to talk about institutional supply and demand zones. lesson, and market structure tells you who is in control of price, supply or demand, buyers or sellers. Supply and demand zones helps you
[01:54] tells you like where price is most likely going to react. Where price is most likely going to reverse from or cause where price is So, if you can combine market structure with supply and demand, you can make
[02:09] sense of the complexity of the market itself. through theory first and then later we go to the charts and try to apply this. So, what is a supply and demand zone? A demand zone is basically an area where
[02:25] buying pressure entered aggressively enough to push price higher. definition of a demand zone. Put it in simple English, it's basically a point of interest, it's basically a zone where there's a lot of
[02:41] buying volume, right? That caused price to break out of this consolidation to Okay, so this is the price point where institutions entered for a large amount And then for the supply zone is the opposite. A supply zone is an area where
[02:56] selling pressure entered aggressively enough to push price lower. So, basically it's the zone, it's the origin point when institutions entered for a large amount of sell order, creating a lot of selling pressure and
[03:10] momentum, causing price to break out of this consolidation to the downside. This zone represents areas of imbalance where one side clearly overwhelmed the That is why we call them demand zone and supply zone, right? Demand zone
[03:24] basically tell us that buyers have overwhelmed the sellers and there was so to push to the upside. And then supply there's so many selling pressure and volume and momentum that caused price to
[03:38] break out to the downside. Now, the reason why these institution zones matter is because these are the areas where price is gravitating toward. understand that whenever you go into the chart and you see strong move where the
[03:54] market move down very aggressively or up very aggressively, they usually have an origin point. And those origin points next. Okay, so when price returns, it will
[04:10] most likely react to the origin point again and then continue moving down even So, once again, I want you guys to understand why are we trading this? I don't want you to just understand the theory but just trying to memorize it. I
[04:23] want you to actually understand the core principles of supply and demand zones. Supply and demand zones matter because they are the footprints of strong institutional order flow. It's basically like, you know, big banks
[04:37] are telling you, "Hey, man, I've entered at this price point. But I haven't finished my sell orders yet, right? I still got a bunch of sell the way down here, guess what? I don't want to sell right
[04:49] here, right? I want to wait for price to come back to my origin point, right? initially. And then once it does, then I will dump another bunch of like billion dollars worth of sell orders.
[05:02] So, that is the fundamental principle of supply zone, right? It allows you to know where institutions have entered in the past and is most likely going to enter again. Okay, that's the core principle of every
[05:15] institutional zone which I'm about to teach you over the next few lessons. Not just supply and demand zones, but also flip zones and order blocks and All right, but for now, let's, you know, just take things one step at a time and
[05:28] just first understand uh supply and demand zones. So, this is really what we call the order flow, right? Remember when we talk about how price have to move from phases of
[05:40] balance to imbalance to balance to imbalance. So, applying this same concept right here, you will know that after a consolidation just like this, move out of this consolidation with a lot of imbalance, right? That's the next
[05:54] phase of the market. So, as a result, it break out to the downside, which tell us that, "Okay, cool. This is the consolidation that led to this imbalance move to the downside. This is the origin point, and this is where we can mark up
[06:06] So, remember, the market needs to come back to fair value. The market needs to seek balance again. So, as a result, it's more likely going to make a pullback, right? To this same supply zone, which
[06:19] it just got out of, filling the remaining sell orders, and then continue with the prevailing downtrend to the downside. So, this is where retail traders, or even institutional traders, will be looking to short, right? They'll
[06:34] be waiting for price to mitigate the supply zone, waiting for price to pull back to the supply zone, then they enter for sells. how to draw and identify supply and demand zones on a chart. So, just bear
[06:47] Now, basically, just understand that it's a supply zone is basically a zone where price paused just like this, or consolidate briefly, sellers step in
[07:01] very aggressively, and cause price to expand lower, and then this is where we can expect price to pull back to the supply zone, and once that happens, we can expect the downtrend to continue, right? Price will
[07:14] just continue moving downwards just like this. So, demand zone is pretty much the same thing, but you look at it from like upside down. So, this is where you can see price consolidate just like this.
[07:27] Later on, huge amount of buying volume, huge amount of buy orders step into the market, causing price to break out to the upside. And as a result, because the market is always seeking fair value, it's going to come back down, make a
[07:39] pullback, make a retracement to the demand zone, and this is where buy orders, and this is also where I can look for longs to trade the continuation of the move itself. So, I have put like a little tip right
[07:53] here for you, and that is to look for imbalance in price to spot supply and So, if you're having trouble just identifying supply and demand zones, use your naked eyes, scan the charts, and look for big juicy candlesticks.
[08:08] to us that there's a lot of imbalance in price, which indicate to us that there's a lot of buying or selling pressure, and all you have to do after you find the imbalance is to find the origin point of
[08:21] the imbalance. Where was the area that led to the and demand zone. zone, the more important that zone usually is, because it just tell us that
[08:34] there's a lot of institutional volume at that price point. So, the next time price comes back up to that price point, it's most likely going to respect it. So, the next thing I want to do to you guys to is to like really just show you
[08:49] how to draw these supply and demand zones. Because as you guys know, I like to just keep things very simple, mechanical, and repeatable, because whatever that is simple, mechanical, and repeatable is scalable, right? So, I'm
[09:03] going to give you two methods to identify supply and demand zones. If you methods, you'll be fine, right? You won't have any trouble identifying these So, once again, what's the the tip that I just gave you? The tip was go and
[09:17] identify imbalance. Go and identify the big juicy candlesticks, right? So, just this, I can see so many, right? I can see one here, one here, some here,
[09:29] this is why when you start learning about supply and demand zones, you will everywhere. But just because you can identify it doesn't mean that you have to trade it. So this is something that we're going to
[09:43] talk about later on, but for now let's just focus on identifying it. Okay, let's try to identify the most obvious supply and demand zone right now on this So let me just start from the left hand side right here. So if I start from the
[09:56] left hand side, I saw that price was consolidating around here. And then what happens was that price dumped heavily. Okay, huge amount of imbalance, a lot of selling pressure. Okay, cool. This is the big move to the
[10:08] downside. Now I'm asking myself where's the origin point, right? The origin Because this is where price was consolidating a little bit and then dumped to the downside. And the first method you can use to draw
[10:20] your supply and demand zone is the range method, which means you want to mark up the entire consolidation that led to this imbalance move to the downside or the upside. So in this case, okay, so this is the
[10:35] to do is use like a box tool on TradingView and go and find the highest point of the consolidation and the lowest point of the consolidation So in this case, this is the highest point of the consolidation, this is the
[10:49] lowest point of the consolidation. So you just put a box right there and then you just expand it out all the way just like this. So right now our expectation is that since this is a supply zone, price is
[11:01] most likely going to pull back up to the supply zone, fill up the remaining sell orders will continue bearish. Right? That's our expectation. But is that what's actually happened? Not really. Why? Because the structure
[11:15] is bullish, right? Remember when we talk about in the market structure lesson in a uptrend when price is creating higher highs and higher lows, the highs are weak, the lows are strong. So in this case, price pretty much pulled
[11:29] result just went up there and take out the last high. Right? So, that's why I just because you can identify a supply and demand zone, does not necessarily means that you have to trade it. We only want to trade the high probability
[11:44] that we're going to cover in the next few lessons, but for now, like I said, few lessons, but for now, like I said, just focus on learning how to draw and identify these point of interest. Now, let's continue to see what price
[11:57] does. Price came down, and then after it came down, it re- versed at this area and started going up very aggressively. So, once again, we see a reversal, right? So, once you see a reversal just like this, you can also draw a demand
[12:10] zone somewhere around here by finding the lowest point of the consolidation consolidation and drawing a box out just like this. Okay? So, this becomes the first demand zone that we have identified.
[12:23] And then, below that, we have a good old demand zone. And then, later on, price went up, pulls back, and then goes up again. So, when there's a retracement just like this, you can also identify a demand
[12:38] zone. Right? Because this is where we got a huge imbalance move to the upside, structure just like this. And this is where you can once again draw the entire consolidation just like this. So, in this case,
[12:53] the entire consolidation will most likely be from the high of the pullback to the low of the pullback itself. Okay? So, let me just zoom in a little bit for you guys to see. Okay? So, in this case, it wasn't really a consolidation, right?
[13:06] It was just price goes up, pulls back, and then goes up and breaks structure. So, if that's the case, since there is no consolidation, all we can do is to rely on marking the high of the pullback to the
[13:19] the pullback will be somewhere around here, and bam, there we have your demand Okay? There we have your demand zone. And I want you guys to notice what price does after this demand zone was formed. After this demand zone was formed, price
[13:34] actually went all the way up here, pulled back to this demand zone, touched it, and then later on then it moved to the upside. Right? So, once again, goes to show that there's buying pressure right here, and this is
[13:47] what allows price to respect this zone the next time it actually came back down here. So, this tell us that this is the first time round institutions entered for a large amount of buy orders, and then
[14:00] actually did just that. Right? Because once again, institutions they are smart, are not going to be buying right here, right? Because if they buy here, you know, they might have to like place their stop loss below these lows, and
[14:13] they have a wider margin of error. So, they are much more better off waiting for price to come to them, waiting for price to come back to the initial entry point, and then when it does, then they enter for longs.
[14:26] Okay? So, yeah, let me just draw another supply zone for you guys to see, right? So, over here, once again, price went up here, reversed at this price point, and So, in this case, there was no consolidation, right? It was just like
[14:39] one bearish candlestick just like this. Which brings us to the second method of your zones, your supply and demand zones. method, which is pretty much the entire consolidation before the breakout,
[14:55] right? You mark the high and the low of the entire consolidation. This time round, the second method is called the pivot method. Okay? The pivot method is you want to mark up the pivot candle that led to the breakout,
[15:10] that led to the reversal, that led to the huge imbalance move. So, in this case, price went up, and it started reversing right here. So, this over here right? Because this is where the imbalance move actually happened to the
[15:25] downside. And if you trace it, you will see that okay, this is the candle that caused the entire reversal to happen. So, this is where we can actually map the entire pivot candle up and this becomes my supply zone.
[15:39] Okay, so using this exact same method, let's try to refine these supply and demand zones that we have just drawn earlier. So, over here, this is where you can,
[15:51] you know, refine this entire range to just the pivot candle, which would potentially be this one right here. And then for this one, refine the entire This is how I would draw it if I'm using the range method, but if I'm using the
[16:05] pivot method, I'm going to be identifying the pivot candle, which is caused the reversal. And then in this case, it's going to be this candle right here. Yeah, so you can use the pivot method to have like much more refined
[16:21] Okay, so here's a caveat. The more refined the zone is, the higher your risk to reward, right? Which means that okay, if there's a supply zone right here, we want to enter for sell the minute price mitigate the zone. Our stop
[16:35] You can see it's much more tighter compared to if you were to mark up like the entire range just like this, right? Then your entry would be a little bit worse.
[16:47] So, the more refined the zone is, the higher your risk to reward. But the downside is there's a greater But the downside is there's a greater chance of you missing the trade entry.
[17:00] Okay, so in this case itself, if you actually draw this demand zone using the pivot candle method, you will see that actually mitigate that zone, right? It It came all the way down here, did not
[17:13] mitigate that zone and just blew and just continued going up just like this. you were actually using the pivot method, you would have missed this entry itself. You wouldn't have been able to get into this entry because price did
[17:26] not mitigate your zone. However, if you were to use the range method, right, to mark up this entire retracement, what happens is that price actually where you could have been tapped into the trade and the price will go up
[17:40] there. Happy-go-lucky, merry-go-round, happy days. So, that's the downside of using the pivot method. Yes, you get a much greater risk to reward, right, which means you have a smaller downside and a
[17:54] greater upside. But, there's also a greater chance of you missing a trade entry. So, my advice for majority of you guys watching this is to find out which one works best for you based on data.
[18:12] Try both of these method over the span of 100 trade. Right, and then based on that, find out which is the method that works for you and just stick to that consistently. So, if you feel like the range method works better when you mark
[18:24] want to make sure that you're always using the range method. If you feel like right, because you are able to get much more precise entries, you know, it's always want to be using the pivot method. So, find the method that works
[18:41] religiously. Okay, so let me just give you guys more Okay, so let me just give you guys more examples on the charts right here. So, I me, right? So, right after this video, if you have the time, go on to a blank
[18:55] chart and just try mapping this out, right? Because the more you do this, the better you get at it. Okay, so let's see. There's another ones, right? Because there's some minor ones like this ones right here and also
[19:08] this ones right here. And I just want you to focus on the most obvious ones for now. And then later on as you get more competent, you can like just get better at like refining them and just spotting more of them. So in this case,
[19:20] price came up, pulled back, consolidated a little bit, and then goes up. Right? So once again, we can mark this entire consolidation right here as the demand zone. Okay? So this becomes the entire demand zone. But
[19:34] since this is a pullback, right? Remember what we just mentioned? You can actually mark up the high of the pullback to the low of the pullback as the entire demand range. Right? So this becomes my range demand
[19:48] zone. It's a fairly wide range. Okay? Very wide range. Okay, later on price went up there. Guess what? Price mitigated demand zone and then continued So just continue mapping out the obvious
[20:02] there's potentially a demand zone right here. And then there's also a supply zone up here. Okay? So this is one of those instances where price is respecting the same
[20:15] supply zone multiple times. Right? You can see price goes up, mitigates a supply zone, comes back down. Goes up again, mitigates a supply zone, comes back down. Goes up again, mitigates a supply
[20:29] zone, comes back down. Telling us that this is a very strong supply zone and it's most likely going to hold. And surely enough, it went back up there multiple times and it always hold. Once again, this is another sign that tells
[20:41] us that institutions are literally dumping a lot of sell orders at this price point. So you shouldn't be, you know, trying to knowing that there's so much selling pressure at this area right here.
[20:57] So once again, your goal is not to draw these perfect boxes. Your goal is to just identify the origin of the move itself. Right? Go and find, you know, this imbalance move to the downside and then just go and identify the origin,
[21:09] method or the pivot method just like this. And you can see what happens after price break to the downside, price mitigate this previous supply zone, Okay, this is just how supply and demand zones work. It's a
[21:24] very simple concept and I really believe that the more you practice this, the better you get at spotting it. Which means that the easier it is for you to actually make sense on like when to buy and when to sell.
[21:36] Okay, so like for example, if you drew this as a demand zone, then you might want to enter for longs the price the minute price mitigate your demand zone. you might want to look for shorts the minute price mitigate your supply zones.
[21:50] We're going to dive deeper into like when exactly to enter later on where you will learn about the concept of entry models which states that once price enters your supply and demand zone, you want to look for certain entry
[22:04] models. Which is entry confirmation, entry signals, entry confluences that have to show up in the market before you can press the buy or sell button. Once again, that's for a future lesson. For now, just get really competent at
[22:20] just identify and trading those zones. Okay, so yeah. Now, let's talk about what counts as a mitigation, right? So, in this case itself, let me just give you guys like an example. So, price was
[22:35] consolidating around here, right? Let's mark this entire consolidation up from the high to the low just like this. Okay, from the low to the high and then combining market structure, you will saw that price has broke structure right
[22:49] here to the downside. Okay, so this is where you can identify your swing high and your swing low. Okay, so in this case, price have pretty much came down, pulled back and then goes down.
[23:03] So, the minute price actually mitigate this supply zone the first time round, does this count as a valid mitigation? Does this mean that again since it has already been
[23:17] Well, I like to keep things mechanical, like I said. So, I want to give you like a very simple rule. It counts as a mitigation if price has break out of the consolidation
[23:31] and it has pulled back very aggressively into the 50% of this zone itself. Right? So, this is the entire zone. If you draw your
[23:43] retracement tool from the high to the low of this entire consolidation, you will see that this is the 50% line, right? Like this blue color line right here. Once again, this is settings. You can just pause the video right now and
[23:56] just copy the settings if you want. So, when you have these settings on your fib retracement tool, you will be able to find out where is the 50% of the zone So, for me, I like to count a valid mitigation as price reaching the 50%.
[24:13] Okay, so this means that if price actually, you know, just pulls back and happened right here and then continue going down, I personally do not like to count that as a valid mitigation, which means that there's a chance in the
[24:28] future for price to still come back up to mitigate the 50% of the level right here, 50% of the zone, before it continue going down. There's a chance, like I said. Nothing is ever guaranteed in this market.
[24:42] happen. So, I think like it's very important to have like a rule just like this so that you don't have any room for guesswork whatsoever. So, yeah. Once again, try this out based on data. This is just based on my data,
[24:58] based on my experience, I found that like a lot of times when price mitigate the zone just like this, it's not really a mitigation, it's just more of like efficient price action where price is just doing its thing, just pulling back
[25:10] the little bit of balance before continuing going down even further. right after this mitigation, price went all the way up here, very, very near to the 50% of the zone itself before continuing going down.
[25:25] Maybe I can show another example like right here, right? So, using the pivot method this time round, I find a pivot candle, uh and in this case, I can just draw this long wick right here. Just like this, and you can see in this
[25:39] price mitigated this previous supply zone right here, zone right here, and it came up to nearly the 50% of it. Just like this. Not really like the 50% of it, but it later on, it went up to
[25:53] the 50% of it, right? If you just drag it all the way up here, you'll see that of it. Right? So, you can see when price down, come up again, mitigate it, comes down,
[26:07] come up again, comes down, and then eventually right now, it has came all there's sufficient selling pressure at this zone, it's going to cause price to continue going down. So, that's the concept that I want to
[26:22] like share with you guys, and that is the concept of what counts as a mitigated zone and what counts as a unmitigated zone. A unmitigated zone, which is a zone that is haven't been touched, right? That haven't really
[26:34] reached the 50% level, that was asked that at some point of time in the future, price will come down to the unmitigated zone, mitigate it, And then when you see a mitigated zone like just like in this case, there's a
[26:48] chance that in the future, the next time price actually come down to this level, price will just blast right through it. Because it has already been mitigated. Because it has already been used. Remember the logic behind these zones.
[27:01] Right? This does that institutions has looked for long orders right here. down here, they're going to deploy the remaining buy orders that they actually wanted to execute. So, this means that there's not much buy
[27:13] orders at this price point anymore. So, the next time price comes down to this right through it and just continue going down, causing this zone to fail. there are certain zones like what we what we've seen just now where price
[27:28] just respected multiple times. And as a result, it just continue holding just result, it just continue holding just like this. the concept of supply and demand zones. Right? Like I said, I think what you
[27:45] guys really need to do now is to just practice more. Just train your eyes to zones more. Because when you do that, what you are essentially doing is that you're building new neural pathways in your
[27:57] Just like when you first start doing anything, it's a little bit difficult. It's a little bit troublesome. But the more you do something, the more reps you put in, the better you get at it because your brain is literally building new
[28:12] your brain is literally building new neural circuits of that process itself. And the neurons that fire together, they wire together. Right? So, what you're you're pretty much reinforcing that neuron. Right? You're just making that
[28:25] that wire thicker and thicker and thicker and thicker. And then 3 months identify the supply and demand zones with with ease. Right? With no trouble whatsoever. So, obviously supply and demand zones is
[28:38] just like one piece of the puzzle. Right? Like I said, success in trading ideal the at the right location and executing This is just one piece of the puzzle, which is the location. What about the
[28:54] to take into account of the market structure, the liquidity, you know, you need to take into account of the order flow, right? You need to take into account of your daily buyers. You also need to take into account of
[29:08] the timing in which you are finding your entry models at, right? So, there's a lot of different variables, right? It Like I said, trading is a masterpiece. It's an arts. So, what you're doing right now is that you are just gathering
[29:20] each piece of the puzzle. Later on, we're going to walk you through on how to piece every single piece of the puzzle together to form a masterpiece. All right, so right now just treat this as like you collecting your Infinity
[29:32] Stones, all right? Like just collect as many as possible because later on you to work with. So, that's everything, right? I just want to end off by saying that like I said, do not just rely on this one
[29:47] concept alone. You want to use multiple confluences, right? So, for example, if we know that this is a supply zone right here, let me just erase the chart. I'm not just going to blindly enter for
[30:00] zone. No, I have to look at the structure. Is price actually bearish? Because if price is bullish, I do not want to sell at week highs, right? So, And then I also need to see, okay, where's the available liquidity, right?
[30:15] we're going to cover later on. I want to wait for the liquidity to be swept. when price mitigate a supply zone? No, maybe I want to wait for my structure to shift, right? I maybe want to wait for price to mitigate this supply zone, and
[30:29] then I want to see the internal structure start shifting bearish first to tell me that the pullback is over, and right now the internal structure, the lower time frame trend has shifted up bullish to bearish, then I look for
[30:42] shorts. Okay, so that's what we would we would call a confirmation entry, right? Where you wait for extra confirmation, then you enter for your short or long position.
[30:54] see this is a supply zone. It's the high enter for a sell the minute price mitigate this zone itself." Right? So, the supply zone, I'll enter for a sell. As simple as that. So, that's your
[31:08] conservative entry. And once again, over the next few lessons, I'm going to talk the next few lessons, I'm going to talk about when to use which sort of entries.
[31:20] and demand zones, the next question becomes, when is a zone actually worth Because like I mentioned, not every demand zone is worth buying and not every supply zone is worth selling. This is where the concept of premium and
[31:34] discount comes in. It will allow you to know which are the point of interest that you want to be shorting from or buying from. next episode. Right? I'm going to show you how to use that concept and combine
[31:48] it with the supply and demand zones, so you can know exactly whether price is expensive or cheap within a range. This way you can make the right course of action. This way you can stop buying high and selling low.
[32:02] next lesson. And as always, remember, you're just one trade away. Muah.



⚡ Saved you 0h 32m reading this? Transcribe any YouTube video for free — no signup needed.