
Create a Twitch Overlay in Procreate!
45sShows the quick setup process for a professional-looking stream overlay, appealing to aspiring streamers.
▶ Play Clip"Title accurately describes a simple, easy overlay tutorial using Procreate; content delivers exactly what's promised."
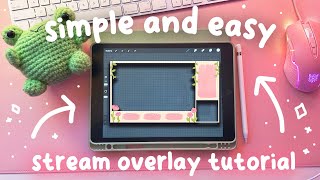
This tutorial demonstrates how to create a cute Twitch overlay using Procreate on iPad. The creator walks through setting up a 1920x1080 canvas, designing a pastel-themed background with flowers and vines, and adding cutouts for gameplay and webcam. The final overlay includes labeled alert boxes and a chat box.
Create a new canvas with width 1920, height 1080, and DPI 600 for high quality.
Fill canvas with black, save as PNG, then import to ensure accurate aspect ratio for gameplay screen.
Add a new layer and fill with desired background color (e.g., muted yellow-orange).
Duplicate the gameplay screen layer and use free form resize to create a webcam slot.
Add a new layer and use the grid brush under textures to create a grid pattern.
Use the Magic Brush > Hue, Saturation, Brightness to change color of a layer.
Use the Monoline brush under Calligraphy with stabilization set to ~55% for smooth lines.
Draw each element on its own layer for easy editing and repositioning.
Add a new layer, set as clipping mask to draw within bounds of the layer below, then merge down.
Use the Spectra brush under Painting to create watercolor smudges for alert boxes, duplicate and resize.
Merge the gameplay and webcam slots onto the background layer, use selection tool and eraser to cut out the areas.
Use Add Text under wrench tool to label alert boxes and chat box. Edit font, color, and add drop shadow by duplicating text layer.
By following these steps, you can create a personalized, cute Twitch overlay in Procreate. The tutorial emphasizes layer organization and simple techniques like clipping masks and drop shadows for a polished look.
What are the recommended canvas dimensions for a Twitch overlay in Procreate?
1920 x 1080 pixels.
0:22
What DPI setting does the creator recommend for overlays?
600 DPI.
0:37
Why does the creator save a black-filled canvas as a PNG?
To ensure the gameplay screen placeholder maintains the correct 1920x1080 aspect ratio when imported.
1:10
What is the purpose of using a clipping mask in Procreate?
To restrict drawing to the bounds of the layer below, making it easy to add details without going outside the lines.
9:04
How do you create a drop shadow effect on text in Procreate?
Duplicate the text layer, change the color of the bottom layer to a darker shade, and offset it slightly.
18:21
Which brush is used for the watercolor alert boxes?
The Spectra brush under the Painting category.
11:46
What tool is used to cut out the gameplay and webcam areas from the background?
The selection tool (squiggle icon) and the eraser tool.
15:19
What is the benefit of drawing each element on its own layer?
It allows easy editing, repositioning, and fixing mistakes without affecting other parts of the artwork.
7:29
Canvas Setup
Establishes the foundation for the overlay with correct dimensions and high DPI for clarity.
0:12Aspect Ratio Trick
Using a black PNG ensures the gameplay cutout maintains the exact aspect ratio, a clever workaround.
1:10Recoloring with HSB
Shows a quick method to change layer colors without redrawing, saving time.
4:22Clipping Mask for Details
Demonstrates a key Procreate feature for adding precise details within shapes.
8:55Cutting Out Placeholders
Final step to create transparent areas for gameplay and webcam, essential for overlay functionality.
15:05[00:00] hi YouTube my name is the Jade plans and
[00:02] today I'm going to be showing you guys
[00:03] how I create my cute twitch overlays
[00:06] using
[00:10] procreate first we're going to begin
[00:12] with a new canvas to create a new canvas
[00:15] hit the plus icon at the top right of
[00:17] the screen and then select the new
[00:19] project icon for the width we're going
[00:22] to put 1920 and for the height we're
[00:24] going to put 1080 this is the universal
[00:27] aspect ratio for YouTube videos most
[00:29] live streaming platforms and the typical
[00:31] size for most video games as well for
[00:34] the DPI DPI stands for Dots per inch I
[00:37] always put 600 for overlays as this
[00:40] ensures your artwork will look clear and
[00:42] high quality now we can select create
[00:44] and we are in our new blank canvas first
[00:47] thing we need to do here is create a
[00:48] space or a cutout for where our gameplay
[00:51] screen and our webcam is going to be we
[00:54] will do this by dragging over the color
[00:56] black and filling in our entire canvas
[01:00] now we're going to hit the wrench icon
[01:02] on the top left and save this blank
[01:05] black canvas as a PNG file to your
[01:08] camera roll we did this to ensure that
[01:10] our gameplay screen is still within the
[01:12] 1920 x 1080 aspect ratio if you just try
[01:16] to draw it by hand you're more likely to
[01:18] be inaccurate and we want to make sure
[01:19] it's that aspect ratio so that your
[01:21] gameplay screen fits perfectly in there
[01:23] now we can close that menu and head back
[01:24] to our blank canvas I'm going to go
[01:26] ahead and delete the black screen layer
[01:29] because we don't need that anymore um we
[01:31] will be importing that image from our
[01:32] camera roll when we need that again then
[01:35] I'm going to add a new blank layer now
[01:37] on the blank layer drag over the color
[01:39] you'd like to use for your base or your
[01:41] background color I went with this muted
[01:44] yellowy orange as I'm going with a more
[01:46] lighter pastel themed overlay but you
[01:49] can really pick any color you like now
[01:51] we are going to import our gameplay
[01:54] screen so again hitting the wrench on
[01:56] the top left of the screen we're going
[01:59] to select insert a photo and then go
[02:01] ahead and select the black image from
[02:03] the camera roll now that it is imported
[02:07] we are now in resizing mode in
[02:10] procreate resizing mode is that little
[02:12] cursor icon on the top left and you want
[02:15] to make sure when you're resizing and
[02:16] you want to keep the dimensions you have
[02:19] the option uniform selected this ensures
[02:23] that per crate does not randomly resize
[02:25] or reshape whatever image you just put
[02:27] in it'll keep the original aspect ratio
[02:30] we can resize and move the gameplay
[02:33] screen to wherever you like on your
[02:36] [Music]
[02:42] screen I'm heading back into the layer
[02:45] section on the top right and I'm swiping
[02:48] on our gameplay screen to duplicate it
[02:50] I'm selecting the cursor menu again to
[02:53] resize and now I'm selecting free form
[02:56] free form allows me to move around the
[02:58] aspect ratio so it's not going to keep
[02:59] true to the size but that's okay so that
[03:01] is for our
[03:04] [Music]
[03:18] webcam and I'm also retitling them just
[03:21] to stay
[03:28] organized
[03:38] [Music]
[03:39] now for the background I wanted to do a
[03:41] grid background so I'm adding a new
[03:44] layer and I'm finding the grid brush
[03:46] under textures and I'm making a grid
[03:48] style
[03:51] [Music]
[03:58] design
[04:07] [Music]
[04:16] [Music]
[04:22] a cool trick on how to rec color if
[04:24] you're not happy with what color you
[04:25] chose you pick the Magic Brush on the
[04:28] top left and go a hue saturation and
[04:30] brightness and from here you can change
[04:32] the color of whatever layer you're
[04:34] selected
[04:35] [Music]
[04:52] on now we're going to begin drawing and
[04:55] I want to draw some cute
[04:57] flowers again I want to do like a cute
[04:59] Kawai pastel style overlay so I'm going
[05:02] to draw some flowers the brush that I'm
[05:04] mostly going to be using for this art
[05:05] piece is the brush monol
[05:08] line you can find that under the
[05:10] calligraphy section under procreate and
[05:12] I've selected modoline and I've gone
[05:14] into the settings and I'm just adjusting
[05:16] the stabilization to about
[05:26] [Music]
[05:28] 55%
[05:36] I'm going to draw in some plants just
[05:37] some little Vines
[05:44] [Music]
[05:53] [Music]
[05:58] here
[06:01] [Music]
[06:13] [Music]
[06:22] [Music]
[06:30] [Music]
[06:36] [Music]
[06:43] and we're also going to draw in some
[06:48] [Music]
[06:58] flowers again you can see I'm using the
[07:00] resize function on procrete to move
[07:03] around a
[07:09] [Music]
[07:16] [Music]
[07:23] layer and I'm drawing on some flower
[07:25] tops as
[07:26] well you'll also notice that I typically
[07:29] add a new layer every single time I do a
[07:32] new section of the art
[07:34] piece so I draw each piece on its own
[07:37] layer this is a good habit to get into
[07:39] because it allows you to go and fix your
[07:41] mistakes much easier than if you were to
[07:43] draw everything on the same
[07:50] [Music]
[07:58] layer
[07:59] [Music]
[08:19] [Music]
[08:28] [Music]
[08:36] [Music]
[08:42] [Music]
[08:48] so I do those two little flowers and I'm
[08:50] going to draw some more
[08:52] here now I want to add some detailing
[08:55] onto this peie type flower I just drew
[08:58] so I'm add adding a new layer and I'm
[09:00] selecting clipping mask under the layer
[09:04] settings a clipping mask is basically
[09:06] your clipping the top layer to the
[09:08] bottom and that makes it so you can only
[09:09] draw within the bounds of the layer it's
[09:12] clipped onto the clipping mask allows
[09:14] you to easily stay in the lines of
[09:16] whatever layer you're trying to draw
[09:22] [Music]
[09:28] onto
[09:38] [Music]
[09:47] [Music]
[09:56] [Music]
[10:04] and once I'm done with the clipping mask
[10:06] I just merged it down to the layer below
[10:08] so now they're attached to one another I
[10:10] duplicated it and I'm adding the other
[10:12] peie Bud onto the other
[10:16] [Music]
[10:25] [Music]
[10:28] stem
[10:34] [Music]
[10:39] and we're drawing on some
[10:42] [Music]
[10:48] [Music]
[10:58] leaves
[11:00] [Music]
[11:11] [Music]
[11:21] [Music]
[11:28] [Music]
[11:41] and then I wanted to go with this like
[11:43] watercolor area for the stream alerts so
[11:46] I have gone into the painting brushes
[11:49] and I picked the brush
[11:51] Spectra and I'm adding some watercolor
[11:55] [Music]
[11:57] smudges
[12:02] [Music]
[12:06] and I've duplicated that into three so
[12:09] that they're all the same and I'm just
[12:11] readjusting them using the readjust and
[12:13] resize function of
[12:15] [Music]
[12:27] procreate
[12:31] [Music]
[12:40] [Music]
[12:48] [Music]
[12:50] and I've renamed them so we're organized
[12:52] and that's how those look and then I'm
[12:55] also adding a chat box using the same
[12:57] brush on its own
[12:59] [Music]
[13:17] [Music]
[13:21] layer I resized it a bit to straighten
[13:23] it out and there you are now at this
[13:27] point you'll notice
[13:34] [Music]
[13:51] I am playing around with the vines a
[13:52] little bit and I'm moving them around
[13:54] the screen as I ended up not loving the
[13:56] placement of where I put them and that's
[13:57] why I suggest drawing each art piece
[14:00] onto its own layer so you can easily
[14:01] readjust and move stuff around without
[14:03] having to redraw
[14:08] [Music]
[14:17] [Music]
[14:27] things
[14:37] [Music]
[14:43] so now that I'm happy with the vines I'm
[14:45] just going through my layer organization
[14:48] and combining the flowers down so that
[14:51] the flower buds are on the same layer as
[14:54] the stems cuz I'm done drawing them now
[14:56] I've made sure everything is labeled
[14:58] properly
[15:00] [Music]
[15:05] now we are going to cut out the webcam
[15:08] and the gameplay screen so you want to
[15:10] merge down the webcam slot and the
[15:13] gameplay slot onto your background layer
[15:15] so it's all one layer next we're using
[15:19] the cutout tool on procreate you can see
[15:21] I have it selected it's a little
[15:22] squiggle on the top left make sure that
[15:24] you've selected the light your
[15:26] background and your gameplay screen
[15:27] layer the one we just merged down make
[15:29] sure that's selected select the
[15:31] rectangle tool and drag over where your
[15:34] gameplay screen
[15:40] [Music]
[15:44] is now we're going to select the Eraser
[15:47] tool and just erase that section you've
[15:57] selected
[16:05] [Music]
[16:14] [Music]
[16:20] and do it again the same steps for where
[16:22] the webcam is we're going to erase
[16:24] [Music]
[16:27] it
[16:31] [Music]
[16:43] [Music]
[16:53] and now we have proper cutouts where the
[16:56] gameplay screen is and the webcam screen
[17:00] [Music]
[17:03] the last step is to add text this step
[17:05] is optional you don't have to do this
[17:07] but I find that it looks nice and
[17:08] organized we're going to add text onto
[17:11] the alert boxes and the chat box to add
[17:14] text we're going to use the wrench tool
[17:15] on the top left and select add text put
[17:19] whatever wording you would
[17:21] [Music]
[17:27] like
[17:29] [Music]
[17:38] to edit the text once you've chosen the
[17:39] placement under the layer menu select
[17:42] whatever text you just put down and then
[17:45] choose edit text you can go change the
[17:48] color of your text or the font or
[17:50] anything like that I'm just playing
[17:52] around with
[17:57] it
[18:02] [Music]
[18:11] [Music]
[18:18] I'm adding a Dropbox to the text by
[18:21] duplicating the text I changed the color
[18:24] of the layer below and then I moved it
[18:27] so that it adds a Shadow effect to my
[18:29] [Music]
[18:47] text I'm also just playing around with
[18:49] the colors to see which one stands out
[18:50] more and there is our
[18:57] text
[19:06] [Music]
[19:12] [Music]
[19:35] [Music]
[19:45] [Music]
[19:52] [Music]
[19:58] to recolor the drop shadow layer I'm
[20:00] just adding a clipping mask onto the
[20:02] text I would to recolor and I'm painting
[20:04] over it easily and then I'm merging it
[20:06] down so that that text is the new
[20:17] [Music]
[20:27] color
[20:30] [Music]
[20:35] [Music]
[20:55] [Music]
[20:57] he
[21:04] [Music]
[21:12] [Music]
[21:18] [Music]
[21:41] [Music]
[21:51] [Music]
[21:53] as you can see I'm doing that for all
[21:54] three of the alert boxes I chose recent
[21:57] follow
[21:59] recent sub and recent cheer and then I'm
[22:01] adding one for the chat box as
[22:14] [Music]
[22:23] [Music]
[22:26] well
[22:32] [Music]
[22:41] [Music]
[23:01] [Music]
[23:10] [Music]
[23:18] [Music]
[23:24] [Music]
[23:47] [Music]
[23:57] [Music]
[24:04] [Music]
[24:10] that is our simple and easy gameplay
[24:12] overlay tutorial if you do like this
[24:14] gameplay overlay I do have it available
[24:17] to download from my Kofi shop as well
[24:19] I'll have the link below if you want to
[24:20] grab this for yourself and there you are
[24:22] that is the end of our tutorial thank
[24:24] you so much for watching I'm hoping to
[24:26] make more tutorials
[24:28] on different ways to make overlays with
[24:30] different programs so this is the
[24:32] procreate one my next one I'm hoping to
[24:34] make is for Photoshop and then maybe one
[24:36] for canva as well let me know if you're
[24:38] interested in seeing those tutorials and
[24:41] yeah thank you so much for watching
[24:42] don't forget to like And subscribe and I
[24:44] will see you next time bye
⚡ Saved you 0h 24m reading this? Transcribe any YouTube video for free — no signup needed.