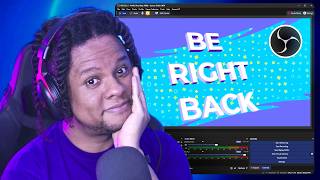

OBS is NOT a motion design tool... or is it?
45sThe contradiction and visual proof challenge viewers' expectations, making them want to see what's possible.
▶ Play Clip"Delivers a solid tutorial on the shader plugin, though the title overpromises 'evolving' when it's mostly a feature walkthrough."
This video demonstrates the OBS Shader Filter plugin, showcasing its Tile Shader and other shader effects for creating dynamic visuals in OBS Studio. The creator walks through the plugin's settings, shows how to apply shaders to sources, and explains how to make them react to audio and other inputs. The video also highlights the plugin's potential for motion design and live streaming overlays, with examples from other creators.
The video introduces the OBS Shader Filter plugin, which allows users to apply shader files to sources in OBS Studio, enabling custom visual effects.
The creator demonstrates creating a new scene in OBS and applying the shader filter to any source, including text and images.
The plugin provides a 'user defined shader' filter. Users can load shader text from a file, with over 100 examples included in the plugin folder.
Selecting the Tile shader creates a grid pattern. The creator shows how to adjust the background color and transparency of the shader.
The shader offers various shapes like rings, squares, diamonds, plus, and custom images. Users can choose a shape and adjust its size and density.
Edge softness controls the blur of the shape edges. Auto rotate makes the pattern slowly rotate counterclockwise.
Polygon size controls the number of polygons. Twinkle makes shapes randomly blink between 0% and 100% opacity.
Users can mix between two shapes, and with the Move plugin, shapes can be animated. They can also be dynamically animated to react to audio.
Hue variation adds color variation to the selected color, from monochrome to full color.
Scroll moves the pattern in a direction, while drift makes shapes move individually, creating a floating effect.
Pulse makes shapes individually scale up and down.
The creator explains that these shaders are mostly for motion design and creative overlays, not necessarily for live streaming, but they can be used for custom overlays and transitions.
Red Gear uses shaders in overlays and transitions. Everything is built within OBS, using color sources, making it customizable and interactive.
OBS allows on-the-fly customization and can react to audio, chat alerts, and other inputs, which is a big advantage over traditional motion design software.
The creator tested linking drift and hue variation to audio, making the shader change color and move with the beat. He references his video 'Everything Reacts to Audio in OBS Studio'.
Users can record shader animations and import them back into OBS as media sources to save CPU, or use them in editing software like Premiere.
The creator demonstrates creating a background for a video by adding text, applying a 3D block filter, and adding a ripple shader.
Recorded shader animations can be imported back into OBS as media sources, reducing CPU usage.
The creator mentions having multiple videos on 3D effects and that the process took about ten minutes.
The creator shows a final example of a back screen with a shader, using Ctrl D to center and scaling it down.
The creator mentions Lucid Glass, a shader that mimics Apple's liquid glass effect, created by another OBS enthusiast.
The creator asks viewers to like, subscribe, and follow on Twitch.
The OBS Shader Filter plugin is a powerful tool for creating dynamic and customizable visuals within OBS Studio, ideal for motion design and interactive overlays. With its extensive settings and audio reactivity, it offers a flexible alternative to traditional editing software.
What plugin is used to apply shaders in OBS Studio?
OBS Shader Filter
How many example shaders are included with the plugin?
Over 100
01:12
What does the 'Twinkle' effect do?
It makes shapes randomly blink between 0% and 100% opacity.
03:17
How can shaders be made to react to audio?
By linking shader parameters like drift and hue variation to audio, e.g., using a filter on the audio source.
07:08
What is the advantage of recording shader animations and importing them as media sources?
It saves CPU usage.
09:03
Shaders for Motion Design
Clarifies that the plugin is more for creative motion design than live streaming, setting realistic expectations.
05:35Real-world Example
Shows how Red Gear uses shaders in overlays and transitions, proving practical application.
06:07Audio Reactive Shaders
Demonstrates a powerful feature: making shaders react to audio, enhancing viewer engagement.
07:08CPU Saving Tip
Recording shaders as media sources is a practical performance optimization.
09:03[00:00] And everything you're seeing here is basically built within OBS studio. You just put it as a filter on your audio and it will make this react of telling you to not use OBS studio as a motion design software,
[00:15] then showing you a tutorial on how to step by step use OBS studio at a pretty interesting shader for OBS studio. For his members would product access.
[00:30] See, there's an OBS plugin called OBS Shader Filter, and it allows you to use files that will modify the source or generate new stuff. with their camera and other sources, that's what they're using.
[00:46] So I'll make a new scene in OBS studio. It goes on any source. Oh, I wish I could do this on text. You can. Let's make it a pleasant color.
[01:00] The shader filter plugin gives you this filter called user defined shader. You click load shader text from file, and when you click browse, it actually
[01:12] brings you to Folder that has over 100 examples straight from the plugin. so you can easily find it. Pattern. Tyler right there. And I can click open.
[01:25] You're going to see this sort of pattern, this sort of grid open up. And I'm going to do my best to really show you all of the options. Basically it created a gray background color.
[01:38] So if I remove that we get the original background with the yellow dots. if you want your webcam to be visible you would uncheck what I'm going to do is change the color so that it's a little bit more visible.
[01:55] So you're going to see that the corners basically get a little more transparent So if you really want to do something very centered you can use Then shape.
[02:08] There are rings square diamond So if you have like another image source or any other source,
[02:20] you can probably bring that horizontal line, vertical line or a custom image. and basically browse for an image that you already have I don't I really love using the plus, so I'm going to keep it on the plus here
[02:33] But right now if you pick another shape for example, plus with ring So to make it more visible, I'm immediately going to go to size and make those super big.
[02:48] And I'm going to reduce the density, This might be too much like that. Then there's edge softness. If you don't want it to two, that looks like something else to to
[03:00] It can also auto rotate. it's automatically slowly rotating counterclockwise. Now if you choose polygon you would have polygon sizes.
[03:17] Pretty much how much it populates this screen. Twinkle will basically bounce between zero opacity to 100% opacity randomly. If I bring it all the way up and I do this, it's going to twinkle really hard.
[03:35] Should go without saying, but I'm just going to demonstrate. So you're basically starting to break it apart.
[03:47] Predictable if you will. So it's going to mix in between those two shapes And now you can really see
[03:59] like the difference keeping in mind that with the move plugin They can be animated. But on top of that you can make them dynamically animated.
[04:11] You can make it react to your audio and all that. There's also hue variation and that is if you selected a different color,
[04:24] I'll put it at one and I'll go back and select like a specific color. Or bring it down. It gets closer closer and closer until it's basically monochrome.
[04:37] It gives you a slight variation and gives more color just to whatever you chose. I'm going to do this. As you can see it's just scrolling.
[04:49] Then there's the angle if you want it to scroll diagonally or wherever. Actually I'm going to lower the scroll so I can show you what the drift does. So drift basically have them slowly moving individually.
[05:05] And then you have the drift speed which almost creates creates. Bring it in the middle like that. So if you combine this with with the scrolling, you really have
[05:19] this drifting almost like leaves floating in the wind. So pulse is basically individual scale growing and and shrinking basically. Now here's the biggest question.
[05:35] What does that have to do with live streaming? The truth is, in my opinion, this is mostly a motion design. I truly feel like this is something that you would use to be creative.
[05:51] So you want to create everything with like color sources, or Look at that. For example. Red gear implemented it in his overlays but also in his transitions.
[06:07] And everything you're seeing here is basically built within OBS studio. if you don't have access or don't want to go touch another editing software, what you can do all that stuff in OBS, but also all of that stuff since it's
[06:21] data is just color sources, for example, it's customizable if you want to make it interactive, if you want to make it react to audio, if you want stuff to happen because it's alert base, for example,
[06:35] maybe someone types in chat and then your whole overlay system changes color. Maybe the icon like here you can see he's using sherbet and streaming. So this is the big advantage of doing that stuff with OBS.
[06:53] I'm not saying that OBS studio is better than a motion design software. Customizing whatever you do on the fly. I also did some tests to see how I would make it react to music.
[07:08] I had linked what is it called the drift to the audio. not only the the hue variation changes, so it becomes colorful at every beat. you can see me playing with the factor here the drift amount right there.
[07:25] You just put it as a filter on your audio and it will make this react to go watch my video called Everything Reacts the Audio in OBS studio.
[07:37] you can get pretty wild results with it, and then you can even record them just to implement them into OBS studio as media sources. for example, if you're just using Adobe Premiere, Adobe Premiere can't do this.
[07:54] I mean, it can, but it's not as simple as what we're seeing there. you have a background for whatever video you're doing in your editing software.
[08:06] but while it's getting easier and easier to make coast like truly, truly easy, if I do control F, I can fill the add a brand new text, don't even name Type.
[08:22] Go to select Pick my favorite font. Add a filter 3D block. Center Add another color Make it purple.
[08:37] Rotate that. Place that control. See that? The vignette. Now let's make a scroll. Look at that.
[08:49] I added a ripple shader to the top and I did 50 extra pixel at the bottom. Look at that. So. You can record this and then add it as you're starting soon.
[09:03] You import it back into OBS as just like a media source. That way it doesn't use up like your CPU or anything, And that's OBS studio, that is OBS studio.
[09:17] If you're wondering for the 3D effect, again, I have multiple videos on that. And yeah, that took me what, ten again, since everything is So be.
[09:31] And just like that, you have your back screen, press Ctrl D to center, scale it down a little bit. Isn't that cool? Isn't that nice?
[09:43] because he's been creating a lot of He actually does a bunch of stuff for OBS, Lucid glass is one of them.
[09:55] because people have been asking me how to create alerts with So this is basically the apple liquid glass thing, but as a shader, Check it out.
[10:07] Also like subscribe and follow me on Twitch.
⚡ Saved you 0h 10m reading this? Transcribe any YouTube video for free — no signup needed.