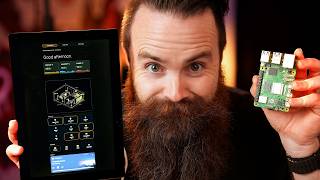

Unboxing the Raspberry Pi Touch Display 2
41sThe excitement of unboxing a new tech gadget and the promise of a cool wall-mounted dashboard is inherently engaging.
▶ Play Clip"Title is catchy but the video delivers on the promise of showing a wall-mounted Pi display, though with some fluff and sponsor mentions."
The video reviews the new Raspberry Pi Touch Display 2, a 10.1-inch portrait touchscreen designed for wall-mounted dashboards. The creator demonstrates the unboxing, setup process, and troubleshooting, ultimately using it with Home Assistant to create a customizable smart home dashboard. The video highlights the display's specs, compatibility limitations, and the ease of use with the Touch Kio kiosk app.
The video starts with unboxing the Raspberry Pi Touch Display 2, a 10.1-inch portrait touchscreen. The box includes the display, a ribbon cable for the DSI port, and a power cable for GPIO pins.
The display is 10.1 inches diagonal, 1200x1920 native portrait resolution, 2.3 million pixels, 224 PPI (denser than a 1080p 13-inch laptop), IPS panel, 85-degree viewing angle, 400 nits brightness, anti-glare, 24-bit color, and 16mm thin. It supports 10-finger touch with a max 35ms response time.
The display costs $80. It only supports Raspberry Pi 5 and Compute Modules, not older models like Pi 3 or 4. The creator notes this limitation.
The creator initially struggled with setup, trying different SD cards and power supplies. The issue was outdated firmware on the Raspberry Pi; updating the EEPROM fixed the touchscreen recognition.
After fixing firmware, the touchscreen worked well. The creator tested it with games and found it responsive. The on-screen keyboard pops up automatically, allowing full desktop use without mouse or keyboard.
The creator mounted the display on a wall and set it up as a dashboard using Touch Kio, an open-source kiosk app. It displays Home Assistant via web socket API, and the server runs on a Proxmox VM, not on the Pi itself.
The creator uses AI to help customize the dashboard. He concludes that the display is a great option for a smart home dashboard, more customizable than a tablet, and encourages viewers to consider it.
The Raspberry Pi Touch Display 2 is a solid choice for a wall-mounted smart home dashboard, offering high resolution and touch responsiveness. Despite initial firmware hurdles, it works well with Home Assistant and Touch Kio, making it a worthwhile investment for tech enthusiasts.
What is the resolution of the Raspberry Pi Touch Display 2?
1200x1920 native portrait resolution.
00:46
What is the price of the Touch Display 2?
$80.
01:39
Which Raspberry Pi models are compatible with the Touch Display 2?
Only Raspberry Pi 5 and Compute Modules.
01:51
What was the issue when the touchscreen didn't work initially?
Outdated firmware (EEPROM) on the Raspberry Pi.
03:43
What app is used to create a kiosk dashboard?
Touch Kio.
06:05
What is the maximum touch response time of the display?
35 ms.
01:26
High Pixel Density
The display has a higher pixel density than a 1080p 13-inch laptop, making it sharp for a dashboard.
00:46Firmware Update Fix
A common issue with new Raspberry Pi displays is outdated firmware; updating EEPROM resolves it.
03:43Customizable Dashboard
Using Touch Kio and Home Assistant provides a more customizable dashboard than a tablet.
05:52AI-Assisted Customization
The creator uses AI to generate dashboard configurations, showcasing a practical use of AI in home automation.
06:57[00:01] the new Raspberry Pi touch display 2, a 10-in portrait to display all my home on a wall because, you know, it looks cool. At least I hope it will. The going to be able to use this. You'll see. Let's open it up.
[00:19] can say what I want. Dude, I'm so excited to open this. A 10-in portable touchscreen display for Raspberry Pi for interactive projects information dashboards. [music] Inside this box is pretty much
[00:33] That's about it. Oh, also two cables. One ribbon cable for the DSI port and a power cable that connects to the GPIO pins on the Raspberry Pi. Honestly, it's need to make this work. So, what's good about this? What's new? Well, what's
[00:46] funny is the touch display 2 is actually not a new product. The 5-in and 7-in already exist. So, is it just bigger? Yeah, with a few more things. It's 10.1 Yeah, with a few more things. It's 10.1 in diagonal, 1200 by 1920 native
[00:59] in diagonal, 1200 by 1920 native portrait, 2.3 million pixels, 224 PPI. It's actually denser than a 1080p 13-in laptop screen. Real IPS, 85 degree viewing angle, 400 candelas per square meter. That's a fun thing to say. It
[01:12] than the original. Anti-glare, 24-bit color, 16 mm thin. The driver board actually lives inside of the enclosure now. You can use all 10 fingers. The 7-in only did five. But, the 5-in back in 2015 could do 10. They brought it
[01:26] >> [laughter] >> You'll see. It has a max 35 ms touch response, so it's quick. I actually tried a few games. And a quality of life thing, the on-screen keyboard just kind of pops up for you automatically. So,
[01:39] you're getting a full desktop with zero mouse or keyboard needed. That's, I points. The cost? 80 bucks. I think that's pretty comparable compared to like other screens. Now, you're not going to like this. I didn't like it.
[01:51] This sucker only supports Raspberry Pi 5 and the Raspberry Pi compute modules. Sorry, dude. You might have a 3 year or 4 laying around. It's not going to work. But I do have a Raspberry Pi 5, fresh install, never booted up. And I did that
[02:04] easy it is just to start from scratch. Set up without really anything. Now again, this is I have not even booted this Raspberry Pi up. This is a fresh Raspberry Pi install. Turns out, it's supposed to be easy, but I'm dumb. At
[02:17] good at operation, you'll be really good at getting this installed. That ribbon >> I hate that thing. It's so stinking flimsy. And that little DSI port, you things down, it's it pops up, you got to make sure it's seated, and that whole
[02:31] The power connection was actually not that bad. And then I screwed it in, and How do I Where do I put this thing? supposed to mount this on a wall? How am I going to mount this on the wall? I'll
[02:47] All you should have to do is plug this in and it'll work. Moment of stinking truth. Power? Okay. happen? Er Mhm. So far nothing is happening, and
[03:01] it's kind of making me worried. Nothing. Time to troubleshoot. I thought it might Thought it might be the SD card, so I tried another SD card. No. I thought it power this new, you know, monitor, maybe it needs more power.
[03:15] No. So I gave up. I went home, came back the next day with a fresh cup of coffee. that coffee, Network Chuck Coffee. By the way, that coffee and you love IT, you're going to love Network Chuck Coffee. It's what I
[03:28] drink every single stinking day. You got to try Default Route. It's my favorite. Anyways, Default Route helped me figure this out. That rhymed. Okay, you ready? Here we go. Plugging it in. Turning it over.
[03:43] Turning it over. Let's see what happens. Got it. It's the firmware. So, Raspberry Pi, you install a fresh image, awesome. You know what's not fresh? The firmware on your Raspberry Pi
[03:56] you need to update that firmware. The what's it called? The EEPROM, EPROM. And automatically recognize that touchscreen. Once I did that, boom, we probably won't have that issue. If you do, do that. Now, the screen is tiny.
[04:13] was sitting there trying to poke that Raspberry Pi for a minute to get my menu bin. I tried to adjust the text size and it destroyed my keyboard. Look at that. but it wasn't obvious to me. And I wasn't going to spend a ton of time
[04:28] than that. It's okay though. It wasn't a big deal. The touchscreen itself is using one finger. I don't know about the 10 thing. Maybe it's 10 supported fingers, but nothing is plugged in yet. In the
[04:40] means you should be able to use more than one finger, but >> [laughter] >> I don't know. I jumped around. I played responsive. I was very happy with it. I compared it to my iPad screen. Shouldn't
[04:53] really good video without sound. Why don't we have speakers on this thing? I touchscreen. And what I'm hoping is it will be a really, really good dashboard. The thing to do right now is to use something like this, right? Like like a
[05:10] crappy tablet. Um I bought this a long time ago and I never set it up. I always shuts off because I'm too lazy to figure out how to make it stay on all It's annoying. Which is probably why I didn't set this up. Raspberry Pi is
[05:24] dashboard because it's more customizable. You have more control and I'm hoping it does this for us. But still, I got to get it on that stinking an enclosure or you you could probably go buy one, but like they all they had
[05:37] to do was give us a way to do it. A really good way. They could have shipped get it on the wall. And all I had was a drill and some screws. I made it work. The screws are kind of cradling the touch pad. But, you know what? I think
[05:52] think? So, it's mounted. It's powered on. I think it looks kind of awesome. add a dashboard. And turning your Raspberry Pi into a dashboard is actually the best thing ever. Way better than an iPad or Android tablet. And here
[06:05] Look at these dashboards. Now, here's what I'm running. I'm running something called Touch Kio. It's an open-source kiosk app. And it's made specifically touch displays. It's basically a locked-down full-screen browser with
[06:18] superpowers. What's really cool is I can unplug it, plug it back in, comes right have displaying is just Home Assistant. No apps, just the website. And what you created these through Home Assistant's web socket API. And keep in mind, I'm
[06:33] not running the Home Assistant server on this Raspberry Pi. It's just interfacing with my existing Home Assistant server, which actually runs on a Proxmox VM here in my studio, or my data center in my studio. That being said, you could run
[06:45] including the touch screen, and you have this all-in-one Home Assistant appliance. Uh, not an appliance, but close. Overall, I'm pretty happy with this. My employees can finally control Home Assistant. I can add graphs
[06:57] way, I do use AI for that. My AI has full access to my Raspberry Pi. I just this look pretty." Boom, he makes it happen. I could do it myself, but I to use AI for things I don't have time for, but I really want to happen. So,
[07:11] what do you think? Are you going to buy the Raspberry Pi touch display two 10-in portrait? I like it. Let me hear your thoughts in the comments. But also, I for a dashboard? Because as nerds, we have to display what we're doing
[07:23] somehow. We have to allow the people in our lives to interface with our home pretty good option. Anyways, that's all I got. I'll catch you guys next time. videos, I like to pray for you, my audience. Yeah, I know it's kind of
[07:37] weird. Just go with it. Prayer is kind of fun. Ready, set, go. God, I thank you for the person on the other side of this screen. I want to pray specifically for them right now, for you, right now, that you
[07:50] will take this video, this the the the talking about tech, the Raspberry Pi, the the touchscreen, the dashboard, Home Assistant, and I ask, Lord, that you will just make
[08:03] them so excited about tech right now. That they'll have a passion that will and that they'll be able to take that passion and not only just have an amazing, fun hobby, but that it will turn into a lucrative
[08:18] That it will fill them with skill that can bless everyone around them. for them right now. I ask this in your name, Jesus, and them a pathway to you, because that's the
[08:33] ultimate source of joy. source of joy. Uh I ask this in your name, Jesus. Amen. Thank you for letting me do that. I'll talk to you guys next time.
⚡ Saved you 0h 08m reading this? Transcribe any YouTube video for free — no signup needed.