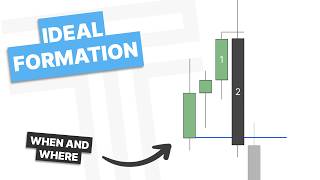

The Ideal Formation Explained
45sClear, concise explanation of a key trading concept that viewers want to learn.
▶ Play Clip"Delivers exactly what the title promises: a clear, detailed explanation of the ideal formation with multiple examples."
This video explains the concept of an 'ideal formation' within a fractal trading model, which occurs when a candle 2 or candle 3 closure simultaneously creates a protected swing. The presenter details how to identify these formations, mark key levels, and use them to trade subsequent candles, with multiple real chart examples.
An ideal formation is when a candle 2 or candle 3 closure simultaneously creates a protected swing, making it ideal for the next candle to trade away without invalidation.
Price fakes out the previous candle's high, then closes back through the series of up-close candles, creating a protected swing on the candle 2 high, ideal for candle 3 to expand.
Candle 2 does not close below candle 1's high, but candle 3 engulfs it and closes through the series, creating a protected swing, allowing candle 4 to trade lower.
Ideal formations alone are not enough; they must occur at a point of interest (like a fair value gap) to be tradable.
Candle 2 sweeps out a low and closes through the series of down-close candles into an important level, creating a protected swing, making it ideal to trade higher.
A candle 2 closure that doesn't reach a level, followed by candle 3 closing over it, creates a protected swing, giving confidence to trade candle 4.
A candle 2 closure that only closes over the body of candle 1 is not ideal; it must close over the series of down-close candles into the point of interest to create a protected swing.
Price closes over the series of down-close candles into a fair value gap, creating a protected swing, and the following candle trades higher from the marked levels.
Candle 3 closes below candle 2's body and also closes through the series of candles that made the high, creating an ideal formation to trade lower.
Candle 2 closure is not ideal, but candle 3 forms a continuation and closes over, creating a protected swing, making it ideal to trade candle 4 higher.
Candle 2 closure is not ideal, but candle 3 closes over candle 2's high and the level, creating a protected swing, allowing candle 4 to be traded.
Price sweeps the range low, candle 2 closure is not ideal, but candle 3 closes over the level and range high, making candle 4 ideal to trade higher.
Definition of Ideal Formation
Provides the core definition that the entire video is based on.
00:29Common Mistake Clarified
Corrects a frequent misunderstanding about what constitutes an ideal candle 2 closure.
05:44Point of Interest Requirement
Emphasizes that ideal formations are not sufficient alone; they need a point of interest.
02:31Less Common Variation
Shows a more complex scenario where the ideal formation is completed in candle 3, not candle 2.
03:59[00:00] How's it going everyone and welcome back to another video. In this video we are going to talk about my ideal formation.
[00:17] This is the ideal structure that I want to see within a candle 2 or a candle 3 closure or trading a swing point within my fractal model. So let's get into the PDF. So what is an ideal formation?
[00:29] An ideal formation is when we have a candle 2 or a candle 3 closure which simultaneously creates a protected swing. So what does that mean? It means upon that candle 2 or candle 3 closure we also have the swing point being a protected
[00:44] swing which means it's very ideal for the next candle to trade away or that it shouldn't be invalidated. So what do I mean? Let's take a look at this candle 2 closure right here. We have price fluking out the previous candle's high and then closing back through the series
[00:58] in this case singular up-close candle, which creates a protected swing right here. So that means we have a protected swing on the candle 2 high, as well as a candle 3 closure, which makes it ideal for candle 3 to expand.
[01:11] And the area I'm going to also want to mark out is that opening price in the series of up-close candles, or if there's only one, the single up-close candle. Now it's the same for a candle 3 closure. There you can see candle 2 does not close below candle 1's high, so it is not a candle 2 closure.
[01:26] candle 3 engulfs that and since it is the series in this case a singular up close candle that it closes low this is now a protected swing and now we can mark out that opposing candle or protected
[01:38] swing and look for candle 4 to trace lower now over here on the left this is less ideal as candle 2 has already expanded but it is still in ideal formation you can see we have a candle 2 closure we close through this series of up close candles creating a protected swing on candle 2's high
[01:55] and then we can look for candle 3 to trade lower from there. And the other scenario shown on this chart is we do have a candle 2 closure. It is not ideal as it does not close through, in this case a singular up-close candle,
[02:07] but candle 3 does create that protected swing. So within this candle formation, we can still look to trade candle 4, and we have candle 2 creating a protected swing. We can look to trade this candle 4 lower.
[02:19] Now, they're going to show up in various different ways, but it is always the same. We have a candle 2 or a candle 3 closure which creates also a protected swing simultaneously.
[02:31] And with these ideal formations it doesn't mean we can just pattern trade them. We still need a point of interest. So here you can see price reaches into a fair value gap. It has an ideal formation. Why is that ideal? Well we have a candle 2 closure but it is also creating a protected swing at the same time.
[02:48] So you can see candle 2 is creating a protected swing. we can leverage candle 3 to expand higher from where? That opposing candle opening price as well as the EQ of candle 2. Similarly with the bearish scenario, it's the same just opposite.
[03:02] Candle 1 reaches up into that air value gap, candle 2 has an ideal formation, and then candle 3 expands away. Now here's an example of another ideal formation. So you can see candle 2 sweeps out a low, and on this closure what does it do?
[03:17] it closes through the series of downclosed candles into an important level, creating a protected swing. So you can see how this singular closure creates a candle 2 closure, but also a protected swing, that is what makes it an ideal formation to trade this higher.
[03:31] And similarly with the bearish scenario the same thing which is up into a point of interest taking out this old high closes below the series of up close candles that create a protected swing also a
[03:43] candle two closure so we can look to trade candle three lower once again where we want to mark out we want to mark out the eq of candle two but we can also mark out the opening price of the series of opposing candles or that protected swing the change in the state of delivery now here's another
[03:59] example of a less common but also ideal formation is when we have a candle two closure but it does not reach up to this level here for an ideal formation then candle three doesn't expand completely but it closes over that level creating a protected swing so now in candle four we have
[04:16] a valid swing point candle two closure candle three closes strong we can look to trade candle four but candle three is also creating that protected swing that gives us more confidence in validation of this idea for price to trade higher. And once again, it's the same on the
[04:31] bear scenario, but we reach up into a point of interest, have a candle to closure. We don't reach for the opposing candle level, right, to create a protected swing. The next candle, or candle three, does close low, candle two is low, also creating a protected swing. Now we can look to trade candle
[04:46] for a lower from here. Once again, what is the area we want to mark out? We can mark out that closing candle level the opening price in a series of up close candles if there's only one candle then you mark out the singular candle other than that you always use the series of candles
[05:00] and then you can also mark out the eq of candle three looking for that to go lower so let's go into trading view and go over a few examples of this so here we are in our first example and we are going to go over what is not an ideal candle to closure now i see a lot of people get this
[05:16] wrong and that is why I'm teaching it now here on YouTube thinking that this is an ideal candle to closure when it is not. So let's go over that. Here you can see we do have a point of interest. Price is reaching into a fair value gap here. The bodies are holding that level. It looks pretty
[05:31] nice. We have a candle to closure. Now why is this not an ideal candle to closure? A lot of people think because it closes over the body of candle one that it is an ideal candle to closure. But
[05:44] What did we learn in the PDF? For this to be an ideal candle to closure, Price has to make a candle to closure while simultaneously creating a protected swing. Is this a protected swing? No. Because we need to close over this series of downclosed candles into the point of interest.
[05:59] Here is the low in that point of interest. What are the series of candles that went into that level? Right here. These two downclosed candles. So Price would have needed to close over this level to be an ideal candle to closure.
[06:13] So it is not. So now that you know what it is not, let's go find some examples of an actual ideal candle 2 or ideal candle 3 closure. So here we are in our first real example, and let's go over what an ideal candle 2 closure looks like, or an ideal formation.
[06:30] So letting this next candle form, what do we notice? We have a point of interest, we have a fair value back here, and we have what? A candle 2 closure. Now what makes this ideal? This is ideal because within this candle 2 closure, what do we do?
[06:45] We close over the series of downclosed candles into the point of interest, which creates what? A protected swing. So you can see, we have a candle 2 closure, which is simultaneously creating a protected swing.
[06:57] That makes it ideal to be trading this following candle higher. What areas can we mark out? We can mark out this opposing candle level, as well as the EQ of candle 2, as I've taught in other videos. and now if we want to see a shallow wick so we want to see price open have a shallow wick supported by these levels to trade higher So let see what happens There you go You can see how these levels support price and we trade higher
[07:21] So this is an example of an ideal candle to closure because it is a candle to closure that simultaneously creates a protected swing. I'll take a moment here and see if you can spot the candle to closure and whether or not it is ideal.
[07:35] So here you can see price is taking out this previous high and do we have what? A candle 2 closure. Now we have to ask ourselves, is this ideal or is it not? If it is ideal, it is simultaneously creating a protected swing.
[07:50] We find the high, we find a series of candles that made that high. In this case, it's just one. Did price close through that level at the same time? It did. So this is an ideal candle 2 closure. We'd want to see candle 3 trade lower.
[08:03] From where? we can mark out that opening price as a level as well as the EQ from the previous day's range. So we can look for price to make a shallow wick in this area and then trade lower.
[08:15] You can see how that area is respected and we trade lower. So that is an ideal formation because the candle closure is simultaneously creating a protected swing. So in this next
[08:27] example you can see price is running out this high and we have formed a nice wick on this candle. But is it a candle 2 or a candle 3 closure? No. We need to let another candle form.
[08:39] Letting that next candle form, what do we notice? We notice that we have a candle 3 closure, because candle 3 is closing below the body of candle 2. But does that make it an ideal formation? No. What forms an ideal formation?
[08:52] Well, candle 3 would also have to close through the series of candles that made that high. So we find a high, a series of candles that made that high, and there we have an ideal formation. So looking at this, how do we mark out this ideal candle free closure?
[09:05] Well we mark out this level here, right, the opening price in the series of up close candles, as well as the EQ of this level. So going into this next candle, if we want to see this hold, we want to see price form
[09:17] its wick in this level here to have a shallow wick to trade lower to these equal lows below. So you can see we make a shallow wick and then expand lower. Now let's go down here and take a look at another ideal formation.
[09:29] This one is also a little bit different because what? It doesn't form in candle 2. So you can see price reached out a low. We have a candle 2 closure. Is that ideal? No, it's not even very bearish, right?
[09:43] But what does it do? In candle 3 we form a continuation, right? And close over there. So that means it's ideal for trading in candle 4 because we have a valid swing framework or a fractal model.
[09:56] three closes forming a protected swing and we can look to trade candle four higher. Now let's go find an example of an ideal candle two. So right here you can see price sweeps out this little high
[10:08] and what do we notice? We have a candle two closure here. Now is this ideal? Yes it would be. Why is that? It's ideal because we have price at a point of interest, a candle two closure, but what
[10:20] does this candle to closure do it closes through the series of up close candles in this case it's just one so this is an ideal candle to closure because we form a protected swing as well as a
[10:33] candle to closure so what areas are we going to mark out the opening price the eq and then we want to see price form its next high in this area making a shallow high to trade lower and there you So you can see we do retest that level and then trade lower So that an example of an ideal candle to closure so here you can see we are in a bullish trend and we have a fair value gap right here we
[10:58] have price forming a little consolidation here so what would we want to see if we are bullish price reach into the fair value gap and then trade higher let's see if we can get a candle closure that aligns with that so you can see we have a candle to closure price reaches into the fair
[11:13] value gap and then closes outside of that now is this an ideal candle to closure no because price didn't close over this down close candle where price reaches into that fair value gap but we
[11:26] can still look for an ideal formation in the next candle so we could one look to trade candle three higher we want to see it close over candle two's high and over this candle here creating a protected
[11:38] swing or we can let that candle form and then look to trade the candle four so here you can see price closes over not only candle two's high but also this level which it does what creates a protected
[11:51] swing so now going into candle four for a continuation we have a protected swing a candle two closure candle three closing strong so this would be a variation of an ideal formation right it is ideal to be trading candle four here because we have everything aligned candle two closure at
[12:07] point of interest, it protected swing formed in candle three. So we can mark out this level here as well as the EQ of candle three and we can look for this area to support price higher in the following candle. So here you can see it does support it higher, that's kind of that area you
[12:23] want to see hold and candle four gets an expansion. So this is an example of an ideal formation but it forms in candle three. Right, it's a candle three closure, it becomes ideal after candle three's
[12:35] closure it's not a candle free closure so here we are for one more example what do we notice here we have a nice little v shape and then a consolidation and price runs out the consolidation low so is this a candle closure we want to trade away from no because it is not a candle two or a
[12:53] candle free closure but in another candle form what do we have sweeping out the range low we have a candle 2 closure and do we have an ideal formation? Well where does price have to close to
[13:06] form an ideal formation? The series of downclosed candles right? So has price closed over this level? No not yet. So we have a candle 2 closure we could still look to trade this higher right we have
[13:18] failure swings right here but is it ideal? No but what could happen is we could form an ideal formation in candle 3 to look to trade candle 4. But in this candle 4, we do what? We do a few
[13:31] things here. We close over this level, we close over candle 2's high, and we also close over this range high. So with all of that put together, what can we look for? We can mark out the EQ of this previous candle, which aligns pretty well with this opposing candle here, and can look to
[13:48] trade candle 4 as it is now ideal to trade candle 4. Candle 4, we get a nice shallow wick and we trade it higher. Now I hope you found this video helpful and it taught you what an ideal formation
[14:00] is within the fractal model. It is a candle closure paired with a protected swing. When those occur simultaneously, it is ideal within my model and my framework to look to the lower time frames for
[14:12] entry. But with that said, I hope you enjoyed the video and I'll see you guys next time. you

⚡ Saved you 0h 14m reading this? Transcribe any YouTube video for free — no signup needed.