No Loopback? Fix UAD Audio Routing!
45sAddresses a common pain point for UAD Apollo owners stuck on Console 1, promising a creative solution.
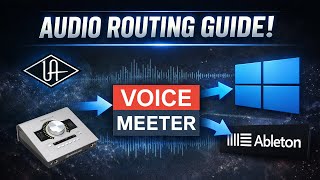
▶ Play ClipThis tutorial explains how to route DAW audio (using Ableton Live) through Streamlabs OBS for streaming, specifically for users of older Universal Audio Apollo interfaces on Windows that lack a built-in loopback feature. The solution involves using Voicemeeter as a virtual audio mixer to bridge the DAW output to Streamlabs.
Older UAD interfaces (non-X models) use Console 1, which lacks a loopback feature, requiring a workaround to route DAW audio to streaming software.
Send DAW audio to UAD virtual channels by changing the output config in Ableton to outputs 3 and 4 (or the pair that corresponds to virtual channels).
Voicemeeter (Banana or Potato) is a free virtual audio mixer that can receive audio from the UAD interface and make it accessible to Streamlabs.
In Voicemeeter, set the hardware output (A1) to the UAD interface's ASIO driver and assign ASIO inputs so that virtual channels appear as hardware inputs.
On the Apollo Solo USB, ASIO 5 and 6 correspond to the virtual channels.
Send the DAW audio channel in Voicemeeter to a virtual output (e.g., B2) by clicking the corresponding button, then add that virtual output as an audio source in Streamlabs.
In Streamlabs, add an Audio Input Capture source and select 'VoiceMeeter Aux Output' (or the appropriate virtual output) to receive the DAW audio.
"The title accurately describes the tutorial's content and audience, delivering exactly what it promises."
Why do older UAD interfaces need a workaround to route DAW audio to Streamlabs?
Older UAD interfaces (non-X models) use Console 1, which lacks a loopback feature.
1:00
How do you route Ableton audio to the UAD virtual channels?
Send the DAW's main output to outputs 3 and 4 (or the pair that corresponds to the virtual channels).
4:00
What free software is used as a virtual audio mixer to bridge DAW audio to Streamlabs?
Voicemeeter Banana or Potato (free).
6:58
What are the two key steps to configure Voicemeeter to receive DAW audio from the UAD interface?
Set the hardware output (A1) to the UAD interface's ASIO driver and assign the ASIO inputs so that the virtual channels appear as hardware inputs.
8:54
How do you send the DAW audio from Voicemeeter to a virtual output that Streamlabs can access?
Click the B2 button on the DAW audio channel strip in Voicemeeter.
11:49
How do you add the Voicemeeter virtual output as an audio source in Streamlabs OBS?
Add an Audio Input Capture source and select 'VoiceMeeter Aux Output' (or the appropriate virtual output).
12:44
On the Apollo Solo USB, which ASIO inputs correspond to the virtual channels?
ASIO 5 and 6.
10:30
Routing DAW to Virtual Channels
Explains the core workaround: sending DAW output to UAD virtual channels via output config.
4:00Voicemeeter ASIO Setup
Details how to configure Voicemeeter to receive audio from the UAD interface using ASIO.
8:54Using Voicemeeter Virtual Outputs
Shows how to route DAW audio to a specific virtual output (B2) for Streamlabs to access.
11:49Adding Voicemeeter to Streamlabs
Demonstrates the final step: selecting the correct Voicemeeter virtual output in Streamlabs audio source.
12:44[00:00] What's up, guys? How's it going? My name
[00:02] is Brett. Um, I want to make this video
[00:05] today to talk about how to route your
[00:08] DAW audio through to Streamlabs for
[00:12] streaming. I'm going to be working with
[00:14] Ableton. Um, I'm going to be using
[00:16] Ableton, Voice Meter, and uh,
[00:19] Streamlabs, but these kind of same
[00:21] principles apply um, if you're using a
[00:23] different um, DAW or if you're using OBS
[00:26] instead of Streamlabs OBS. This guide is
[00:30] specifically for Universal Audio
[00:32] hardware owners um that are on PC. So,
[00:36] it's going to be pretty tailored to
[00:37] that. And uh yeah, let's get into it.
[00:41] Okay, so first I just wanted to show you
[00:44] guys what interface I'm using. Um so I'm
[00:48] using the Universal Audio Apollo Solo
[00:51] USB. So we got a Solo USB connection
[00:54] plugged straight into my Windows PC. The
[00:57] problem with these is that they are
[01:00] still running uh older software uh
[01:03] compared to the new Universal Audio
[01:05] stuff. So the new Apollo X's
[01:09] um and some of the bigger rack mounted
[01:11] Apollos are using console 2. Um so if
[01:16] you're using this one or any of the ones
[01:19] I think aren't X um you're still using
[01:22] console one software. Um, why that's
[01:26] important, if you're using console 2,
[01:29] there's a loop back feature, so you can
[01:31] do the DAW straight to OBS. Um, a little
[01:35] easier if you have UAD console 2. Um,
[01:39] but for the rest of us who've got older
[01:42] stuff um, and are stuck on console one,
[01:45] we kind of have to get creative about
[01:47] how we're routing that DAW audio. So,
[01:51] I'm going to pull up my console here
[01:53] real quick. Okay. So, I've got my
[01:56] console here, my UAD console. And if I
[02:00] go to about console, it'll tell you the
[02:03] version. So, like I was saying, we are
[02:05] on version one still. So, there's no
[02:07] loop back feature. So, in a nutshell, I
[02:11] can kind of go over what we're going to
[02:12] do. We're going to send our DAW audio to
[02:16] our virtual channel right here. Um, so
[02:20] depending on which Apollo you have, you
[02:22] could have multiple virtual channels.
[02:23] So, the one I have, the smallest one, it
[02:26] only has uh two virtual channels. Um,
[02:30] and they were split mono, so you might
[02:32] need to uh click link or unlink. So,
[02:35] there you go. They're mono again. You
[02:37] click link to make them linked. Um, and
[02:39] basically, we're going to route our DAW
[02:43] audio to this virtual channel using um
[02:49] kind of the hardware outputs on the uh
[02:51] Apollo. And we'll kind of go over that
[02:53] in a sec. So if we But that's in a
[02:56] nutshell what we're trying to do. So if
[02:58] we open up Ableton, let me work on
[03:01] opening that up real quick. Okay. So I
[03:04] have Ableton loaded up here. I'm just
[03:07] going to try to uh
[03:11] throw in maybe Oliver Tools um
[03:16] loop or something. Yeah. Okay. Here's a
[03:18] drum loop. I'll just do like a kick and
[03:21] snare
[03:22] drum loop
[03:25] loop this. So, if I play this
[03:34] um you guys can't hear anything because
[03:35] it's not routed through uh Streamlabs.
[03:38] So, that's kind of what we're trying to
[03:40] figure out here. So, if we go to
[03:43] console, you know what? I'm just going
[03:44] to keep this drum loop looping. Okay,
[03:46] I'm going to go back to console. Right?
[03:48] Nothing's popping up on here. Okay.
[03:54] So, how do you get this audio to the
[03:57] virtual channels? So, if you go to it's
[04:00] going to be options.
[04:02] All right. I'm going pull up the
[04:03] settings tab. You can see that we're
[04:04] synced up to our universal audio
[04:06] interface. Uh we're going to go to
[04:09] output config.
[04:12] So what's happening here is normally
[04:17] you're sending your main signal out
[04:20] through outputs one and two right here.
[04:22] Those are your main outputs on the
[04:23] Apollo.
[04:25] If you send them out to three and four,
[04:28] that will actually send them to the
[04:31] virtual channels. And it it may depend
[04:33] on uh depending on which uh Apollo you
[04:35] have, but you can kind of just uh test
[04:37] the different outputs. So, I'm going to
[04:39] say yes. So, we're sending everything
[04:42] out through three and four. So, you can
[04:44] see here, I'm going to set this to main
[04:48] through three and four. So, when I play
[04:50] this now, I still hear it coming out of
[04:52] my speakers, but I also see it here
[04:56] visually on um on the DAW audio thing
[05:00] here. And you guys are already hearing
[05:01] it because I've I've already got it
[05:03] routed correctly, but um so that's kind
[05:06] of what we wanted. Um, this virtual
[05:10] channel also feeds the monitor. So, if
[05:13] you didn't want it to do that, you could
[05:15] mute there. Um, you can see like I have
[05:18] my mic muted right now just so I don't
[05:20] like hear it coming out of the speakers
[05:22] as I'm recording it. Um, so yeah, so
[05:25] that's the first step is you want to
[05:27] figure out how uh what output aligns
[05:30] with the virtual channel. Um, so since
[05:32] we figured out that it's three and four
[05:35] for my situation,
[05:37] the next thing we want to do is get that
[05:40] working in Streamlabs.
[05:43] Okay, so let's go over the problem we're
[05:46] trying to solve here. Um, our end goal
[05:49] is to get our DAW into Streamlabs OBS.
[05:53] So here's my Streamlabs OBS. Um, you can
[05:57] see I only have two things right now. I
[05:58] have my desktop audio and I have my
[06:01] microphone. So, what we normally do in
[06:04] this instance, if we go to source,
[06:07] we can go to audio input capture. This
[06:09] is how we normally add audio inputs. Um,
[06:13] just kind of ignore everything I've got
[06:15] there. We're going to click on add a new
[06:17] source. And I'm just going to I'm just
[06:19] going to leave it. We can call this
[06:22] Ableton output. Okay.
[06:26] Now, here we are on our Ableton output
[06:30] um audio source. And if you look at our
[06:32] device,
[06:34] we don't have an output straight from
[06:37] Ableton, right? Like that's not a real
[06:39] option. It's not optimized to do that.
[06:42] Um and so what we need to do is we need
[06:45] to route that DAW audio through voice
[06:49] meter cuz voice meter uh is something we
[06:51] can access in OBS. So, that's kind of
[06:53] like the whole goal of of what we're
[06:55] trying to do. So, here it is. VB Audio
[06:58] Voice Meter. Um, it's completely free.
[07:02] So, you can get Banana for free.
[07:07] And then potato. I have potato. These
[07:10] are like the weirdest names. It's just
[07:11] like more complicated, honestly. I think
[07:13] banana is like totally fine. And so,
[07:16] let's open this up and I'll kind of show
[07:19] you what the next steps are here. Let us
[07:22] look at voice meter real quick. Um, I
[07:25] know this is pretty intimidating the
[07:27] first time you look at it. Um, banana is
[07:30] a little simpler, but it's uh kind of
[07:32] the same concepts here. So, we'll just
[07:35] start here.
[07:38] Pretty much this whole section, these
[07:40] are hardware inputs. Um, so the things I
[07:44] have connected right now are my
[07:47] universal audio inputs, like all the
[07:50] channels that the Universal Audio has
[07:52] access to and uh my capture card here.
[07:55] Um, if I look at other input devices,
[07:58] um, I could also add kind of like my
[08:01] webcam uh, also has a microphone, so I
[08:04] could add that. So, these are things
[08:05] that are like physically plugged into
[08:07] your computer um that you can access
[08:10] over here. This is kind of a
[08:14] a pretty confusing section. These are
[08:16] virtual channels. These are channels
[08:19] that Streamlabs OBS can directly access.
[08:23] Um and other apps can directly access
[08:25] them too. So, it's really good for um
[08:28] routing signals through to other apps.
[08:31] There is also
[08:34] kind of a mixer section over here on the
[08:36] right. You can see that again these are
[08:39] our five hardware channels that we
[08:42] talked about. These are our three
[08:43] virtual channels.
[08:46] So when you're setting this up for the
[08:47] first time with your universal audio
[08:51] interface, what you're going to want to
[08:52] do is you're going to want to click this
[08:54] A1. This is your main out.
[08:58] Um, and you want to click ASIO and
[09:02] whichever universal audio um, interface
[09:05] applies to you. So for me, that's the
[09:07] USB right here. Right. So I can click
[09:08] that. The next thing you're going to
[09:10] want to do, you're going to want to
[09:12] assign the ASIO inputs over here. Um,
[09:17] I'll link a video below that uh talks
[09:21] about how to do that really well. But
[09:24] if you go to
[09:27] if you go to your system settings here,
[09:34] basically you can patch in
[09:37] which ASIO
[09:39] um inputs you want where um into your
[09:42] five hardware channels. Um,
[09:45] so my interface only has six channels
[09:50] total. Um, because it's like the
[09:52] smallest universal audio one, but I just
[09:54] have it like the hardware channel one is
[09:57] one and two, then three and four, and
[09:59] then five and six. So I have it just
[10:01] kind of easy. So over here you can see
[10:04] ASIO 1 and two, three and four, five and
[10:08] six. Um, and I went ahead and made a
[10:10] little cheat sheet of what those
[10:13] correspond to on my interface. So, the
[10:16] ASI inputs one and two, those are your
[10:19] uh mic inputs. So, I really only have
[10:22] two inputs on this thing. So, it's
[10:23] either mic or line, whichever one you're
[10:25] in, or the high Z if you're in the uh
[10:28] front port.
[10:30] Three and four is actually your
[10:32] monitors. So, it's the two channels out.
[10:35] Five and six, these are the virtual
[10:37] channels. So this is what we assigned in
[10:39] the console earlier. Um so we're already
[10:43] routing our DAW audio here to virtuals 1
[10:47] and 2. So if we go back here,
[10:53] you can see that I've named this already
[10:56] DAW audio. Um and you can rename it like
[10:59] if you wanted to call this, you know,
[11:01] Ableton audio, you can rename it by
[11:03] right clicking it. Okay. So, the next
[11:05] thing that's really important is we need
[11:07] a way for Streamlabs OBS to access this
[11:11] DAW audio, right? Um, and the way we do
[11:15] that is by using voice meters virtual
[11:18] channels.
[11:20] So, one thing,
[11:22] if you look over here, you notice it
[11:25] says B1, B2, B3. Um, that's what these
[11:29] correspond to right here. I'm actually
[11:32] going to rename these real quick just to
[11:33] be super clear. This is B1.
[11:38] This is B2.
[11:41] This is B3. Okay.
[11:46] So,
[11:49] the whole goal is I've got our Ableton
[11:52] audio routed here. I can send this to
[11:56] whichever virtual channel I want. B1, I
[11:59] can set it to B2. I could send it to B3
[12:01] and then I could tap into that virtual
[12:03] channel from Streamlabs. So, for
[12:05] instance, I'm going to send this to B2
[12:08] right now. And that's going to
[12:09] correspond with this channel right here,
[12:12] the one in the middle. And when we send
[12:14] audio through that, we're going to be
[12:16] able to see the audio here, the DAW
[12:18] audio. We're also going to be going to
[12:20] be able to see it on this other mixer
[12:22] right here for B2. And the way we access
[12:25] this, access this in Streamlabs is we're
[12:28] going to grab a channel called Voice
[12:30] Meter AX. Okay. So, if I go back to my
[12:35] Streamlabs,
[12:37] right? Okay. So, I'm going to go to
[12:38] sources again. Audio input capture.
[12:44] I already created this earlier. So,
[12:45] let's add that
[12:50] under this Ableton output portion under
[12:53] device.
[12:54] You could see that there's one called
[12:56] voice meter ox output. Okay. So that
[12:59] directly corresponds to that B2 virtual
[13:02] channel. If I select this, that's how
[13:05] I'm going to be able to access our
[13:07] Ableton output uh in Streamlabs. So once
[13:11] I've done that, I can play audio through
[13:13] Ableton. And you can kind of check the
[13:15] chain. You could check your console,
[13:17] make sure you're getting levels there.
[13:18] Um, check your voice meter. Make sure
[13:21] you're getting levels there for your
[13:23] DAW. And then you can check Streamlabs,
[13:26] make your make sure you're seeing a
[13:27] level here. I'll show a demo of that
[13:29] real quick. So, I'm going to play some
[13:32] of this Ableton audio again here. So,
[13:34] you can see it here. It's playing. I can
[13:37] hear it coming out of speakers. If I go
[13:39] to console, I can see it going into DAW
[13:43] audio, the virtual channel.
[13:46] And I can also see it here on voice
[13:49] meter. I can see my mic and I can see uh
[13:52] the drum loop playing.
[13:55] Turn this off for a sec. All right. So,
[13:57] hopefully you guys can hear my audio. Uh
[14:00] you can hear the drum loop coming
[14:02] through the DAW. So, that's this channel
[14:04] right here. You can go ahead and mix
[14:07] here. You can like lower the volume,
[14:09] raise it, you can mute it if you're in
[14:11] the middle of the stream or something,
[14:12] whatever you need to do. Um, so yeah,
[14:16] just remember that uh we didn't have to
[14:18] use B2. We could also have used uh B1.
[14:22] That's where my mic's on right now. You
[14:24] can use B3. You can also route like
[14:26] Discord uh through B3. You could route
[14:29] capture cards through virtual channels.
[14:32] Um, you know, anything that Streamlabs
[14:34] is not picking up, you can route through
[14:36] a virtual channel. Um, yeah. So, I hope
[14:39] this video was helpful. Um, definitely
[14:41] reach out if you have any questions.
[14:43] It's a bit of a complicated topic doing
[14:47] all this routing and uh, voice meter can
[14:49] get a little weird. I definitely
[14:51] recommend saving uh, like a template
[14:54] once you get uh, something that works
[14:56] for you. But uh yeah, thanks for
[14:58] watching.
⚡ Saved you 0h 14m reading this? Transcribe any YouTube video for free — no signup needed.